Leaking shower
by
Steve M
+21
I hope someone can help. I have a leaking tiled shower which is on the ground floor. It's leaking through to the adjacent closet. The carpet is wet after the shower has been used. I was going to re-grout but though i'd better check with those more knowledge. I have a few images showing the probel.
I'd be grateful for any help.
I'd be grateful for any help.


22 answers
-
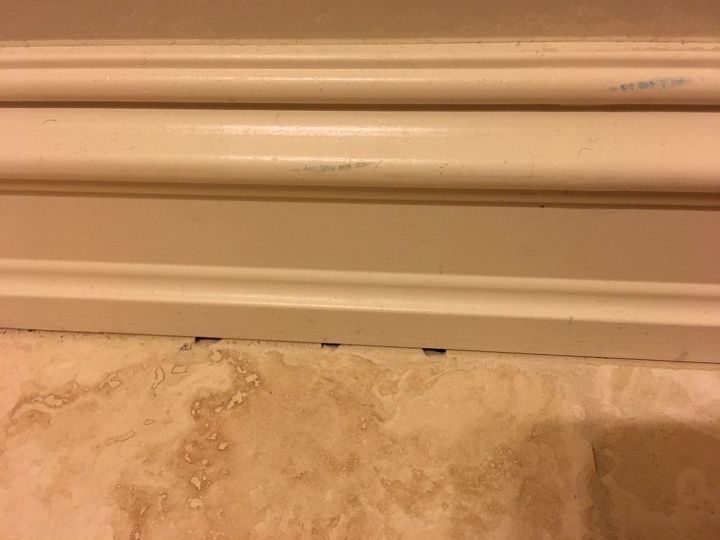
Steve, yes, certainly repair where the grout is missing in those few areas. Also, where the wall tile and floor tile meets, you should use a tile caulk to seal that line. If the old caulk looks like it has gone bad, like in the corner of the shower in that first picture, remove the old caulking and replace it with new. How long has this been like that and how much water has gone through? There may be potential mold issues inside the wall which could mean fairly extensive repairs (compared to grout and caulk).
 Dan's of Central Florida, Inc.
on Jan 24, 2012
Dan's of Central Florida, Inc.
on Jan 24, 2012
-
Thanks for the help. It's been a few weeks and we haven't used it since. It may have been happening longer and i was not aware of it. I was actually going to re-grout the whole shower. I'm also considering cutting a hole in the dry wall from the closet side so i can take a look inside to check there are no leaks as well as to see if there's any other damage. Is that something worth doing? I don't know if the leak is coming from the grout or some faulty plumbing. Thanks again.
 Steve M
on Jan 24, 2012
Steve M
on Jan 24, 2012
-
If you have a good closet access, then I think it would certainly be worth checking into things. At the very least you will want to pull off any baseboard (if there is any in there) and cut some holes into the drywall to allow a bit of air circulation so that any moisture inside the wall can dry. If there is baseboard and you only cut small sections where the baseboard was, simply putting the base back in is many times enough to "fix" the holes you made. Or, you might get a little crafty and make a permanent access panel to the shower plumbing from inside the closet.
Dan's of Central Florida, Inc.
on Jan 24, 2012
-
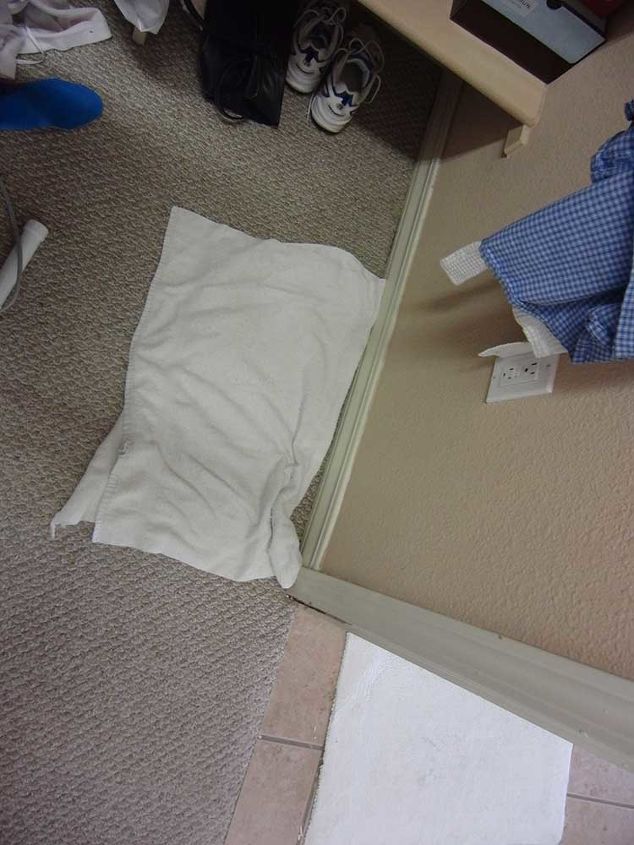
Thanks again for the advice. Would the moisture hang around in these parts, west Texas where we have very low humidity? I'm hoping that will save us from too much damage. I do have good access as you can see from the image taken from inside the closet. Where the towel is on the floor is where the carpet is getting wet
Steve M
on Jan 24, 2012
-
The moisture will only dry out once your shower no longer leaks, But i assume you already understand that. My concern is what the shower wall was constructed of. If it was drywall, even green board, it may be damaged. If it was done with cement board you may get lucky. Before you spend any money or time caulking or grouting, you must be sure that the bond between the tiles and the walls has not been compromised. Using your knuckles tap on the tiles. Start up higher where you know that there is nothing wrong with the wall. The noise you get in response to this tapping should sound solid. Then move down the wall towards where you suspect any leakage is occurring or where the grout is missing. Go along the entire base tile area working up and down. Does the sound begin to change. Much more like a ringing sound a hollow sound or clicking noise. If so the bond of the tile to the wall has been compromised and the tile has become loose. It may in fact come out when you scrape the old grout out to prepare for the new. If this indeed has happened, you need to consider pulling out the first few rows of tile that surrounds the shower base and replace them along with the damaged wall that will be exposed. Also you must consider any hidden damage under the floor, to ceiling below. Water not only moves down it does as you have seen sideways. Normally more moves down which means you have some other hidden issue elsewhere below.
 Woodbridge Environmental Tiptophouse.com
on Jan 25, 2012
Woodbridge Environmental Tiptophouse.com
on Jan 25, 2012
-
This scenario is so common, I also have it in my house; it looked exactly like this picture. After inspecting the tile for tightness, clean it very well, digging out the loose grout with the point of a 5-in-1 tool. To get a pretty, straight bead of caulk, run two lines of blue tape along the outside edges of your soon to be caulk bead. Go to The Depot and buy a tube of white polyurethane caulking; lay it down. Wet your finger in a little bowl of dishwashing soap and water and make the caulk smooth. By the picture, do this at the floor joint and between the first and second course of tile. With your tape, make allowance for a wider bead at the floor and a narrower bead between the 1st and 2nd course. In most cases, this takes care of the problem. Best, Charles
 Peace Painting Co., Inc.
on Jan 25, 2012
Peace Painting Co., Inc.
on Jan 25, 2012
-
Thanks for the great advice. I tested with my knuckles and all the tiles appear to be very solid. The whole house is on one floor, so no rooms below. If i caulk between the first and second course, does all the grout have to be removed or just the loose parts removed then caulk over the top? I do have one other question regarding caulk. Most i have seen say for gaps up to 1/8th of an inch. There's one vertical section where the gap is 1/4 of an inch. Is there a different caulk i need to use or something i can use to fill with first? Thanks.
Steve M
on Jan 26, 2012
-
Steve... have seen failed grout like this dozens of times...and in nearly every case is was due to the tile being set on drywall or green board. Re-grouting and caulking may provide a TEMPORARY fix. In all of these types of failure I have seen in the past, some tiles may appear sound but others not...the tapping method is only a ballpark evaluation. The FACT that water is getting into the other room shows that the structural elements in that wall have also become wet...at least recently. This may have been going on (just in the wall) some some time before you noticed it. The tile floor also has me worried...is this tile over a pour concrete pad...was a membrane used (most likely not). As much as I hate to say this the real only fix is to tear this out...wet drywall is not going to last too long. A way to confirm this would be to "pop" off one of those tiles and see what they are set on...the age of this install would also be a big clue...if this is more that 10 years old I can almost guarantee its NOT set on some cement board backer.
 KMS Woodworks
on Jan 26, 2012
KMS Woodworks
on Jan 26, 2012
-
Thanks again. The house was built in 2005 though we were not the original owners so to be honest, i have no idea how the shower floor was constructed. I did pull the baseboard off and pulled the carpet up in the adjacent closet. It was a little damp but no more than that. I think i'd be happy to seal things up for now then look into maybe having the whole lot torn out and replaced. I'd like to do it myself but might have to wait until the summer.
Steve M
on Jan 26, 2012
-
Two more things and I will sit in the corner. When grouting. To do this job properly you need to remove all the grout in the areas that you want to re-grout in. Do not grout over the old. Besides not looking professional, it will simply not last. Purchase a grout saw, or one of the many tools designed to do this and spend a afternoon removing the old stuff. It can become quite dusty when doing this, so be sure you use enough ventilation and a dust mask and eye protection. The 2nd thing that may be causing your issue is a failed drain connection to the shower pan. If this occurs water will run under the floor to the surrounding wall. If this is indeed the case, you may find the grout will not do the trick. Many shower pans and floors use a plastic type connection. If you remove the drain grate you may see a round ring in the threaded portion of the drain pipe. This ring has little groves cut into it to allow the special tool that you can purchase to turn this which in turn compresses the rubber seal that prevents leaks from happening. Check this out easily by removal of the floor grate and use a screwdriver and attempt to turn this ring. If it moves, purchase the tool and tighten it back up. This may resolve your issue.
Woodbridge Environmental Tiptophouse.com
on Jan 26, 2012
-
Thanks i understand. I do plan only to replace the grout where it is bad but caulk as described above, up one level. I do have a dremel so i shall look into an attachment to remove the old grout. Thanks again.
Steve M
on Jan 26, 2012
-
Yes, just the loose parts need removing before caulk, and the polyurethane caulk will easily fill the gap sizes you have. The only drawback is it will not look like grout but like caulk, being wider. CP
Peace Painting Co., Inc.
on Jan 26, 2012
-
Thanks. Do you have any particular preference for polyurethane caulk? I have a Lowes and Home Depot just up the road.
Steve M
on Jan 26, 2012
-
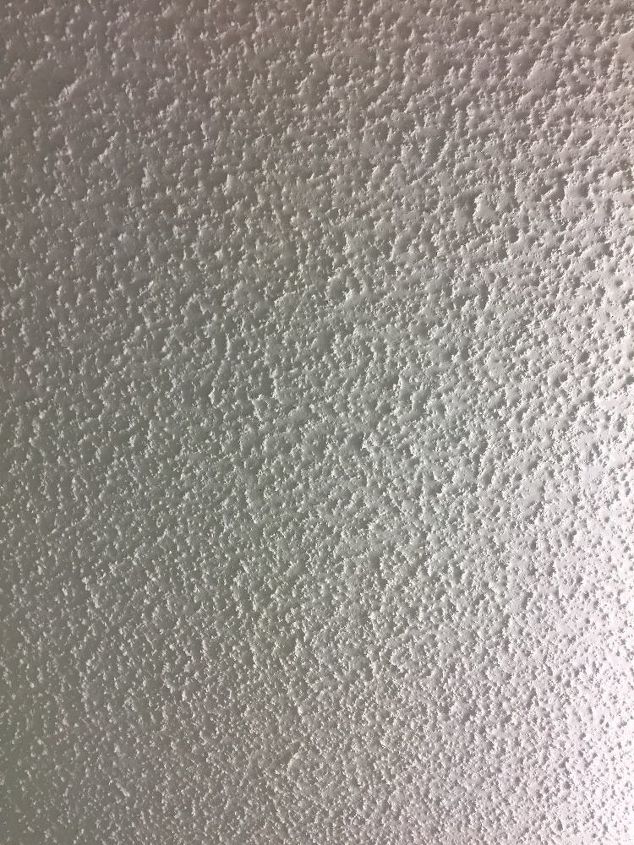
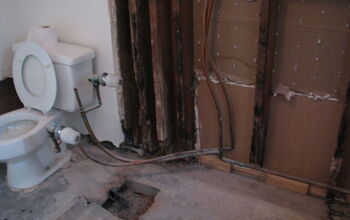
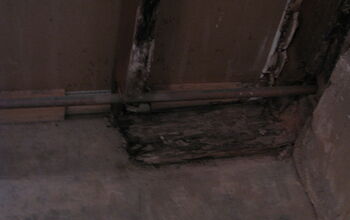
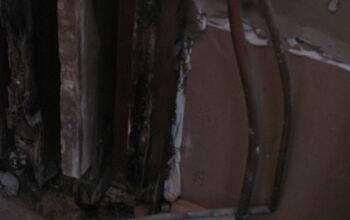
Steve, you need to realize that any patching you do to this shower will probably be a short term fix. When a shower is built properly it should hold water inside of it without the tile. My guess is that your shower has been leaking for some time prior to leaking bad enough to show on the outside of your wall. Slow leaks like this will cause the wall behind the tile to deteriorate and create a perfect environment for mold and wood rot. If the wall behind the tile is not some form of concrete board, it will be a water resistant drywall. I have seen failure of this type wallboard result in the tiles falling off the wall due to moisture intrusion. It might be wise to cut a hole in the wallboard outside of the leaking area to see if problems are building up. If your shower smells musty, have a professional check for mold before you cut into anything. Black mold can be a health hazard. It can also spread to other areas if you disturb it. If you open the outside of the wall and patch the inside grout lines you would be able to see for sure that your patch is holding for now. This will buy you some time before you will need to have the shower rebuilt. I have attached a few photos of what was left of a wall behind a tub/shower with a wall leak that had been ignored for a long time.
 Tri-Lite Builders ~ Homework Remodels
on Jan 26, 2012
Tri-Lite Builders ~ Homework Remodels
on Jan 26, 2012
-
'P&L Window and Door'
Peace Painting Co., Inc.
on Jan 26, 2012
-
Thanks for the images, that looks nasty. I think i'll temporarily fix the issue for now and in the summer look to strip it out as i don't have the time at the moment. I'll pick up some Window and door this weekend. Thanks for all the great help.
Steve M
on Jan 26, 2012
-
You may have to replace the "shower pan" and that's a job for a professional.
 Janet Smith
on Nov 06, 2013
Janet Smith
on Nov 06, 2013
-
Call a professional tile installer and have them to come out and assess the situation. Most of the time the initial consultation is free. There could be one or three things going on here. Could be that waterproofing was not done correctly during initial installation. Don't try to fix it yourself, though, without a professional looking at it first. We have had to help so many people in the past who wanted to "do it themselves" and made a mess. Then fixing the initial problem plus the mess the homeowner made is more costly than if a professional had been called to begin with. And if one professional's opinion doesn't seem right to you, then call three or four of them in your area. If their consultations are free (as they are here), you have nothing to lose!
 EMILY
on Jan 22, 2015
EMILY
on Jan 22, 2015
-
Your shower should have a pre fab shower pan, or a contractor built. The membrane should be installed with a minimum 8" clearance up from the shower floor. I coat all shower walls with a liquid membrane prior to installing tile. Also in all wet areas I use a epoxy grout, or quartz lock. It's a bit more expensive than your sanded/sanded grout by laticrete. The epoxy grout is a waterproof grout, non porous and will not stain or discolor. Follow the direction on your material and be prepared to exorcise your patience
 Ji.flooring2009
on Jan 23, 2015
Ji.flooring2009
on Jan 23, 2015
-
Thanks for the help but this is an old thread and the problem was fixed almost 3 years ago.
Steve M
on Jan 23, 2015
-
Ah lol hope all is well
Ji.flooring2009
on Jan 23, 2015
-
Those photos are all to familiar. Way to many people do not realize what is hidden behind those old tubs and showers. Good advice. .
Woodbridge Environmental Tiptophouse.com
on Jan 24, 2015
Sign Up to Answer