


DIY Cornice Board
$100
4 Hours
Easy
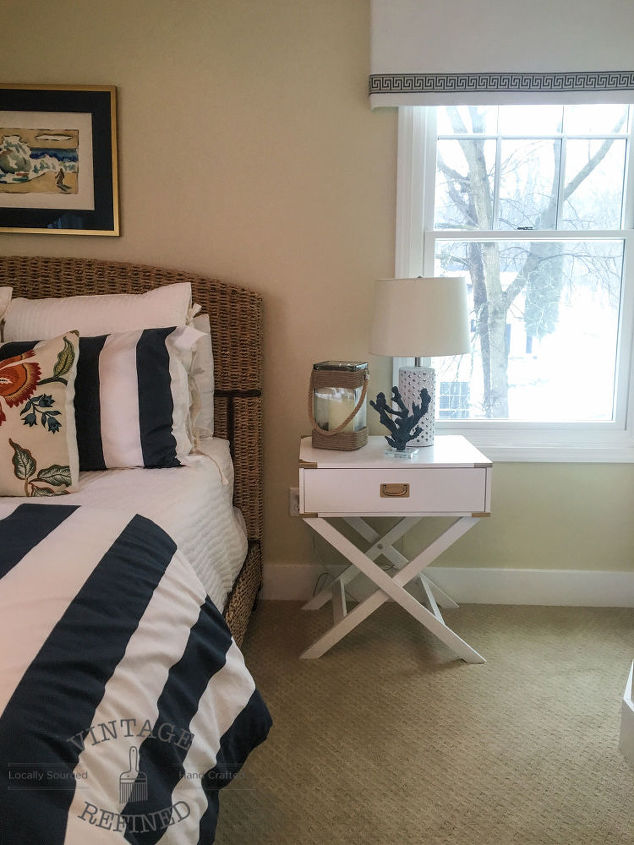
One of our guest bedrooms at the lake house has been soooo close to being complete for quite some time. The last detail that has seemed to just linger on has been the window treatments. On several occasions I started the task and quickly learned window treatments can get pricey...real quick. It's a guest bedroom after all. I mean, I love hosting guests and I want them to be comfortable during their stay with us, but not too comfortable. You know what I mean, right?!
As most projects start, I spent a solid 10 hours on Pinterest doing 'research'. After reading about a million different ways to create a cornice board, I decided not one method was really perfect for me, and ended up taking bits and pieces from each of the different versions.
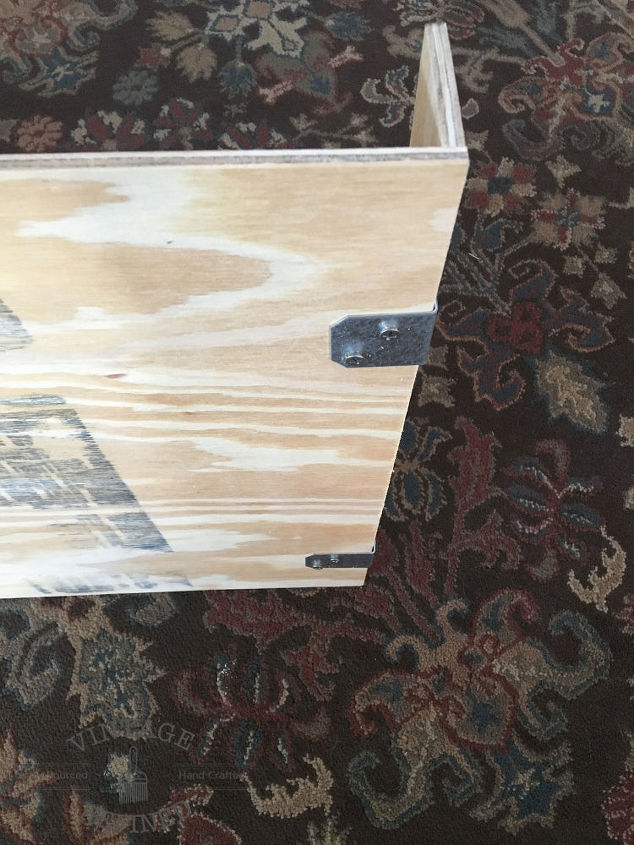
Once you have the boards cut to the size you want, you'll need to assemble them at a 90° angle using your L brackets and screws.
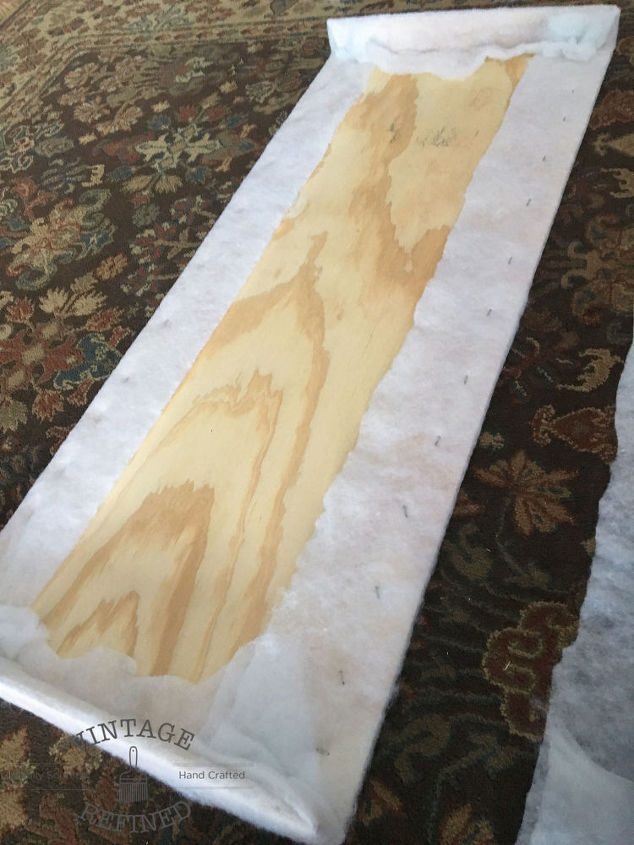
Next cover the board with batting and secure it using your staple gun. It's totally up to you on how thick of batting to use. It just depends on the look you're going for.
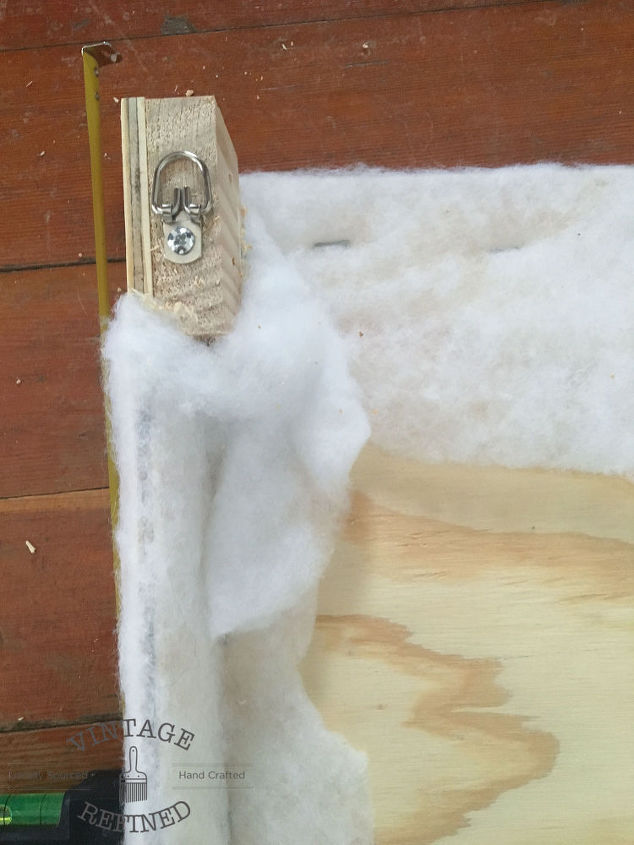
It was about this time that I realized the plywood was pretty thin, and nailing something into it to hang the board may be a bit challenging. We had some scrap wood lying around, so I cut two small squares to attach to the inside corners. This gave me a large enough area to drill in the D rings. I then glued a bit more batting over the sides to cover up the screws.
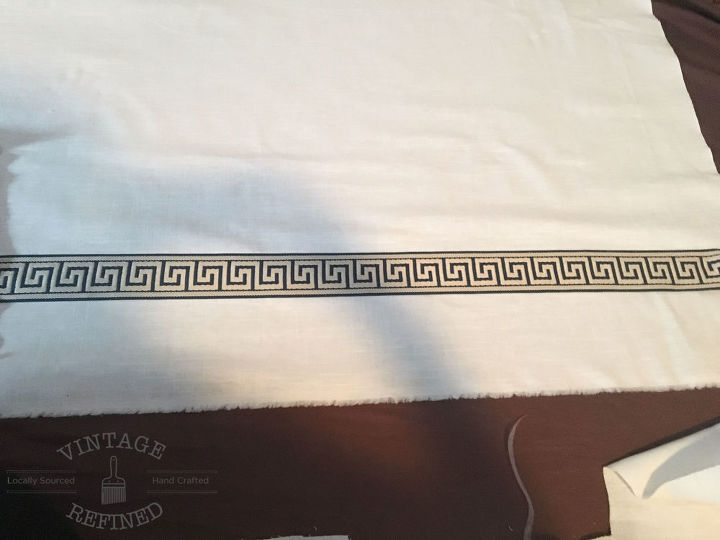
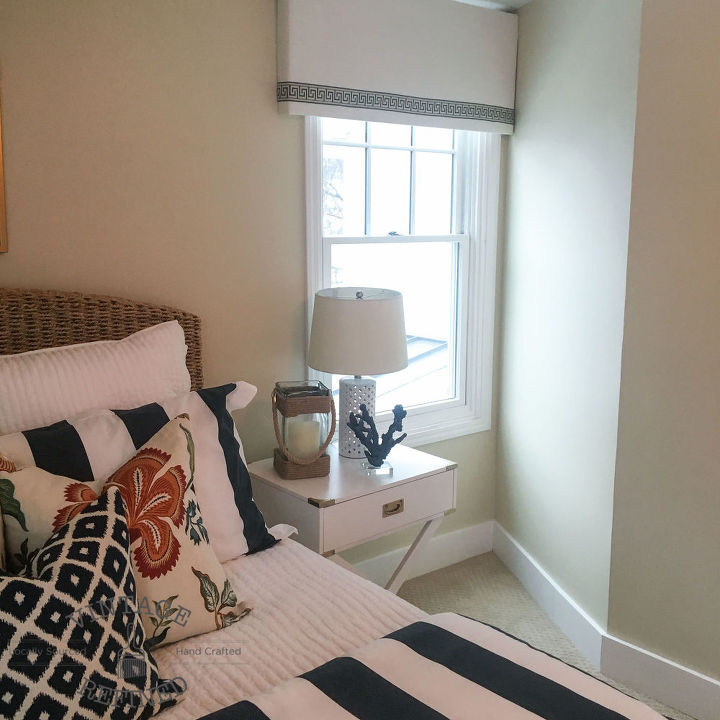
At this point, you'll get a pretty good idea of what the cornice board is going to look like, and it's time to start focusing on the details. I wanted to keep a simple, classy feel. For the fabric, I chose a white linen material. To give it a bit of color, I picked out a Greek Key patterned trim from M&J Trimming .
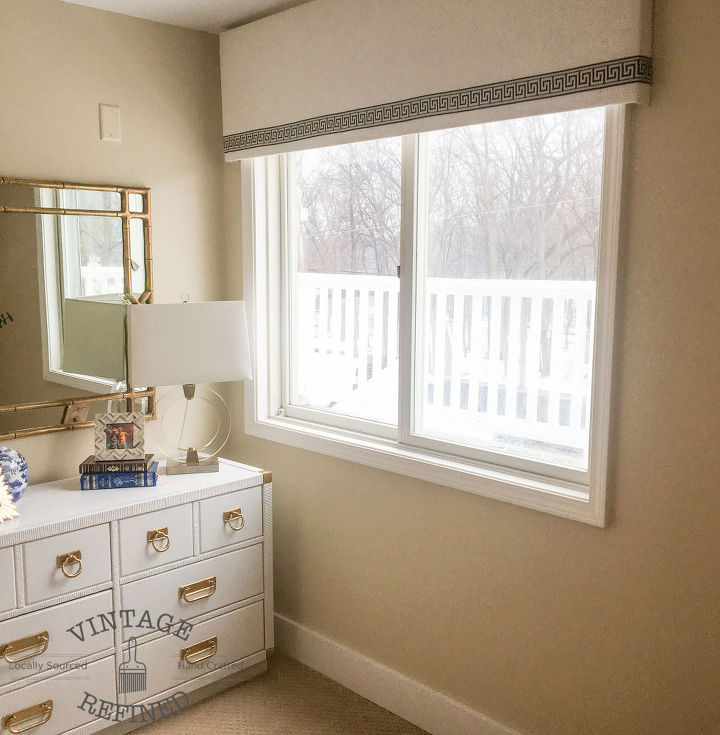
I hung them one inch off the ceiling. Hanging them high helps to create height and makes the windows appear larger.
For more After pictures and hanging tips, visit http://www.vintagerefined.com/blog/2016/1/30/diy-cornice-board

Want more details about this and other DIY projects? Check out my blog post!
Comments
Join the conversation
2 of 3 comments
-
Love love love. I have been wanting to add cornice boards for a while. Yours look great!
-
Wow! I love them. Your instructions and pictures were fantastic. God I love this site!! Another DIY project to try!


Frequently asked questions
Have a question about this project?