


Fake It 'till Ya Make It With a DIY Shiplap Styled BAKERY Sign
I admit, I no longer bake. It's a combination of choice and health, but I admit I really miss it!
So I decided to fake it with a cute kitchen sign that says otherwise...
Loosely based on a shiplap style, a few loose planks had this beauty workin' hard!
This one is soooo fast and easy to make. No need for building skills this round!
Here's how I got the look...
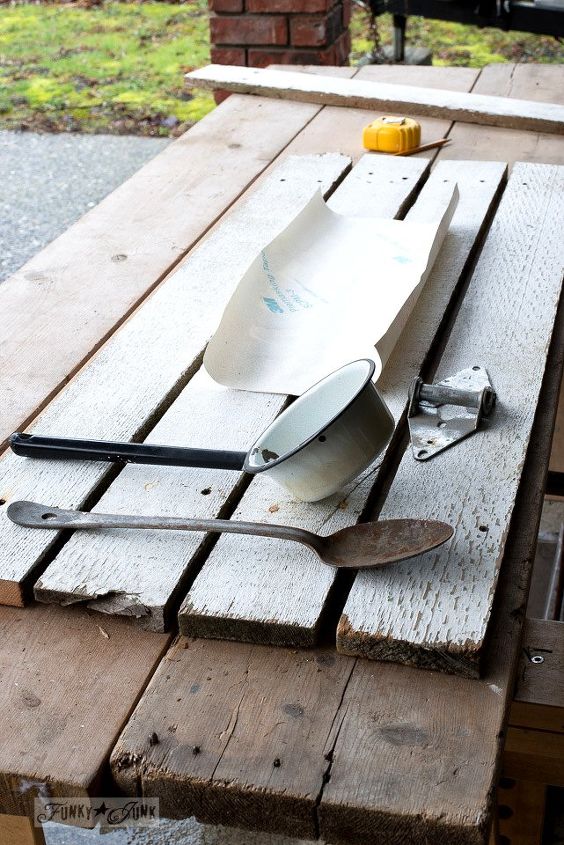
1. Cut individual boards to desired length.
Tip: lay your components on top to estimate your desired size.
2. Position planks as you will hang them. I left a small space in between each one to allow for S hook spaces.
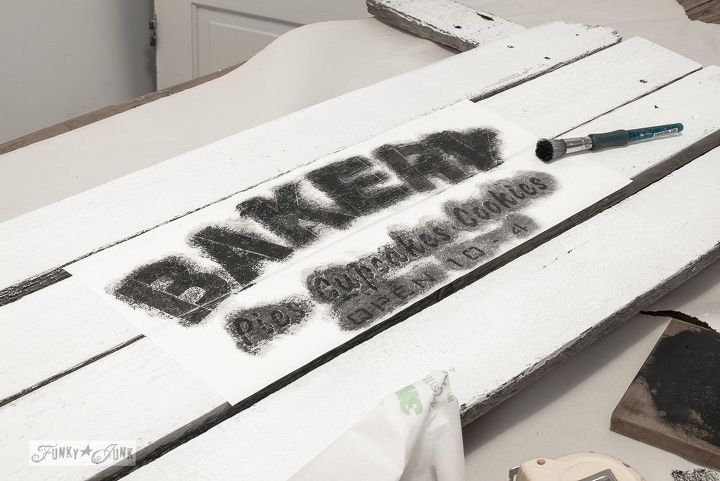
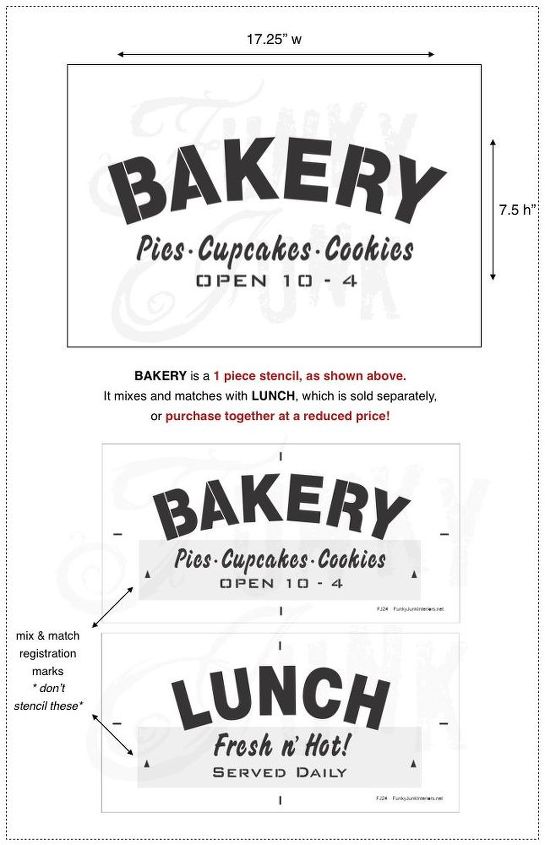
Stencil design in black in the middle of the boards.
How to stencil super sharp images:
- load stencil brush with paint
- off-load most onto a rag until brush feels dry
- tap or swirl brush through stencil for desired effect
Find the BAKERY stencil HERE
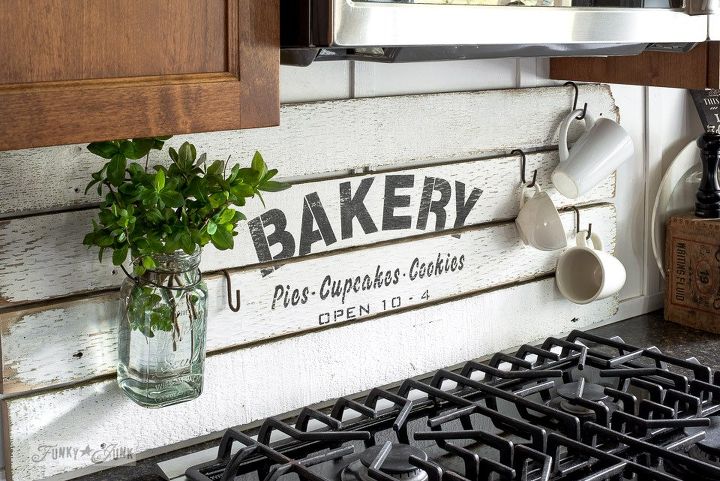
3. Hang single planks in place one at a time.
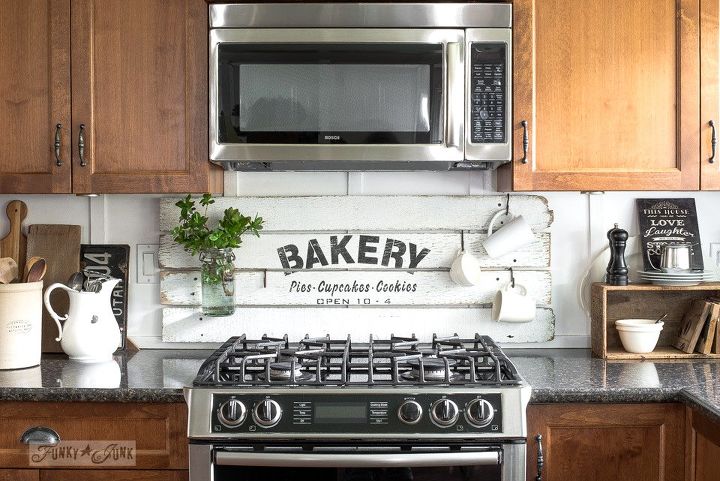
NOTE: If you wish to insert S hooks for hanging like I did, install two support boards on the wall prior to hanging planks, to create a space between wall and sign for the hooks. Or just add hooks or screws on boards.
Then insert s-hooks to hang, and put it to work!
I'm so in love with the impact this BAKERY sign has in my kitchen! I'm using it to hang mugs near my coffee station so it's super useful!
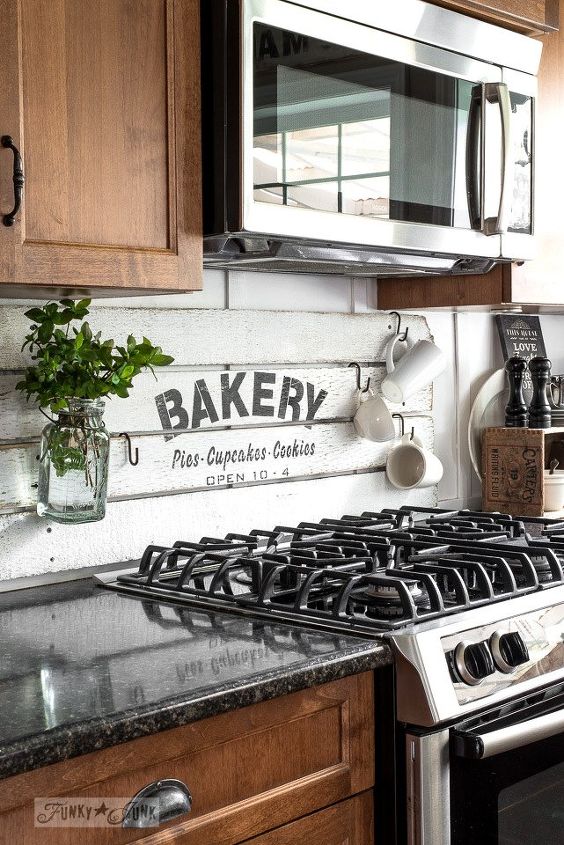
Note: Hang sign behind gas stove at your own risk. Always check home code safety before installing wood behind gas ranges. I cover my sign when I cook and I rarely use the back burners.
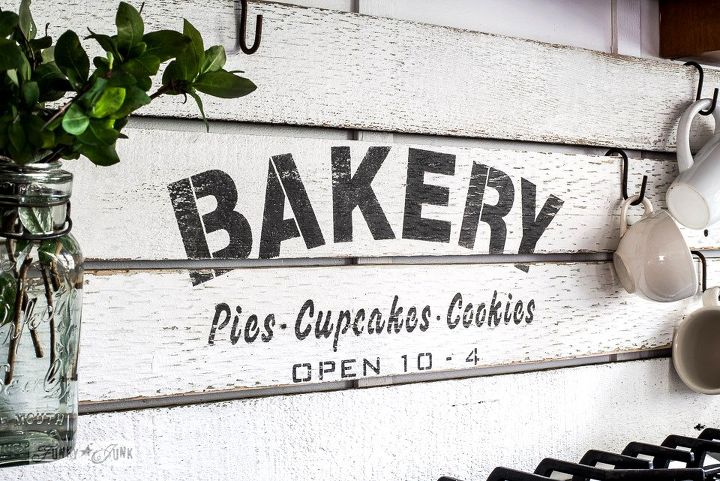
Love how the black graphics really pop against that white! Makes for a nice modern farmhouse touch, doesn't it?
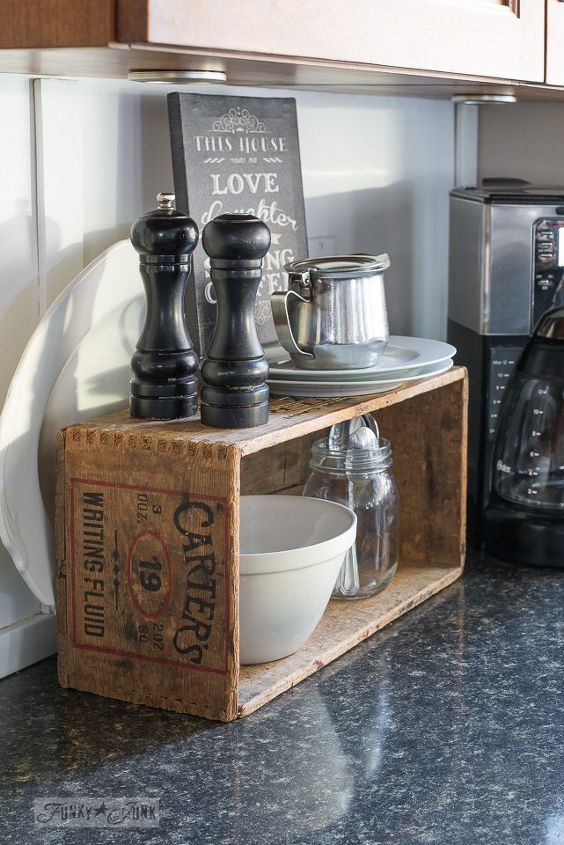
So, this sign demanded a little fluffing around my woodsy, rustic kitchen. An old crate helped double the counter space in my small kitchen.
The blog post has a few more shots of what else I did too, at link below.
And there she is. My happy little (faux) baker hard at work. Calorie free I might add...

Comments
Join the conversation
-
In a NUT shell........I love your entire kitchen. It is a combination of dark, white, and all of your ideas combined. It looks like a well thought out kitchen!!!
-
Nice. As soon as we're free to roam, I'll look for some old boards.


Frequently asked questions
Have a question about this project?
I may have missed this but; how do you have it attached to the wall or does it simply lean up against the wall?
I like the look, but isn’t it a fire hazard?
What is the wood plaque? Did you make it out of wood, and put it together with the right spacing to accept the hooks? I hoped to see suggestions on how to build or find a wood plaque like this one, to stencil..... Kind of looks like one side of a wood crate?