


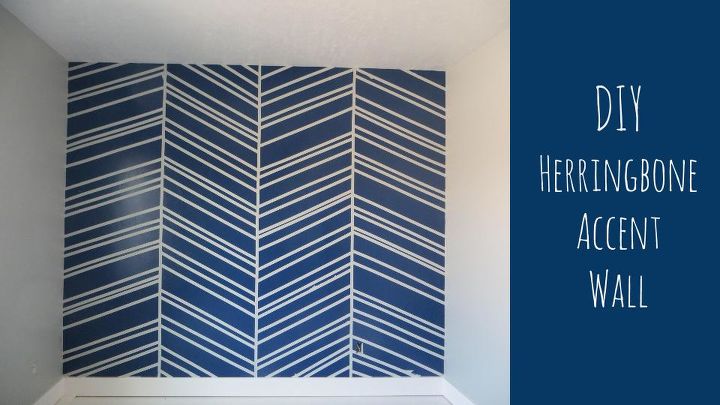
DIY Herringbone Accent Wall
$20.00
1 Day
Easy
So one of the amazing things about having a girl is living vicariously through her. Lucky for me she happily goes along with it. She must love her mom. One thing that you will quickly discover about me is that I am almost done building a house. A lot of posts will be about new projects there or some new furniture I want to redo or decoration I think I can make. With that being said we are about a week from moving in and the carpet is just about to be laid so it's a good time to get my daughters accent wall done. And not just any wall, a herringbone wall. Her color scheme is amazing and one that I can totally run with. Grey, Navy Blue, Coral, and Turquoise. Something else about me is that I love turquoise, doesn't matter the shade, if it's turquoise I can make it work.
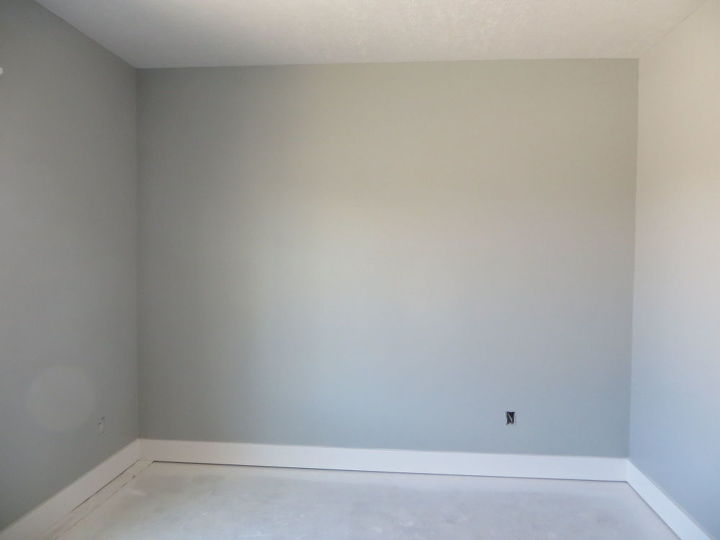
I am not a painter, so to start with a project like this was a little bit out of my comfort zone, even worse was that I only had a small window to accomplish it in. I woke up this morning and said it's now or never. I am going to share some of the things that I learned and hopefully what is in my brain will transpire to the wall. Our base color of our walls is Argose-it's a grey color-sorry not a good description but it was part of the color scheme so it meant one less step I had to do.
I am not a painter, so to start with a project like this was a little bit out of my comfort zone, even worse was that I only had a small window to accomplish it in. I woke up this morning and said it's now or never. I am going to share some of the things that I learned and hopefully what is in my brain will transpire to the wall. Our base color of our walls is Argose-it's a grey color-sorry not a good description but it was part of the color scheme so it meant one less step I had to do.
Things I needed to paint this wall:
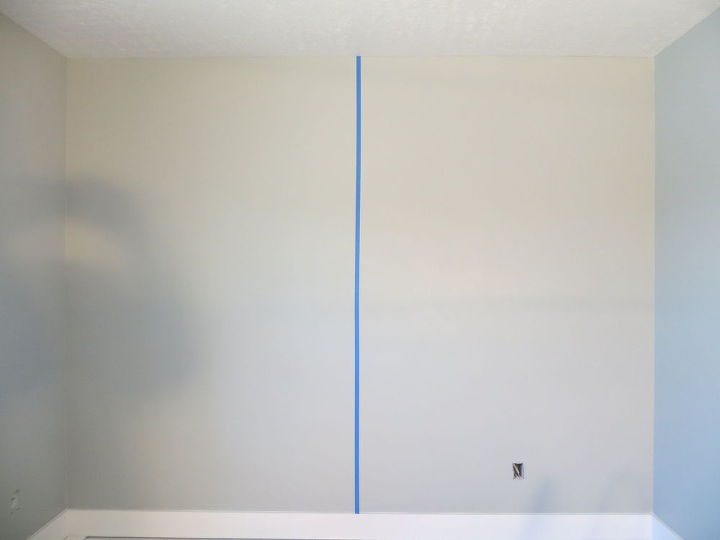
The length of the wall was 126 inches and I wanted it divided up into 4 sections vertically with the hope that 4 sections would make the wall seem bigger then with 6 small sections. That put the half way point at 63. I put a mark on the wall in 3 different spots vertically and then ran a piece of tape from floor to ceiling.
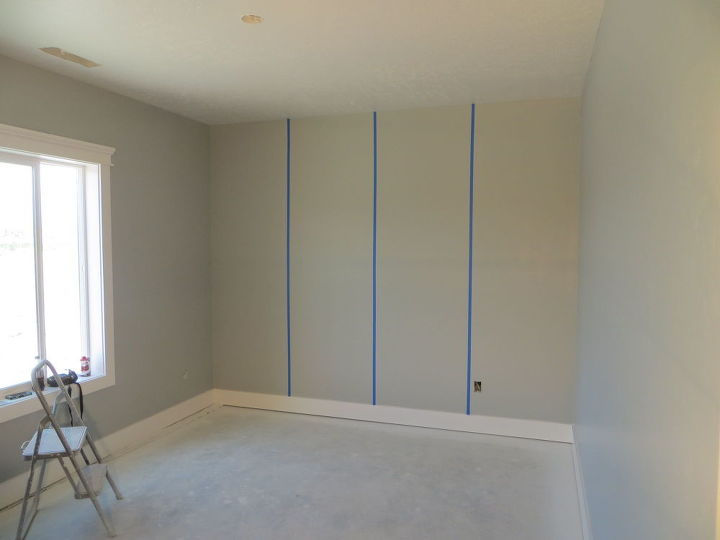
From that point I measure from the center of that line to each outside wall and marked at 31 1/2 inches and proceeded to mark those vertical lines the same way I did the center line. See not that complicated right.
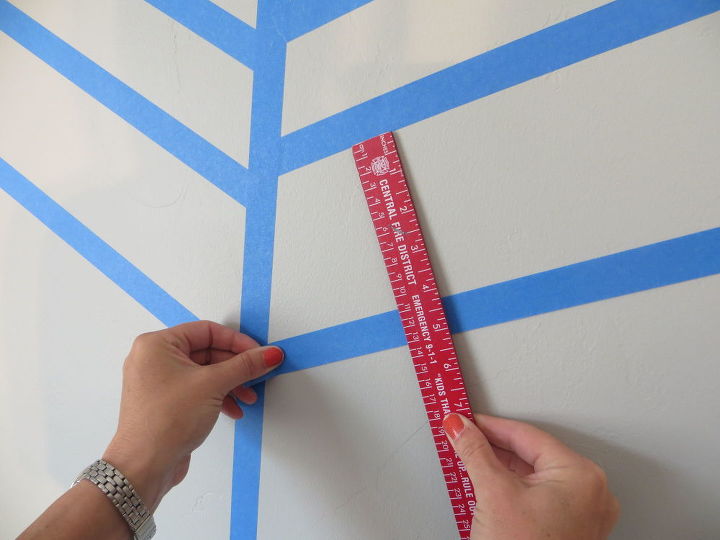
I knew that I didn't want some strict pattern, I wanted it to be a modge podge pattern and look fun and youthful.What did I do? Just put up a piece of tape to see if the angle was what I wanted. You will need to decide how deep or narrow you want your V to be. I went with a wider V and was happy with the results. This was where the ruler came into play. I measured the distance from the top of the angle to the bottom to make sure the distance was the same from one end to the other.
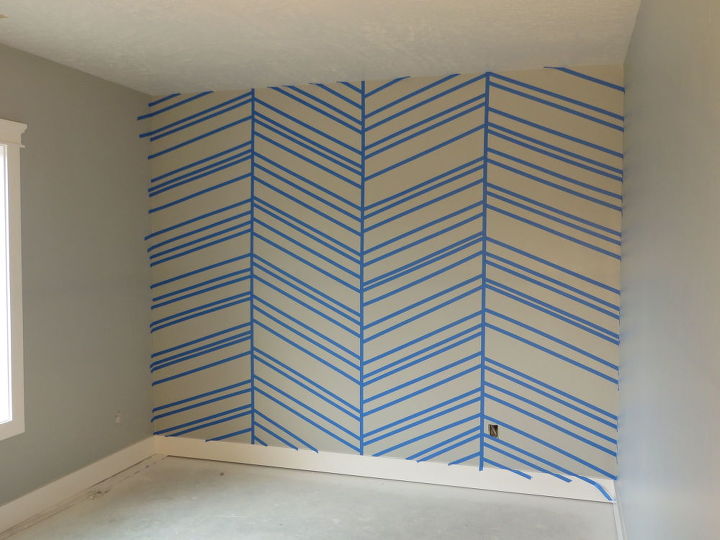
This took the most time and it was hard to do since I kept feeling that I didn't want a pattern and I was doing one. But when I would step back and look at it as a whole instead of an individual row it looked awesome.

Want more details about this and other DIY projects? Check out my blog post!
Comments
Join the conversation
2 of 6 comments
-
this is a great project! Yours, fun, but with a change of palette or addition of color or metallic could be quite elegant. Thanks for sharing- great job!
-
I love this and would never have thought it up myself. Thanks for the inspiration 🙂


Frequently asked questions
Have a question about this project?
What color did you use?