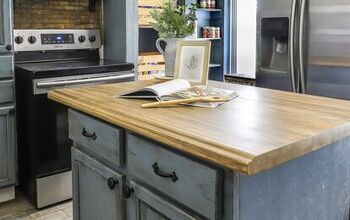
How to Paint Your Countertops

Ashley Brown
by Ashley Brown
4 Materials
I spend so much time in the kitchen, cooking and cleaning over and over again. I want to feel happy and excited when I enter my kitchen but I just never get that feeling. So, it is time to do something about that!
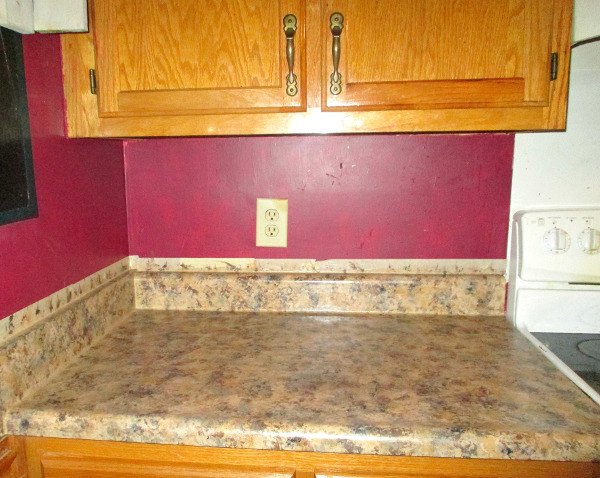
We don't plan on staying in this house forever (you know, because we are packed in here like sardines) but we don't want to throw a ton of money into it just to do that all over again at a new house. Who would?
This is my finished countertop.
This is what I started with ( I know, it's depressing).
Materials Needed:


Very ugly countertop


Sander/ sander paper


A good primer ( I used Glidden Gripper Primer)


Acrylic paint in about 5 colors( I got 2 of each color and it was just enough for the whole kitchen)


Polycrylic


Paint brush/ roller and sponges


Waterproof caulk
Start with a clean countertop and then sand really well to to dull the surface. Clean off any dust from sanding.


Apply 1 coat of primer.


Let dry and then apply another until you have full coverage.
I used 5 different sponges but you can use the same one and wash it out between colors.
Start by wetting your sponge a very little bit (squeeze out excess) then dab on one color at a time. I started with the lightest colors first then moved up to the darkest. Do not try to apply in a pattern, the more random the better. Just have fun with it!
If you have applied all of your colors and it looks blotchy like this then go over it again with your lighter colors to blend everything better. We worked on one section at a time so the paint didn't dry up.
When needed recruit help.
For the cracks and other places that the sponge couldn't reach I cut off a tiny little piece of sponge and applied paint with that.
When you have applied all of your colors, if you think it is not blended enough try going back over with the lighter 2 colors. That really helps to blend it all together.


Let everything dry! Then apply 4 coats of polycrylic (let dry between each one). Follow the dry times on the container. Apply caulking around the edges of the sink.


I would wait about a week before putting anything heavy on it, just to make sure it has time to cure.
Ashley Brown
Want more details about this and other DIY projects? Check out my blog post!
Go
Frequently asked questions
Have a question about this project?
3 of 11 questions
Comments
Join the conversation
2 of 31 comments
  • Donna Donna on Jun 09, 2018

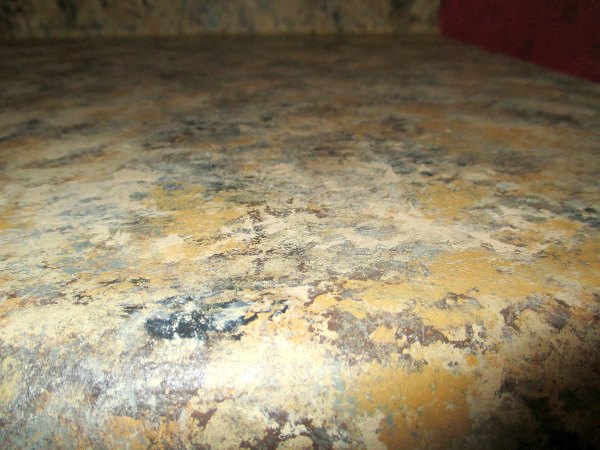
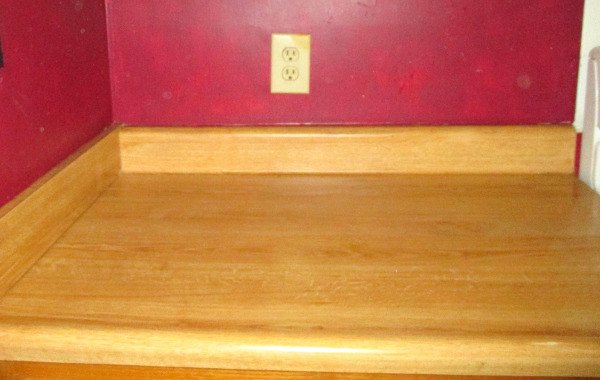
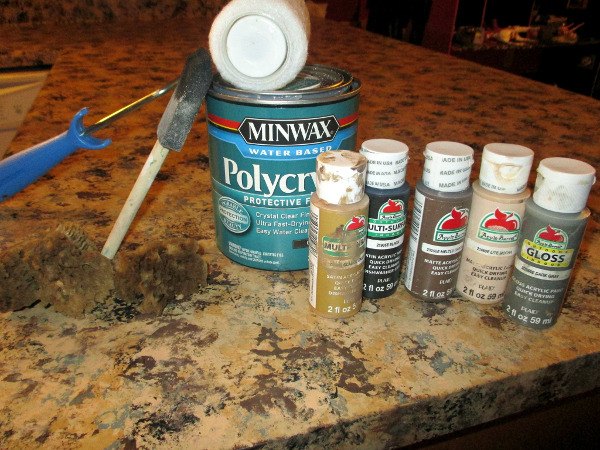
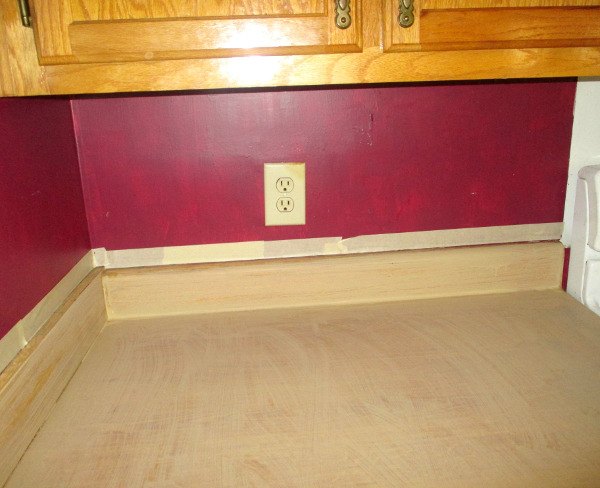
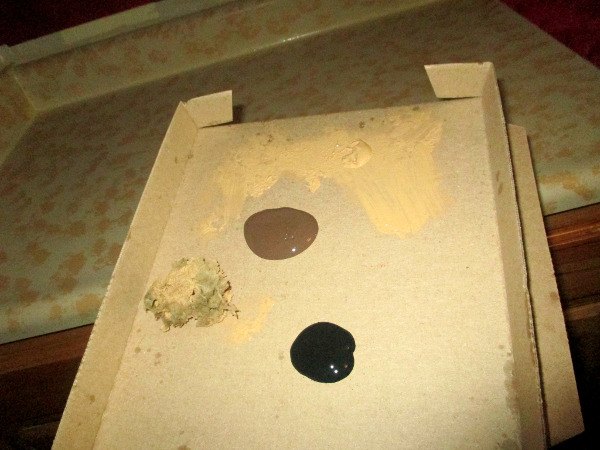
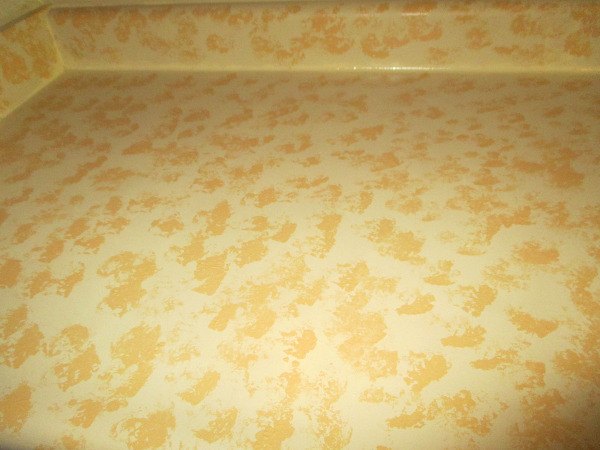
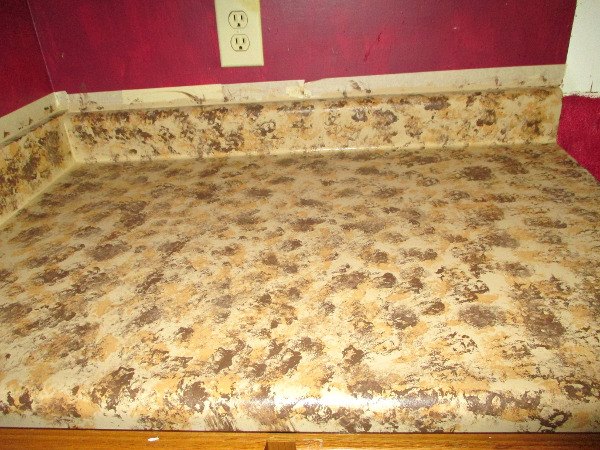
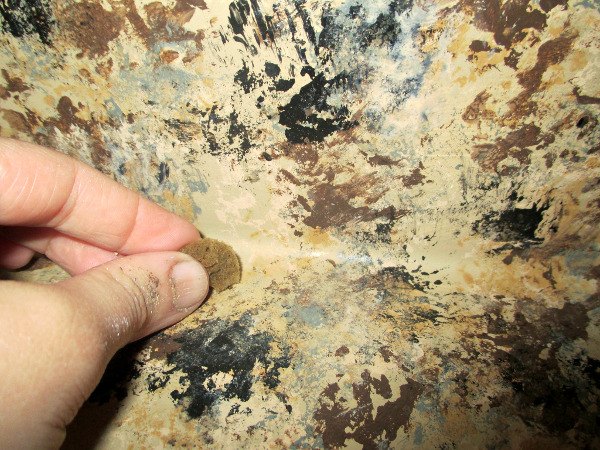
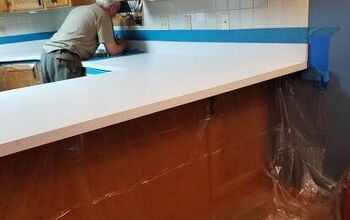
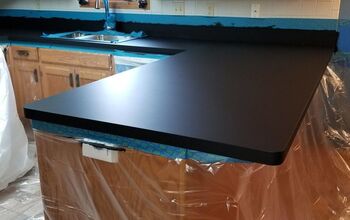
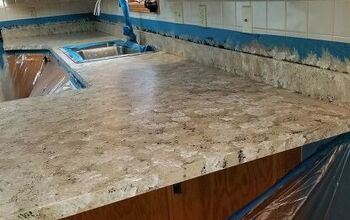
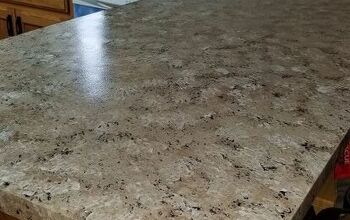
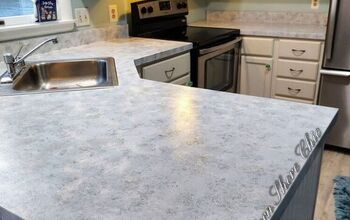
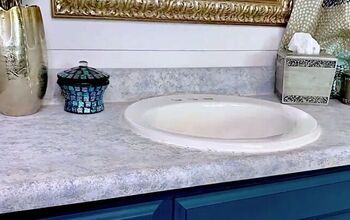
    We just did something similar to our counters but we used a kit by Giani. Step 1 = prepping the counter by putting painter's tape around the areas to paint, and clean & etch existing counter using Brillo or SOS steel wool pads with soap in them. Clean counter well using cloths and clean water. Step 2 = paint the counters with black primer. Step 3 = apply the 3 colors, starting with the darkest working to the medium then lightest using a sea sponge, covering in 3 foot sections at a time. Step 4 = paint on the clear coat protection, about 3 coats. There is also an epoxy clear coat that would probably last longer and provide a better protection than the clear coat that comes with the kit. Instructions say to wait 14 days before putting anything heavy on the counter. Picture #4 = final result. We love the look so much better!

  • Patricia Patricia on Jul 17, 2018

    I'm sorry but it looks just awful to me. Way too much... splotches of bad color. Maybe a good idea with some white, black, and grey paint...?

Next