


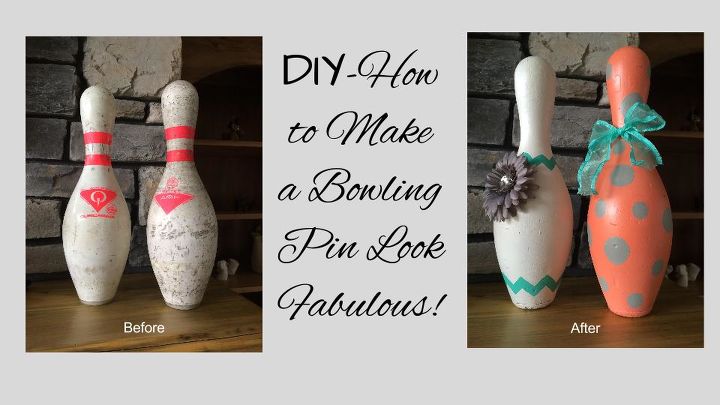
DIY-How to Make a Bowling Pin Look Fabulous!
$10
1 Hour
Easy
This is one of those posts that I went back and forth on for a while, not sure that I would love the end result or be happy with the time that I would put into it. I am happy to report that it did not disappoint. My husband frequents pawn shops and for the last year or so has been accumulating bowling pins. I think that they look cool and I like the idea of having them. I had placed 2 in our living room but decided they didn't match the decor that well since they were a little beat up. So I wondered if I could make them a little more decorative. I did some online searching for some ideas and all that I could see was superheros, minions and snowmen (not what I had in mind).
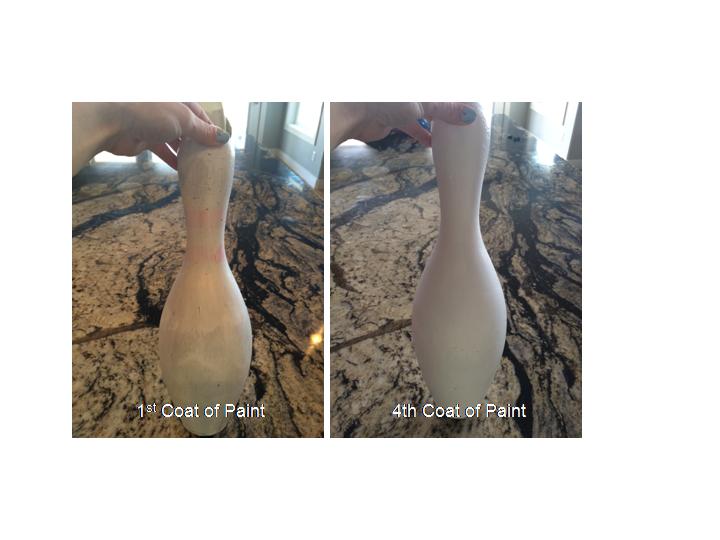
So with that being said I decided there was a first time for everything and would figure it out for myself and free hand it. It actually was a fast process and extremely easy. If you are curious I think the pins can be picked up for about $7, not a bad price for an interesting decoration piece. All it took was some paint and a little imagination as to what I wanted to do with them.
So with that being said I decided there was a first time for everything and would figure it out for myself and free hand it. It actually was a fast process and extremely easy. If you are curious I think the pins can be picked up for about $7, not a bad price for an interesting decoration piece. All it took was some paint and a little imagination as to what I wanted to do with them.
Supplies
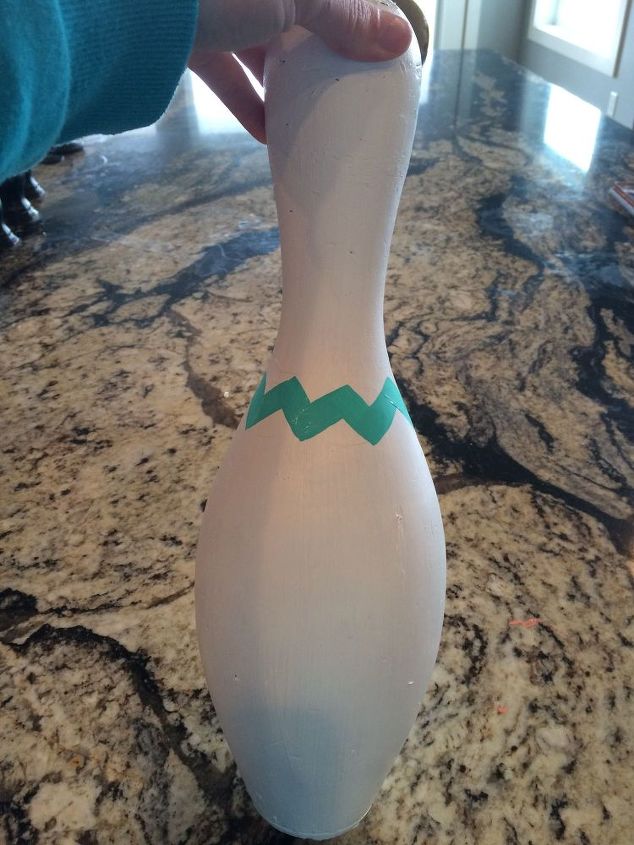
For the chevron lines on the white pin I measured the spacing from the top of the pin and marked and from the bottom of the pin and marked leaving a 2" space all the way around. I then free-handed it, hoping that it would match up as I went around the pin. I was lucky! For the bottom I measured up 1 1/2" and then 5" using the space in between as my guide. It also was 2". Once again I free-handed it and was lucky! I was really happy with the end result.
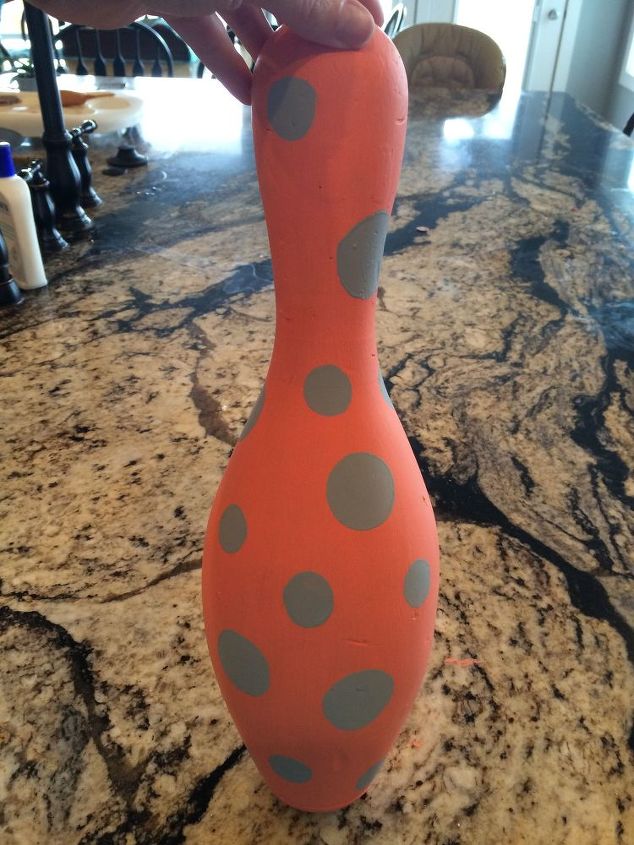
For the orange pin I used a paint color called Tropic Orange. I am really happy with the color since it matches the color scheme in my living room. I used my spouncers to get the dots on the pin. It did leave the paint bubbly, is that a word?-on the pin, so I had to go over each dot with a brush to smooth them out. But it didn't take too much time to do and I am really happy with the end result. Last but not least do a coat or two of finish spray.

Want more details about this and other DIY projects? Check out my blog post!


Frequently asked questions
Have a question about this project?