


Pallet Wood Cubby Organizer Shelves
Years ago I bought one of those printers typeset drawers. The kind of drawer with tons of little cubbies that used to house the printers type for the old printing presses and now can hold tons of little knickknacks. I think everybody bought one at the time and I still have mine.
The problem with the printers drawers is that the display holes were tiny. Only the smallest of collectibles would fit on those shelves. Think tiny thimbles, political buttons, small bottles, a key.

The cubby shelves I'm showing you today is for the next generation of keepsakes. These shelves will fit that collection of baseballs, alarm clocks, ornaments. Making these shelves will free you from the itsy bitsy, to the average knickknack...from the teensy-weensy to one nice sized souvenir.
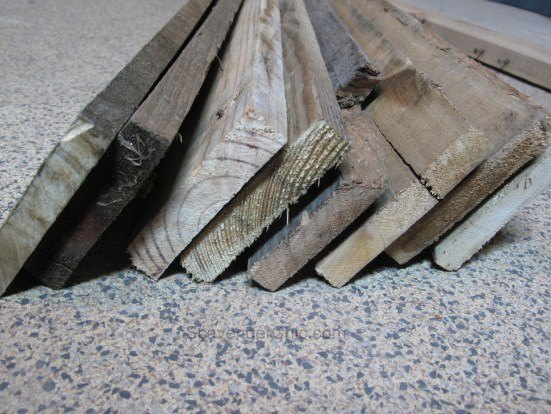
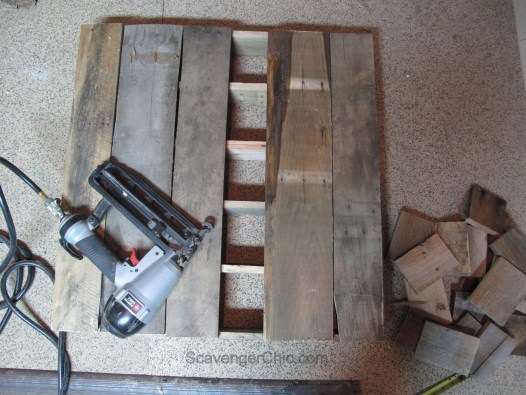
To begin this project you're going to need 8 pieces of pallet wood. Each of the pieces need to be the same width and about the same thickness.
Six of the pieces were cut 26 1/2
The remaining 2 pieces, for the sides, are 27 3/4.
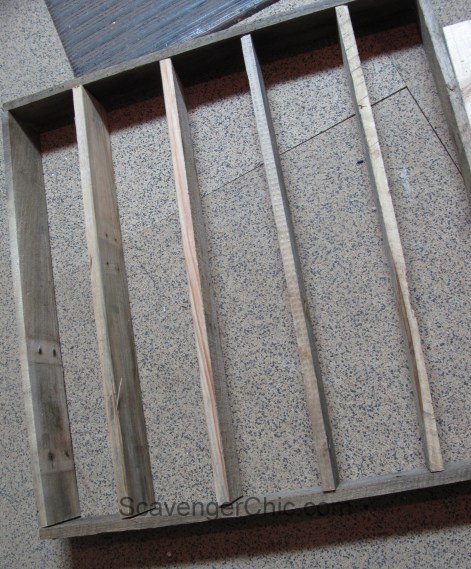
Nothing is nailed together yet, just figuring out if I liked the size and spacing.
Use the same width pallet wood that you cut your shelf pieces to cut 20 shelf dividers. Mine were each 4 3/4 but since the width of pallet wood tends to vary from piece to piece, you will probably have to measure your own piece, but 4 3/4 is probably a good ballpark estimate of what you'll need.
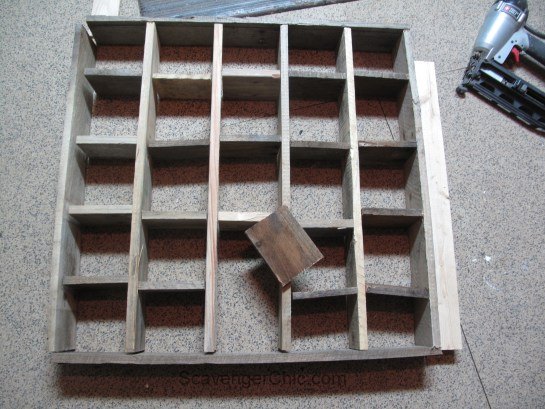
Finally starting to nail. The corners were attached first followed by the long shelving. All are nailed from the sides with finishing nails. The smaller cut boards are just being used for spacing at this point.
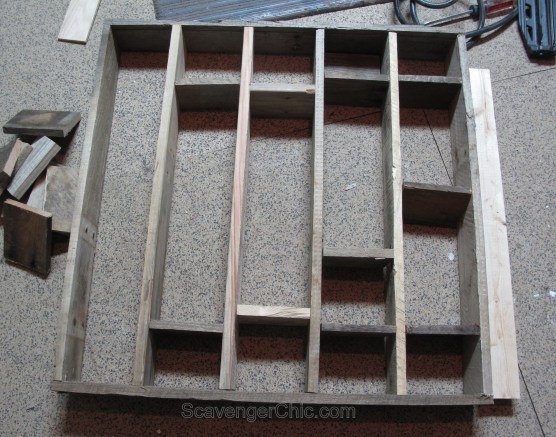
More pallet wood was cut for the back, slightly shorter than the 27 3/4 side pieces. Again, I used a nail gun to attach. I put in a couple of nails per pallet piece for wherever the backing hit the shelf...that's 12 nails per board.
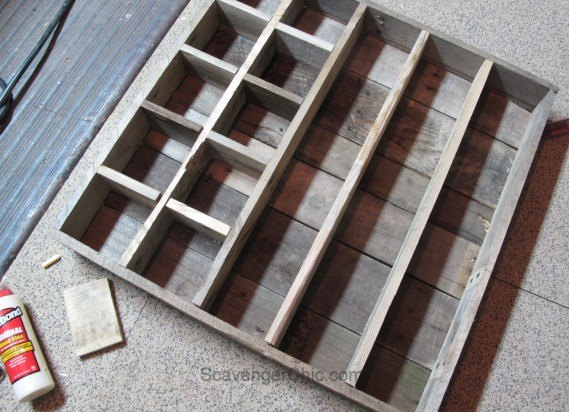
For the most part, the smaller divider shelves are just attached with wood glue. I was able to put one more finishing nail at the top of each piece to hold it securely while the glue dried. Because these are the vertical dividers they won't have any weight on them.
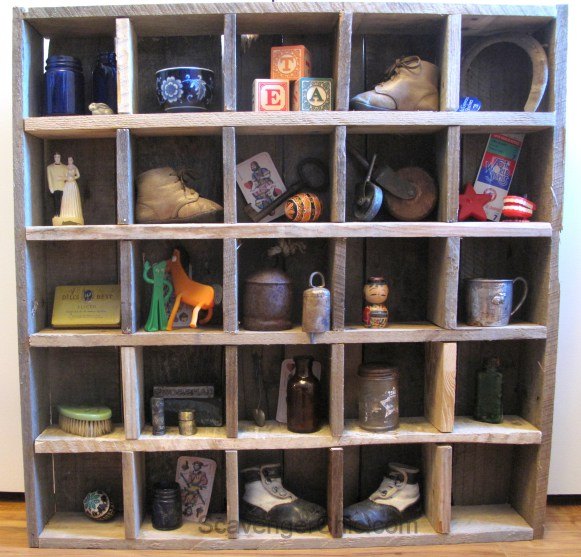
All finished and ready to load up with your favorite collectible.
I thought I was all done until I saw a Pottery Barn shelf for $166. Looked almost exactly like mine, but what it had that mine didn't was numbers under each shelf.
Make sure you click on over to see the Pottery Barn shelf and how I made vintage style numbers from a soda can. Yup, a soda can. You can find that post here.
http://scavengerchic.com/2016/03/24/soda-can-vintage-number-labels/
For the full cubby shelf tutorial with lots more pictures click on the link below. See ya soon.

Want more details about this and other DIY projects? Check out my blog post!
Comments
Join the conversation
2 comments
-
Awesome!
-
What a cute cubbie.


Frequently asked questions
Have a question about this project?