


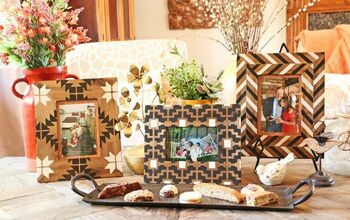
Woven Ribbon Frame - DIY
4 Materials
Easy
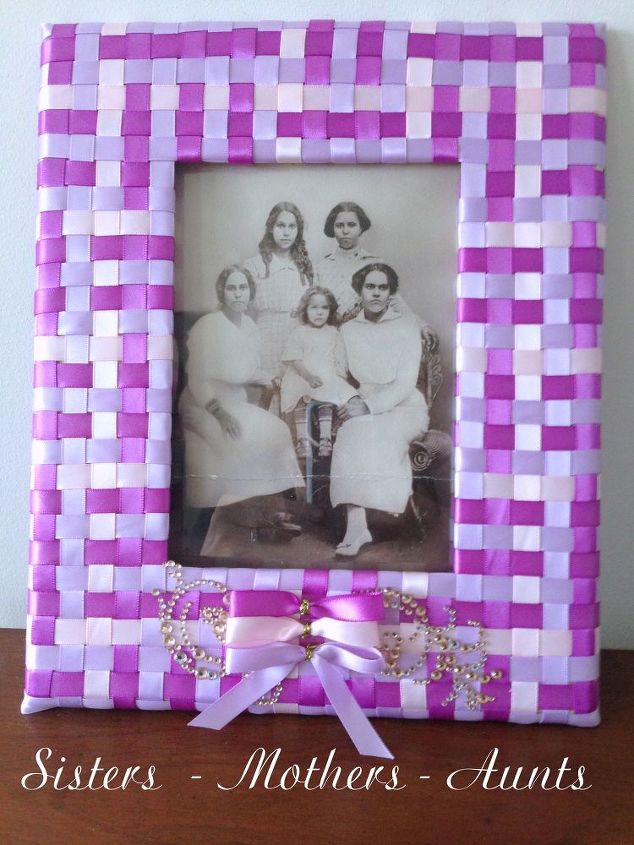
Transform an unfinished wood frame into a decorative piece using ribbon to display loving memories or mementos of special occasions. Makes for a lovely Mother's Day gift!
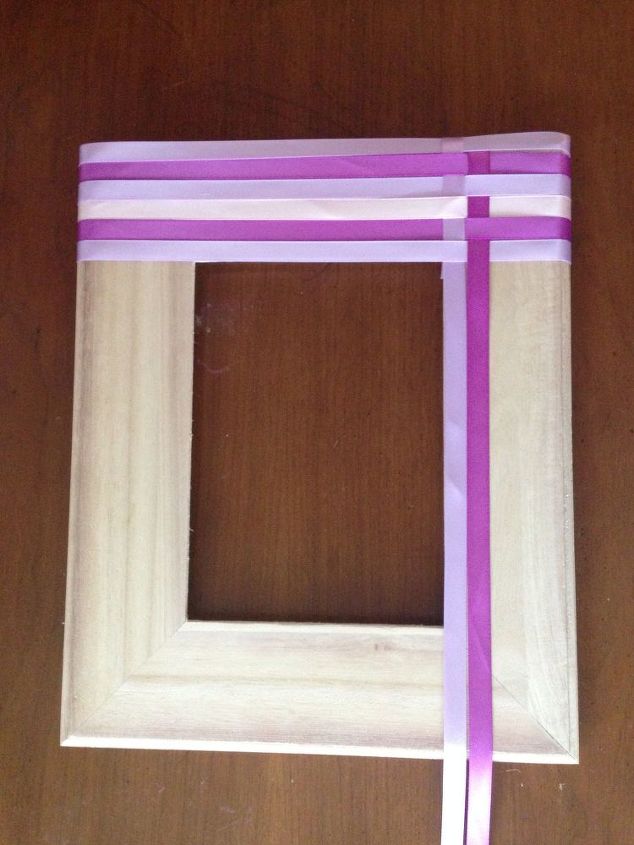
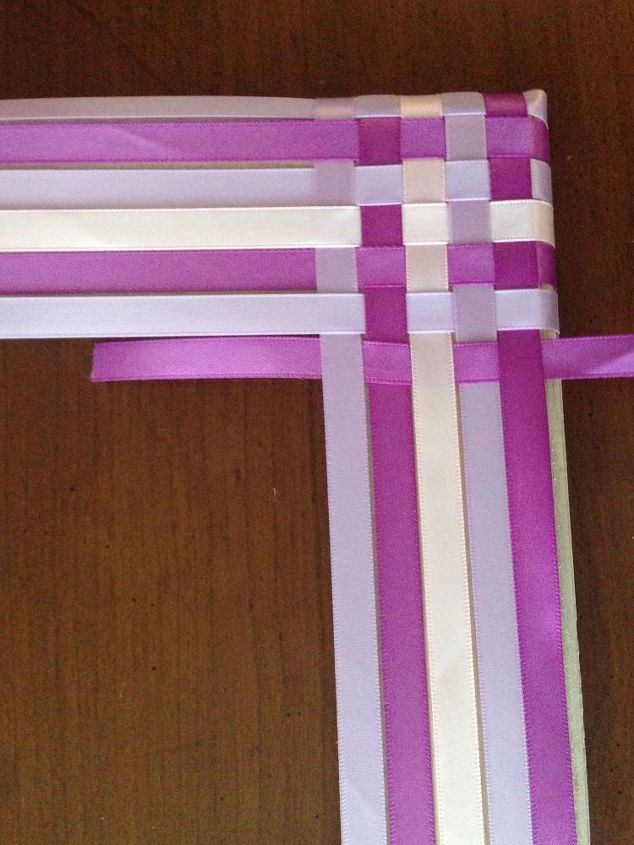
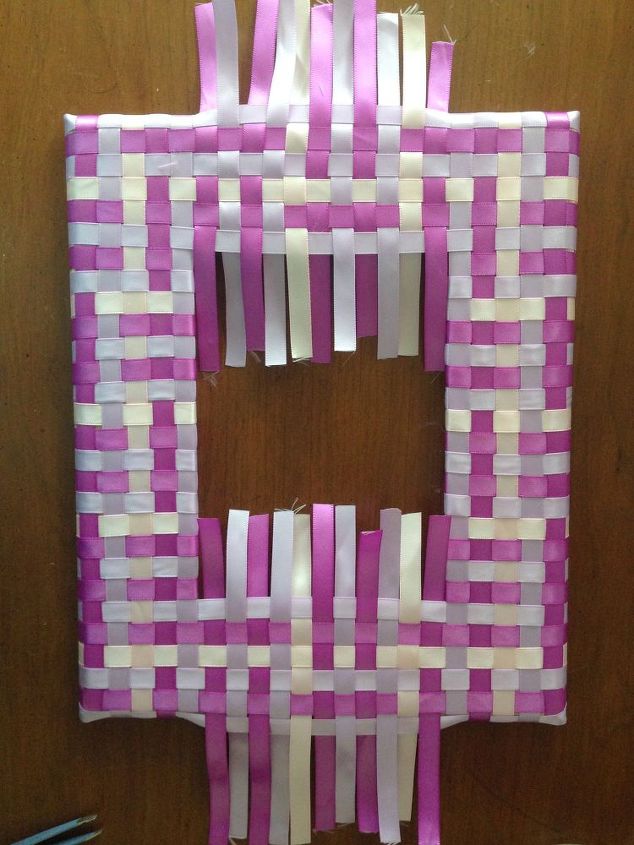
Start by laying out your ribbon strips by covering one side of the frame in a desired color pattern at the inside edge, cutting enough to wrap around to the back and tape together. Next, at the inside edge of the frame, begin weaving the ribbon over and under each ribbon, alternating the ribbon as you weave. Secure the ends with tape on the back of the frame, cutting off any excess.
Continue placing and weaving ribbon strips, keeping the same color pattern on each corner section of the frame.
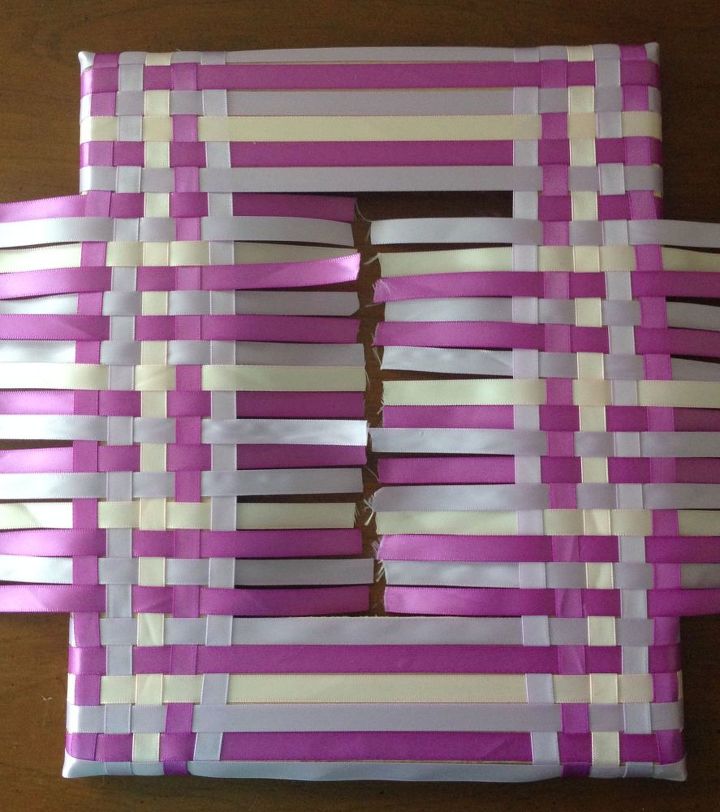
Once the longer ribbon strips are woven, shorter strips of ribbon should be placed in the same color pattern and woven on the shorter sides of the frame. Lay out the ribbon strips in the color pattern, then cut them in half, and next, weave the ribbon over and under, one side at a time.
Next, do the shorter sides of the frame the same as before, securing each strip with tape on the back.
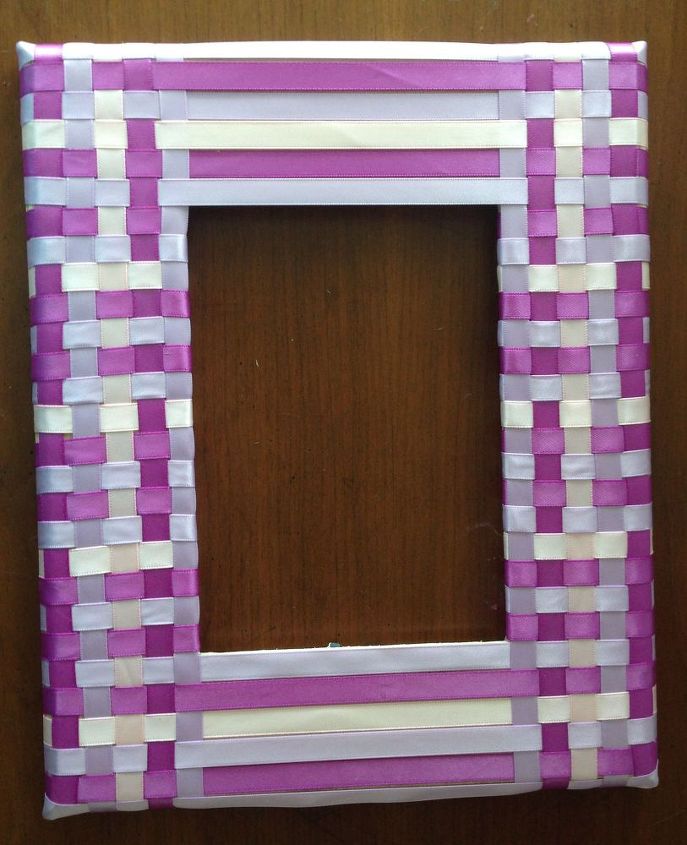
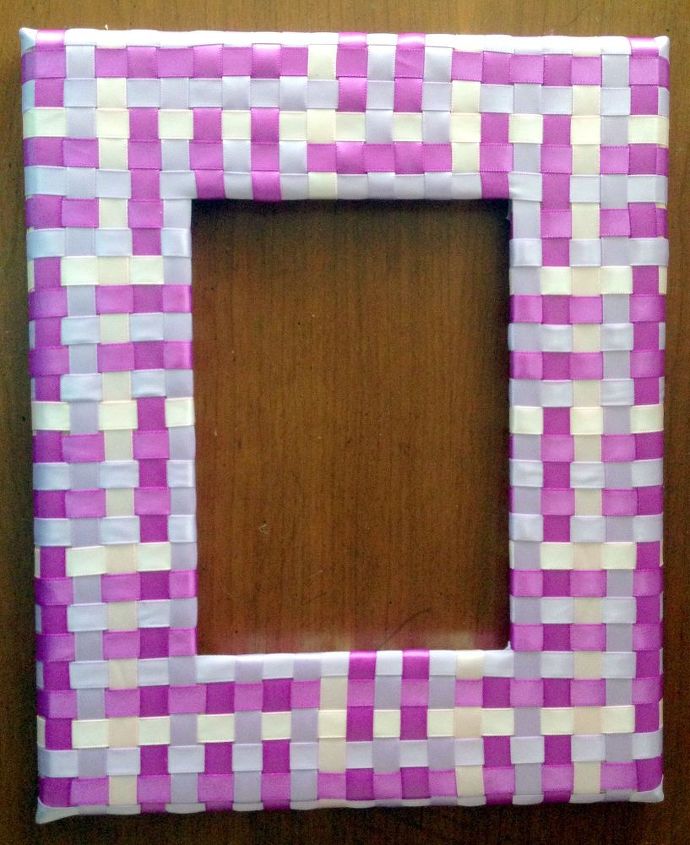
Once finish, check the woven ribbon strips to make sure they are straight on the front. For a neater look on the back, cover by gluing on a piece of fabric slightly smaller than the size of the frame.
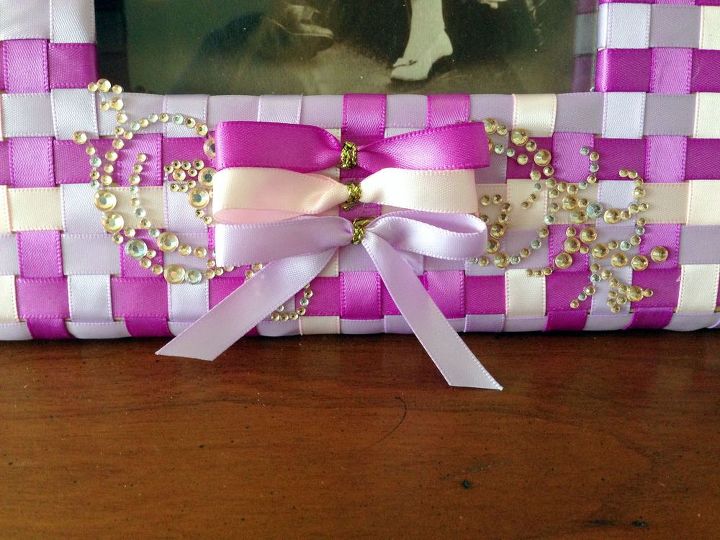
The finished woven ribbon frame can be embellished with swirled rhinestones and cute little bows. And finally, insert your precious photo and admire your creation!

Want more details about this and other DIY projects? Check out my blog post!
Comments
Join the conversation
2 of 27 comments
-
So cute! Hugs
-
lindo!!


Frequently asked questions
Have a question about this project?