


Repurposed Books and a Secret Hiding Place...Shhhh
5 Materials
Do you like secret hiding places? If you do, this easy project may be for you and better yet, it goes together in about an hour.
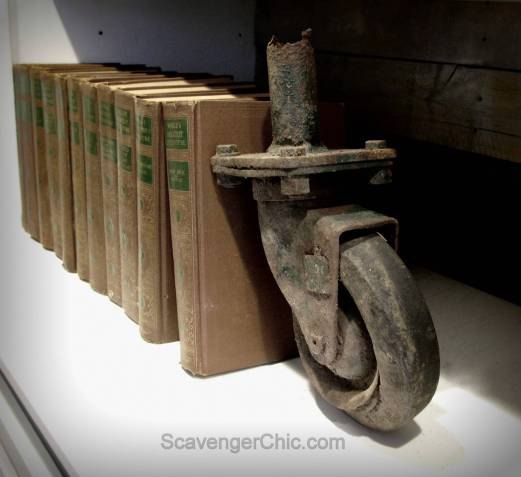
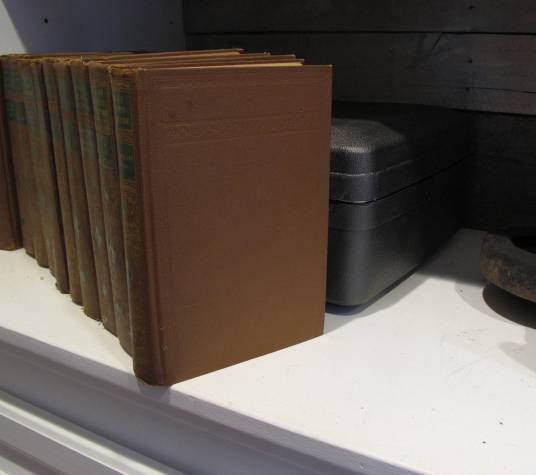
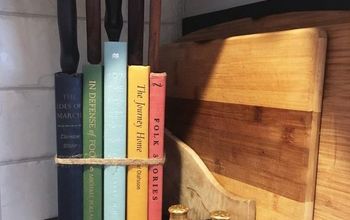
If you look at this picture you may think this is a post for a great upcycled bookend. But, if you looked at the title, you would know that it’s actually the books that are repurposed. Can you see the lockbox sitting on the shelf?
If you look at this picture you may think this is a post for a great upcycled bookend. But, if you looked at the title, you would know that it’s actually the books that are repurposed. Can you see the lockbox sitting on the shelf?
For months our insurance advisor has been telling us we should get a safe in the house to store all our valuable papers. The safe was not necessarily for theft prevention but to keep papers safe in case of flood or fire.
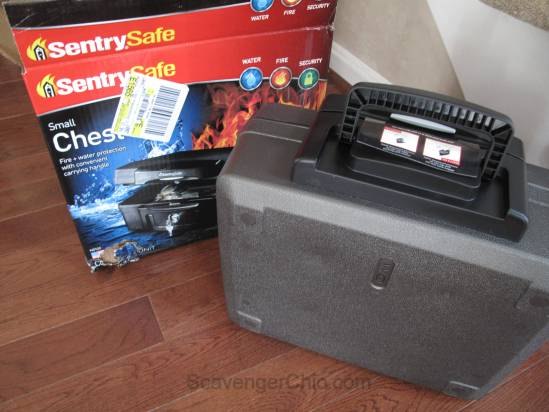
They really are not that expensive. This SentrySafe was from Walmart for about $20. It claims to be fire and water proof and it comes in several different sizes, I just wanted a small one because I really don’t own anything that is safe worthy.
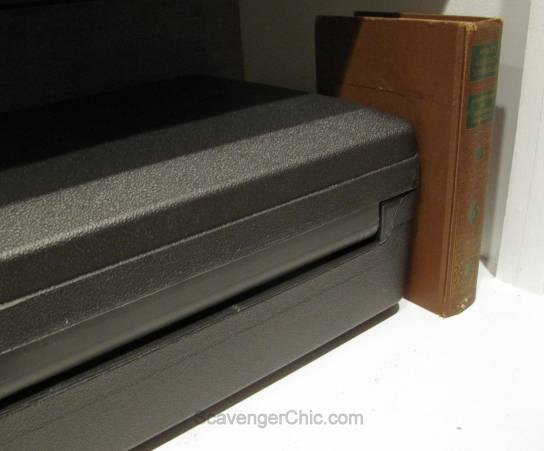
Now that I had it home, I really didn’t want it sitting around. While it just looks like a small suitcase, it does nothing for my decor so I needed to hide it.

I used a scroll saw to make my cuts but I eventually found it was quicker to start the long straight cuts with a chop saw then switch over to the scroll saw for cutting just the corners. You may want to use a dust mask, that paper pulp goes everywhere.
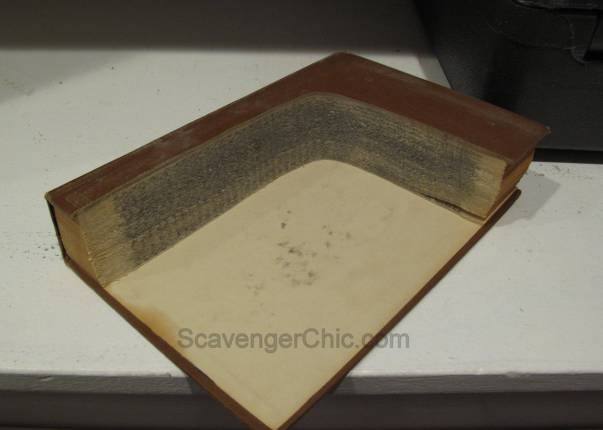
Once you have one book cut, use that book as a template for the rest of your books.
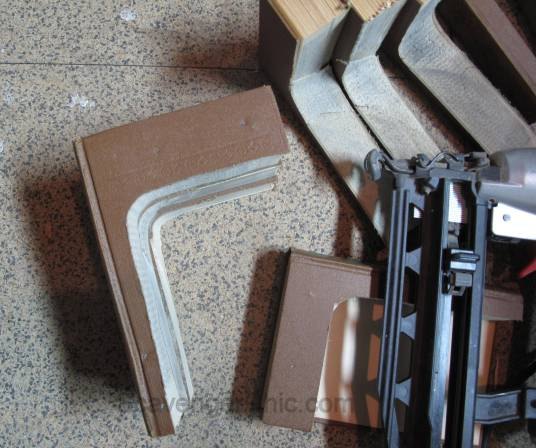
When all my books were cut, I tacked them together with 2 1/2″ finish nails with the aid of a nail gun.
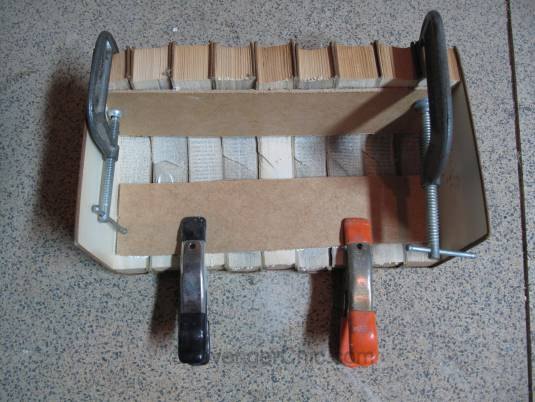
Some leftover scraps of 1/4″ mdf secured with builders adhesive reinforces the books.
Make sure you click on the link below for more pictures and a list of papers that our advisor thought we should put in the safe. You never know when you may need it.

Want more details about this and other DIY projects? Check out my blog post!
Comments
Join the conversation
2 of 108 comments
-
CAUTION! Safes are "fireproof" only to a certain temperature, some nearly useless.
YIKES! Valuable or not, reduce, reuse, repurpose, recycle means if an item can be reused as is by others, pass it on.
FYI! Before sawing up a useless book, drill 2 holes near either squared edge of the unused (to be discarded) portion & use binder clips or cord to make a hinge for "books". Give them to a crafter or toss into your next bag of donations.
PLEASE sign me EcoQueen of Crafts!
-
I like it! Great use for old books!


Frequently asked questions
Have a question about this project?
why not just put the 'safe' in a drawer or closet self ?