


Master Bedroom Closet Makeover

When we moved into our 1970’s home over three years ago, I was tickled pink to have a walk in master bedroom closet. I’ve never before had one, and although this one would be shared with my husband, I was still completely stoked.
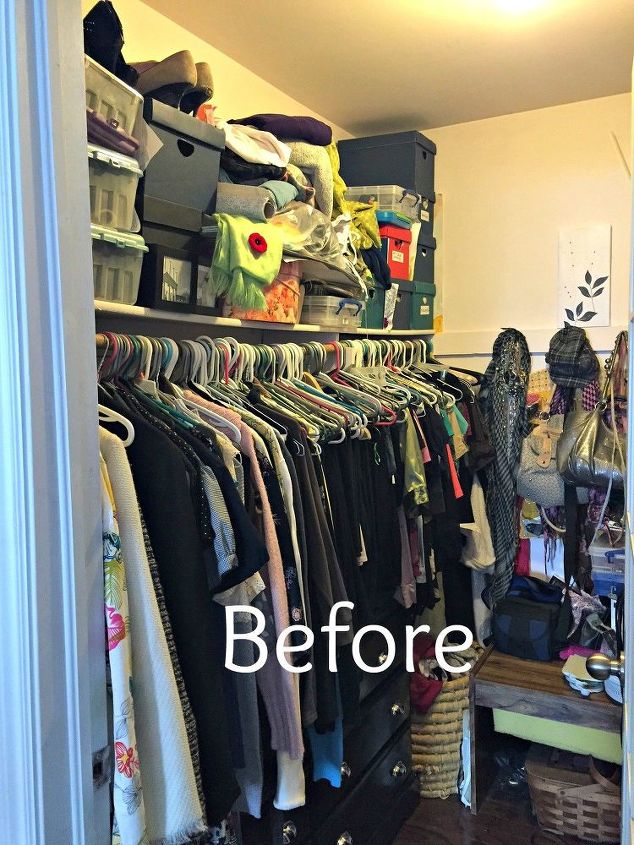
This closet was not at all living up to its full potential, and we certainly didn’t have the budget to hire a contractor to build a custom closet. So what’s a gal to do? Obviously a master bedroom closet makeover of course!
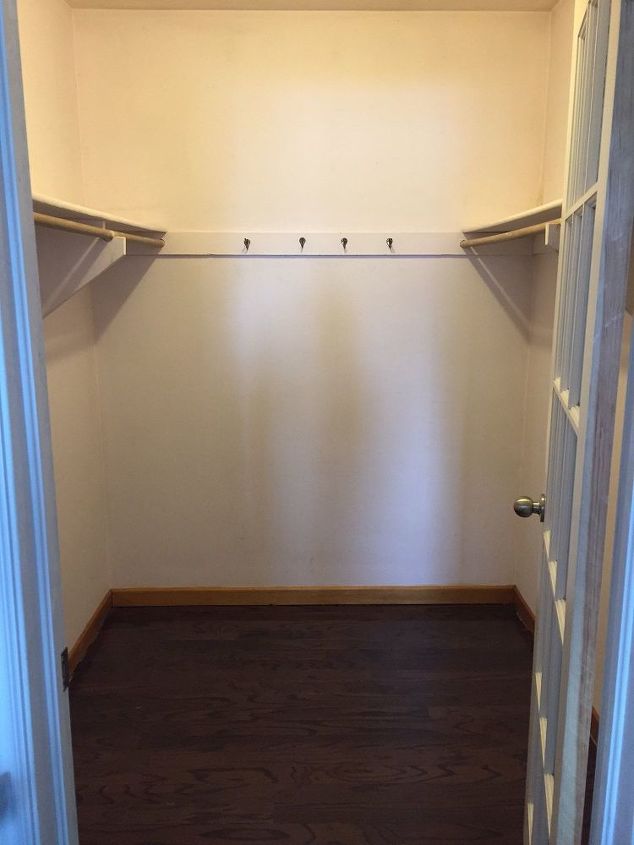
We started by cleaning it all out, and did a massive purge. It felt pretty amazing to get rid of so much junk.
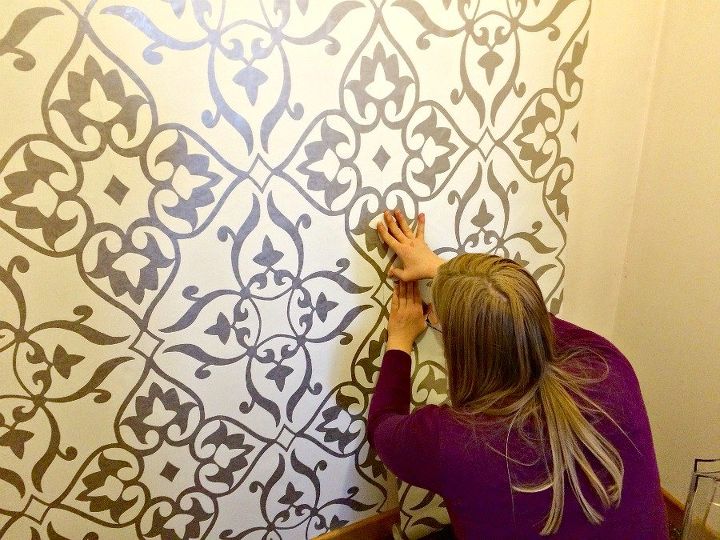
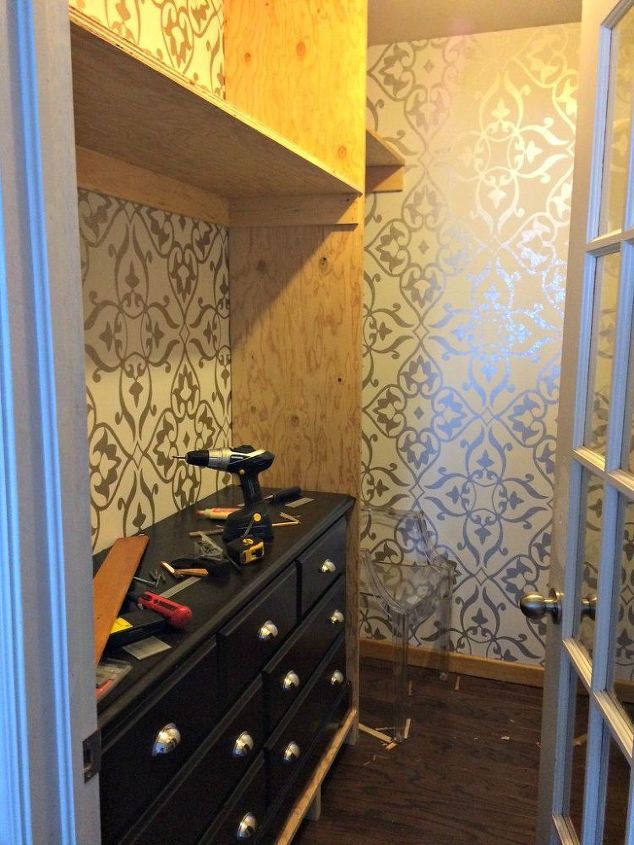
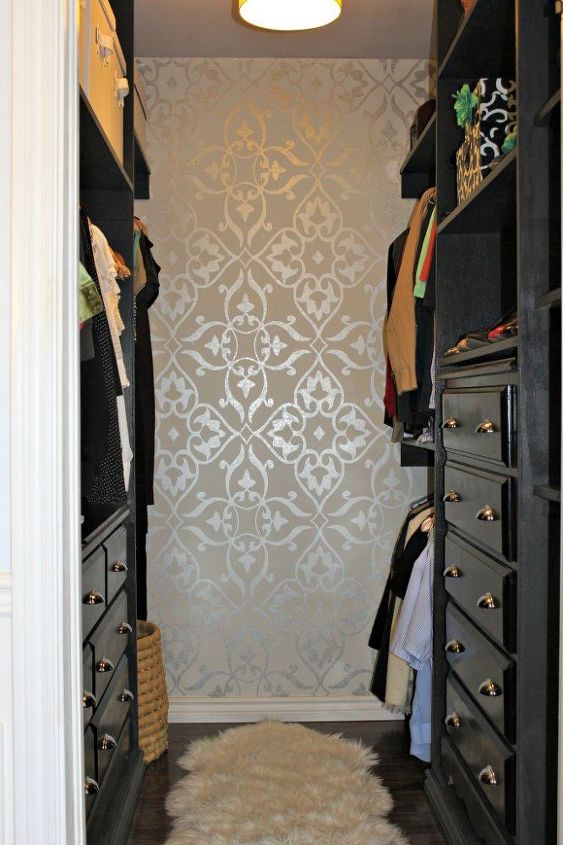
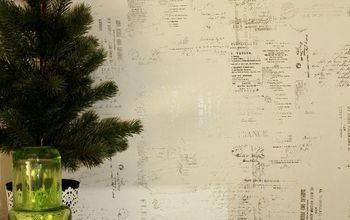
Once the old shelves were removed, I installed this gorgeous metallic medallion wallpaper. It's a small space, so I wanted a paper that would make a big statement.
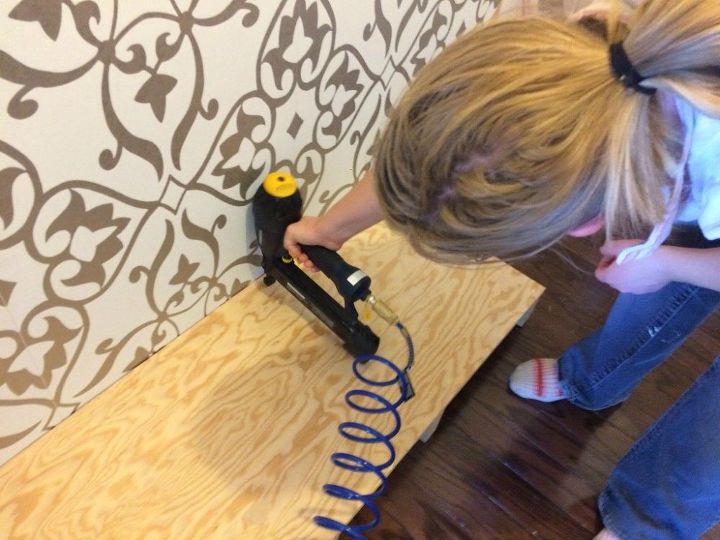
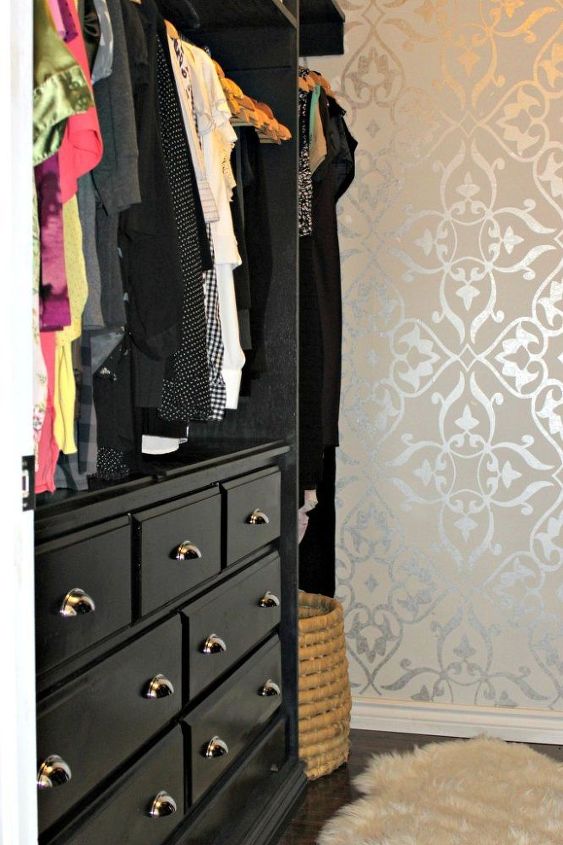
Next, we started the building process. We knew we wanted to incorporate our dressers into the closet, so we basically built the closet around them. We started off by building the base for the dressers to sit on. We used 2×4’s, wood glue and a nail gun to secure it all in place.
Once the platform for the dresser was built, we added the dividers which help to hang the rods, and keep things sorted and organized.
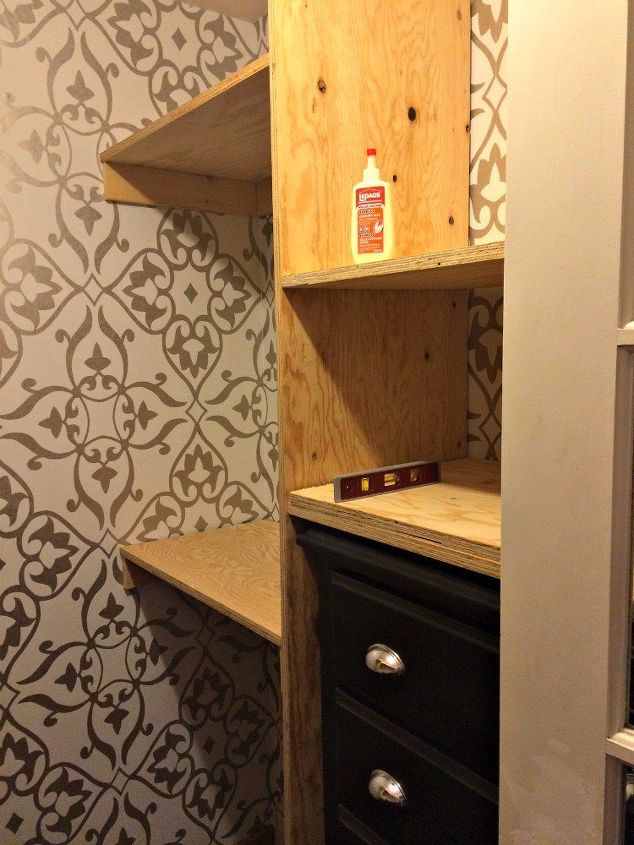
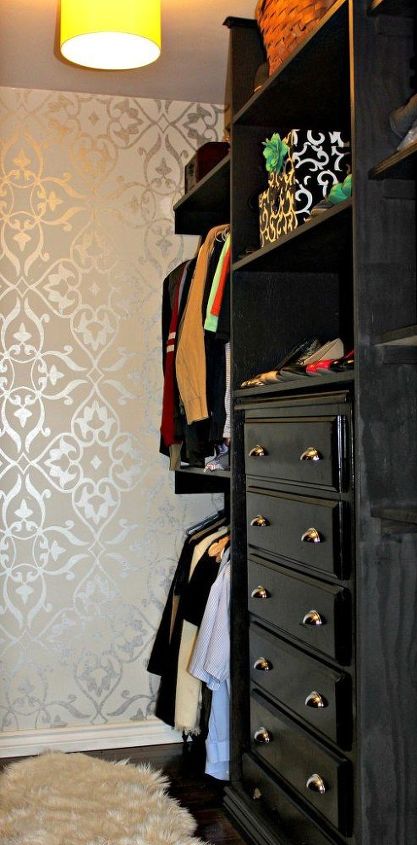
Here is the other side of the closet with a lot more shelves. We repeated the same process of building a base for the dresser to sit on and then built the shelves around the dresser.
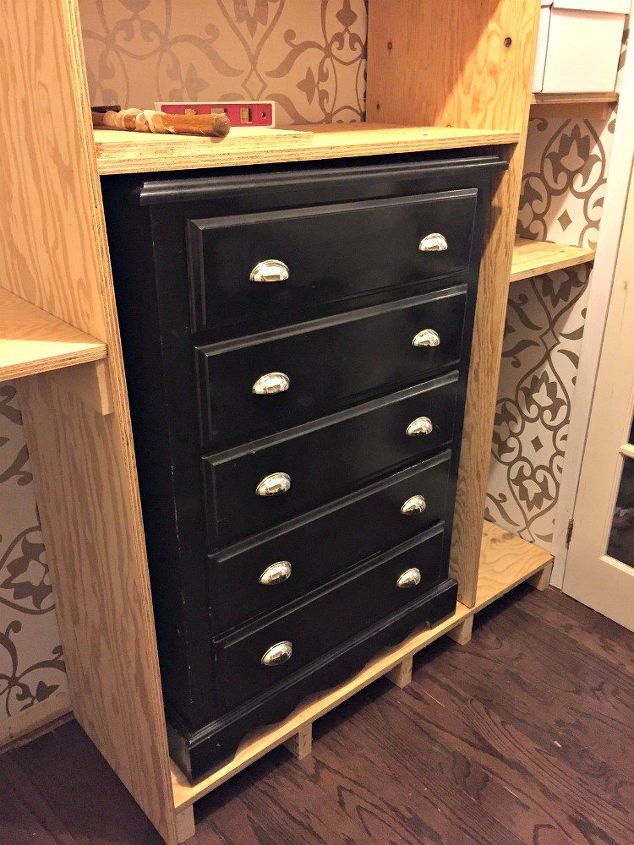
My husband's side has a ton of storage, and the cubby that houses the high boy dresser makes the closet and drawers look custom built. Woo hoo! Mission accomplished. We continued to use the wood glue and nail gun method for the shelves, while reinforcing the areas where the hanging rods will go.
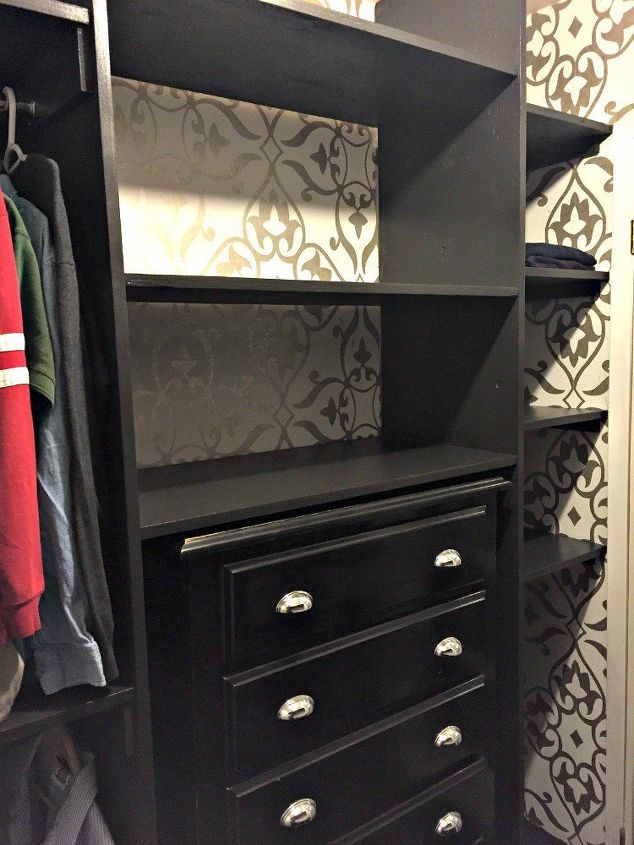
After all the built ins were completed, I sanded the shelves and edges. Then, I painted all the shelves Black Magic by Valspar. This colour is basically the darkest grey you could get before black. I LOVE how this masculine colour contrasts with the feminine metallic wallpaper.
Ta-da!!!! All finished.
So after three long days, and some sore muscles the closet was finished. I am loving all the new storage and can’t believe how much more crap can fit in there now. I can’t even really remember what it looked it before, nor do I want to.
I’m so glad we were able to bring this untouched 40 year old closet into this century and it’s now one of favourite places in the house. Check out my blog for a bunch more photos of how the closet came together and other DIY and decorating ideas.
More Gorgeous Bedroom Ideas
Resources for this project:
See all materials


Comments
Join the conversation
-
Beautiful you making the closet manegement. Wonderful use wallpaper colour. Nice repaint.
Beautiful look.
-
Looks nice but I would never redo without using adjustable shelves. Time and needs change.


Frequently asked questions
Have a question about this project?
Where did you hang rest of clothes? You only show maybe 1/4 of clothes. Where did it go? I also notice you don’t answer questions people are asking.
what size is the closet ???? Love what you did
When I tapped on “More” where you listed the beautiful wallpaper you used, you listed some other wallpaper….Not the pattern you used! Can you please let me know the name of the pattern you actually used in your closet? Thx!