


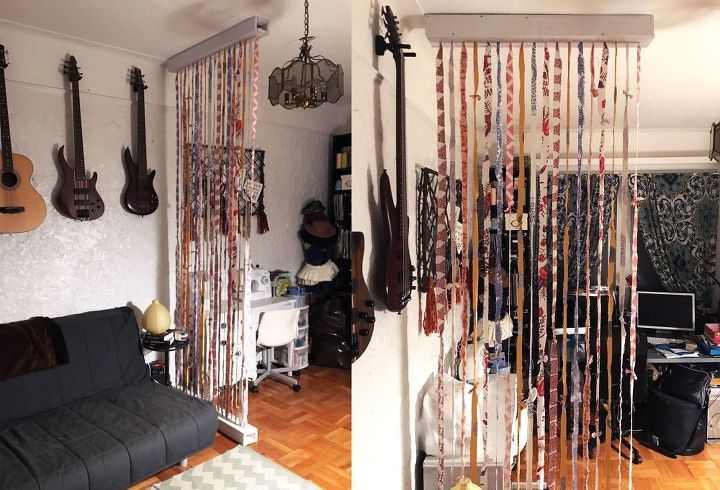
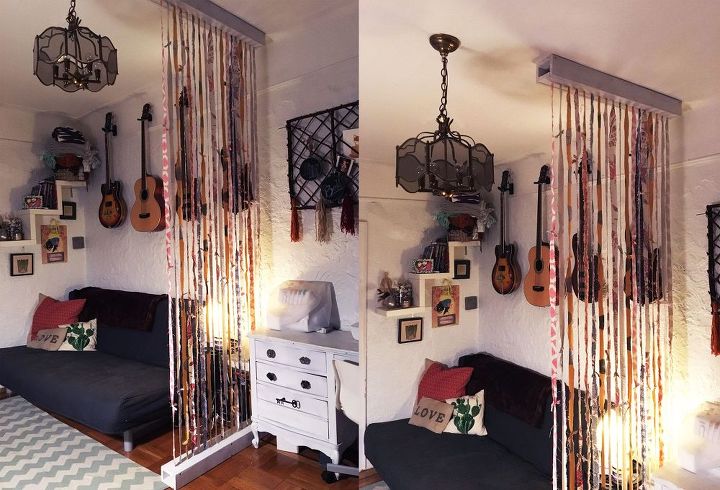
Suspended Fabric Wall / Room Divider

8 Materials
$23
3.5 Hours
Medium
Want to divide a room? Or simply spice up a plain wall? Create this customizable fabric wall for a very "free people" sort of feel. You can use the same method, but use varying types of fabric or materials to fit the aesthetic of your home.
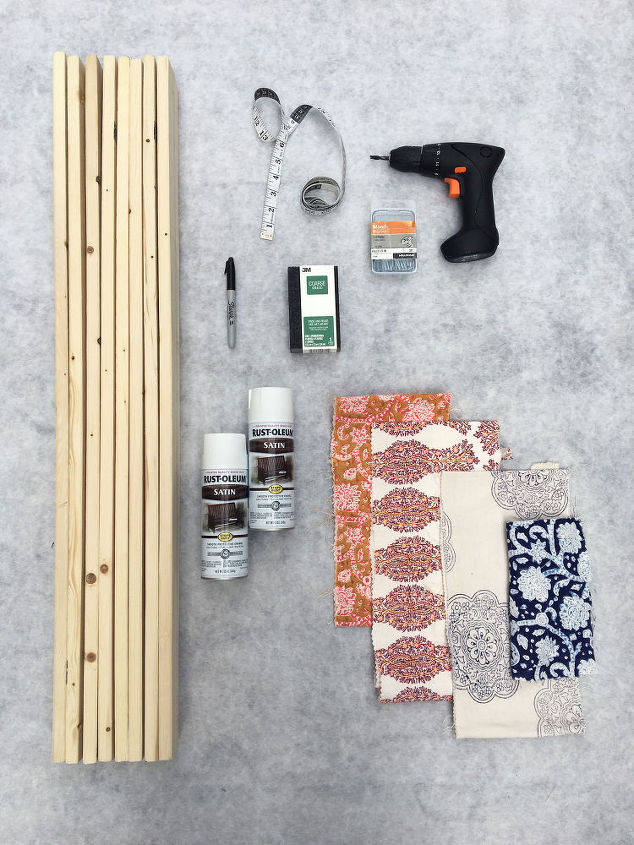
MATERIALS:
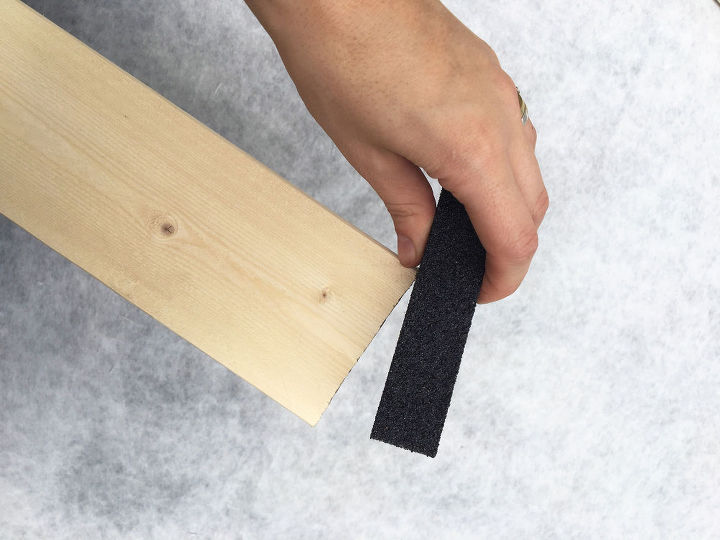
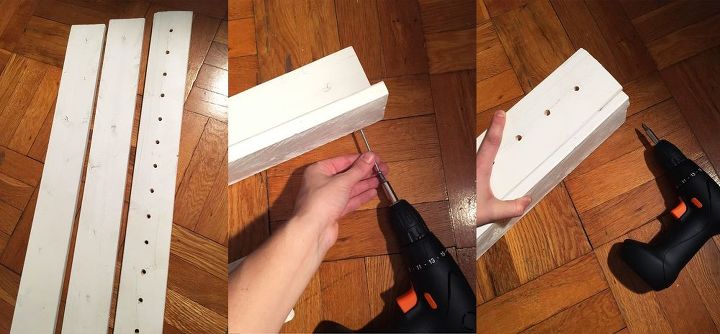
STEP1: When purchasing wood from your hardware store have them cut it to the length you wish to make your wall. I was making a small dividing wall so I had them cut the boards to 38". This allowed me to get 2 38" pieces out of each plank creating 8 pieces in total and leaving me with some scraps for future projects! With the freshly cut edges you will need to sand down any rough surfaces.
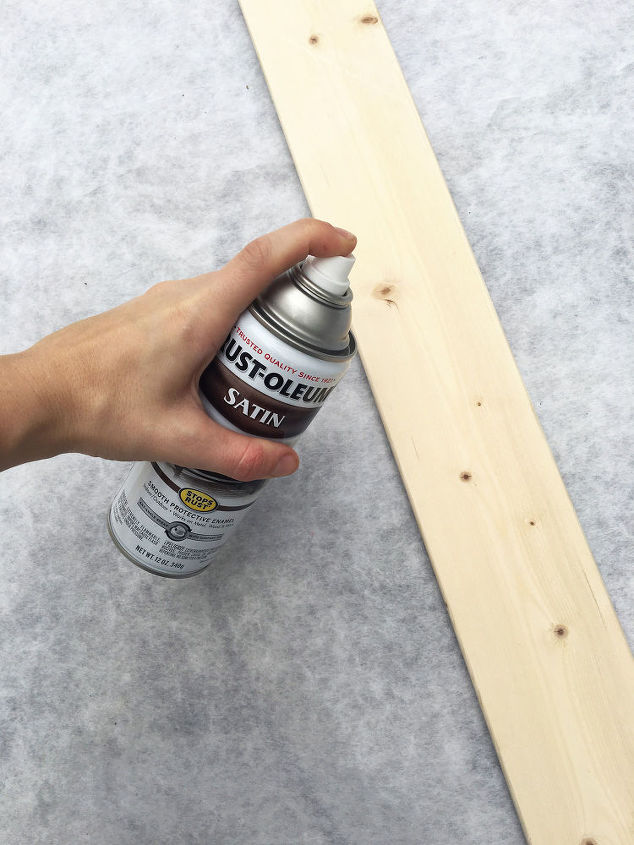
STEP 2: Spray paint the boards and allow to dry.
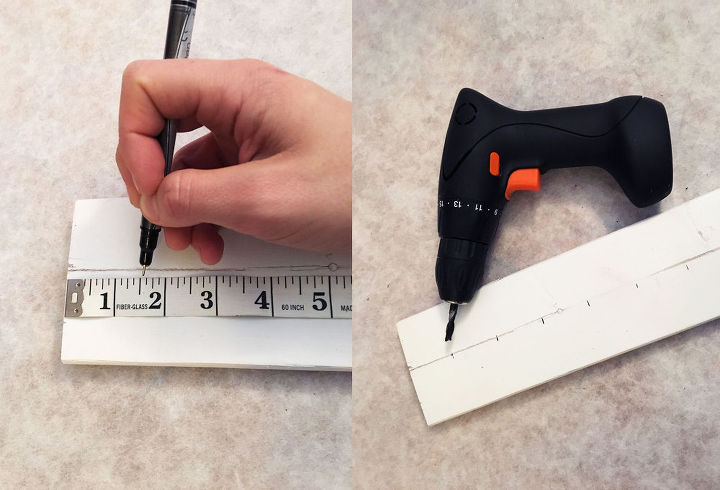
STEP 3: Take 2 of the boards and grab your measuring tape. Mark the center of the board about every 2" with a cross-mark. Drill holes at each of these marks. Set these 2 boards aside.
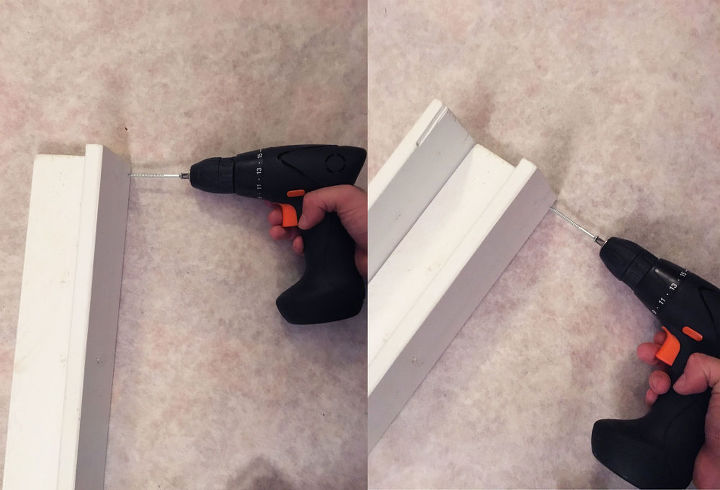
STEP 4: Take 3 of the other wooden boards and place one flat on the ground. Screw a board onto each side of the first board creating a 3-walled trough-like shape.
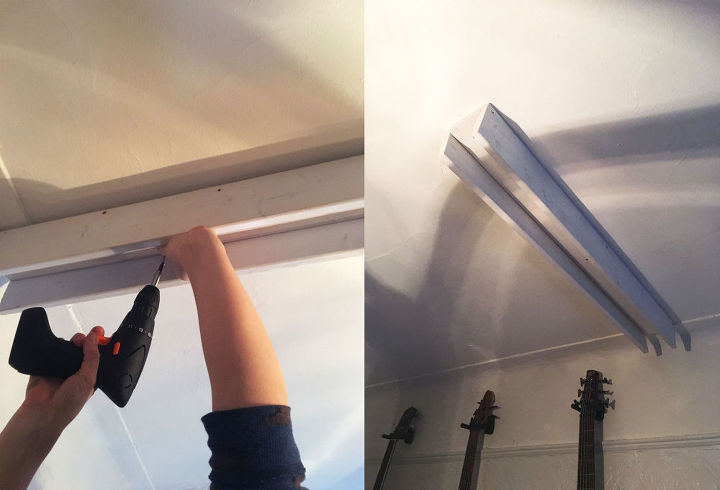
STEP 5: Drill the 3-walled shape from the previous step to the ceiling where you wish your wall to be. Make sure it is nice and secure.
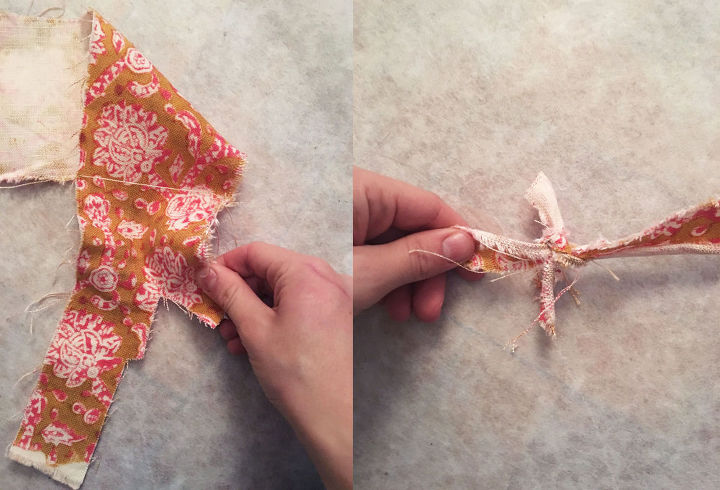
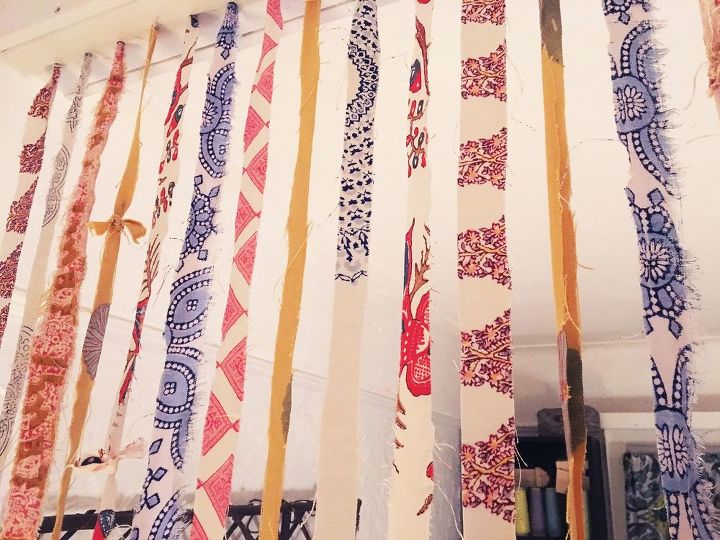
STEP 6: Measure the length from the floor to the ceiling where your wall will be. Grab your fabric and cut 1-2" wide strips in the full length you will need to cover from floor to ceiling. I used scraps so I simply tied my 1-2" strips together to meet the measurement needed in length.
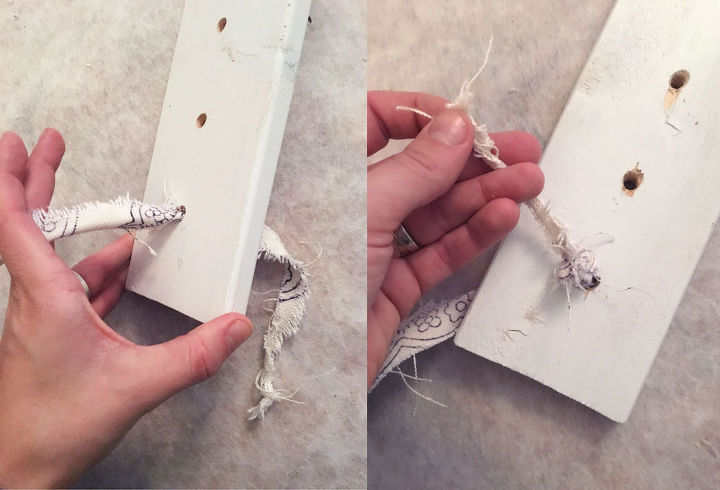
STEP 7: Now grab one of the boards with the drilled holes in it. Feed one end of each fabric strip through each hole allowing several inches to be pulled through. Tie a knot so that the fabric cannot be pulled through the hole.
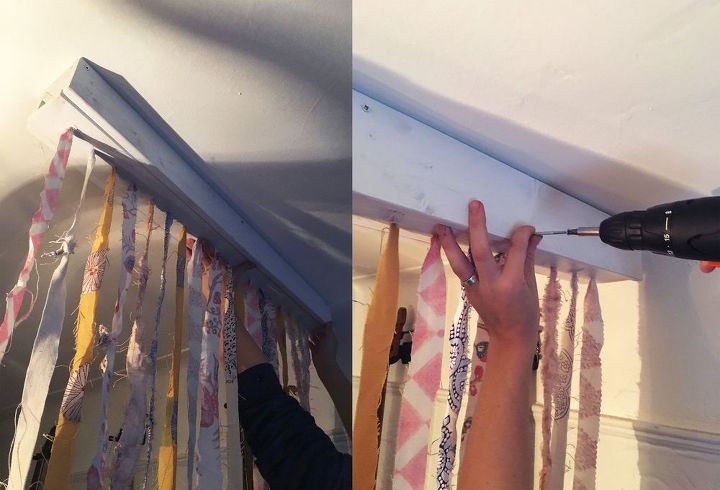
STEP 8: Take the board you just fed the fabric through and slide it into the trough shaped boards that have been screwed into the ceiling. Secure it in place by drilling screws into each side.
STEP 9: Grab the other board you drilled holes into and 2 of the other plain boards. Create another 3-walled shape by drilling these boards together with the hole filled board on the top.
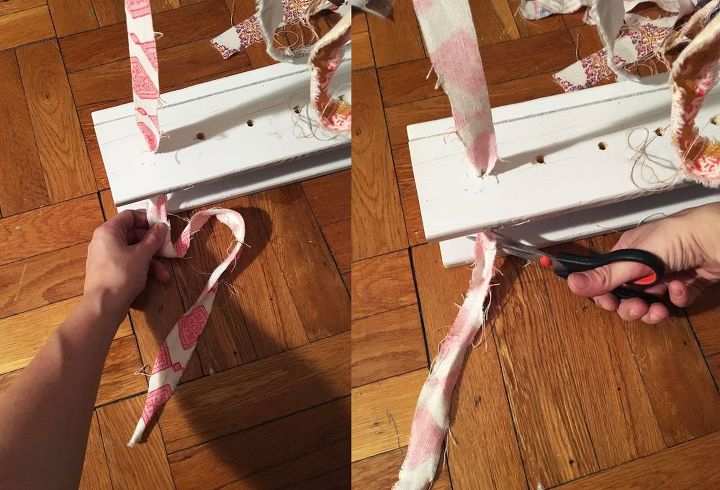
STEP 10: Place this shape beneath the fabric strips that are hanging from the ceiling. Feed the end of each fabric strip through their according hole and pull through until taught. Tie a knot in the fabric beneath the hole holding it in place. Cut any excess fabric
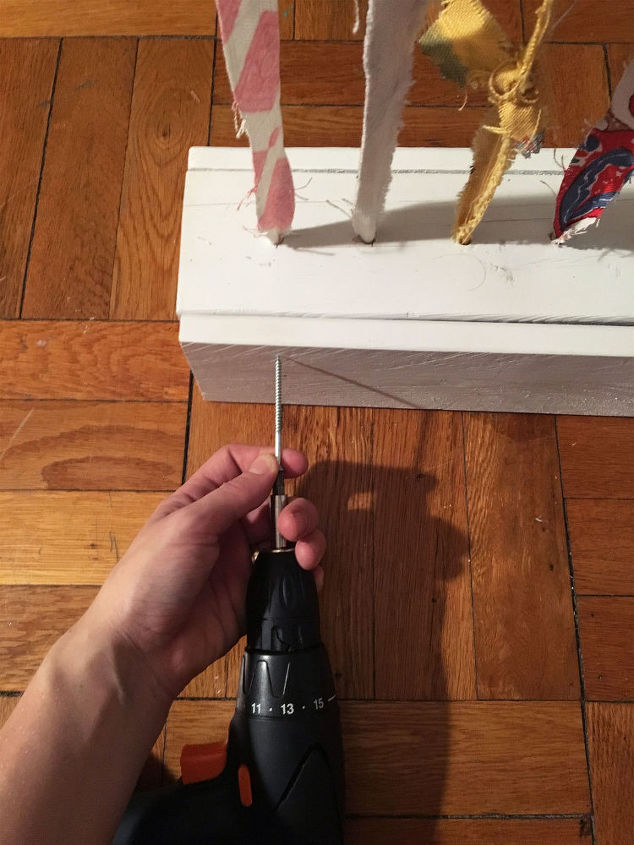
STEP11: Take your remaining board and screw it to the side of the 3-walled shape. This conceals the knots you just made.


Any price and availability information displayed on [relevant Amazon Site(s), as applicable] at the time of purchase will apply to the purchase of this product.
Hometalk may collect a small share of sales from the links on this page.More info
Comments
Join the conversation
2 of 57 comments
-
That is cool as f. Been watching you and one more y’all are very inspiring thank you
-
Love your style n great ideas for privacy divide rooms ❣👍🤗💯


Frequently asked questions
Have a question about this project?
Wouldn't you have to disassemble the whole thing to wash or replace the fabric at least once a year?
Why not sew the fabric strips onto a long piece of fabric, fold over forming a packet, stitch (like you would a curtain) and run a tension rod through the pocket. you could put beads on the strips of fabric tying a knot to keep the bead from slipping. Much easier and washable and still really cool.