


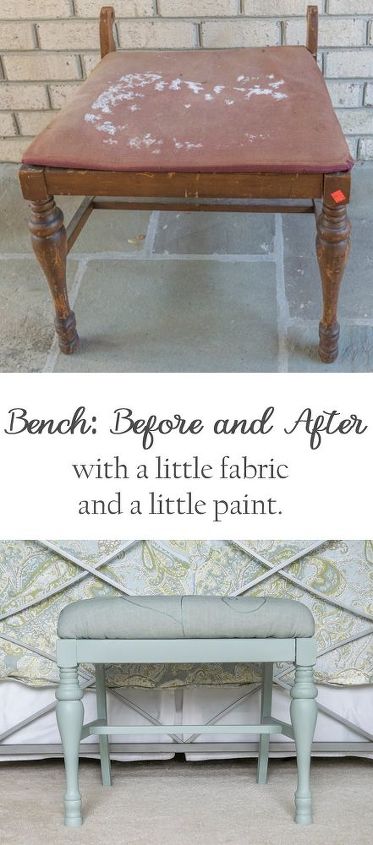
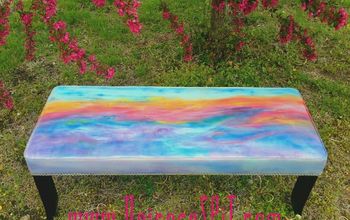
Paint + Fabric = New Life to an Old Bench
4 Materials
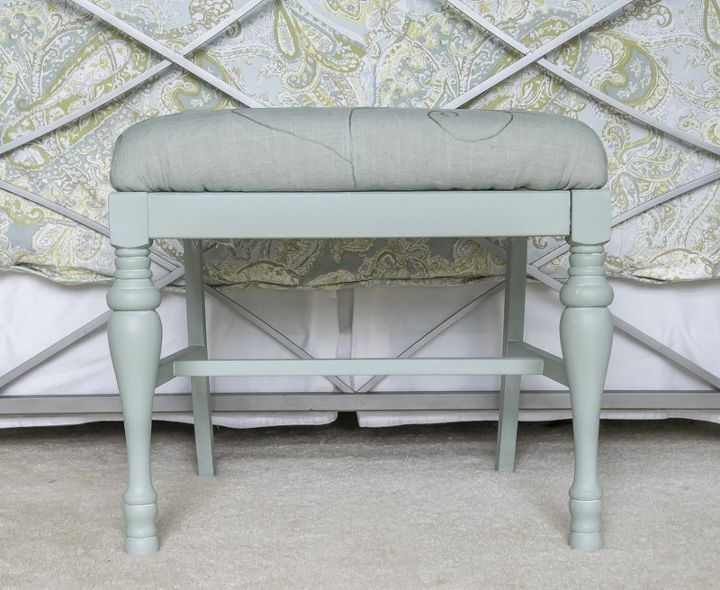
Back in January, Kate and I went shopping at some local salvage stores. We had a ball perusing all the bric-a-brac that these stores had to offer...it was quality mother/daughter time. This trip yielded an old window frame, which I used to make this Paisley Shell Wall Art, and a very sad old bench whose fate I've been pondering for the past 5 months. I was all over the place when trying to decide what to do with this old bench. I know it needed a new coat of paint and the 'cushion' that you see is really nothing more than a piece of thin, cracked wood with some very thin padding. No matter what I ultimately decided, I knew that the base of seat would need to be replaced. For a period of time I thought of replacing the cushion with a hard surface and making it a nightstand or side table, but really just didn't know what to do with it. This little bench has been roaming between my house and my garage since January until I figured out it's fate.
One day, an idea popped in my head and it went something like this:

So I had a plan! The first step was to stop at my favorite fabric store and grab some linen in green/gray tone that works with my bedding. While there I picked up some 2 foam and some batting. On the way home from the fabric store I stopped at a wee little embroidery store and found some silk embroidery thread that was just a shade darker, but in the same color as the linen. Feeling that the creative kismet gods were smiling on me at that moment, I hightailed it Lowe's and found Valspar Eucalyptus Leaf (in a flat sheen) paint which matched everything perfectly. Truly, pondering what to do with this guy for the past 5 months was the hardest part of this whole process. Once I had what I needed for the transformation, everything else was easy.
And, as icing on the cake, I was tickled, or more like giddy, to use my brand-new toy, I mean tool, a HomeRight Finish Max Fine Finish Sprayer! If you've been a reader for any length of time, you know that I will paint just about anything that doesn't have a heartbeat. My family just shakes their collective heads now when they walk into the garage and discover my latest foray into repainting 'stuff'. Heretofore, the tools of my vice have been paint brushes and cans of spray paint. So, when an opportunity arose to add a new tool to my paint arsenal my response was an overwhelming "Ooooh, Goodie! Thank-you, Thank-you, Thank-you! Is it here yet?" And since this paint sprayer has garnered great reviews, I was truly bursting with anticipation to use it.
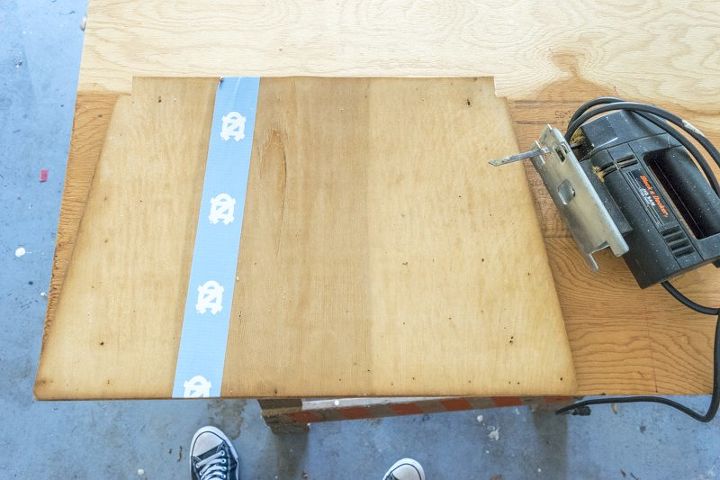
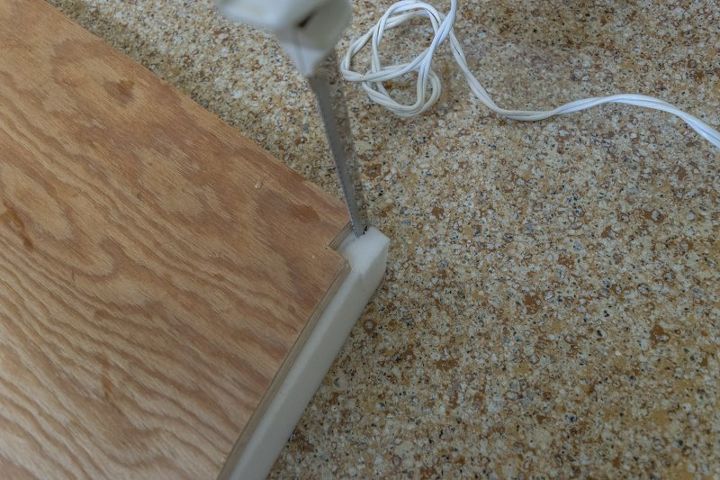
Once the new base was cut, I used my kitchen electric knife to cut the notches in the foam to match those on the back of the base.
I wrapped the foam and base with batting and secured everything with my trusty staple gun. Here's a little video showing one way to wrap the batting around the corners to avoid big bunching. After you've secured the batting with your staple gun, you can trim away the excess.
{
"id": "3423706",
"alt": "",
"title": "",
"video_link": "https://www.youtube.com/embed/45hB6ydGWNI",
"youtube_video_id": "45hB6ydGWNI"
}
{
"width": 634,
"height": 357,
"showRelated": true
}
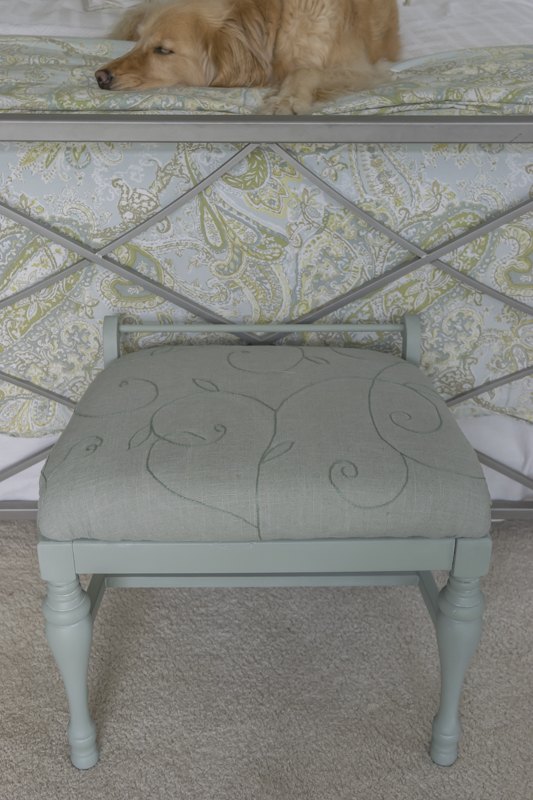
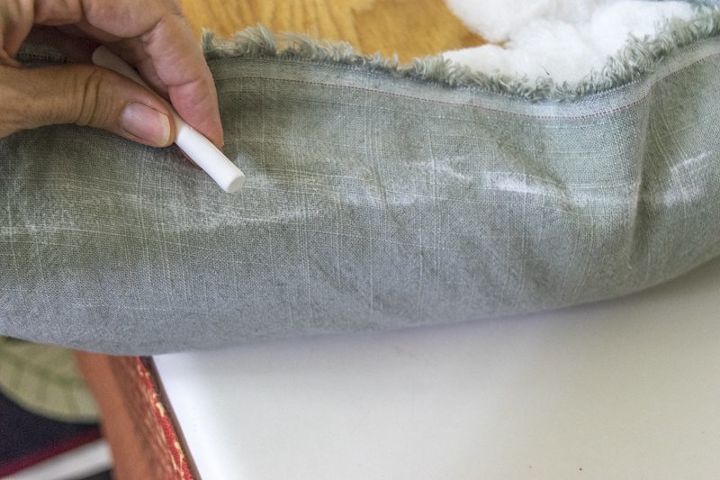
Since I wanted to embroider a vine pattern on the cushion, I used my trusty white chalk mark the outline on the fabric showing the bottom of cushion as I wanted the vine to extend down the sides. This let me know the area I had available to embroider.
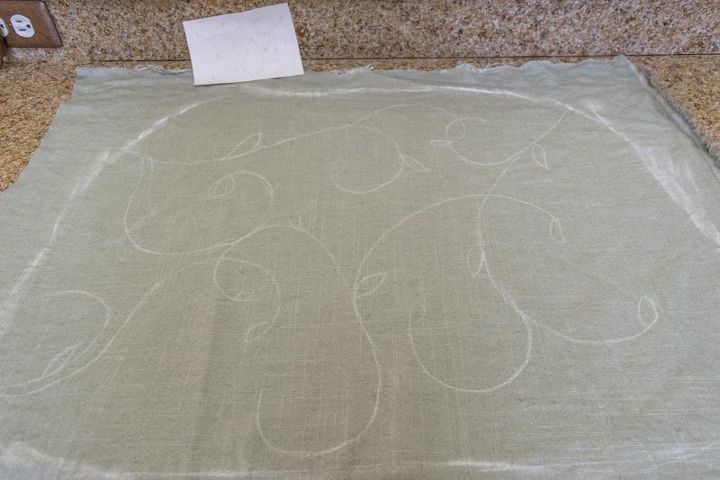
Then I used my chalk again to draw a vine pattern on the linen.
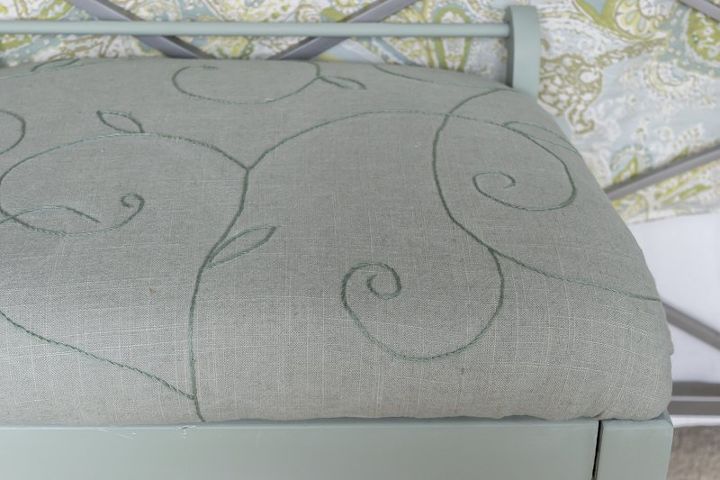
Then I threaded my needle with three strands of the embroidery floss and began working in a stem stitch. When the chalk would start to rub off, I'd go over it again. Once that was done I set it aside while I worked on the wooden structure of the bench. This little video ditty (its a ditteo!) is more for fun than for 'education'.
{
"id": "3423718",
"alt": "",
"title": "",
"video_link": "https://www.youtube.com/embed/4GYIVj-2-nU",
"youtube_video_id": "4GYIVj-2-nU"
}
{
"width": 634,
"height": 357,
"showRelated": true
}
I was chomping at the bit to use my HomeRight sprayer, but before I did I lightly sanded the surface and wiped it down with deglosser. The enclosed instructions are very detailed and assured me that this was going to be a very easy tool to use. I did thin my paint a little bit to get the desired 'run-out time' as detailed in the instruction booklet. I set the spray pattern to 'cone' and the flow to medium and went to work. This was SO easy.
{
"id": "3423726",
"alt": "",
"title": "",
"video_link": "https://www.youtube.com/embed/ZmDIExIpXEM",
"youtube_video_id": "ZmDIExIpXEM"
}
{
"width": 634,
"height": 357,
"showRelated": true
}
I let the bench dry, which took about 30 minutes and then went over it again.

Want more details about this and other DIY projects? Check out my blog post!
Comments
Join the conversation
2 of 3 comments
-
Very nice! Love the colors. Thanks for sharing.
-
Very beautiful job done. You are an interesting writer and talented, too!


Frequently asked questions
Have a question about this project?