


Wall Art for a Grand Entrance With Modern Masters Reactive Paint
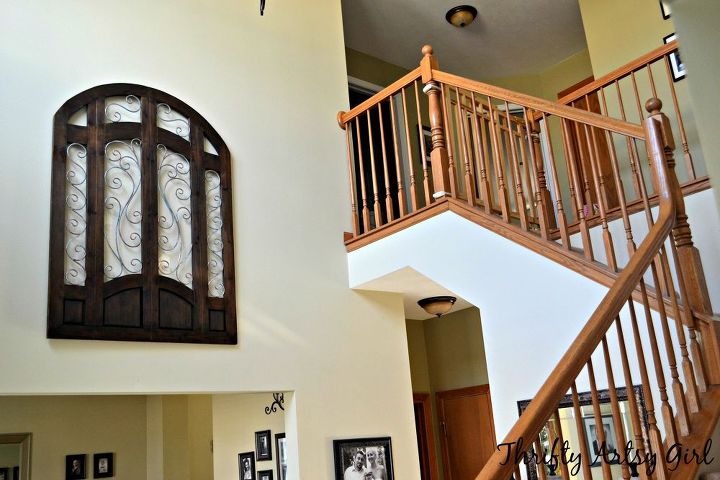
When we first bought our home I was in total awe over our two story entryway complete with a gorgeous open staircase. I never thought I would be lucky enough to have such a beautiful space in my home.
As much as I love my entryway I have found it to be a very difficult space to decorate. Huge, high walls that require large pieces, which unfortunately equals large dollar amounts to acquire, have been left blank over the years because I'm a cheapskate. I have looked at some beautiful old windows and arched wood and metal wall art but I've never been willing to throw down hundreds of dollars for them.
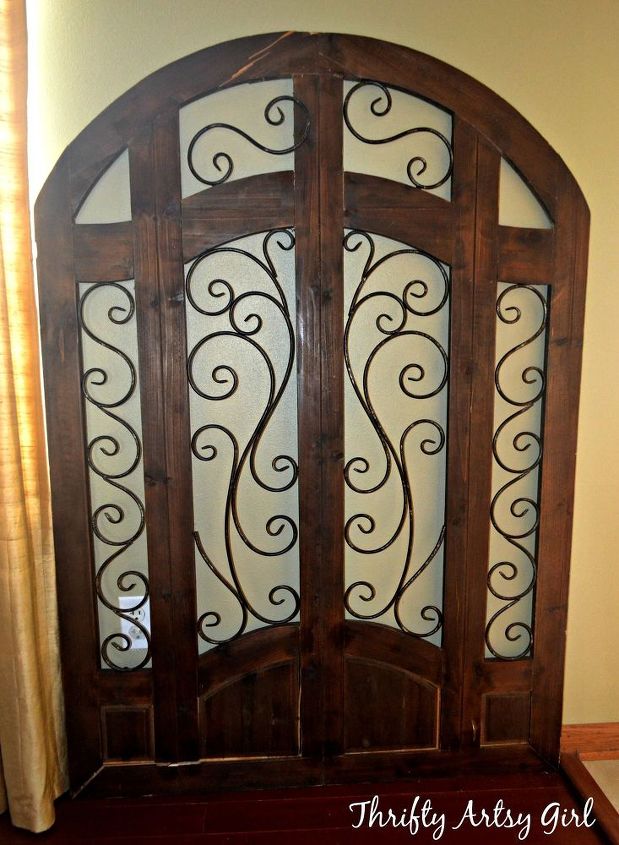
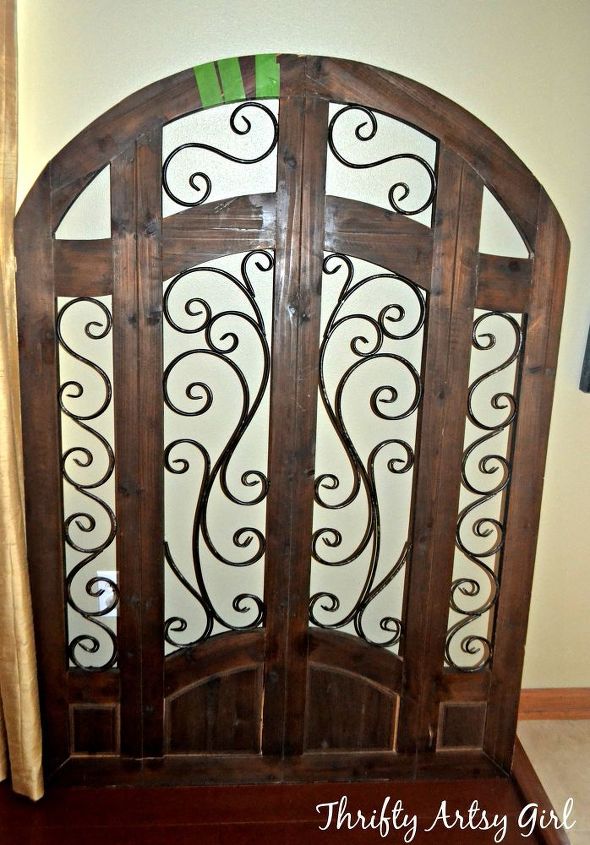
A couple months ago me and my bestie Mel were shopping at one of my fave stores, Kirklands, and lo and behold one of the arched wood and metal wall art pieces I'd been pining over for years was sitting outside, battered, broken and majorly clearanced from $170 down to $49. This piece is ironically called the Grand Entrance plaque. The store had had it on display for years (that's when I first saw it) and it must have somehow fell, damaging it for some lucky DIYer like me to scoop up and fix ;).
As much as I love my entryway I have found it to be a very difficult space to decorate. Huge, high walls that require large pieces, which unfortunately equals large dollar amounts to acquire, have been left blank over the years because I'm a cheapskate. I have looked at some beautiful old windows and arched wood and metal wall art but I've never been willing to throw down hundreds of dollars for them.
A couple months ago me and my bestie Mel were shopping at one of my fave stores, Kirklands, and lo and behold one of the arched wood and metal wall art pieces I'd been pining over for years was sitting outside, battered, broken and majorly clearanced from $170 down to $49. This piece is ironically called the Grand Entrance plaque. The store had had it on display for years (that's when I first saw it) and it must have somehow fell, damaging it for some lucky DIYer like me to scoop up and fix ;).
I knew I would have to do some repair work to make my new wall art look like her gorgeous self again. I was totally ok with that and I figured I would also do a little facelift with some paint to make this piece completely unique to my home.
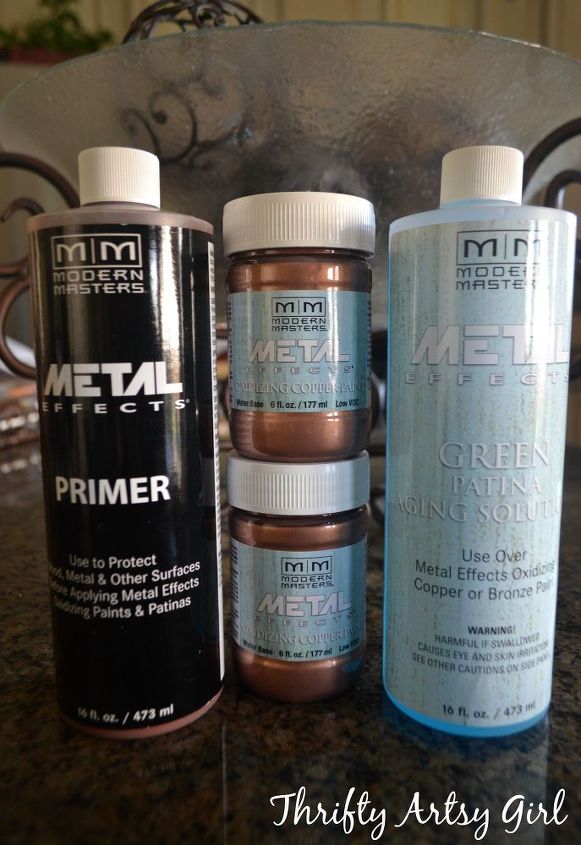
Enter modern masters metallic reactive paint. This paint creates a patina on virtually any surface, from canvas, to metal, to wood, making it look like naturally aged copper. I knew it would be perfect for transforming this piece into one of a kind artwork. I decided I would change the somewhat plain looking black decorative metal pieces to aged copper with a green patina.
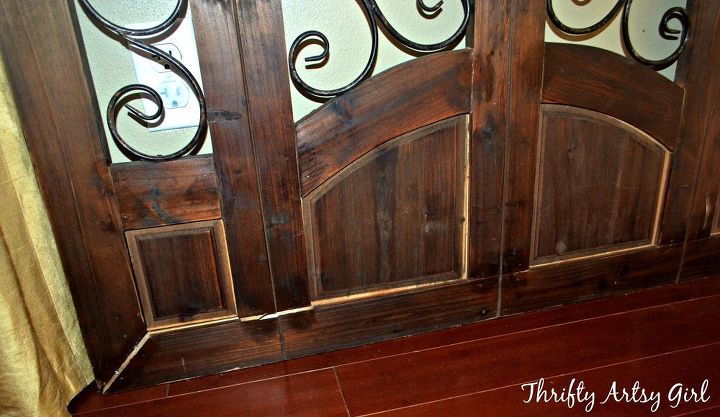
But first things first I had to repair the broken sections. The bottom pieces were pulled apart but thankfully had nails that I could see. I pounded the bottom in with a hammer until it was as close to back to normal as I could get it.
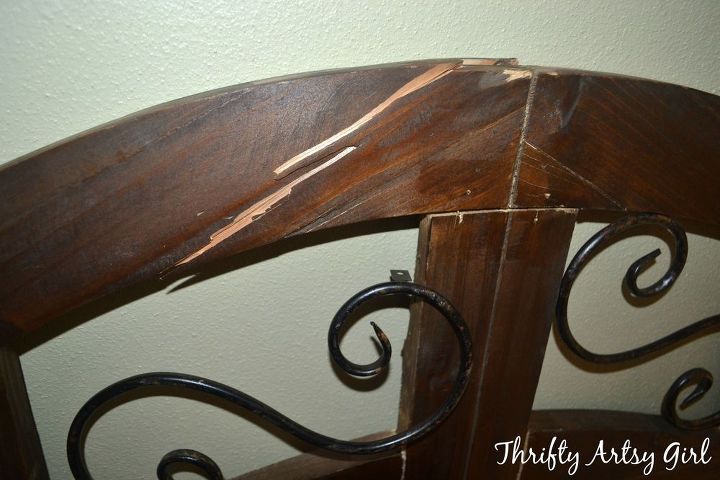
The top was cracked on one side so I simply squirt some liquid nails in between the cracks and taped it together for 24 hours. I also hammered the top down so the seams came together and reattached the metal decorative piece that was missing a screw with a tiny screw I dug up.
After fixing up the broken spots I removed the tape from the top part and I re-stained the parts of the wood that were scuffed or missing stain so the wood looked good as new. I then started the paint process for creating the aged copper with patina look I wanted on the decorative metal pieces.

The first step is painting at least 2 coats of primer with 12 hours dry time before applying the oxidizing copper paint. Here's how the metal looked after painting the brownish primer.
Next I applied one coat of oxidizing copper paint. Here's how the plaque looked with copper colored metal.
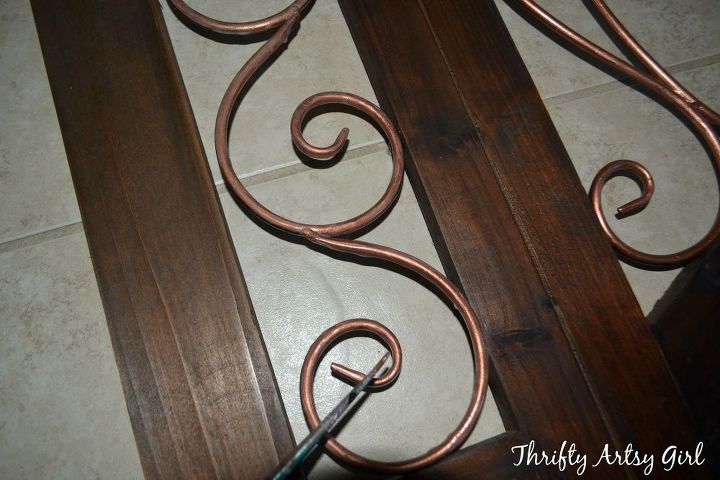
For the next step (the fun part) I laid the plaque down in my kitchen work space and got out the oxidizing copper paint and the green patina aging solution to do the final step. I used artist paint brushes but you can use any kind of brush, a roller or even a spray gun. To make the patina look you first paint copper paint onto your surface and then while the paint is still wet you apply the patina aging solution.
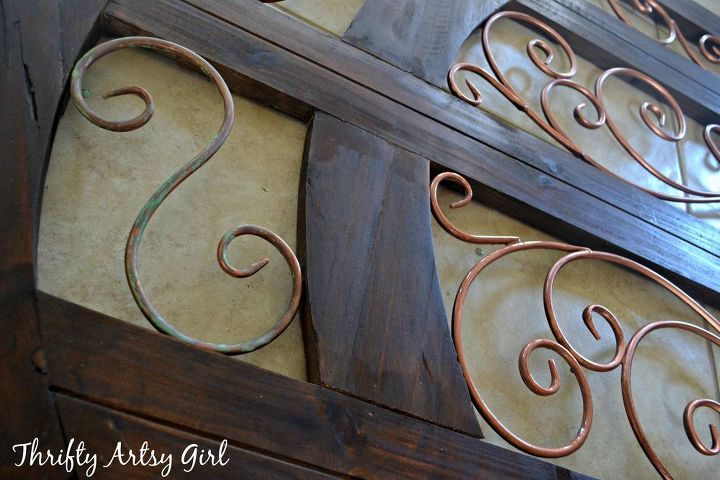
I did the metal pieces in sections so the paint would not dry. Here's a pic of the first section I did already changing to green patina right after I finished putting the patina solution on the second section. I'm sure you'll notice that I did get drips on the floor, but never fear since all the different paints for this project are soap and water clean up they washed right off ;).
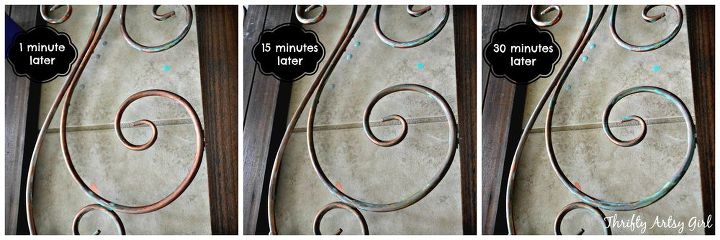
It really was a fun process watching the copper change over such a short period of time. When I was finished I wasn't completely satisfied with the amount of patina on the copper so I "spot" patina-d after I was done so I could get more of the green patina look I wanted. I took a few pictures to show how the patina showed up in the course of minutes after the aging solution was applied.
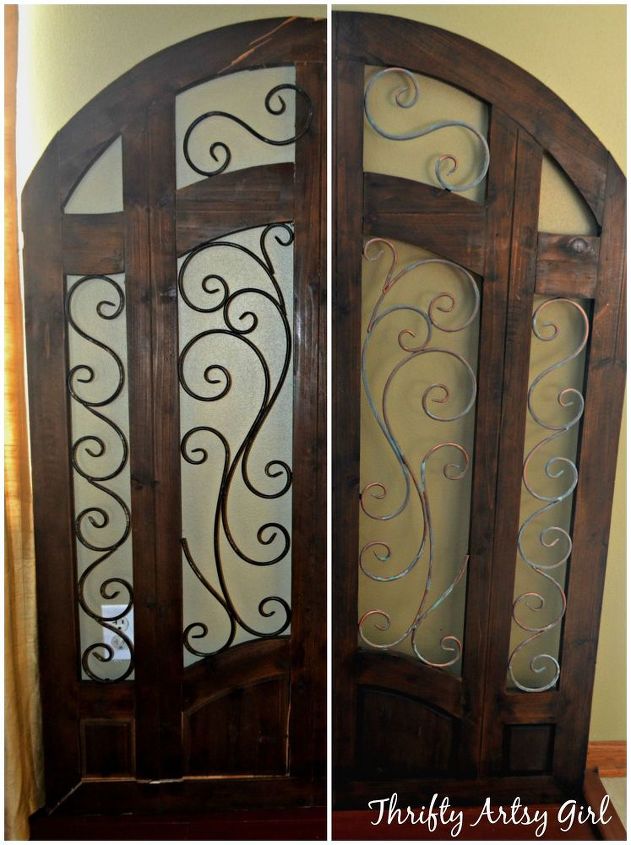
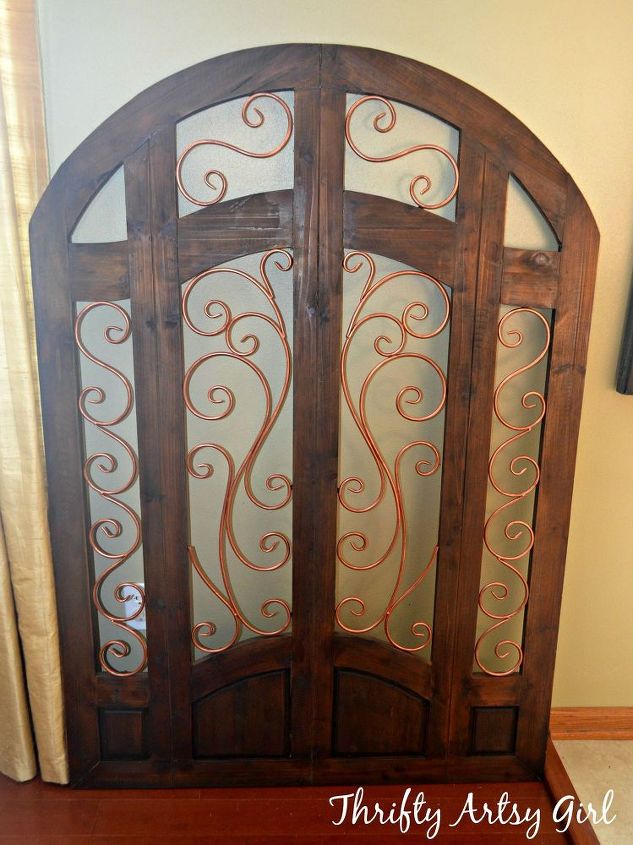
Here's a few after pictures of the plaque. I really wanted more green but after I was finished I have to say I do like how some of the copper still shows. Possibly if I had used a spray gun or if the metal surface was level I would have ended up with a completely green patina.
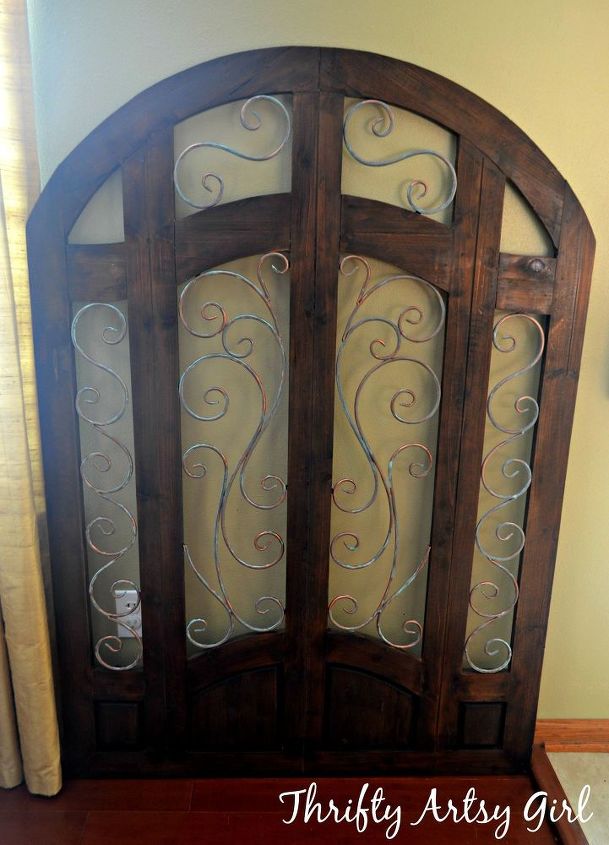
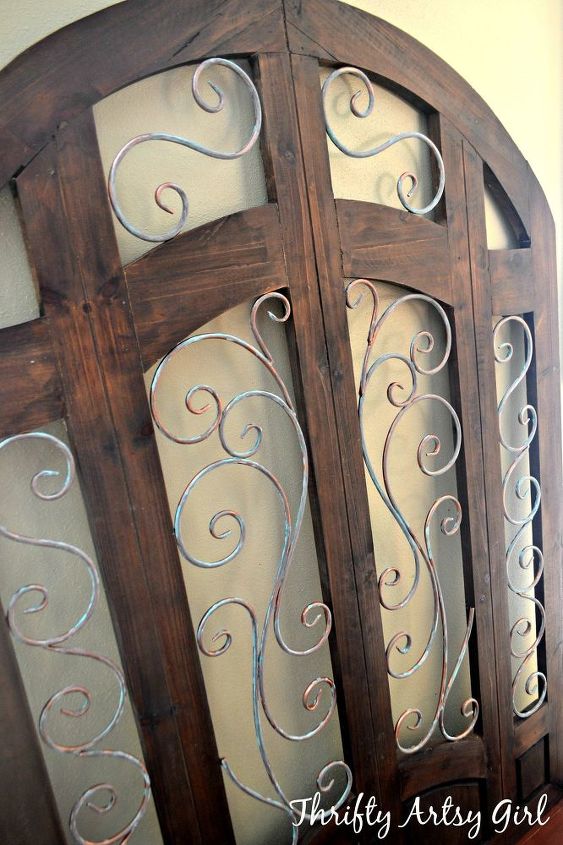
I couldn't be more pleased with how my Grand Entrance plaque turned out! It really has made our entryway look more grand ;). I can't wait to try my Modern Masters copper reactive paint on other pieces throughout the house including our mailbox! To see more pics of the process or more after pics check out my blog :).

Want more details about this and other DIY projects? Check out my blog post!
Comments
Join the conversation
2 of 51 comments
-
black was better looking to me
-
Love the addition of oxidized copper! Beautiful!


Frequently asked questions
Have a question about this project?