


Rockin’ Polka Dot Pony

5 Materials
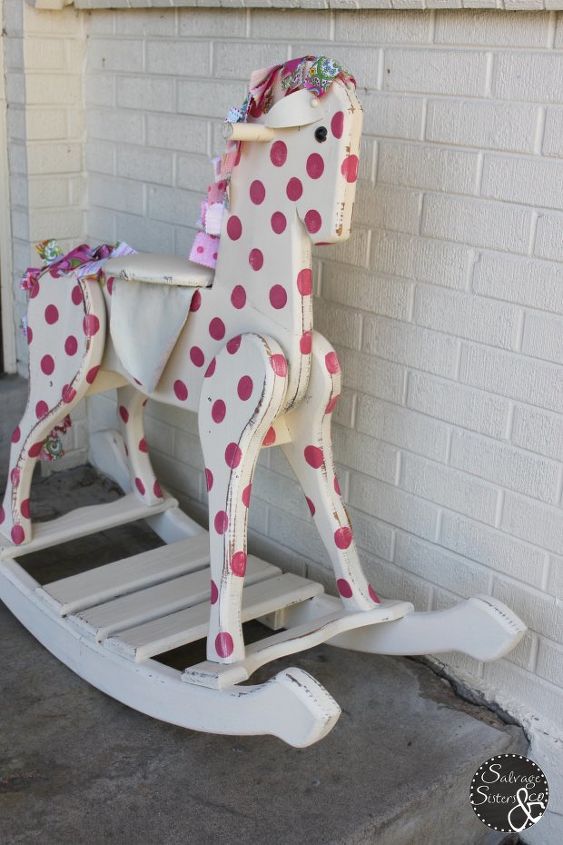
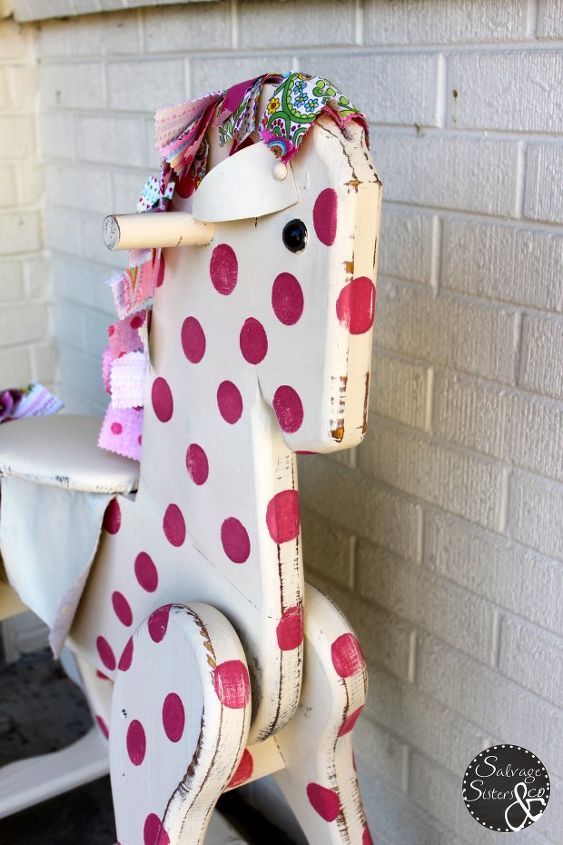
How cute is this? Julie from Salvage Sisters & Co gave this vintage rocking horse new life with Cheesecake, Cherry Blossom, and natural wax!
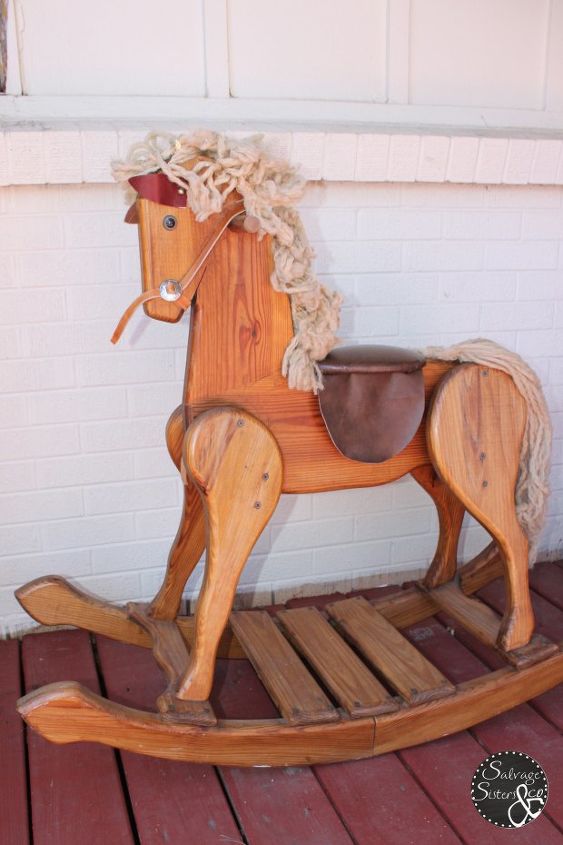
Finally SUNSHINE! Happy spring ya’ll! I just wrapped-up what I think may be my favorite piece yet, a sweet little rocking horse. My dear family friends gave this pony to me in it’s original condition. It was made by the family dad, I’m guessing, sometime in the late 70s early 80s. Now, it was adorable as is and my girls have loved rockin’ out on this little yeehaw, but once I had permission I couldn’t wait to give her the polka dot pony makeover she deserved!!!
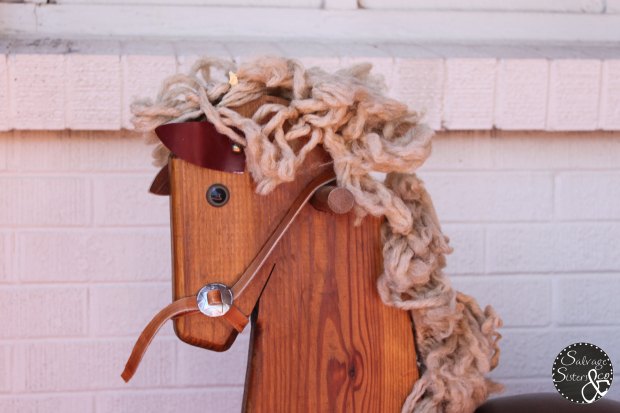
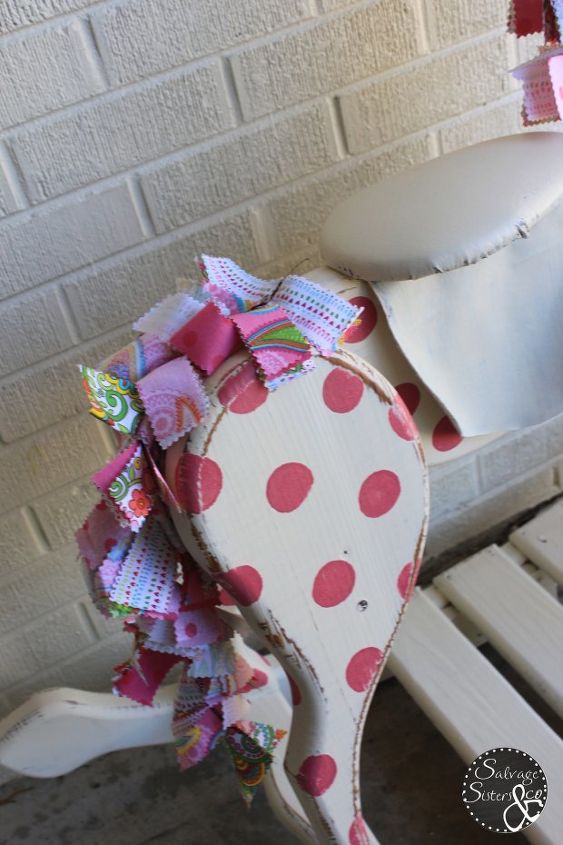
(I ripped out her little mane before I took before pictures so it’s just kinda jammed back in there).
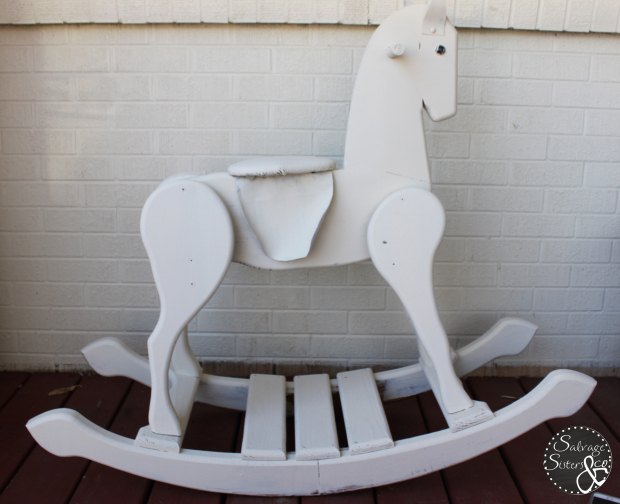
First, I gave her two coats of Country Chic Paint in Cheesecake, letting it dry a couple hours in between. I even painted her little pleather saddle.
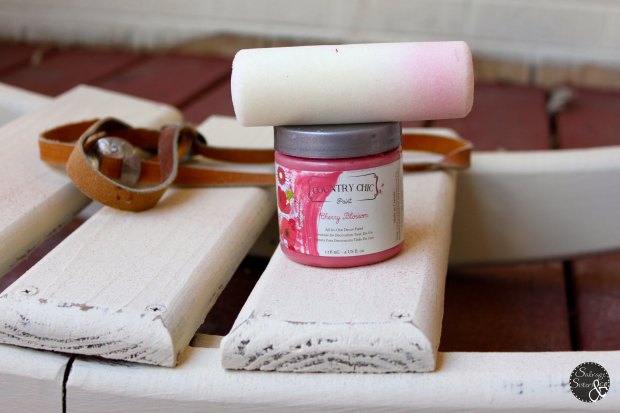
Next using Country Chic Paint in Cherry Blossom I used the end of a mini sponge roller and carefully dabbed on polka dots. I just eye balled where I wanted them and strategically placed one right on her kisser. I thought her sweet little face looks adorable with the Cherry Blossom dots!
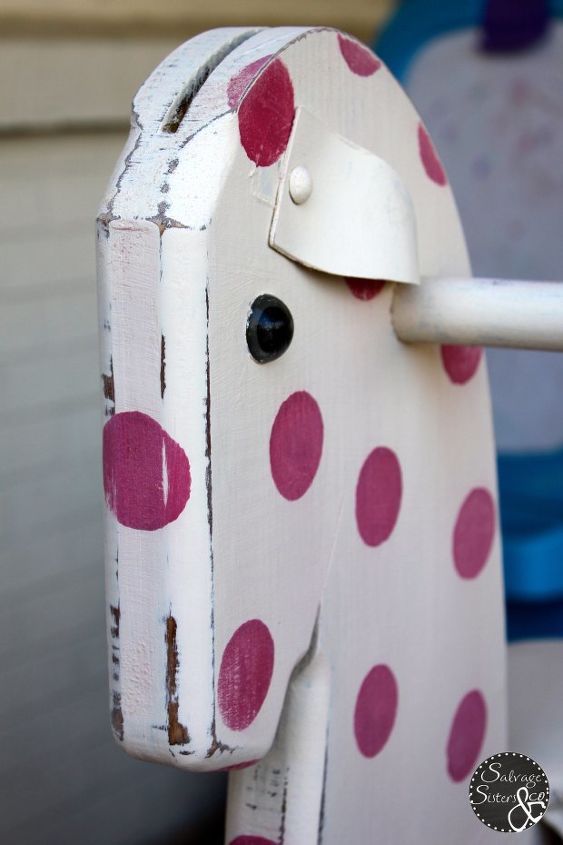
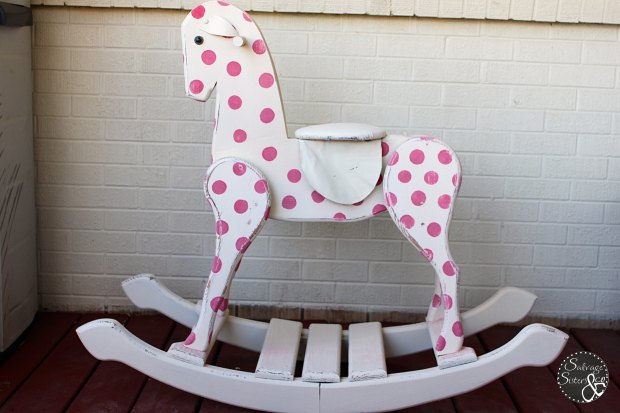
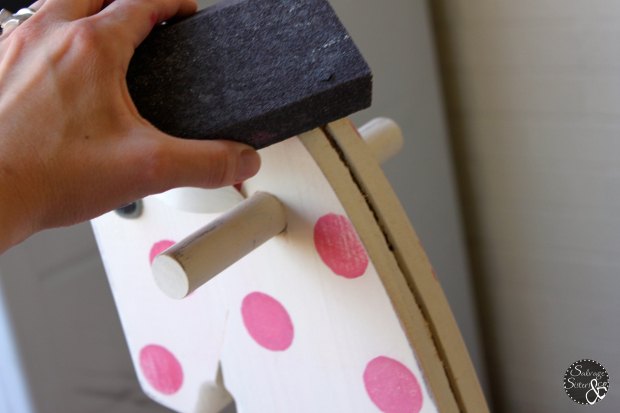
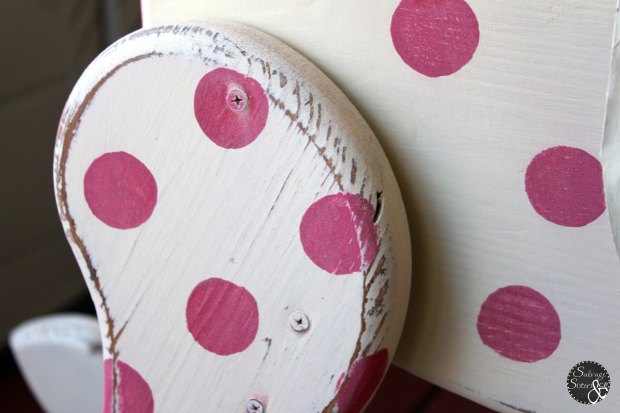
I heavily distressed her edges with 220 grit sandpaper, then I completely sanded her to wear-off some of her polka dots and give her a vintage inspired look. Although I used the All-In-One Paint on this little pony I decided to still give her a coat of natural wax for extra durability and protection from the little rascals that would be riding her.
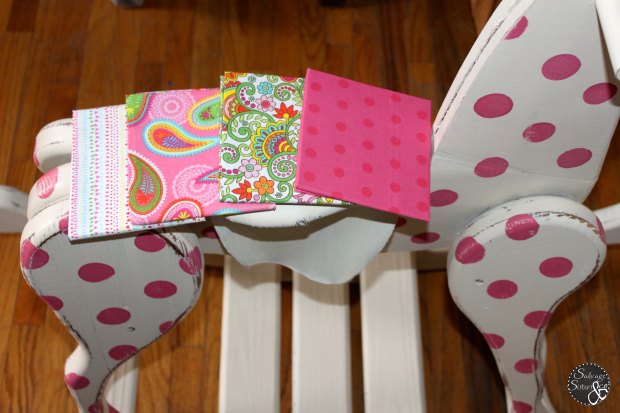
For her “mane” I decided to buy quilt quarters in cute coordinating patterns and cut a thousand of them with pinking shears into strips (I don’t really know how many but my thumb still can’t push the space bar). Next I put them into piles with a few different sequences. The yarn was originally glued into a crevice down the neck but I decided (after failing with the stapler) to nail the fabric strips into the horse. For the tail I sewed the strips all together and nailed the top of the strip into the original nail hole for the yarn tail.
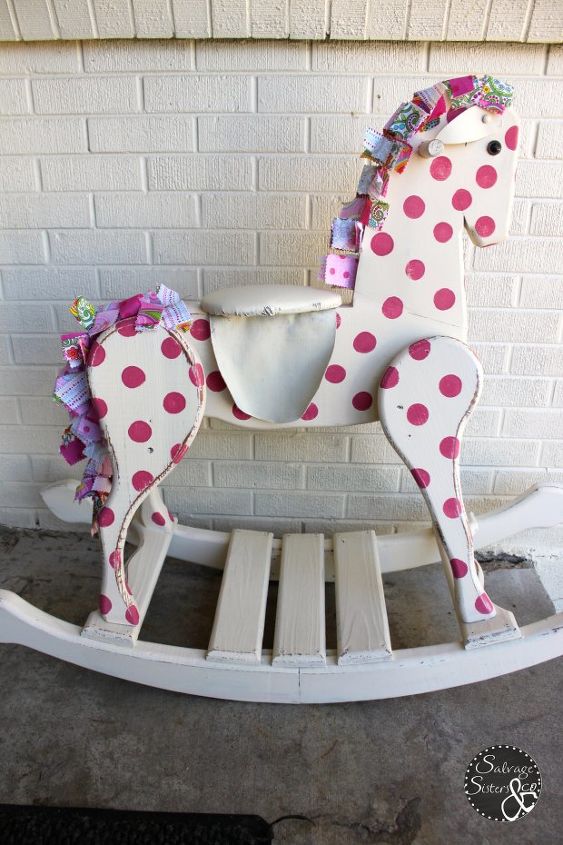
This little pony is so precious I think we might have to keep her. If not, the money will have to go to therapy for my children that never want to let her go!!! For now, this little pony will be rockin’ the polka dots with the Z’s!
Until next time, have a happy summer!
Comments
Join the conversation
3 of 5 comments
-
Adorable! What an awesome makeover.
-
WOW!


Frequently asked questions
Have a question about this project?