


Drawer Flip

15 Materials
1 Day
Medium
What do you do when you have an unattractive dresser from the 70's and a blank empty space in need of something to help maximize its space? Flip those ugly dresser drawers into gorgeous bathroom shelves - that's what! These drawers provided me with a creative way to use the vertical space in this bathroom nook where I'll keep guest toiletries, extra toilet paper, and bathroom towels. I wasn't sure how this would turn out, but I was pleasantly surprised how easy this project ended up being. Gather paint, a few tools, a table saw, and your imagination to create this look for yourself! Three cut down, repainted, and perfectly placed dresser drawers become bathroom shelves in this drawer flip project!
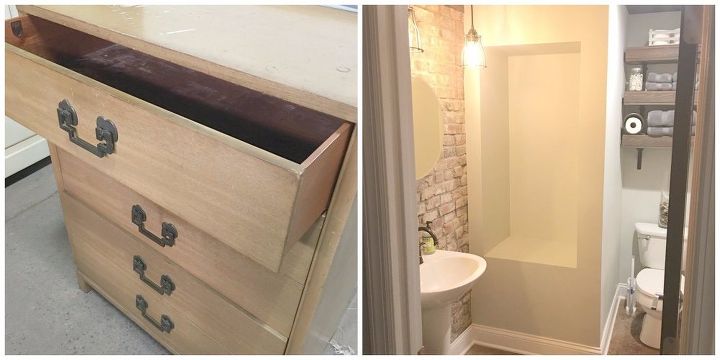
The dresser and shelving nook before.
Supplies: -Table Saw -Electric Sander -120 Grit Sand Paper -Chisel -Tape Measure -Carpenters Square -Pencil -Level -Finish Nailer -16 gauge 1.5 inch finish nails -Paint (your preference) -Stencil (optional) -1" Scrap Wood for supports
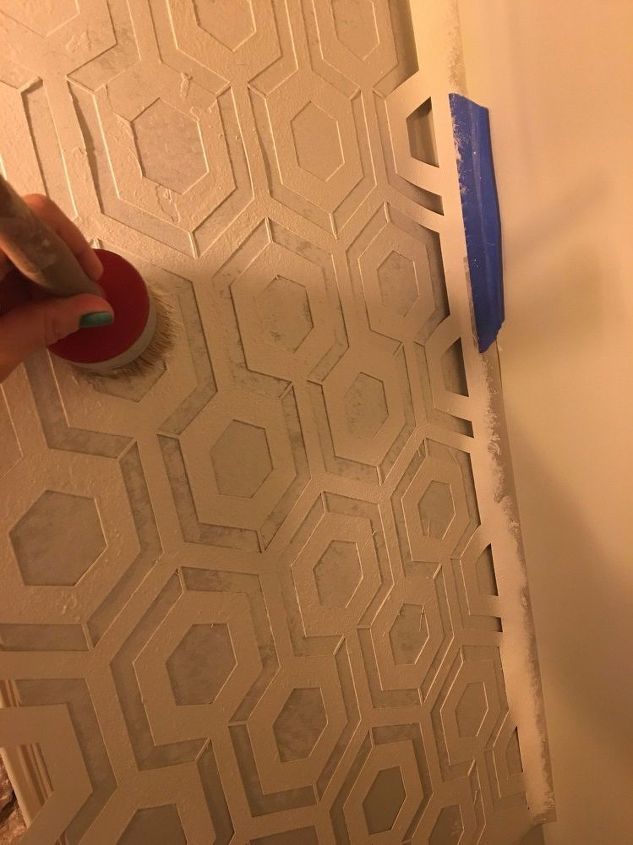
STEP 1 (optional): Prep your walls. I decided to stencil the inside of this bathroom nook to add a bit of dimension. I have this same stencil work in the bedroom just off of this bathroom, so I thought it would be nice to reintroduce the pattern here. The walls were already painted grey, so I used a glossy white to paint the stencil pattern. I used painters tape and spray adhesive to hold the stencil on the wall while I painted. Once everything was stenciled, I allowed the wall to dry.
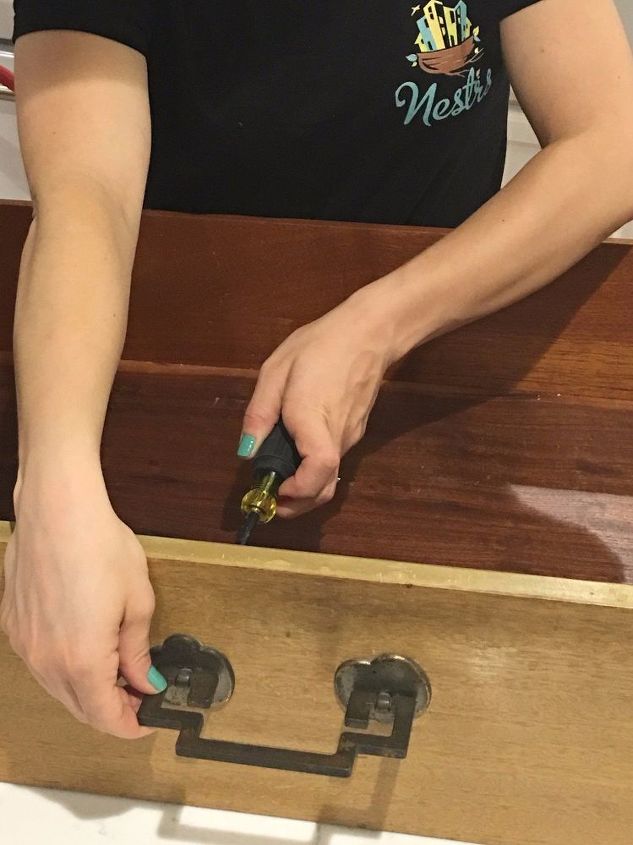
STEP 2: Remove hardware from drawers Take off any and all hardware from the drawer and put aside to reassemble later.
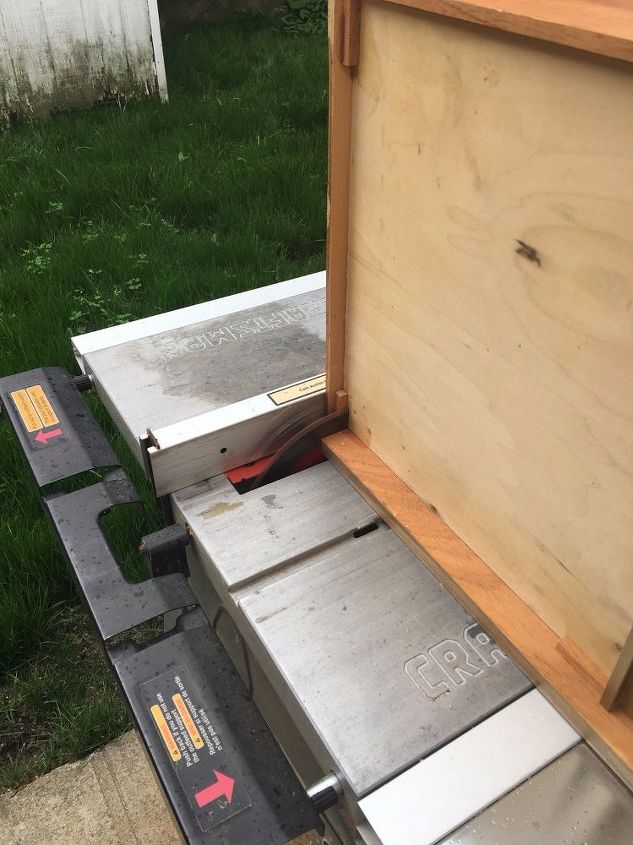
STEP 3: Cut your drawers to size Unless you're really lucky and the drawers you want to use as shelves are exactly the same size as the opening, you'll have to cut your drawers down to size. Drawers that are smaller than the nook opening won't work. I cut off one side of the drawer using a table saw. Do this for every drawer you want to utilize. Be careful since you'll want to salvage each piece of the drawer.
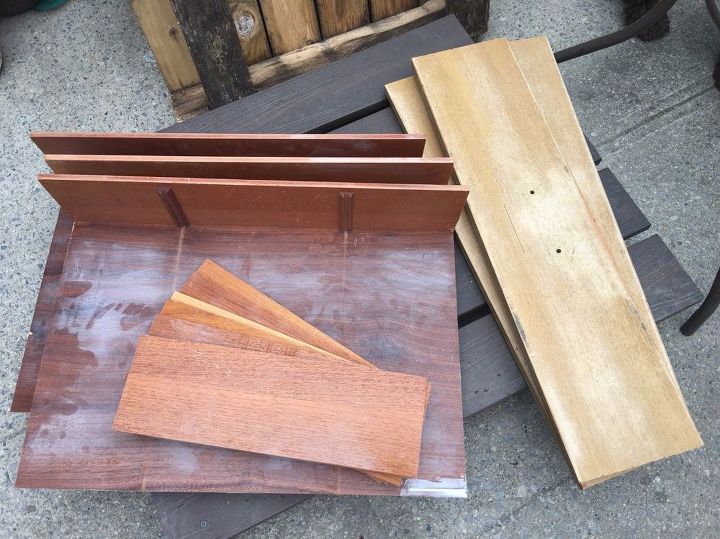
STEP 4: Disassemble every part After I cut down every drawer, I disassembled the other side and the face of the drawer carefully. Keep the back of the drawer in place with the bottom of the drawer. I used a small chisel to help pry the pieces apart. I wanted the face of the drawer to overlap the nook opening. So make sure the face of the drawer remains a little bigger than the nook's opening. You can now cut down the bottom/back of the drawer down to the exact size of the nook's opening. Here is a picture of all the pieces separated.
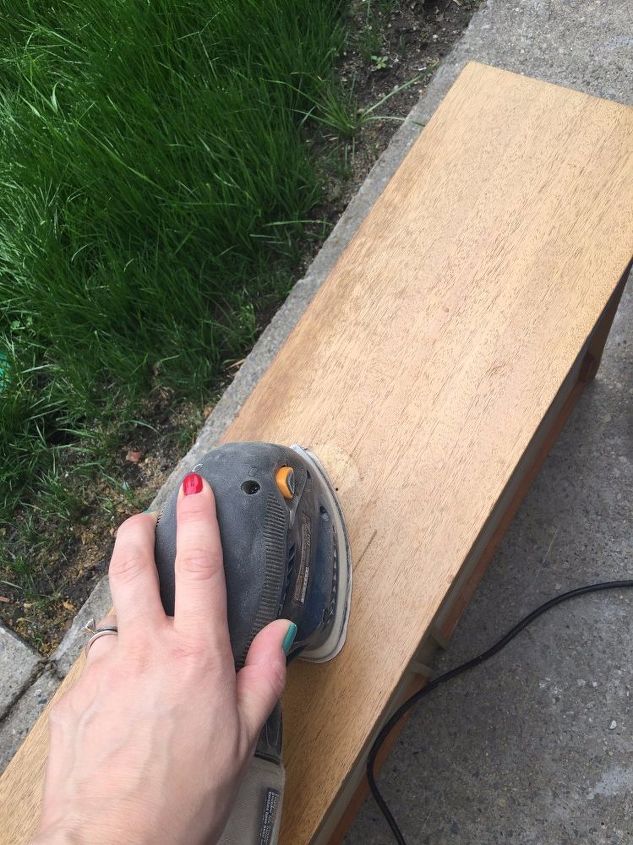
STEP 5: Stand your aprts down Once all the pieces are apart, I took an electric sander with 120 grit sandpaper to the drawers. This helped clean up the sides and faces of the drawers I just cut.
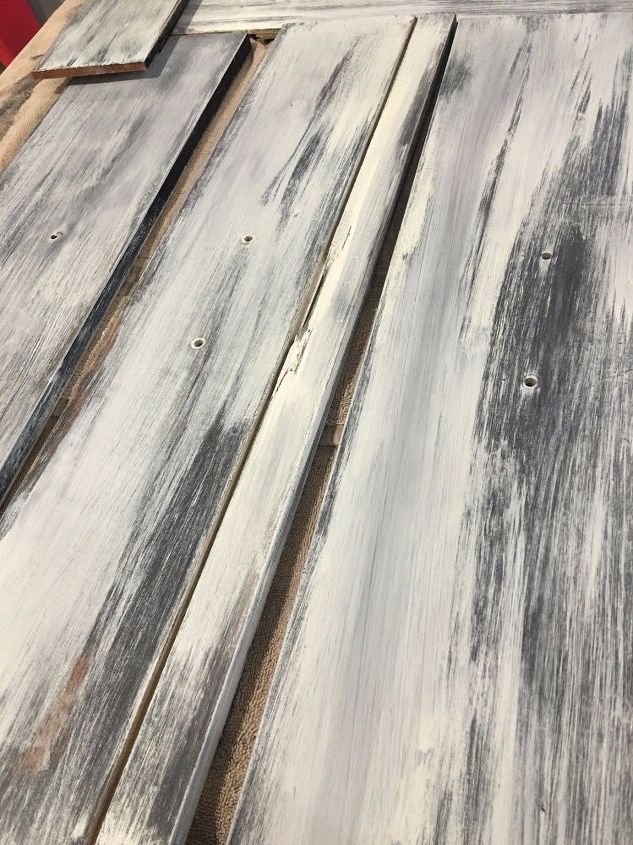
STEP 6: Paint your drawers I decided to layer black and white chalk paint on the drawers. This is where you get to have fun updating these old drawers and having them fit into whatever design scheme you've got going on.

STEP 7: Start installing from the bottom up Once everything was painted I started the installation from the bottom of the nook and worked my way up. The first piece was the easiest since the bottom of the nook would support it. I placed the bottom of the drawer in the space and then hit it a few times with the finish nailer for good measure.
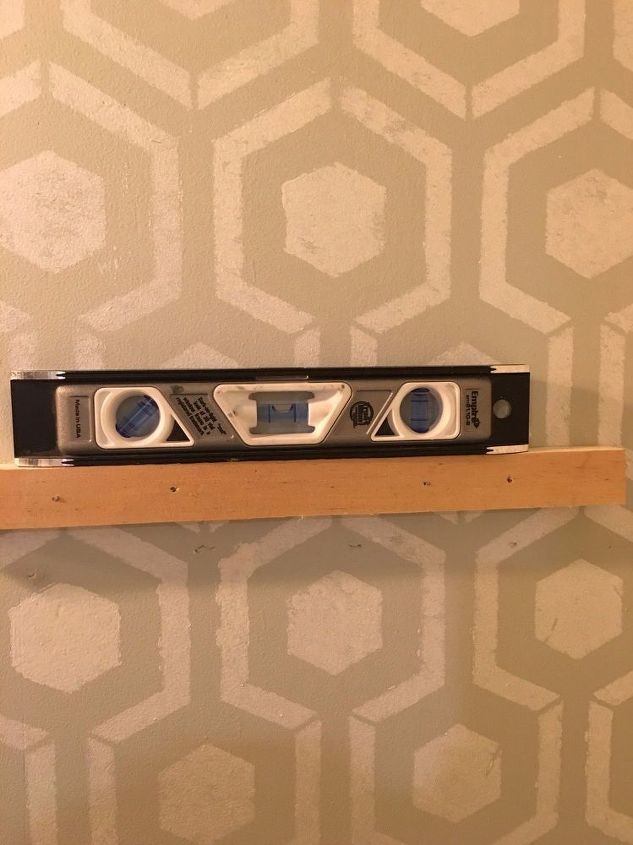
STEP 8: Use a level to add supports The next level up is where things started to get tricky. A level is your best friend here. Using scrap pieces of 1" wood I made support rails that the drawer would sit on top of. Mark on the wall where you'd like the bottom of the drawer to hit. Line up your support rail, make sure it's level, and then nail it into the wall. Repeat this step on the other side of the nook.
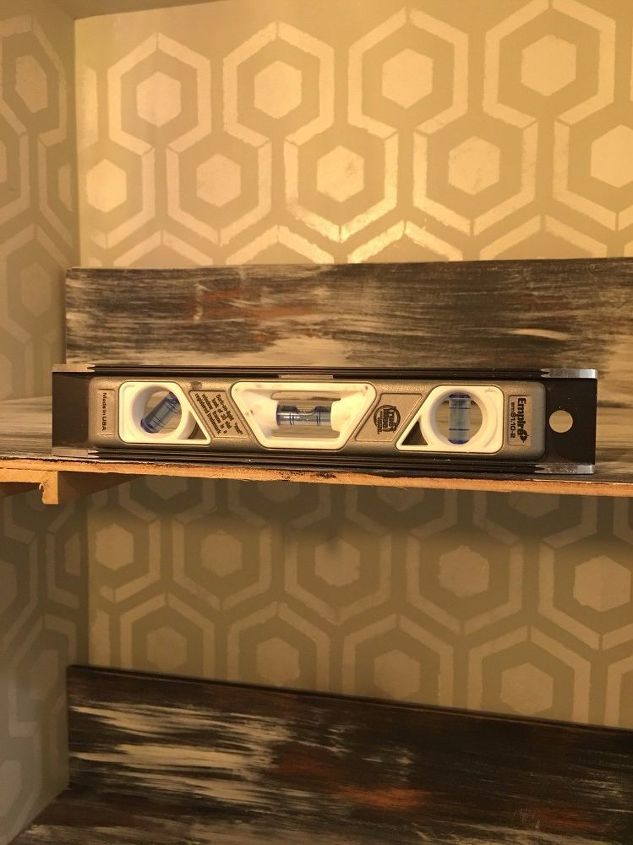
STEP 9: Arrange your drawers Place your drawer on top of the support rails. Make sure it's indeed level.
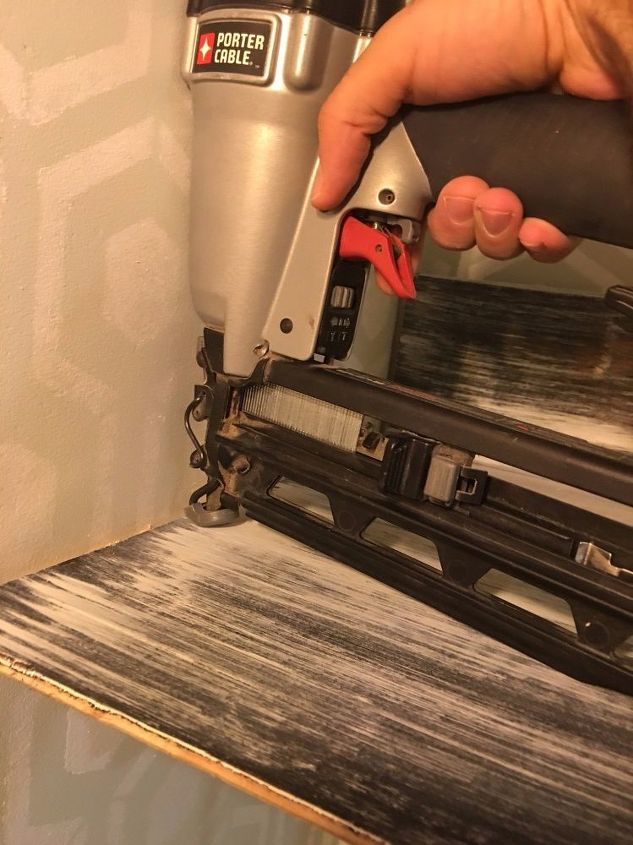
STEP 10: Attach drawers to supports If the drawer is level, nail the drawer to the support level. Repeat step 9 and 10 as many times as you have drawers.
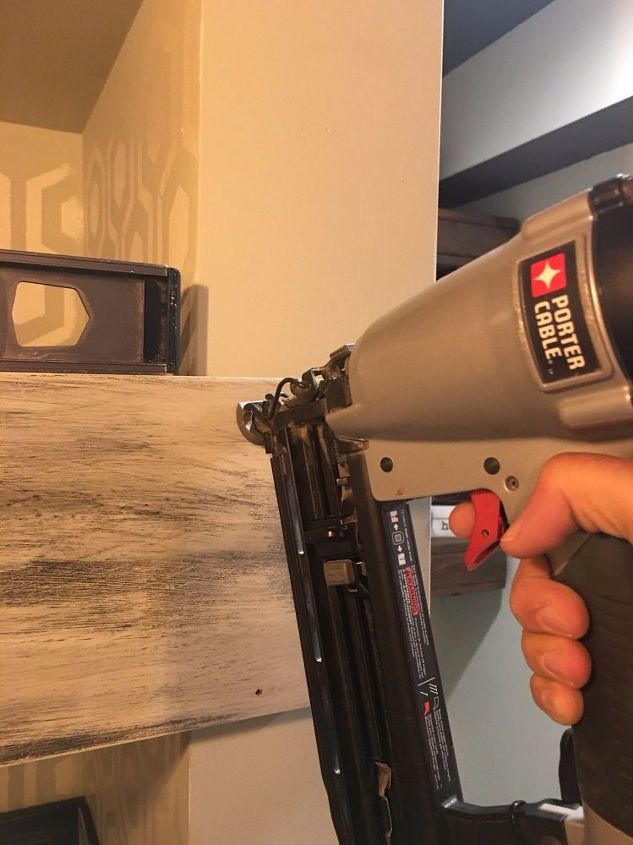
STEP 11: Add the drawer fronts & hardware Now, all you have to do is place the face of the drawer in front of each shelf so it looks like the drawer is completely in tact. Make sure it is level and nail it in place. Replace the hardware.
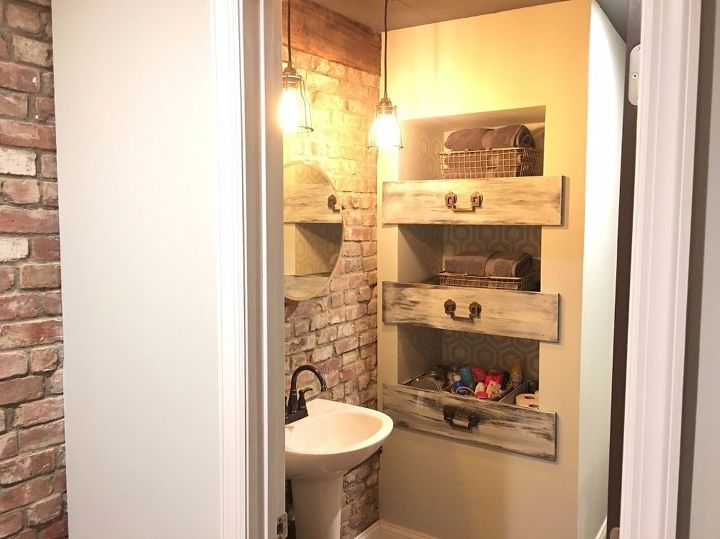
Artsy, functional, and unique! We love this addition to our bathroom!
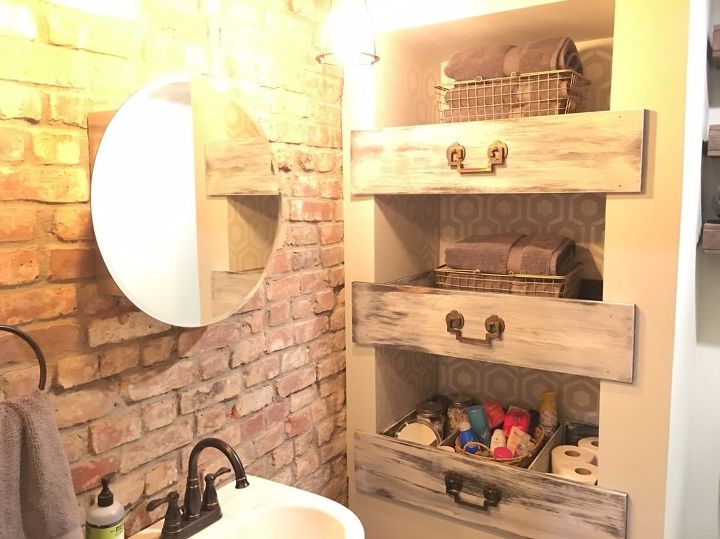
I definitely have one-of-a-kind shelving!
Resources for this project:
See all materials


Any price and availability information displayed on [relevant Amazon Site(s), as applicable] at the time of purchase will apply to the purchase of this product.
Hometalk may collect a small share of sales from the links on this page.More info
Comments
Join the conversation
2 of 105 comments
-
WOW!! Turned out great. They look fabulous!!
-
Love this look and your bathroom!


Frequently asked questions
Have a question about this project?
Are the shelf supports nailed to studs? If not, how much weight can the shelves support?
Did you use the whole body of the dresser to do this?
I would like to know details on the brick wall as well. If you did it yourself, where did you get the brick?