Sunshine Mirror Wall Decor From an Apple Basket

12 Materials
2 Hours
Easy
I'm always trying to find something unique to make using materials or items that served a completely different purpose in their previous "life." As I mentioned in my apple basket light fixture project, I got my hands on several stacks of the baskets a few years ago and have been wanting to use them but haven't had the "Eureka!" idea or the motivation to do something with them. I finally found another great idea and it comes in the form of super inexpensive (ummm...almost FREE!) wall décor!
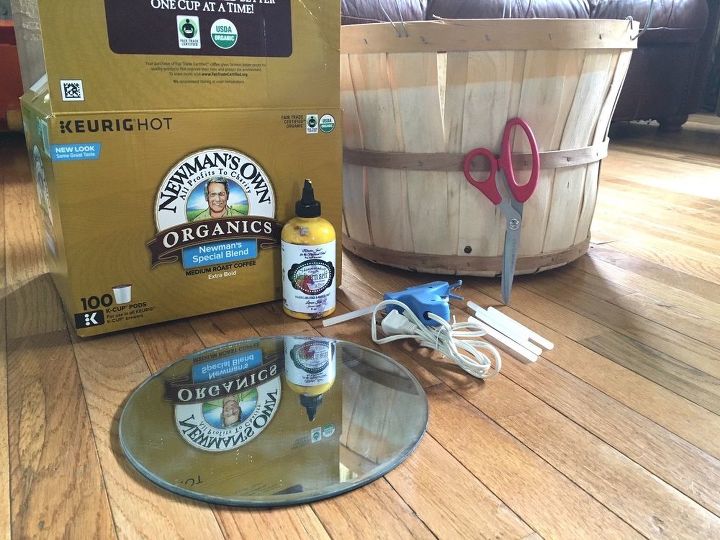
Supplies:


-apple basket


-cardboard


-round mirror (the one I used was from my wedding 4 years ago--I got them online from Oriental Trading for cheap)


-Unicorn Spit (Super cool wood stain! You can use any stain or paint you wish but someone gave me a few bottles of this stuff and I love it!)


-scissors


-hot glue gun/sticks


-twine/rope/ribbon (not pictured)


-wire snips (not pictured)


-writing utensil (not pictured)


-strong adhesive (I used E6000. | not pictured)


-rag/cloth (not pictured)


-box cutter/X-Acto knife (not pictured)


-hole punch (not pictured)


|||Believe it or not I didn't spend any money on this project as I already had everything on hand!|||
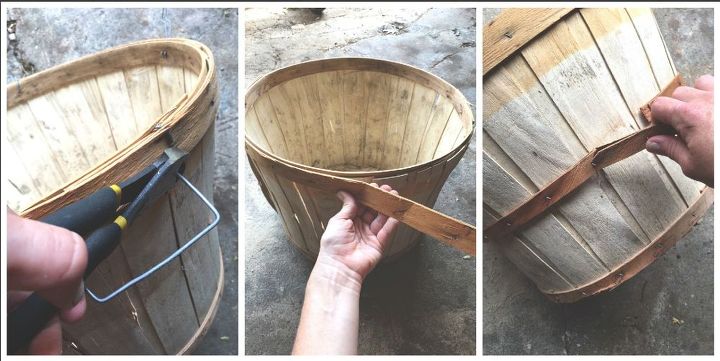
STEP 1: Disassemble basket


First, you'll want to CAREFULLY disassemble your basket. I'm sure you could take the time to remove every single staple if you had a whole lot of time to kill but I didn't, so I just carefully slid my fingers under the wooden "bands" that went around the top, middle and bottom and essentially popped the wood off. It may split the wood here and there, but that's ok, because you'll be cutting/snapping the wood in half anyway. Just don't completely shred your wood pieces!
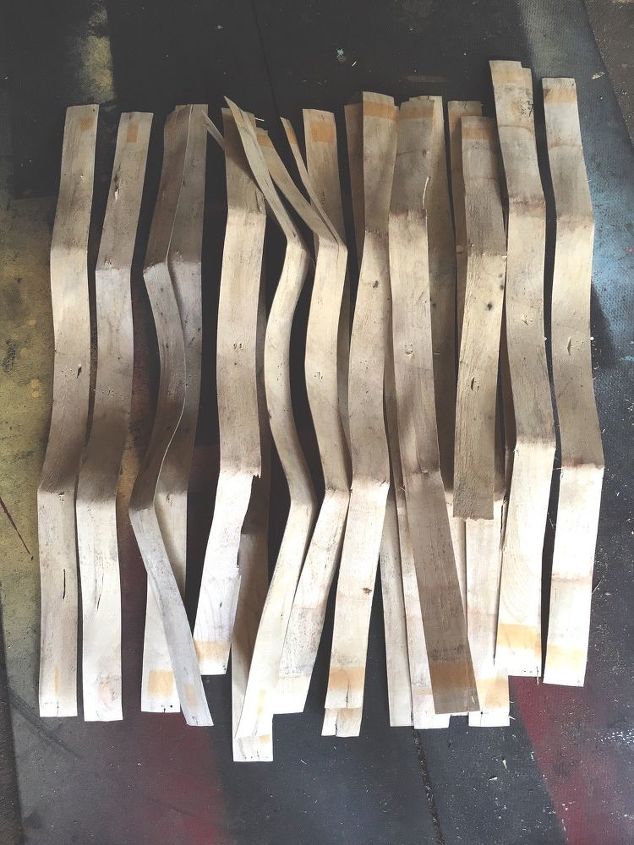
This is what you should end up with when your basket is disassembled: several strips of very thin, somewhat flexible wood.
STEP 2: Snap/cut wood pieces


Next, I bent the wood pieces in half and they naturally snapped into two. The wood is somewhat flexible, so you can eyeball the middle by gently meeting the two ends together--they should snap right in half. If you're not comfortable with snapping the pieces, you can measure out each strip of wood and cut them with scissors; again, I didn't want to spend too much time on everything being PERFECT, because I wanted my wall décor to be somewhat rustic, unique and artsy.
STEP 3: Stain/glaze/paint


After my wood pieces were snapped, I took a cloth and my Unicorn Spit and wiped them down. You can do this with a brush or sponge, but I found it easy and quick to use a cloth.
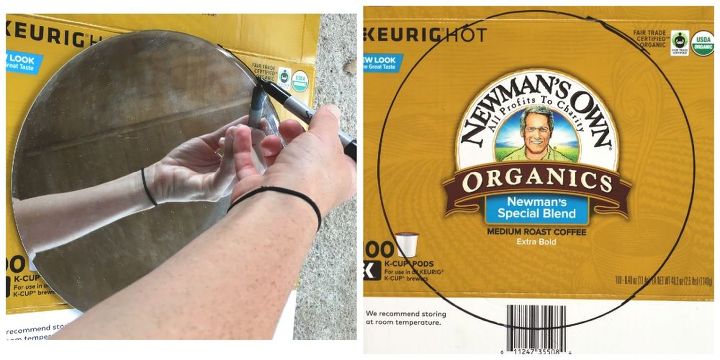
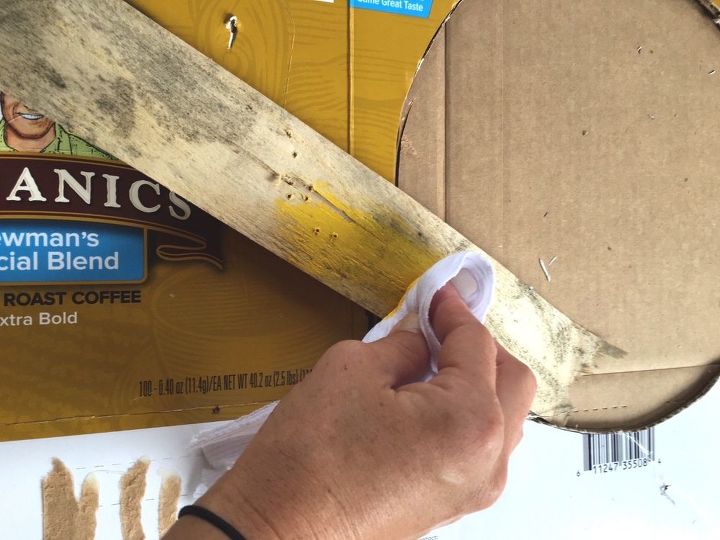
STEP 4: Trace circle
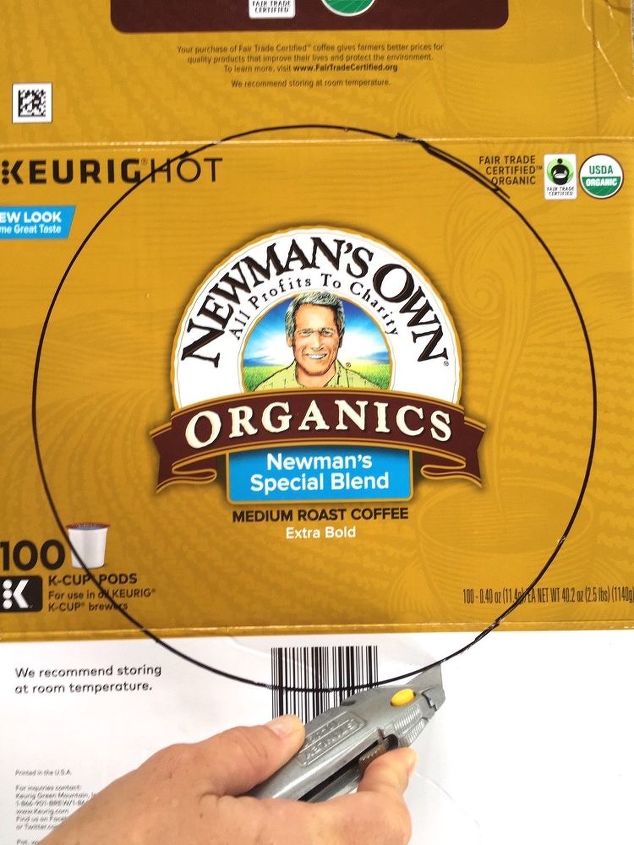

Next, I took my mirror, laid it on my cardboard box and traced a line around the mirror.
STEP 5: Cut circle


Next, I took a box cutter and cut my circle out. After I cut my circle, I ended up flipping it over so that the raw cardboard side was facing up (and Mr. Newman was facing down), because I found that the smooth side with all of the coffee graphics wasn't holding my hot glue.


STEP 6: Assemble wood pieces (not pictured)


After my circle was cut out, I took my wood pieces and started hot gluing them to it, gluing the jagged side on the cardboard so that the straight ends were sticking out. If you're doing a flower or want to change up your sun and have pointed ends, just cut the end of your wood pieces that are sticking out. I chose to only have two layers but you can do as many as you'd like, just keep in mind that you'll want have somewhat of a flat surface to glue your mirror down on.
STEP 7: Glue mirror


Next, using E6000 or another strong adhesive, glue your mirror to your wood design. I laid a stack of books on my mirror overnight to ensure that the mirror stuck to the wood.
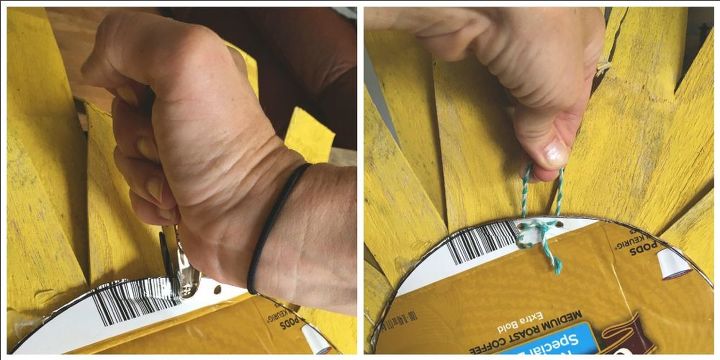
STEP 8: Hang your wall décor


Finally, I took a regular size hole punch, slid it between the wood slats and cardboard, and punched two holes. I thought about adhering some sort of picture hanger to the back instead, but I was afraid the glue may not hold so I tried this method instead (Any pointers? Feel free to share!). I used some twine I had on hand to tie through the holes in order to hang on the wall.
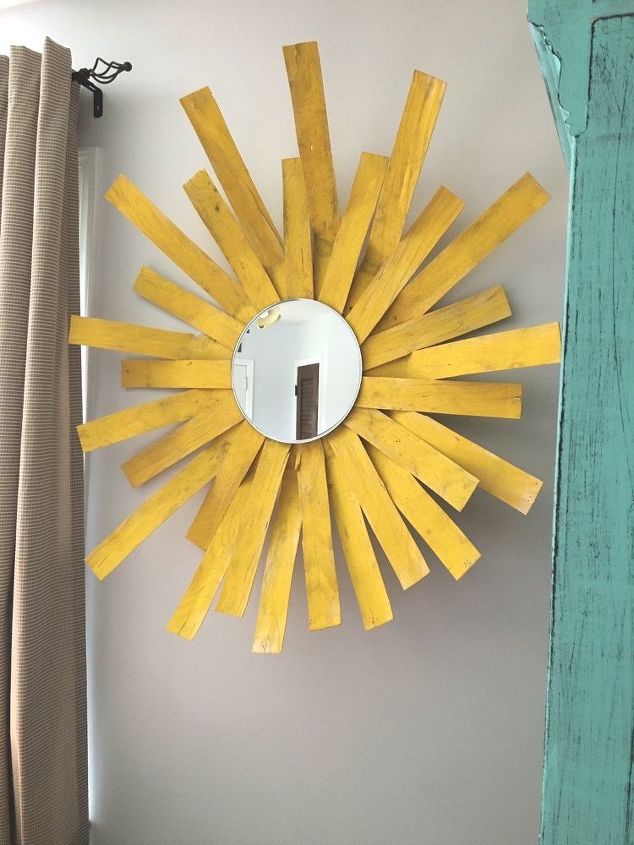
I'm still trying to find my exact style--it's usually all over the place because I just love color and design in general--but I'm obsessed with the sun mirror!!! It pops perfectly against my distressed aqua bookshelf I painted a few months ago.
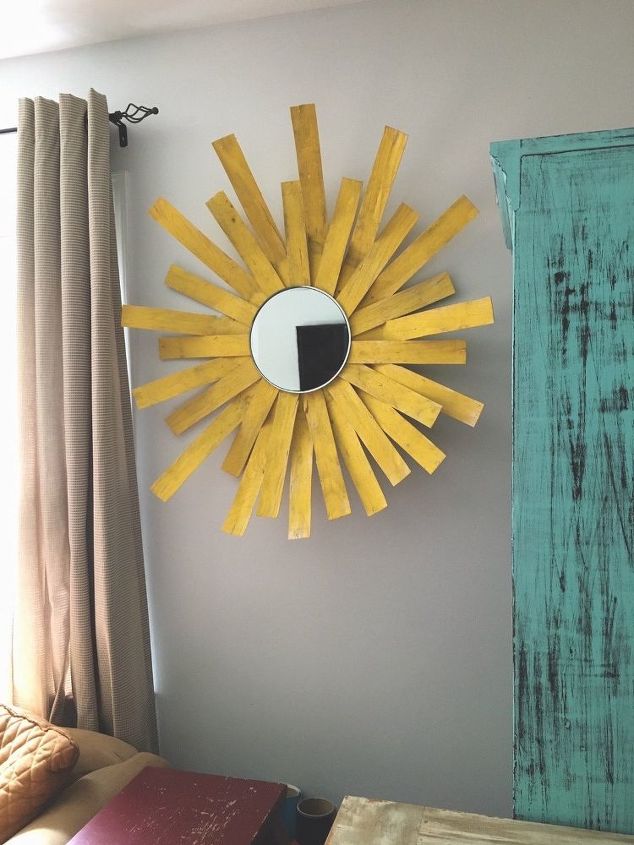
What do you think?! I LOVE this cheery, simple design! What's even more special to me is the fact that the mirror was part of mine and Rob's wedding reception so I think it's so neat that little odds and ends of our wedding are repurposed and sprinkled throughout our home.
Suggested materials:
  • Apple basket
  • Mirror   (Oriental Trading)
  • Cardboard
See all materials
Frequently asked questions
Have a question about this project?
3 of 4 questions
  • Selina Selina on Feb 02, 2017
    Where can I get apple baskets?
  • Tina Becerra-Hinsley Tina Becerra-Hinsley on Apr 04, 2018

    Why did you do this??!!

  • Linda Chapman Linda Chapman on Apr 04, 2018

    Would you please explain to me what Unicorn Spit is.? I have noticed it being used on several projects over the last few day, and have never heard of it.

    thank you, Linda

Comments
Join the conversation
2 of 38 comments
  • Karen Bruner Karen Bruner on Apr 05, 2018

    I have to try this project. It's so cool looking. It's great to get such awesome ideas from talented people and to use things around the house. Yes I will try this one. Thanks for sharing!

  • Amanda Davis Burns Amanda Davis Burns on Apr 05, 2018

    You inspired me! I think I will try it but instead of breaking the strips I will glue the loops, perhaps glueing the ends side by side instead of on top of one another, and make a flower! I will stain the front side of the loops one color and the back side another color. It will most likely be pink and purple because that is what my daughter loves! Thank you for the inspiration!!!

Next