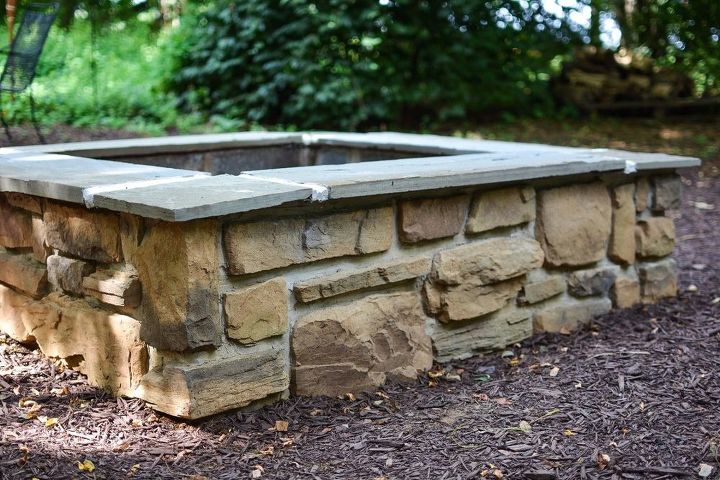
DIY Stone Firepit

Tara Butler
by Tara Butler
22 Materials
Creating your own professional grade, beautiful fire pit is easier than you think! See the full post at http://laceandgraceblog.com/2016/07/diy-stone-firepit/
Step One: Plan Plan Plan! Where do you want your fire pit? How big? Take into consideration any future plans you may have for your yard and make sure the placement of the fire pit doesn’t conflict with those plans. For instance, do you want to build a big deck in the future? A pool? Do you think you will add an addition to your home? Where are you property lines? – you don’t want to build a large fire pit too close to your neighbor’s house (or your own!) – for privacy and safety issues. Look around for different veneer stone, designs, etc that you like. Shop around for the best prices.


Step Two: Buy Materials. (see above) Make sure you add in a buffer for materials in case of mistakes. If you go with our design the above includes this buffer.


Step Three: Clear Area of any weeds, brush, etc (this was what the area looked like- luckily we did not have any trees in our way just a ton of brush!
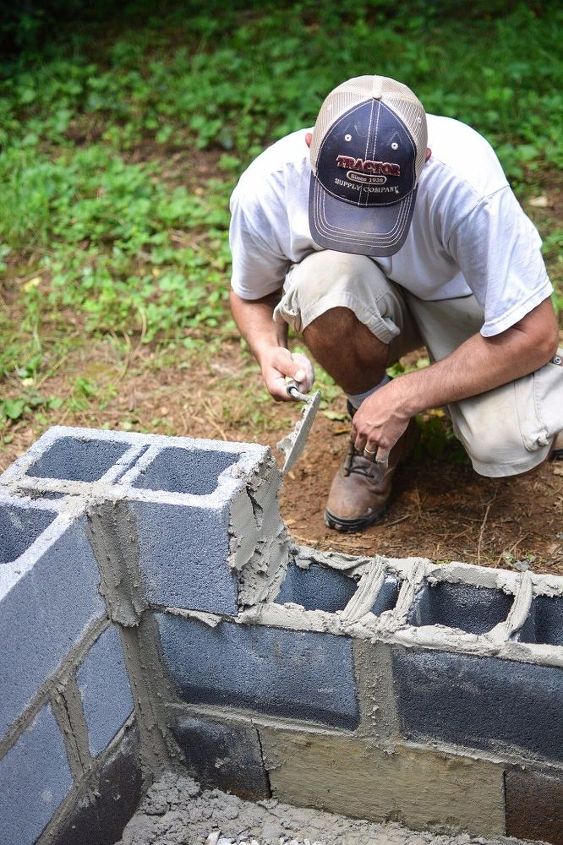
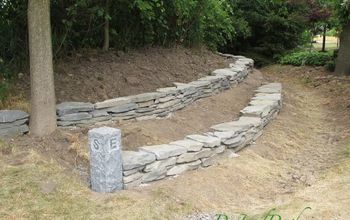
Step Four: Dig a 60inX60in square hole 10-12 inches deep (you can easily adjust this based on how high you want your fire pit)


Step Five: Level the dirt of the hole


Step Six: Lay down paver base, level and pack


Step Seven: Lay down drainage stone, level


Step Eight: Slap down cement mortar on outline of square.


Step Nine: Start laying first layer of cement blocks, each side should be 3 cement blocks wide. There should be a 6 inch- 10 inch gap between the outside of the cement block and the edge of the hold. Put mortar on sides and top of cement blocks. Continue this until you are three layers high. Reinforce inside and outside corners with mortar. Let fry for 48 hours.


Step 10: Pour small stones around perimeter of square, fill in with dirt until it is level with the rest of the ground surrounding the pit. (you can just use dirt here if you like- the stone just helps with drainage)


Step 11: Fill in small stone in center of fire pit until it is at a level you like. Too shallow and you won’t feel the heat, too high and it may damage your flagstone with the flame.
Step 12: Lay out your veneer stone and plan your pattern for the first side, use your corners as a start and work your way from left to right


Step 13: Mix your veneer mortar according to instructions in your wheel barrow and use trowel to place a small amount of mortar on the edges and center for larger stone pieces and just the center of smaller pieces.Place on cement blocks, if the stone starts to slide lean a large stone up against it to hold the veneer in place until the mortar dries a bit.


Step 14: Continue this process until one side is complete. Repeat step 12 & 13 for each side.


Step 15: Let dry for 24 hours
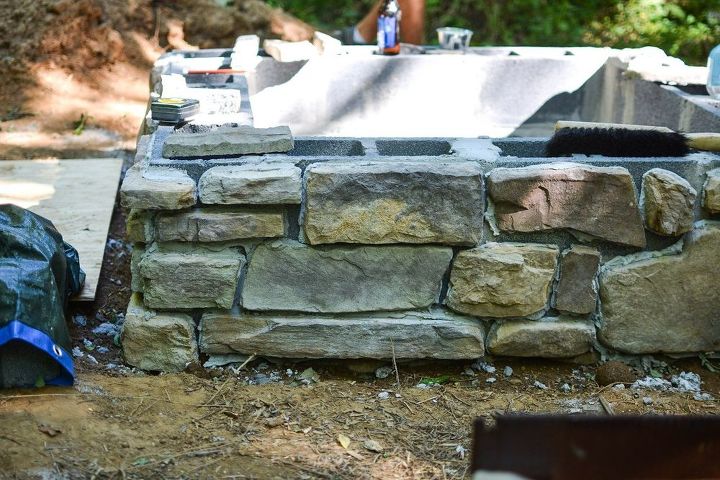
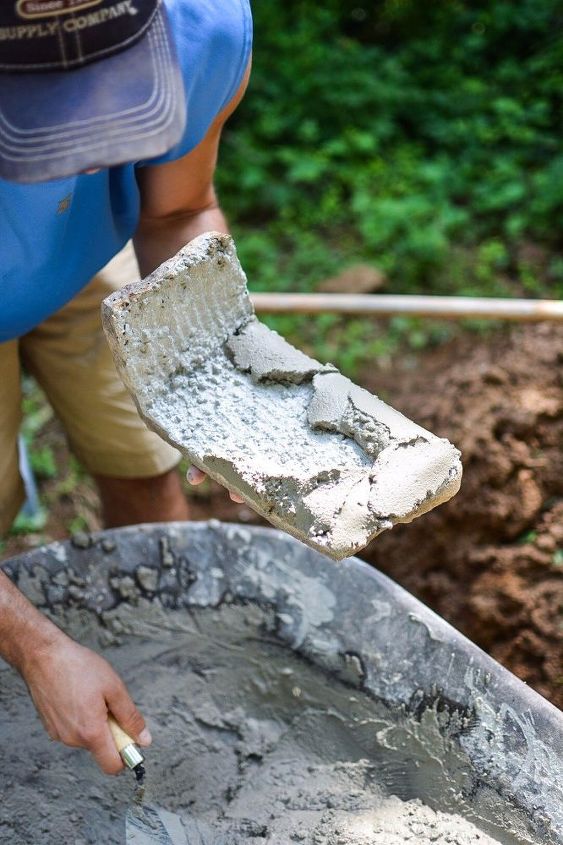
Step 16: Mix up veneer mortar and place mortar in your grout bag, slowly fill in the gaps between each stone, doing a few at a time (like icing a cake folks!)


Step 17: Grab your masonry slicker (or spoon) and smooth the grout for a refined finish, repeat Step 16 & 17 until you have gone around the entire fire pit.


Step 18: Let Dry for 24 hours


Step 19: Mix up mortar and grab a small flagstone piece. Pick a corner and line up the flagstone so it hangs over the outside edge of the fire pit between 1-2 inches, mortar it and stick it on. Next grab a large long piece of flagstone and space it about an inch away from the first piece (we will fill in mortar here later). Continue this step, alternating between the large flagstone and the small flagstone pieces (small will be used for corners only).


Step 20: Fill in 1 inch gaps between the flagstone pieces with mortar and smooth out with your slicker/spoon. Let dry 24 hours.


*** We recommend covering your in-progress fire pit with a tarp to protect it from the rain so everything gets nice and dry.
** Note Oxygen gets to the fire just fine. To avoid cement block damage do not make the base of the fire too large. For a lasting fire-pit get steel sheets and place on the inside sides of fire pit to stop direct flames from touching the cement blocks. We are working on getting these made and I will update when they are installed.
Suggested materials:
  • Paver Base   (Lowe's)
  • Drainage Stone   (Lowe's)
  • 8X8X16 Cement Blocks (36 of them if going with our design)   (Lowe's)
See all materials
Tara Butler
Want more details about this and other DIY projects? Check out my blog post!
Go
Frequently asked questions
Have a question about this project?
3 of 6 questions
  • DES57 DES57 on Jul 19, 2016
    I see a lot of people building fire pits with cement block. It worries me that they may explode when superheated by open flames. Does anybody know for sure?
  • Michelle Dodd Michelle Dodd on Jul 20, 2016
    You don't say anything about leaving a hole at a low spot to allow oxygen for the fire. Was that in the video?
  • Chris Chris on Feb 19, 2018

    I don't understand this step, would you clarify?

    "Start laying first layer of cement blocks, each side should be 3 cement blocks wide. There should be a 6 inch- 10 inch gap between the outside of the cement block and the edge of the hold."


    The picture shows cinder blocks, 1 block wide going up. Where did you install them 3 wide? Where is the 6-10" gap? What is "the edge of the hold"? What is a hold? Thanks!

Comments
Join the conversation
2 of 32 comments
  • Lyle McElwee Lyle McElwee on Feb 19, 2018

    good job,,,looks like a lot of yrs of fun around a fire..hope you enjoy.


  • Bjorn Karlstrom Bjorn Karlstrom on Jul 30, 2020

    Using concrete blocks as a liner in a fire pit will fail unless you fill the holes in the blocks with concrete! If you don't the blocks will crack in the heat and soon you will have real mess. We have tried this and generally it is not a good idea to use concrete blocks for this purpose unless you line the inside of the pit with fire resistant bricks, etc.

Next