Hand Sewn Baby Swing

Amanda C, Hometalk Team
by Amanda C, Hometalk Team
6 Materials
$25-31
3.5 Hours
Medium
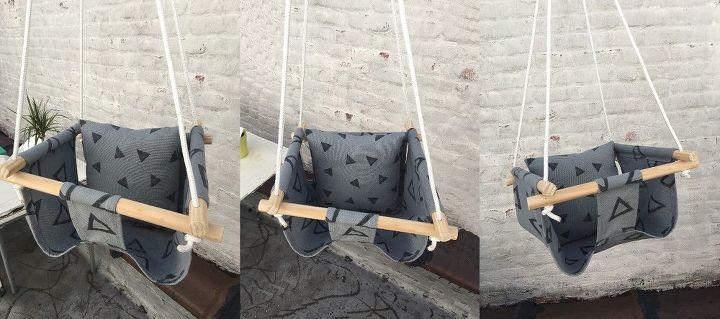
I've got a lil' niece on the way, so I decided to make her a swing! This tutorial is for those with some sewing knowledge, but, honestly, it is just some straight lines so you don't have to be a pro either. This cloth swing is really pretty simple and super cute! With some sewn fabric, wooden dowels, and rope your lil' bundle will be swinging for joy!
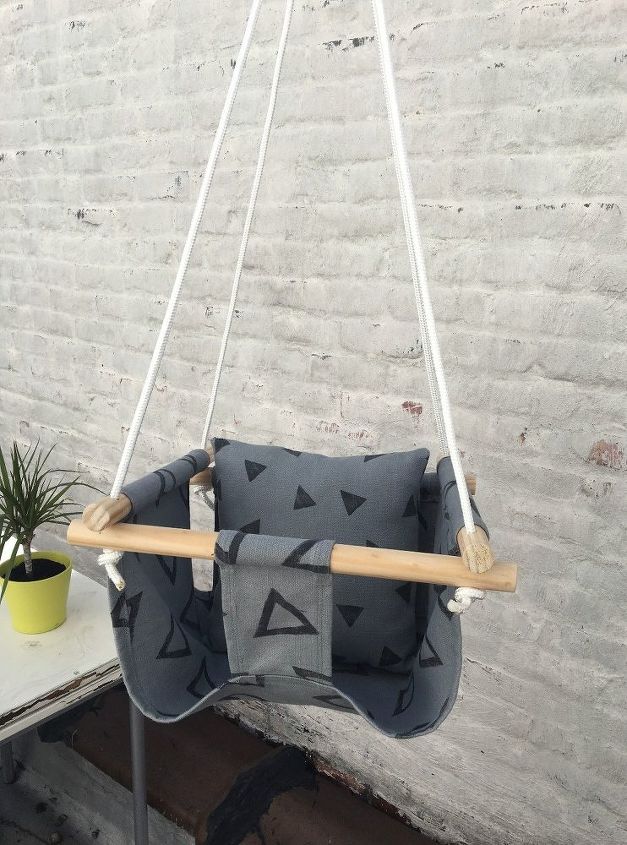
A great place for any baby to swing and sway!
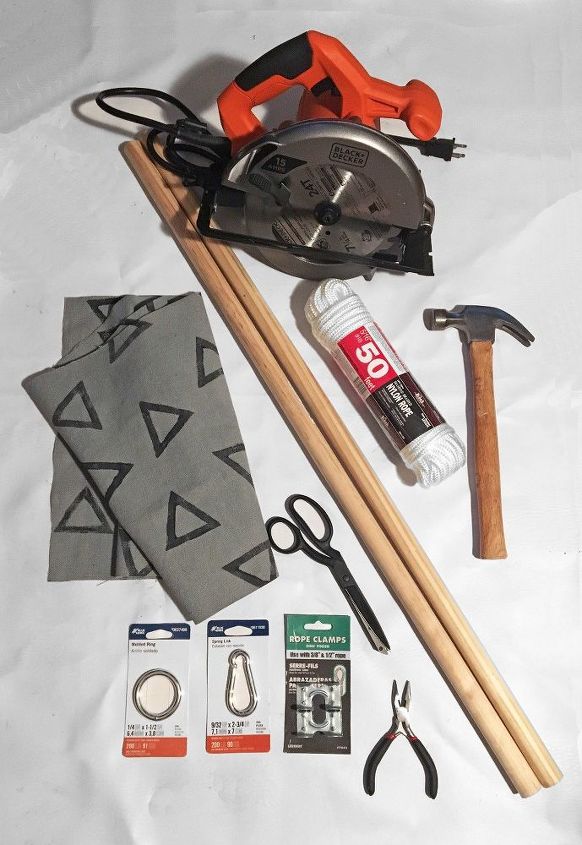
SUPPLIES:


-1 yd. Fabric in a Duckcloth or Canvas or Upholstery Weight Fabric


-Scissors


-Metal Ring


-Metal Spring Link


-5/16" 25' Nylon/ Poly Braided Rope


-2 1"x3' wooden dowels


-Rope Clamps (2- Make sure to get ones that fit 3/8"-1/2" rope)


*Make sure that all the metal items you choose are safe for up to 200 lbs. just to be safe. Also, if you want to use this outside you need to buy outdoor fabric OR get Thompson's fabric spray and make the fabric suitable for the outdoors.


Tools:


-Sewing Machine (Not pictured)


-Hammer


-Circular Saw


-Sand Paper (Not Pictured)


-Pliers
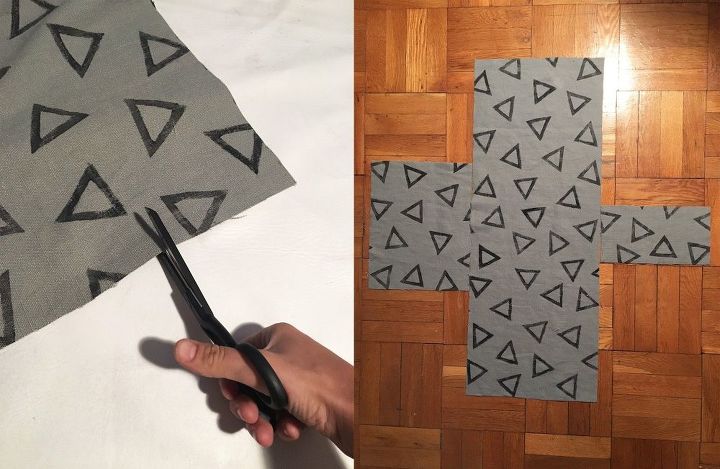
STEP 1: Cut your Fabric.


You will need to cut 3 separate pieces as follows:


1 - 36" x 14"


1- 14" x 11"


1- 6" x 11"


The picture to the right shows how they will lay out to create the swing shape.
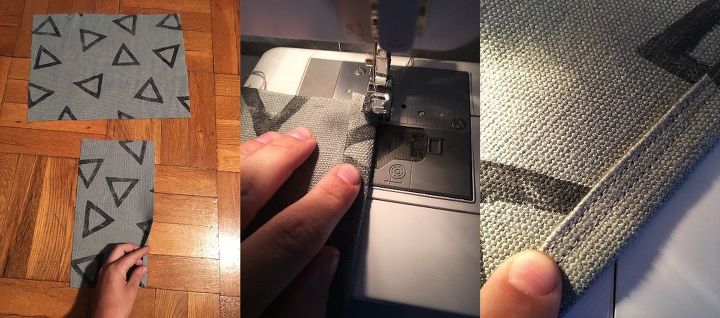
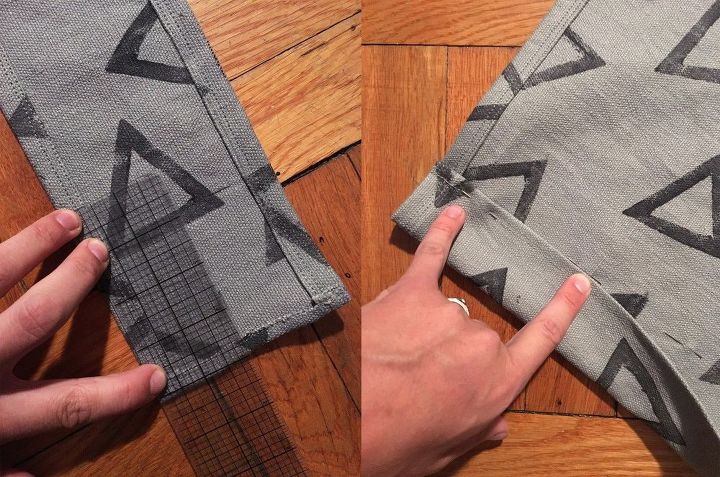
STEP 2: Hem the Sides


Hem the sides of the front and back piece (the 14"x11" and the 6"x11"). You will hem the 11" sides on both pieces. First iron over 1/4" and then another 1/2" to create the side hem crease.


Sew each hem crease down first with one seam and then another 1/8" over.


Each side hem will have 2 seams.
STEP 3: Hem the Middle Piece


Now you must grab the middle piece ( 36"x14") and hem the long sides (the 36" sides) of this piece.


First turn over 1/4" and then 1/2" and iron it to create the hem crease. Then you need to find the middle of the 36" side (18") and make a mark. Do this on each 36" side. Grab your front piece (6"x11") and also mark the middle of the 6" side and match up this mark with the middle mark on the middle panel hem. Place the rough edge of the front piece under the creased hem on the middle piece and pin it in place (wrong side to wrong side). Then sew the middle pieces hem in place with 2 seams as you did to the front and back pieces in step 2. Only sew the side with the front piece and sew over it to keep it attached and in place.


Once you have the hem sewn down (and the front piece sewn in with it) you need to fold over the front piece so that it is facing the correct way. You will flip it out and sew another 2 seams over this section to hold it in place. (See the middle picture.)


Now you will find the middle of the back piece (14"x11") and mark it on the 14" side. Match this mark up with the middle mark on the other 36" hem on the middle piece and sew it into place in the same manner that you did the front piece. (First sew the hem, then flip it over and sew it so that the right side is facing out.)
At this point this is what your swing should look like. All pieces are sewn into place and we are almost done sewing!
STEP 4: Sew the Raw Edges


As you noticed in the picture above, there are 4 raw edges that need to be sewn down.


First press over 1/4" and sew it in place on each of the 4 raw edges.


Now measure 4" down and fold your edges to this point. Sew a seam to hold down this fold. These folds will have space to feed your wooden dowels through so be sure to sew the seam close to the edge. (Over the 1/4" seam you just made should work just fine.)
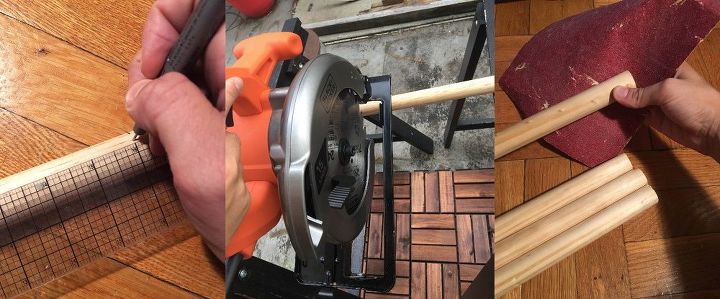
STEP 5: Cut Your Dowels


Now that you are done with sewing it is time to work on the dowels that will hold the seat in place. You will need 4 16" dowels.


Mark your 16" on each dowel.


Now grab a circular saw and cut each piece to 16".


Once you have cut each piece, sand down the edges to remove any splinters or rough spots.
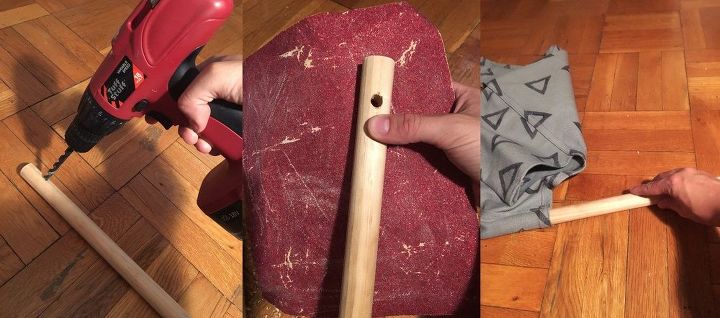
STEP 6: Drill Holes for the Rope


Now we need to drill holes into the dowels to feed the rope through later on.


Each dowel will have a hole on both ends 1 1/4" from the end. Drill your holes starting with a small drill bit and work your way up to 3/8". Make sure that your holes sit evenly on the dowel so that they face the same way. A good way to do this is by using a drill press, however I do not have one, so I simply used an old ruler method. Once I drilled a hole on one end of the dowel, I marked the other end using a ruler, so I knew where to drill the hole.


Sand down all the holes once they are the size you need.


Now simply feel each dowel through the edge seams on the seat that you created in step 4.
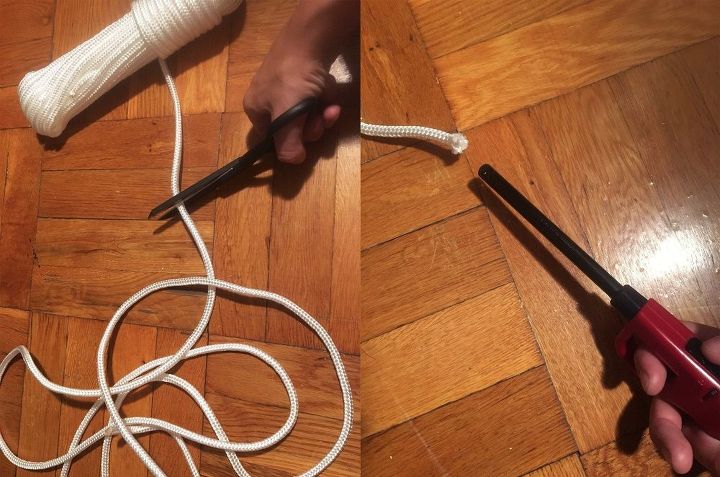
STEP 7: Cut Your Rope


It's rope time! For the seat to hang correctly you will need 2 pieces of rope cut at the same length. I cut 2 at 10' each so that it has plenty of length to hang from high heights (you can adjust it to fit your needs). You also need to cut a 5' piece of rope for the top knot which I will show later on.


Once all the pieces are cut you need to melt the ends so that the rope doesn't fray. Don't worry! It's nylon so it melts into place and doesn't catch fire!
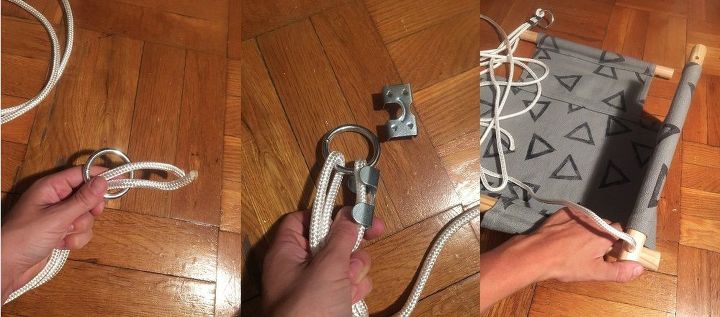
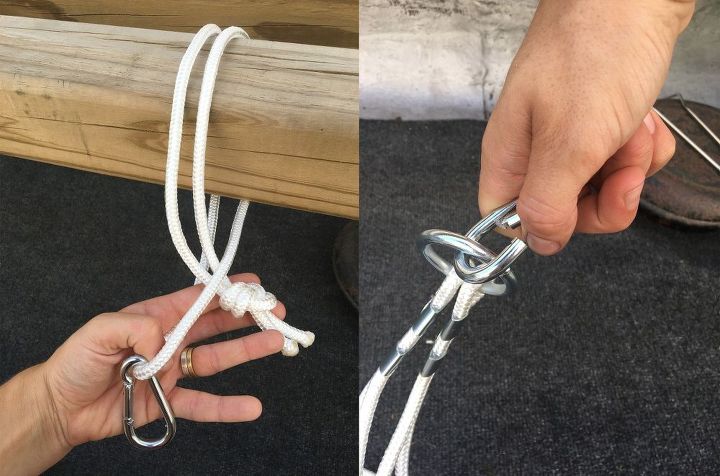
STEP 8: Attach the Rope to All Pieces
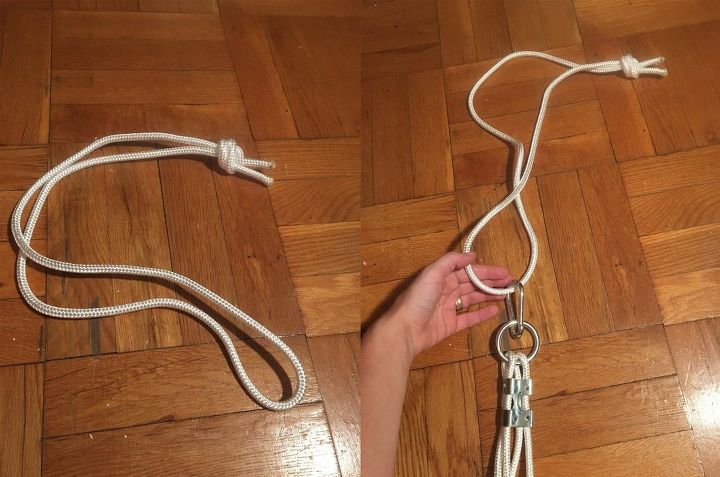

Feed each of your 10' rope pieces through your metal ring so that the middle point rests over the ring.


Grab your rope clamps and hammer them over each of the ropes to hold them in place next to the ring.


Now simply feed the ends of the 10' rope pieces through the holes you made in the wooden dowels. The middle piece (or sides) of the swing seat go on top of the front and back pieces.
STEP 9: Tie a Knot


Take your 5' piece of rope and tie a knot at the end.


Now attach this piece of rope to the metal ring with the spring link.
STEP 10: Hang Your Seat


Your seat is now complete, however you need to hang it! If you want to hang it from a tree or a beam, do a loop knot with the 5' piece of rope and them simply clamp the spring link to the metal ring. If you want to hang it from a hook in the house or something, you can omit the 5' rope and simply hook it straight to the hook with the spring link.
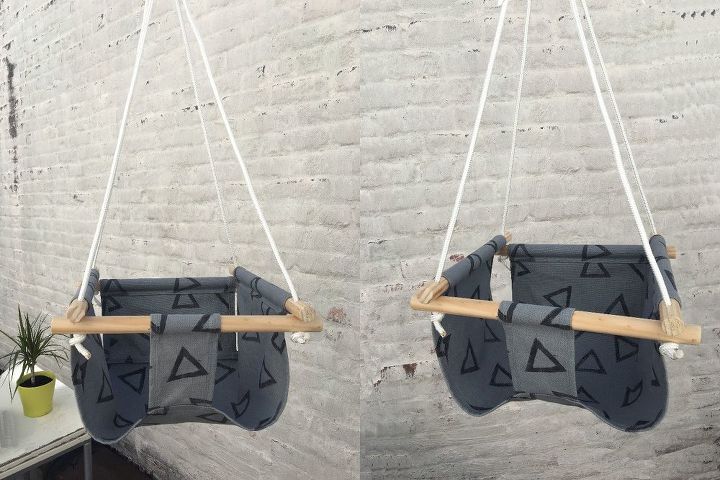
Look how cute this lil' seat is! I can't wait to gift this gem!
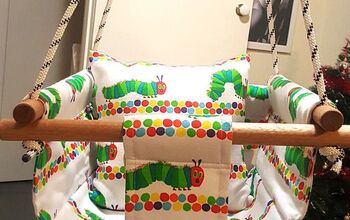
I added a pillow to the back of the swing for extra comfort, and so that there is support when the baby is a bit smaller. I simply cut 2 12.5" x 12.5" squares from the fabric and sewed them together and filled them with cotton. (A normal ol' square pillow.) This is completely optional!
Suggested materials:
  • Canvas / Duckcloth Fabric   (Local)
  • Wooden Dowels   (Michael's)
  • Metal Ring   (Lowe's)
See all materials
Frequently asked questions
Have a question about this project?
  3 questions
  • Lynn Zubich Lynn Zubich on Feb 20, 2017
    At what age/ weight is a child to big for this swing?
  • Courtney Reid Thoreson Courtney Reid Thoreson on Feb 20, 2017
    Instead of sewing all those pieces together, couldn't you just cut out one piece in the shape needed and then hem the raw edges?
  • Liz Owen Liz Owen on Jun 13, 2017

    Is your fabric the same on both sides or did you double-back it? I have some duck cloth, but the backside is plain. Would it be too difficult to double back it?

Comments
Join the conversation
2 of 7 comments
Next