


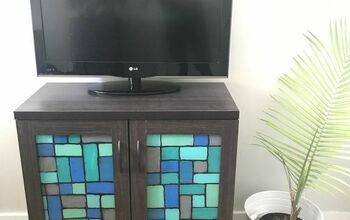
Upcycled Glass Cabinet
I had an old "Frankenstein" bookshelf that had been in my basement for so long. I call it "Frankenstein" because it was built from all different scraps of wood and had multiple finishes. I had been wanting to hang a glass cabinet in my kitchen and this shelf happened to have the right dimensions. My vision was to create faux ceramic tiles with stencils and paint to add a bit of whimsy to the kitchen.
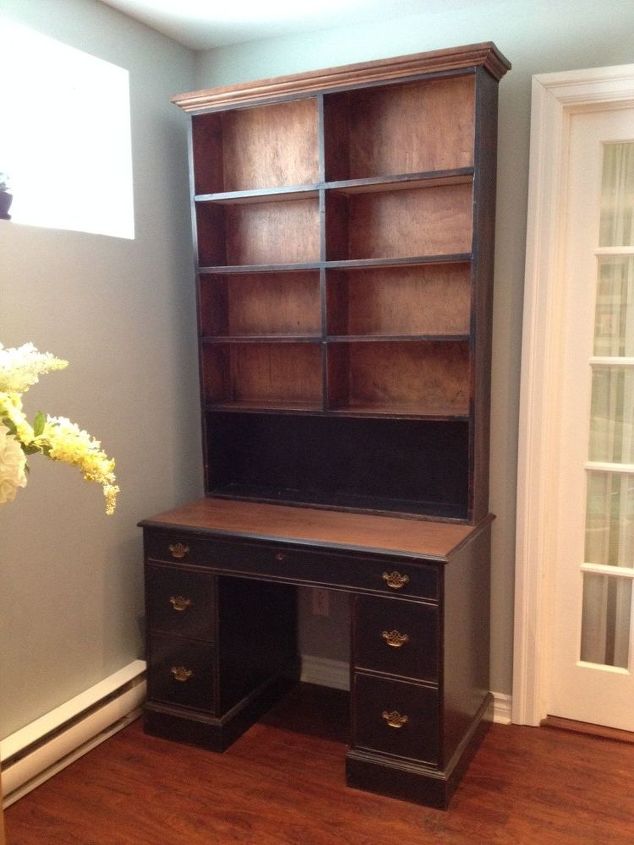
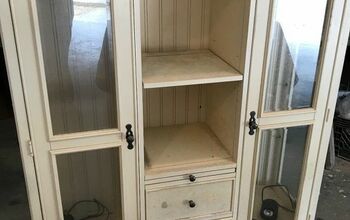
This is what I started with. I am working with just the top part.
Here is a list of the supplies I used:
- Country Chic Paint: colours - Simplicity; "Liquorice"; "Coastal Fog"; "Pebble Beach", "SundayTea", "Peacoat" and "Ocean Breeze"
- Ceramic Tile Stencil from Royal Design Studio
- Talavera Tile Stencils from Royal Design Studio
- Stencil brushes
- Painter's Tape
- Small paint roller & brush
- Topcoat and clear wax
- Paper towels for blotting
I wanted my glass cabinet to have doors, so two doors were built by making a wood frame with mitred edges and gluing them together. Glass will be installed at a later date. Now, before I go further with the tutorial, I just want to mention that I had first attempted to do the project with the back panel intact and it proved to be quite difficult, especially trying to stencil the corners. When I finally took the time to remove the back panel, the painting and stencilling went so much easier. Some of the pictures were taken while the back was still intact, but if you can remove the backing, I would definitely recommend it.
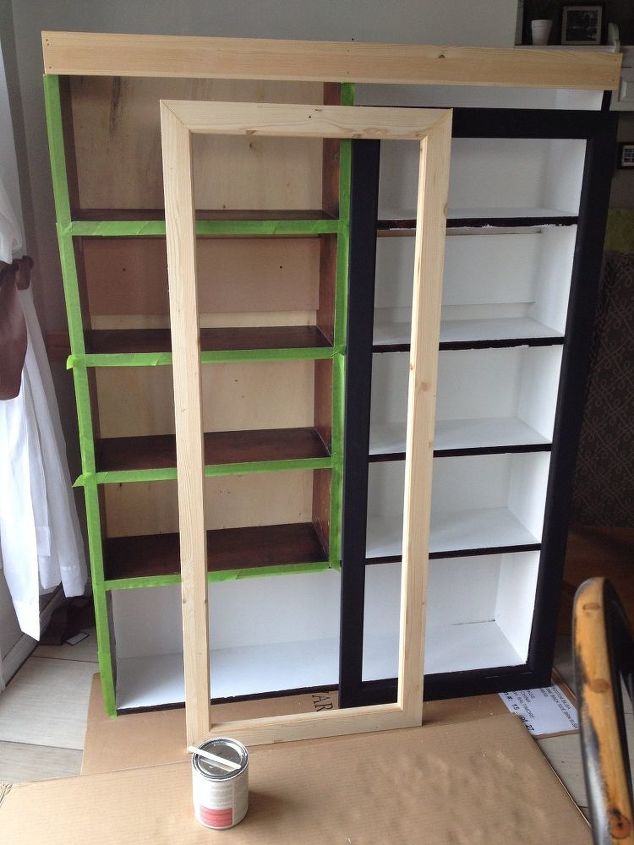
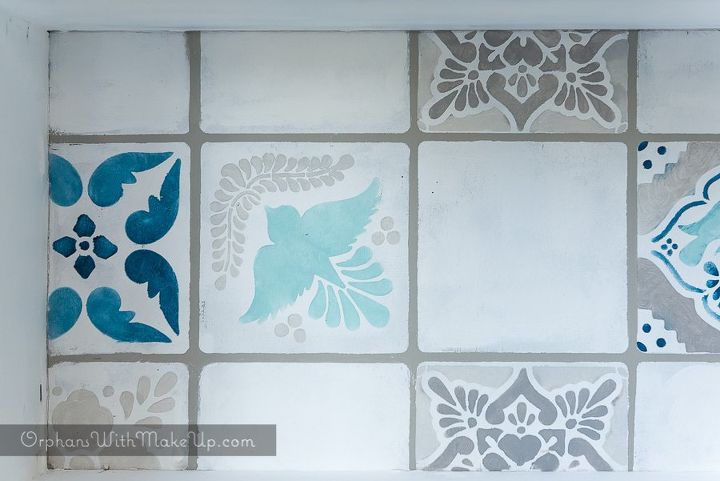
Since there were many different finishes to start with, I decided to first paint all the interior white, just so I could start with an all-even color, but you would probably skip this step. The exterior was originally painted a distressed black but I decided I wanted a clean look so I refreshed the exterior with "Liquorice" black paint and sealed with varnish. Next step is to paint the back panel the color that you want your grout lines to be (this is where most of you would start this project). In my case I went with a grey color. I painted "Coastal Fog" using a small roller brush.
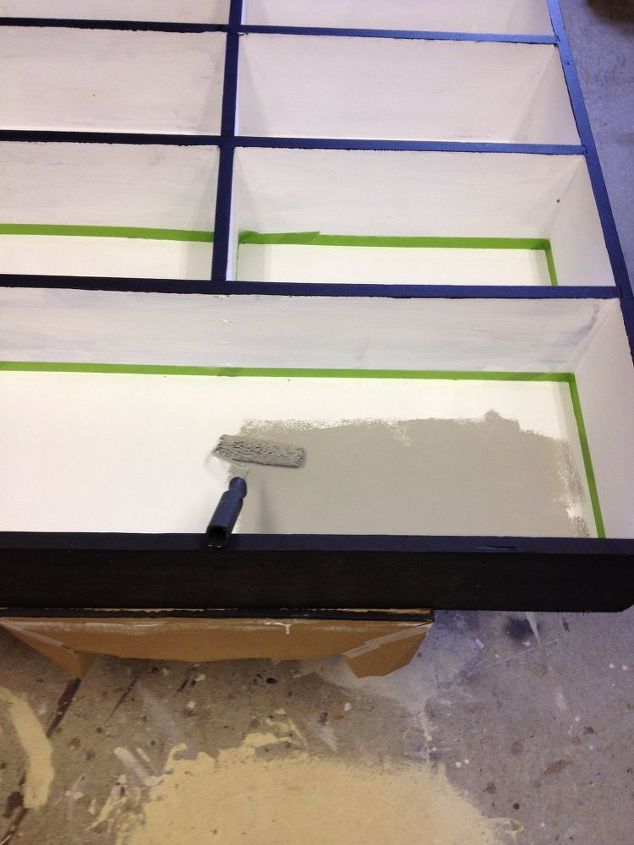
Next step is to lay down the Ceramic Tile Stencil (below is what this stencil looks like) over the painted grout color and roller paint another color.
In my case I chose "Simplicity" white. This color determines the background colour of your faux tiles.
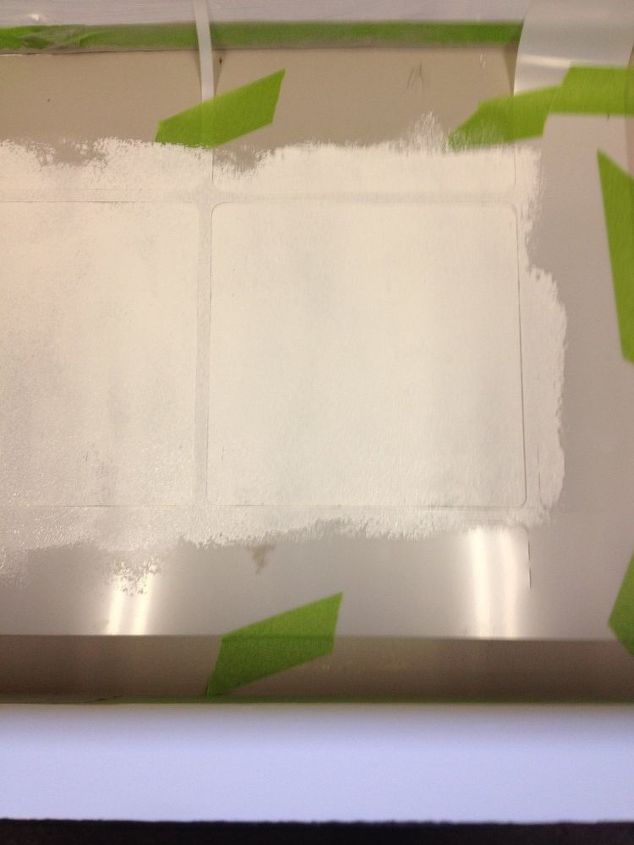
The image below is after the base grout colour had been painted and then the ceramic tile background color was painted white, and it was at this point that I decided to remove the back panel from the shelf as it would have been impossible to lay the faux tile stencils flat.
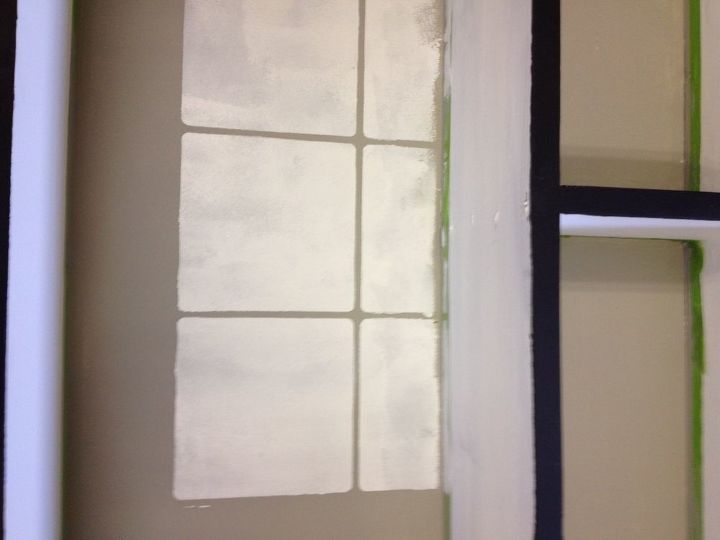
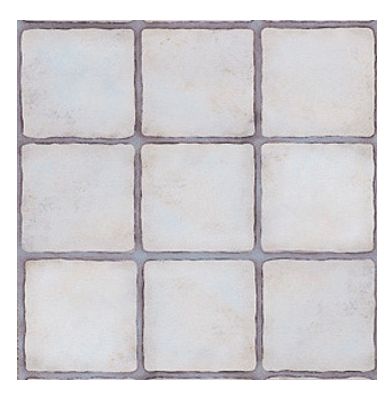
Now came the fun part of painting the Talavera tile stencils (shown below). There are 6 different patterned tiles and each of the six stencils are individual stencils.

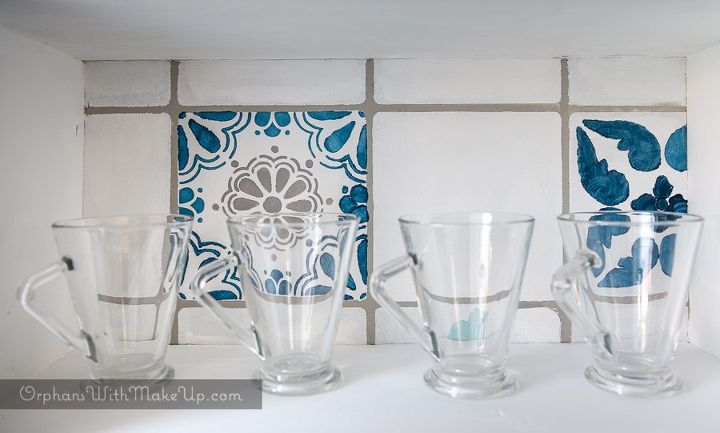
Get all your different color paints, brushes and paper towel ready. I also want to mention that since the partitioned sections of the cabinet were not that big, I strategically tried to place my stencils in the centre of each of the cubby holes and placed them accordingly so that the centre would show a full row of stencils, without being cut off. I poured a bit of each colour paint in small containers.
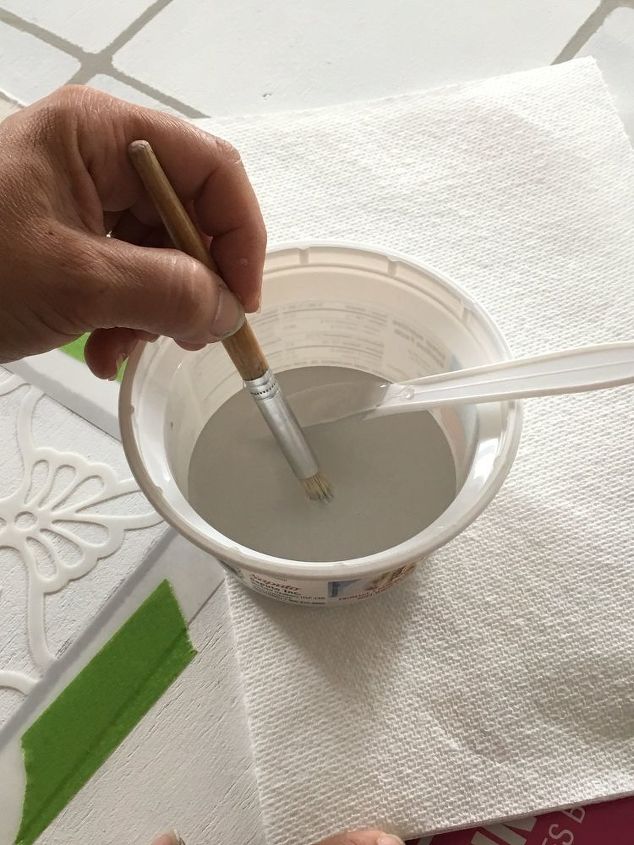
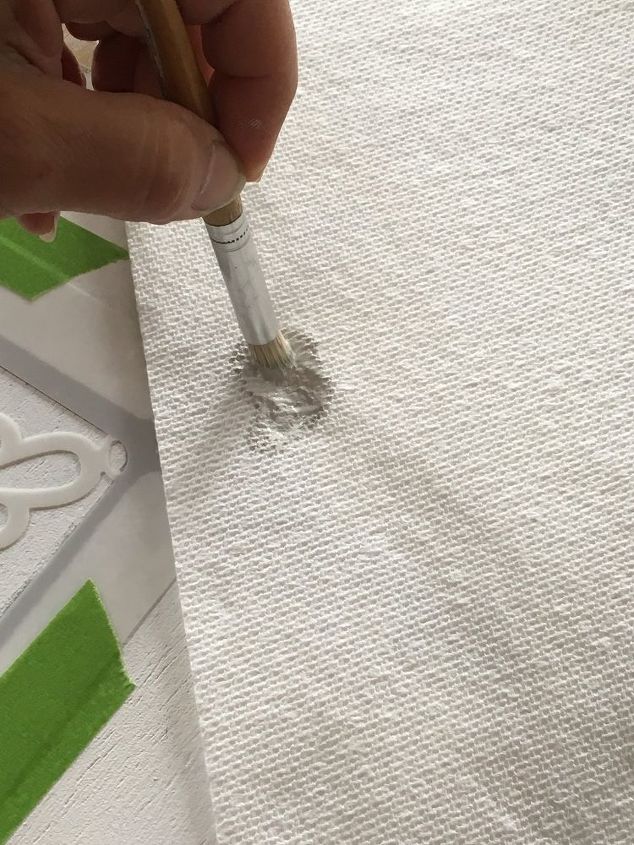
Dip and blot your brush. Paint stencils in a circular motion.
I added different shades of the same color ("Coastal Fog", "Pebble Beach" and "Sunday Tea") for some tiles and a bit of blue ("Peacoat and Ocean Breeze") on others and alternatively mixed blues an greys on other tiles. Use as many or as few colours as you want.
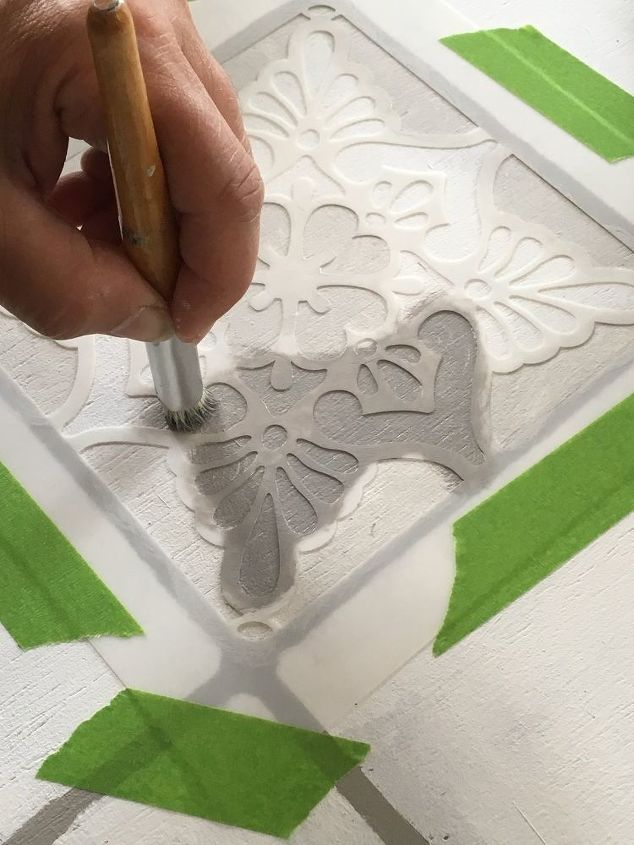
I chose not to stencil a tile in each square, but rather randomly here and there. Keep stencilling and painting until you've painted out all your squares.
If you mess up some grout lines, just go back and straighten out your lines with painter's tape and retouch with a small brush as needed.
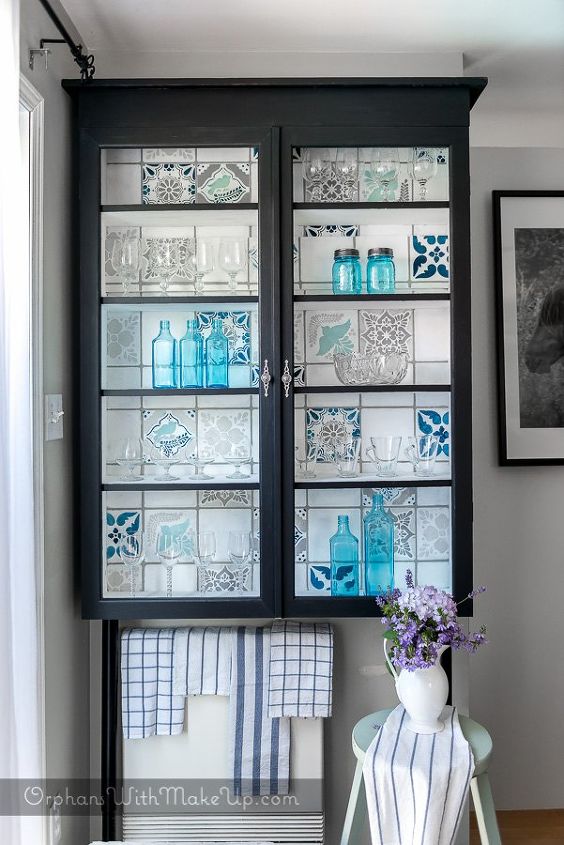
I added some polished silver hardware on the doors and the glass on the two doors still has to be installed. I hope you enjoyed this stencilling project.


Comments
Join the conversation
-
Wow!!!!! Wonderful.........jealous too
-
WOW!!! This is gorgeous. This is the best project I've seen on here.


Frequently asked questions
Have a question about this project?
This is absolutely beautiful'. Did you add legs to the bottom.
Hi did you do a tutorial on the desk yet and is the cabinet attached to the wall it looks great love the dark colour
I love the hardware! Where did you buy it?