


How To Transform Crates Into Beautiful Functional Storage
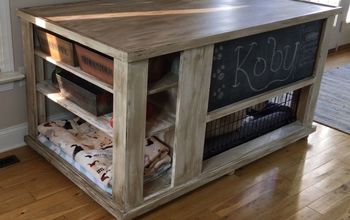
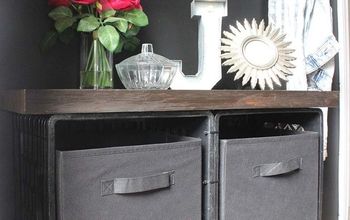
With a two year old kid and lots of toys around our home, I needed storage that would not only go with my decor but that could easily be tucked away when needed. I used 2 crates; painted them, added wheels and even added a chalkboard frame to create my own storage solution.
If you would like to transform crates into functional storage, here are the steps to follow
http://nowathomemom.com/crates-an-easy-toy-storage-solution/
Have you ever used crates as a storage solution, I would love to see your creations and ideas
If you would like to transform crates into functional storage, here are the steps to follow
http://nowathomemom.com/crates-an-easy-toy-storage-solution/
Have you ever used crates as a storage solution, I would love to see your creations and ideas
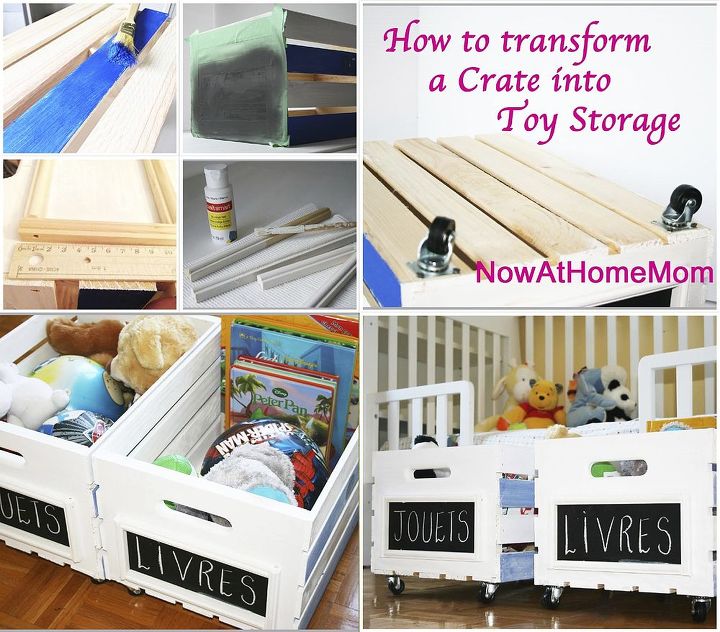
How to easily Transform Crates into functional storage
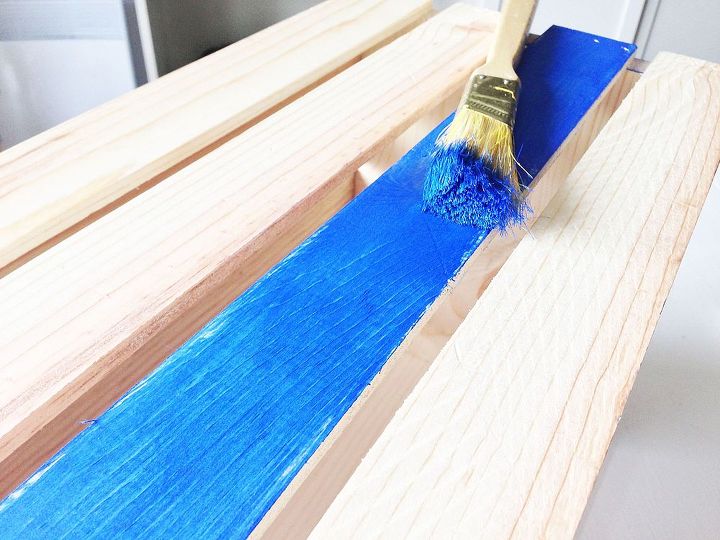
apply acrylic paint with a medium size paint brush directly on the wood, no sanding was necessary for this project because I was working with untreated wood
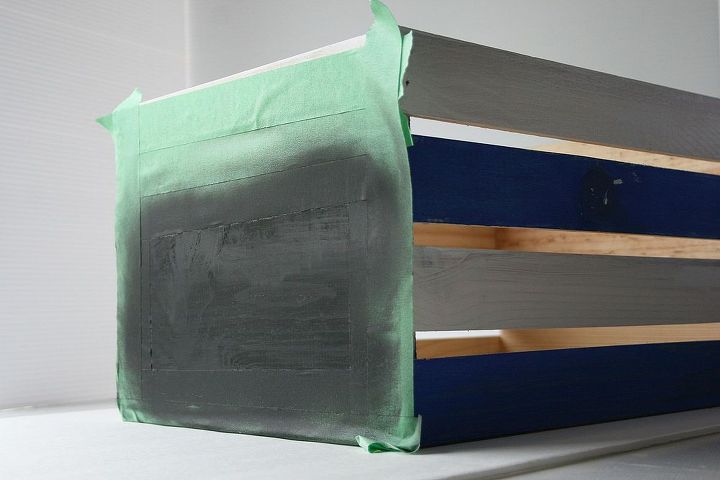
outline a rectangle using painter’s tape and spray paint it using Rust-Oleum chalk board spray black paint
wait approximately 3 hours before removing the painter’s tape to ensure a perfect rectangle
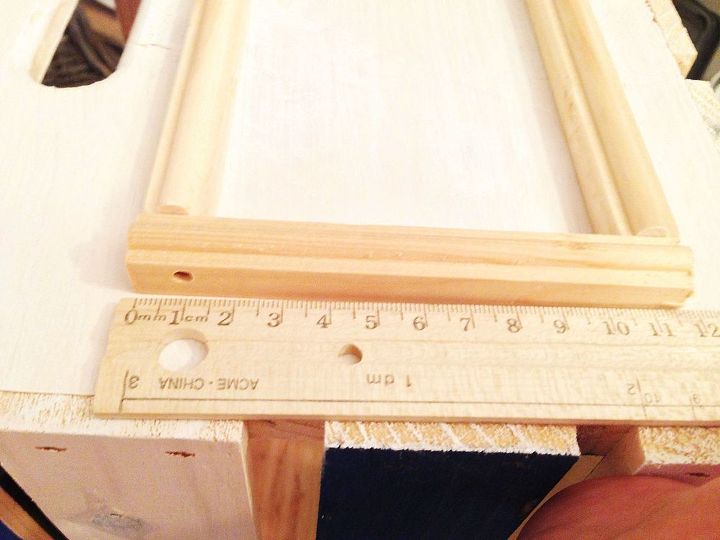
measure the outline of the chalkboard rectangle and then measure the pieces of wood you will use to create the frame
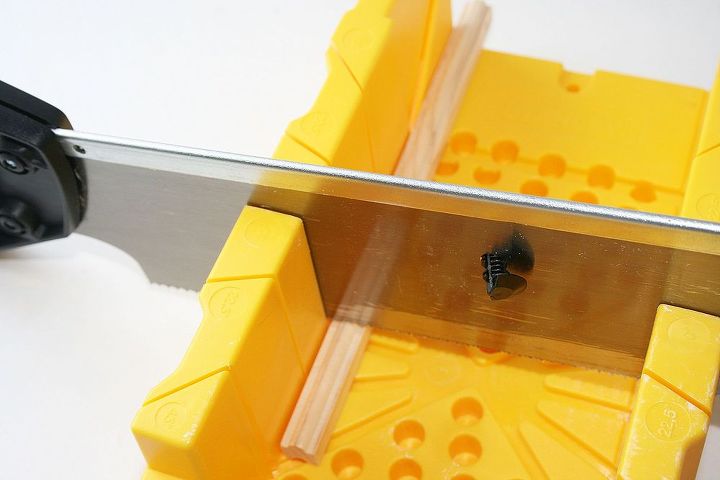
you can use a miter saw box to cut the pieces as per the measurements to create the frame
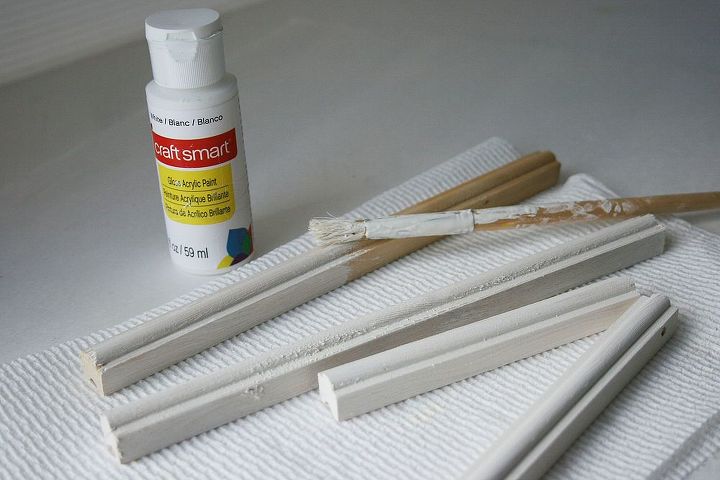
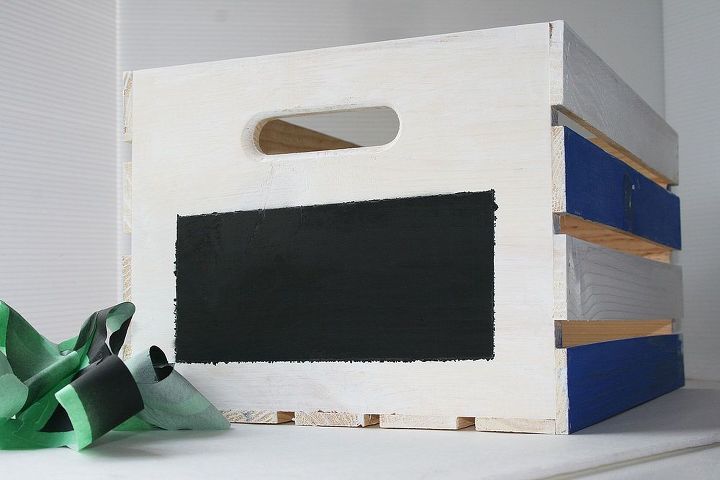
paint the small wood pieces to blend in with the rest of the crates (color of your choice)
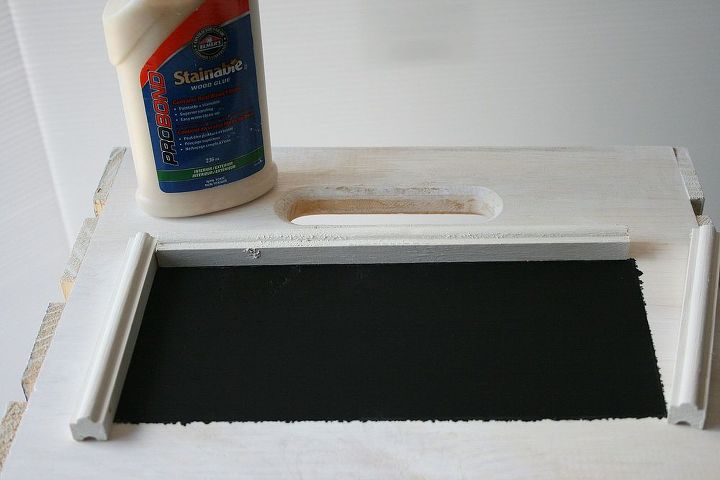
frame the chalkboard rectangle by gluing the pieces of wood to the crate
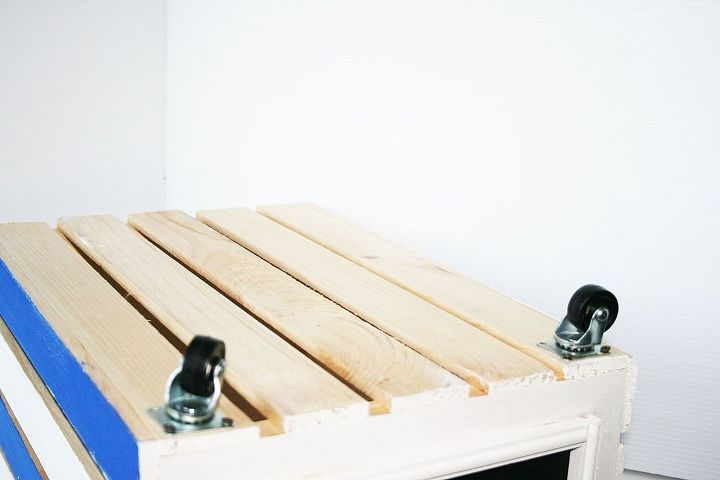
add wheels/casters to the crate, so that they can easily be moved around and tucked away

Want more details about this and other DIY projects? Check out my blog post!


Frequently asked questions
Have a question about this project?