


Build a Barn Wood Sign for Fall

7 Materials
$10
2 Hours
Easy
By now y'all probably know that my favorite season is fall. To say that I'm in love with fall decor is a complete understatement and once I start seeing harvest merchandise in stores, especially Michael's, I get weak in the knees.
A few years ago Rob bought a truck load (literally) of barn wood from a local guy--the man filled the back of our truck up to the brim with old barn doors, shutters, beams, and the like, and Rob has made several different pieces over the years with the wood he purchased. This year, however, I decided to switch up my usual medium of pallet wood for barn wood, so I raided Rob's stash. Thus, the birth of this amazingly simple, yet charming sign.
A few years ago Rob bought a truck load (literally) of barn wood from a local guy--the man filled the back of our truck up to the brim with old barn doors, shutters, beams, and the like, and Rob has made several different pieces over the years with the wood he purchased. This year, however, I decided to switch up my usual medium of pallet wood for barn wood, so I raided Rob's stash. Thus, the birth of this amazingly simple, yet charming sign.
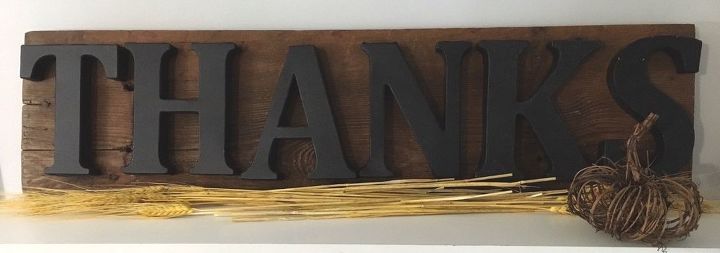
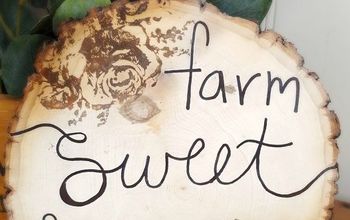
Are y'all as in love with this as I am?? I know this will fit right into our "new" farmhouse next fall. I can already picture it sitting on our dining room fireplace mantel with wheat shoots and various colors and sizes of pumpkins!

PRE-STEP 1: Before I go in to the supplies and steps, I just wanted to show the original barn door that I got the wood off of. This sucker was HEAVY (Rob had to help me get it up on a table so I could pull the pieces apart. If you are doing this project and you're going to use the wood off of an old barn door like I did, I suggest using a flat bar. Start at one corner and carefully pry the edges up first, work your way down one side, then the other. You can easily split the wood if you're too rough with it so take your time getting the wood separated. It's a pain and it's tough but it's so worth it when you see the beautiful barn wood slats in tact once you're finished.
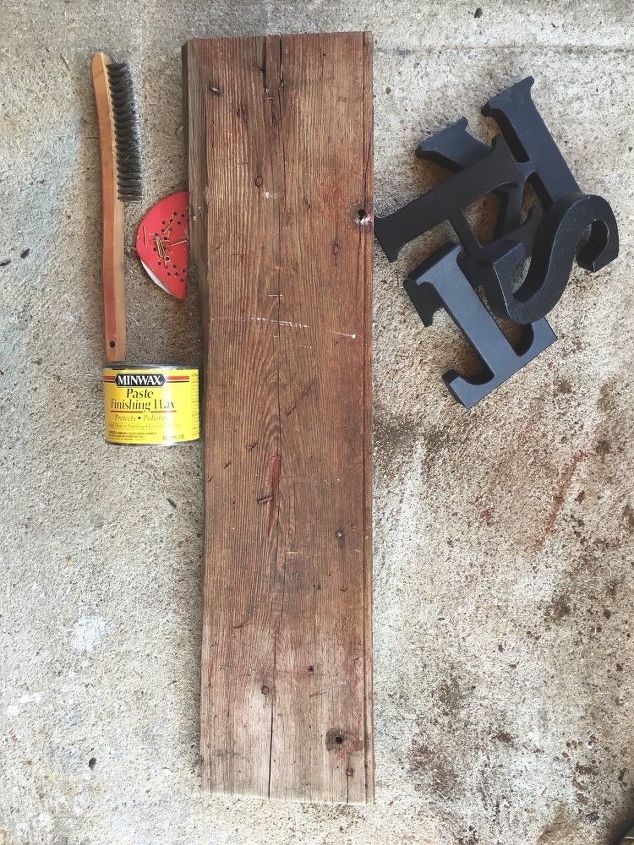
SUPPLIES:
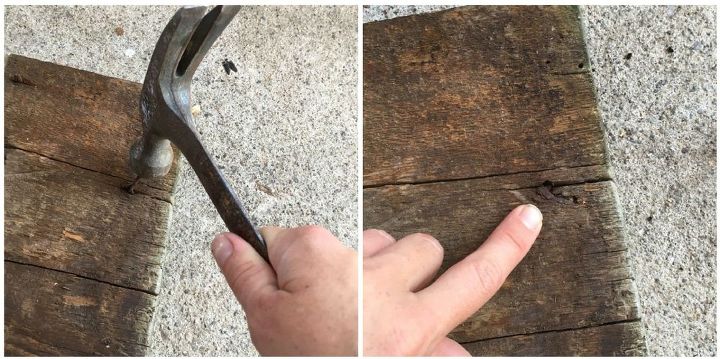
STEP 1: Hammer old nails
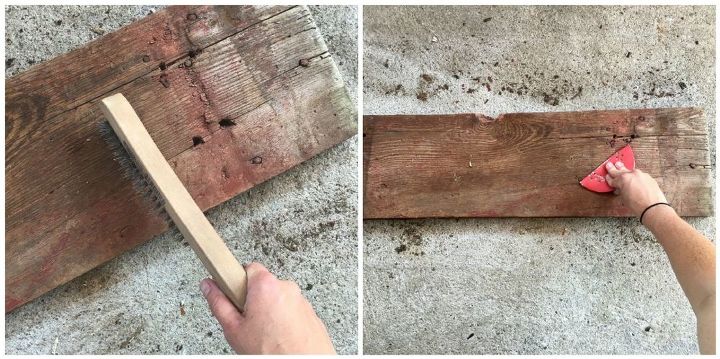
STEP 2: Clean up the wood
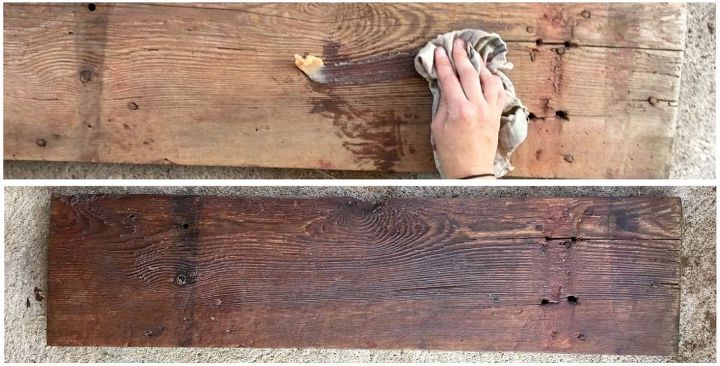
STEP 3: Apply wax
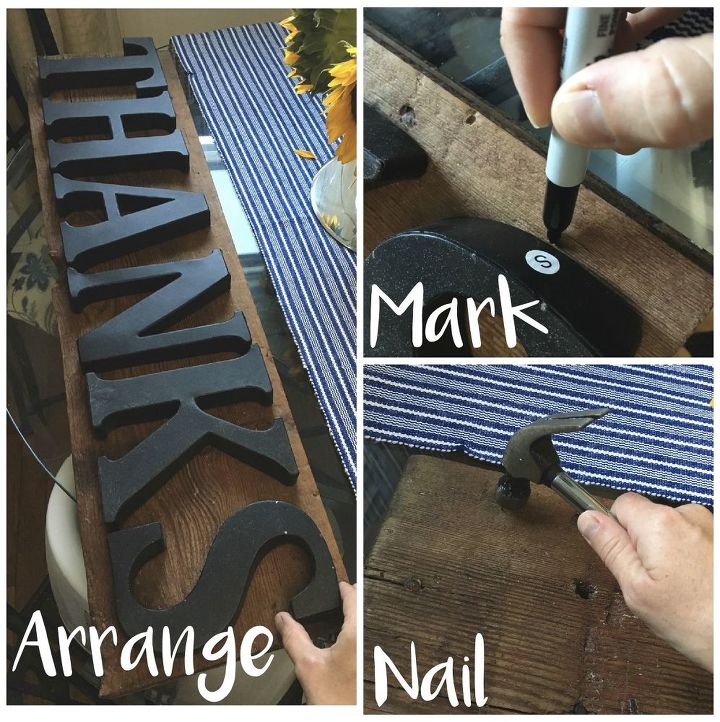
STEP 4: Add letters
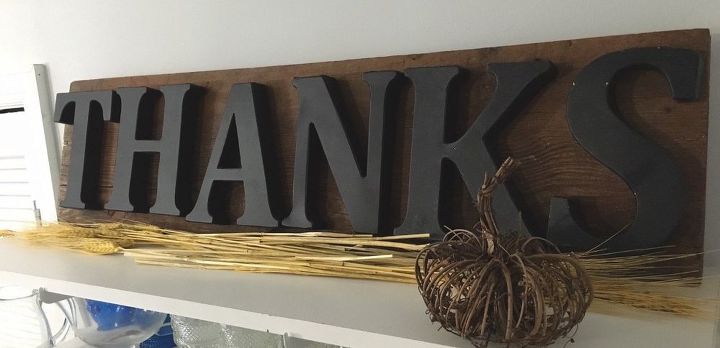
So what do y'all think?? I was so happy with how this sign came out. The only thing that I would like to figure out though, is if there's a better way to hang the letters. Rob said you can't really effectively glue metal so unfortunately, every time I take the sign down to store it, I'll have to take the letters down as well. If anyone has tips or suggestions on how to successfully adhere the letters to the wood where they stay on permanently, I'm all ears!
Comments
Join the conversation
3 of 31 comments
-
This looks great. Super job.
-
Use gorilla wood glue to fasten letters


Frequently asked questions
Have a question about this project?