


Puffy Paint + Mason Jars for an Awesome Centerpiece!

by
Maura White
4 Materials
I know decorating with mason jars is all the rage right now, so when I saw a 12 pack on sale and had a $2 coupon, I just had to bring home a case.
I would love to make jam - but it has been a bad year for our raspberries because it has been so dry out. So I decided to come up with something crafty to use my jars for in the meantime, until I get a load of fruit on my hands for some jam.
I found some really pretty glittery gold flourish stickers on Amazon that I wanted to incorporate onto the jars somehow. But I wanted it to be 3D and not just a sticker on a jar. I attempted to trace the flourish with hot glue to make the flourish pattern pop out and become 3D (I saw someone master that on Pinterest). When I tried it though, it came out terrible. The hot glue was just a mess and the jar ended up in the recycling bin. But I did have some puffy paint on hand that turns out is way easier to apply for a 3D effect. I finished it by adding some spray paint and dried lavender for a lovely, frugal way to decorate with mason jars!

Materials needed for your own mason jar vase:
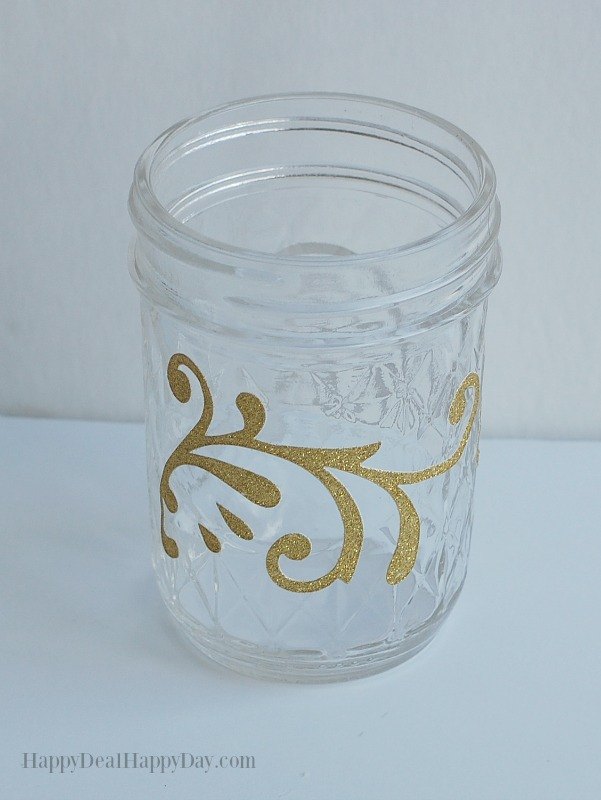
Take your 3 jars and your stickers and just place them in a pattern of your choice around the middle of each jar.
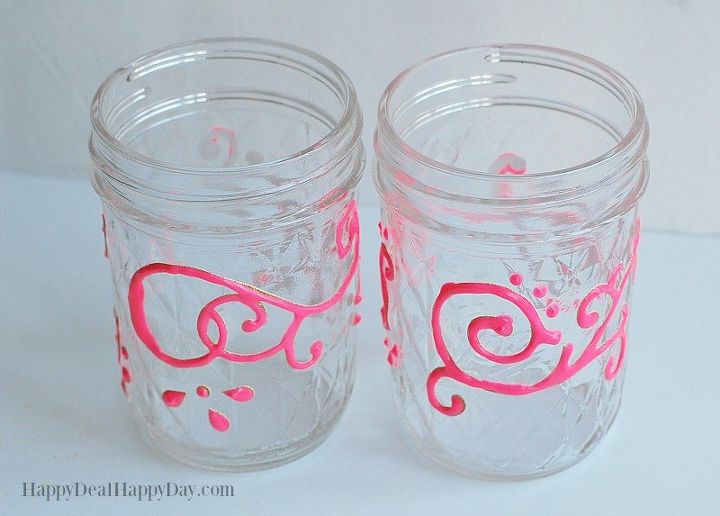
Then with a still hand and some patience, trace the flourishes with some puffy paint. This part can be forgiving if you make a mistake while tracing. You can easily incorporate the mistake into the pattern. I just used the flourishes as a guide because I know I could not free hand it as nicely.
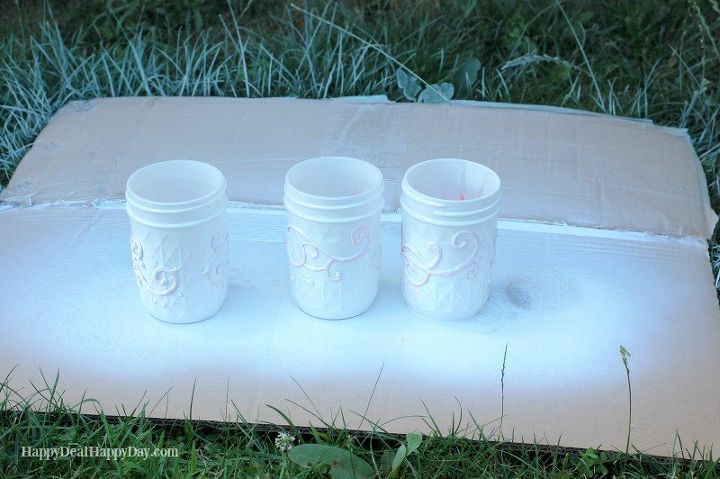
After you let your puffy paint dry (I waited 24 hours) you will want to put on 3-5 coats of white spray paint. Thinking back on this now, it would have been much easier if I used white puffy paint so that I didn't have to worry about covering up that bright pink. But pink was all I had on hand, so I just went with it. :) When spray painting, it is always better to add on more thin coats rather than one thick coat of paint. Thick coats of spray paint just end up dripping and makes it look a mess.
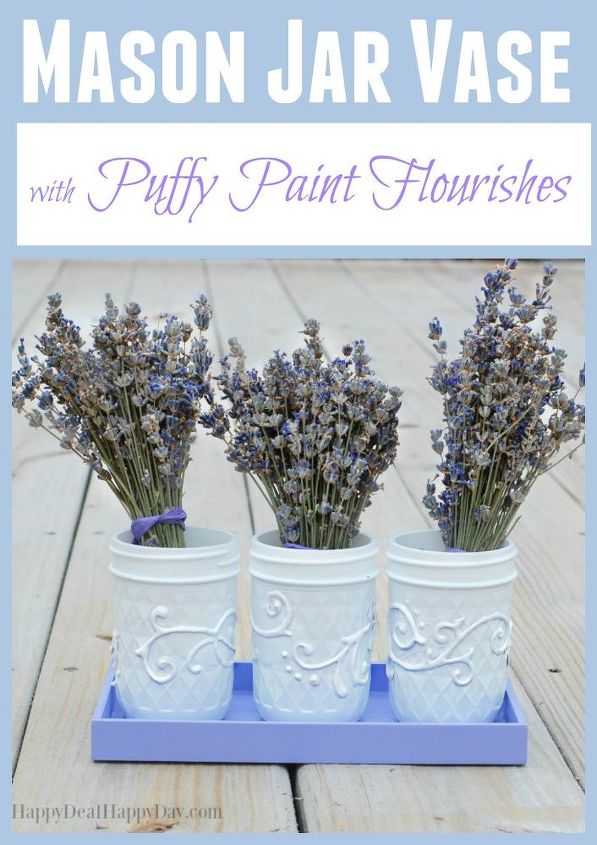
Add your favorite flowers and you have a great centerpiece!
Want more details about this and other DIY projects? Check out my blog post!
Comments
Join the conversation
3 of 46 comments
-
Great idea to do with the grandkids!
Thanks!
-
This is a great idea. Thank you. I’m going to try this (eventually😉) with designs on paper taped to the inside of the jar as a pattern. If it turns out nice, I’ll post a pic.


Frequently asked questions
Have a question about this project?
Might. How long between the spray coats?
Can you use these as canisters to hold food? Is the spray paint safe for food?
Wonderful idea. Looks so homey. Did you spray paint the insides of the mason jars?