


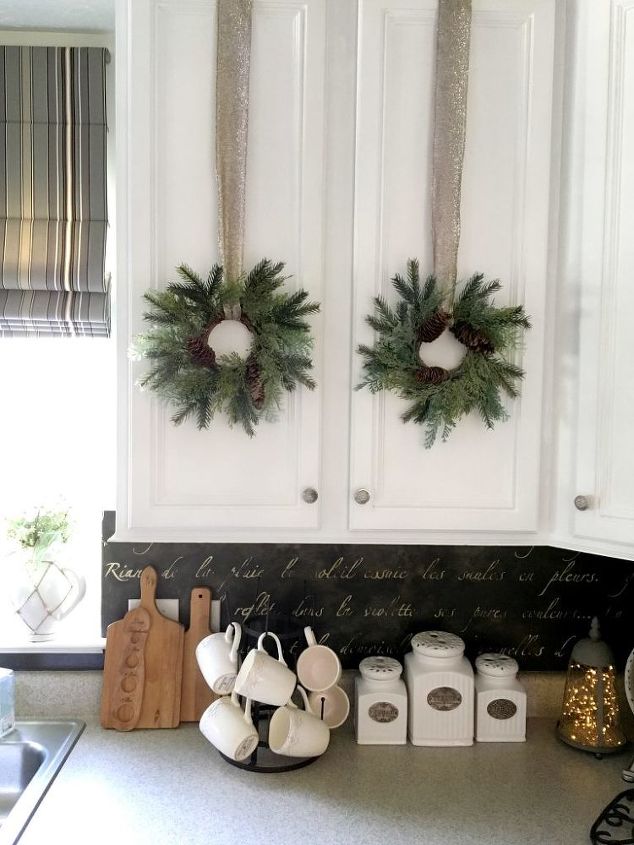
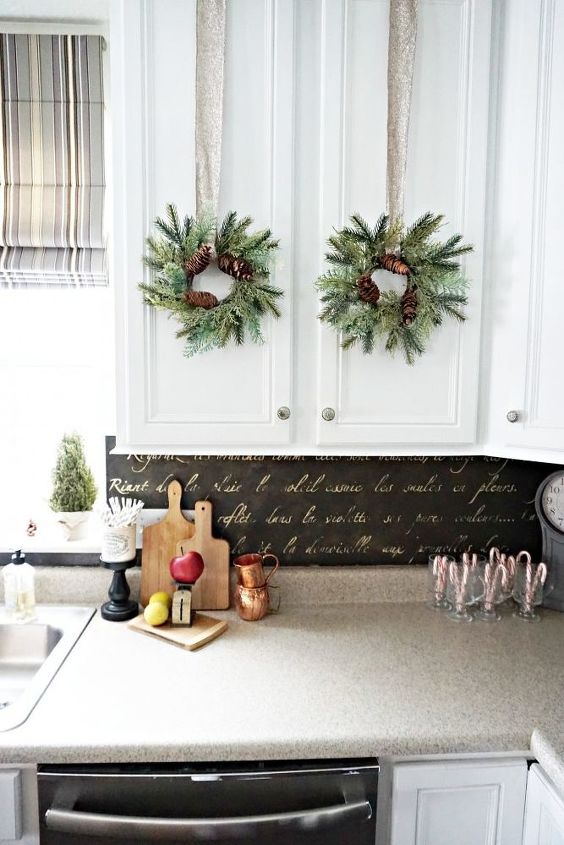
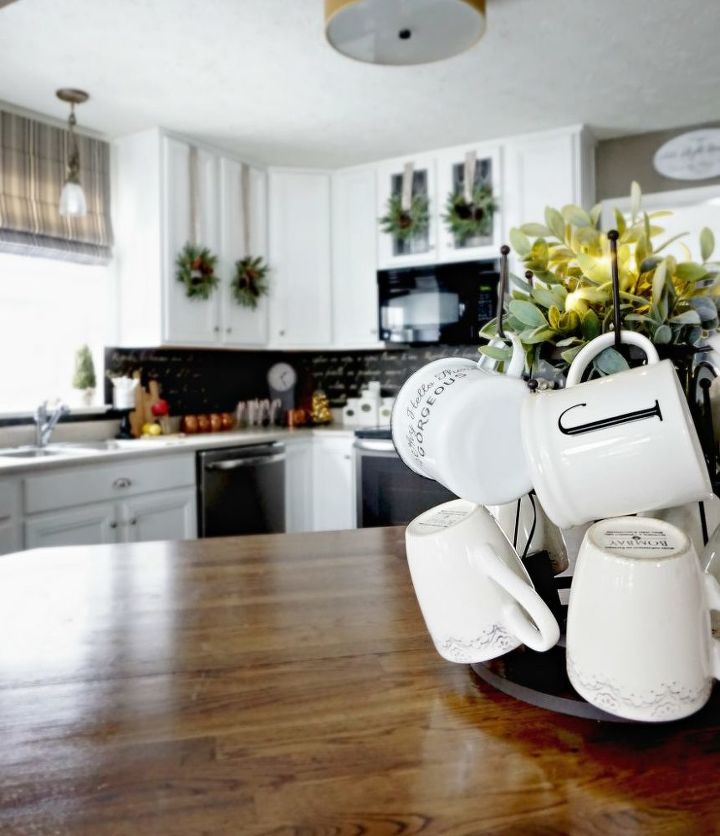
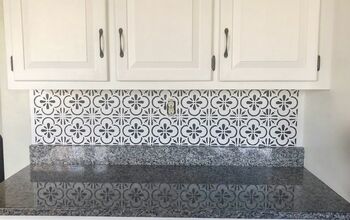
DIY French Stenciled Backsplash
In this tutorial, I'll share stenciling tips to give your kitchen backsplash a fresh new look. If your wall has damage I'll also share my tip on how to hide a damaged wall with texture using a knocked-down wall effect. USE A STENCIL OF YOUR CHOICE! These days, you can also choose TILE patterns in the form of a stencil which can fool the eye, yet save you even more money! You can do this project (depending on the size of the kitchen) for very little money.
About me: I'm Jeanette, the blogger behind Snazzy Little Things. In my Budget Home Makeover Series, I help you create a roadmap to determine the best approach to add value to your home without spending a fortune. I help you visualize your spaces, then choose the lowest hanging fruit that will give you the biggest bang for your buck. Your roadmap will include the best budget DIYs that are on trend, look high-end, and to help you fall in love with your home again.
AFTER: My entire budget kitchen remodel included the following steps:
- Cabinets painted in a durable finish (that doesn't yellow)
- Wood trim embellishments added
- Updated drawer pulls and hardware
- Stenciled Backsplash (today's post) using a stencil of your choice
- Updated Lighting
- Roman shade
- Repurposed Island
Total kitchen remodeling cost: under $1600!
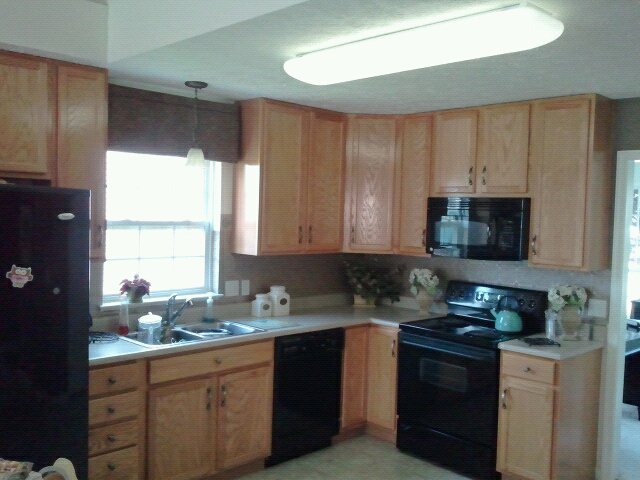
BEFORE: Builders grade oak with deep wood grain
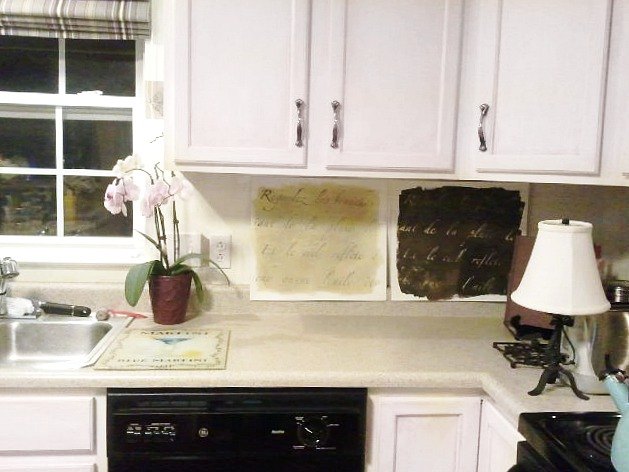
1) Choosing Your Stencil + Color Palette
Before you buy any materials...my first suggestion is to visualize your entire kitchen in it's finished state. (I use Polyvore to do this, a free app!) Use swatches (as pictured) to actually see your ideas in action. Let your swatches sit a few days. See how the light plays on the colors throughout the day.
Now is also the time to start shopping online for the stencil pattern you'd like. If a scripty French poem isn't your ideal choice, we can also work with the many beautiful Moroccan tile patterns on the market as well.
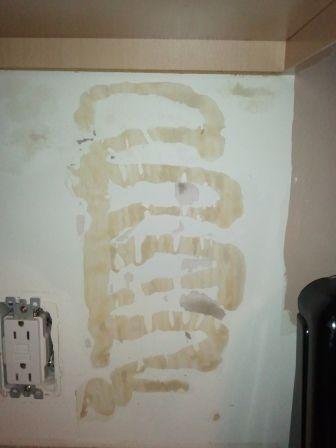
2) Assess the condition of the wall
Does your wall have cosmetic issues? If it's not a smooth surface, then a textured wall may be in order. (If you prefer not to texturize the wall, you can skip the wall texturing portion of the tutorial).

3) Homax Wall Texture Knockdown
Using a plastic spatula / wall scraper, I sprayed the Homax directly onto the spatula, then immediately applied to the wall, applying in a criss cross pattern, leaving some of the spatula marks visible. This is OK! Continue creating a criss cross pattern all over the entire backsplash. Just work with it while it's wet to make the texture look natural. This approach helped cover up the glue disaster in the previous
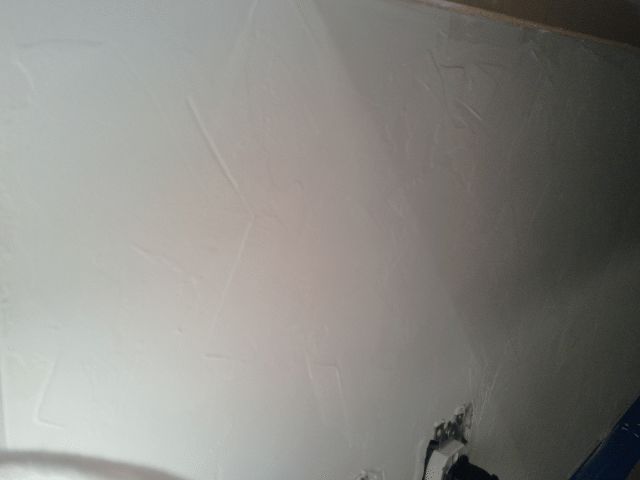
4) Let Dry 24-48 Hours
This approach conveniently covered up the glue disaster, bumps and and imperfections. (If you have holes in your walls, this texture should only be applied after you properly patch the holes).
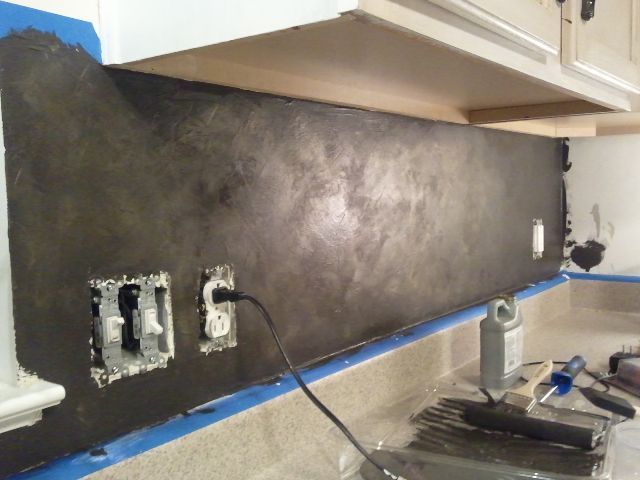
5) Tape Off The Counter + Paint:
Use the color of your choice. I chose an interior latex paint in a high gloss. I painted the wall like I would any other wall. I trimmed corners and edges using an angled 2" synthetic brush. Then a wall roller for the main area.
6) (OPTIONAL): Before stenciling, dry brush another color
If you look closely -- before I stenciled I decided I didn't want a "solid" color wall. To give it a more natural looking finish, I dry brushed a lighter patina overtop before applying my stencil. Just dip your brush, squeegee it by wiping off the excess paint on a paper towel. Then apply the second layer in a criss-cross pattern very lightly to give it a more natural finish. You can wipe off the excess brush marks as needed.
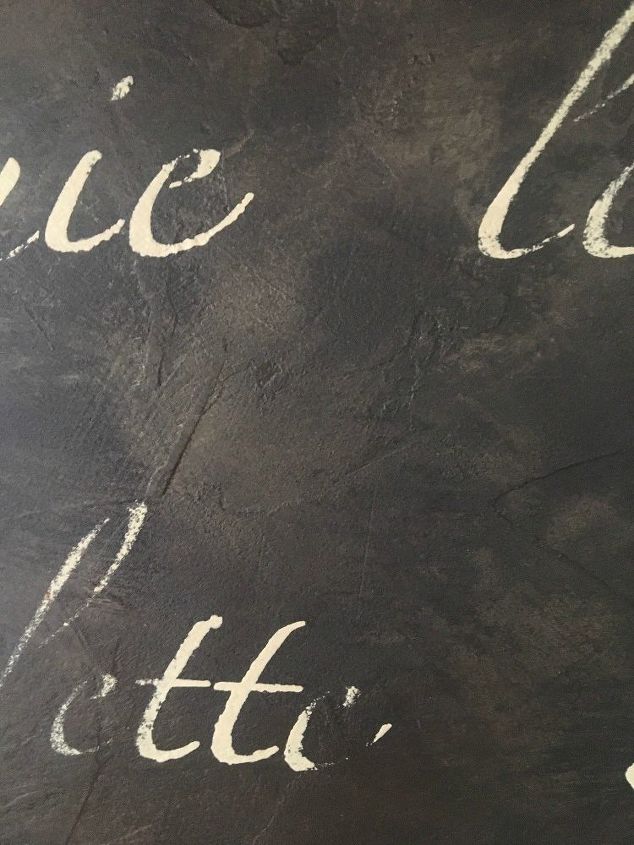
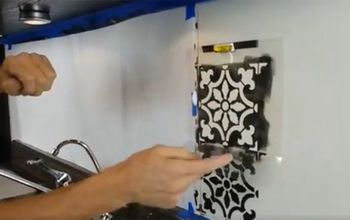
7) Apply the Stencil (Some tips)
- Tape up your stencil where you'd like it to be.
- Using a foam roller (see link in materials), squeegee the excess paint off of your roller (as shown) onto a piece of paper and paper towel. This reduces bleed.
- Roll the foam roller with paint across your stencil template.
- I always pull back my stencil very carefully to ensure it looks ok. If any bleed occurs I try to wipe it off but in this case I liked the rustic, imperfect look.
- Carefully remove the stencil. Once the previous stencil is dry, repeat.
- Continue lining up your stencil and make sure it's not going uphill or crooked.
- If any bleed through occurs, you can use an artists brush to touch up.
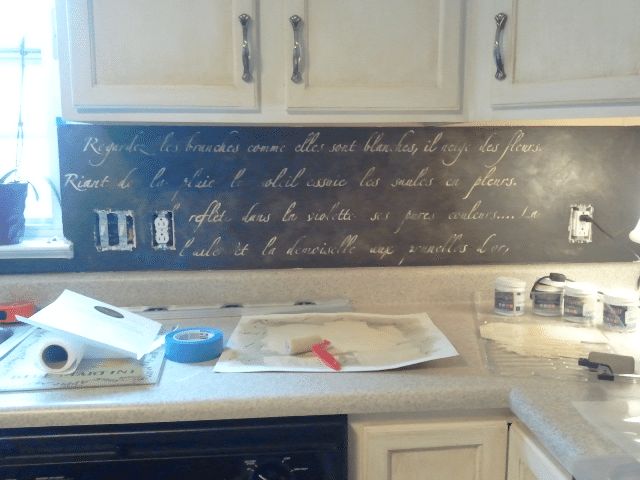
8) Final Top Coat
Apply a water based polyurethane (as seen in the materials list below. This particular top coat won't yellow over time. Wipe down gently with a soft cloth (microfiber works well) to keep clean!
More projects coming soon to share all the steps I took to update my kitchen.
- DIY Classic Wainscoting
- 12 Ideas to Embellish Your Kitchen to Look High-End
- Painting builders grade cabinets (and reducing wood grain)
- Adding trim to your cabinets
- Add faux leaded glass to your plain cabinets
- Repurposing your kitchen island using butcher block
- Installing flooring
- Painting your stair railings
- Make your own wood trim
- Installing frieze moulding
- How to paint leather furniture
- Making over a small laundry room
- And much more!
I help you create a roadmap to determine the best approach to add value to your home without spending a fortune. We will visualize your spaces, then choose the low hanging fruit. Your plan will include the best budget DIYs that are on trend, look high-end, and to help you fall in love with your home again. -- Jeanette @ Snazzy Little Things
Resources for this project:
See all materials


Comments
Join the conversation
-
Awesome job....
-
I love the wreaths hanging on the cabinet doors!


Frequently asked questions
Have a question about this project?
Love your kitchen! Where did you get the wreaths and how are they hanging from the top of cupboards?
What paint color and brand did you use on you cabinets. I love it
I loved this idea for my kitchen. I ordered “the stencil of my choice,” but it looks nothing like the one you have for your backsplash; your letters are bigger and line spaced farther apart. Did you do anything different when applying the paint to the stencil, such as skipping a line? Thank you in advance, Mary