


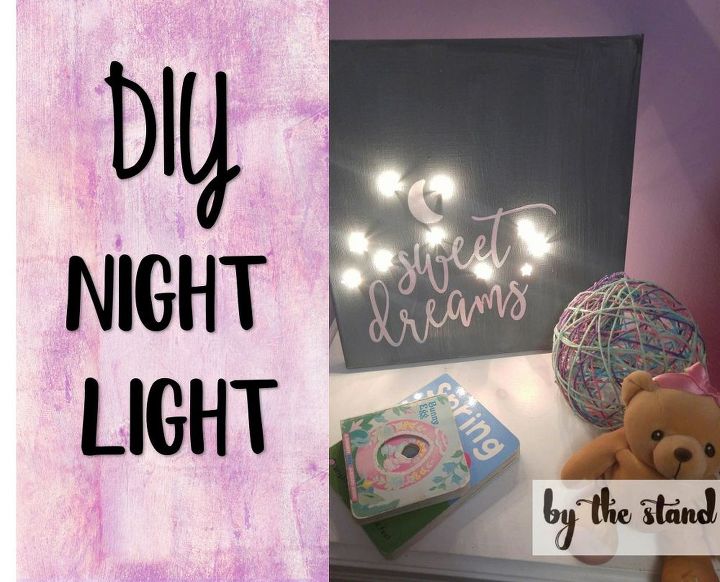
DIY Night Light

by
Holly Grace
$15
2 Hours
Medium
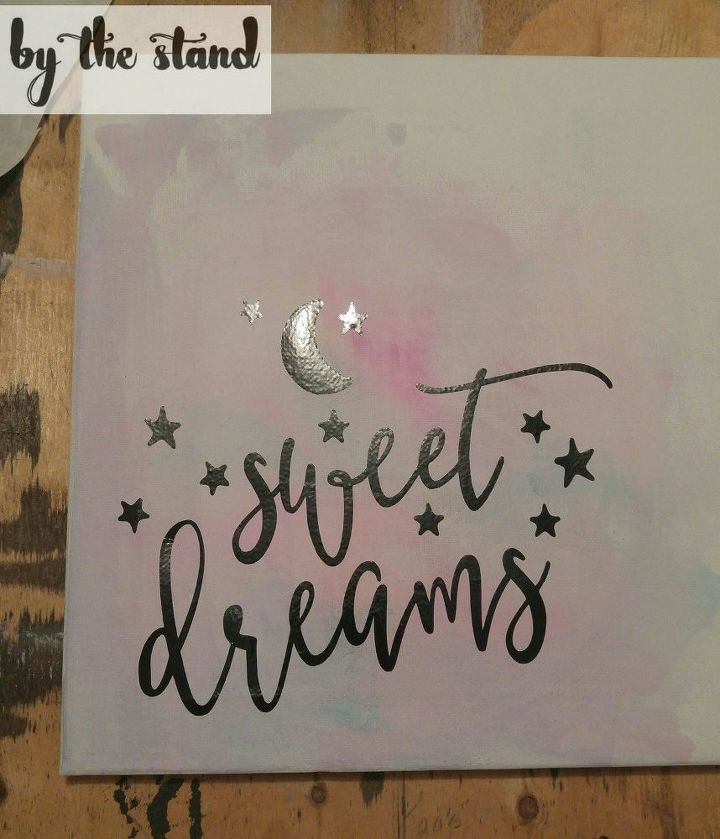
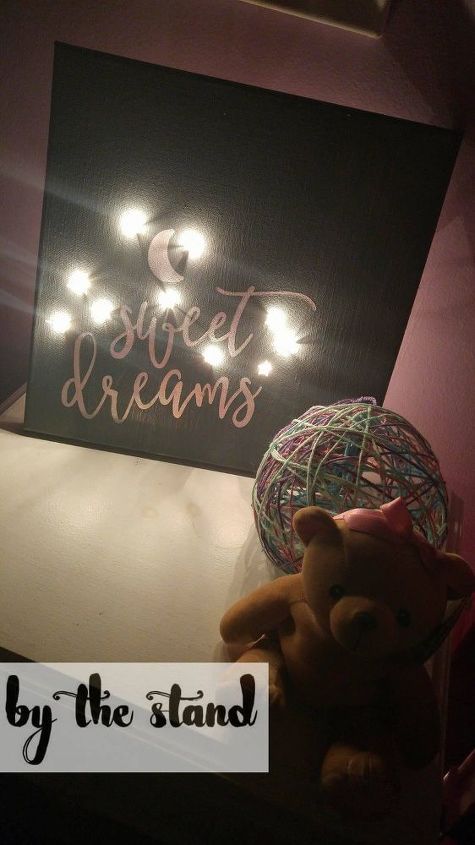
Good evening, everyone! I have a cute little project to share with you all tonight. Just in time for bed, too! My daughter has been telling me for awhile that she wants a night light. Since she is seven, I feel like she is a little too old for the Disney princess plug in. I wanted to make her something that would serve as both night light and decor. Look at me pulling DIY double duty!
Anyways, take a look and see what I came up with!
Anyways, take a look and see what I came up with!
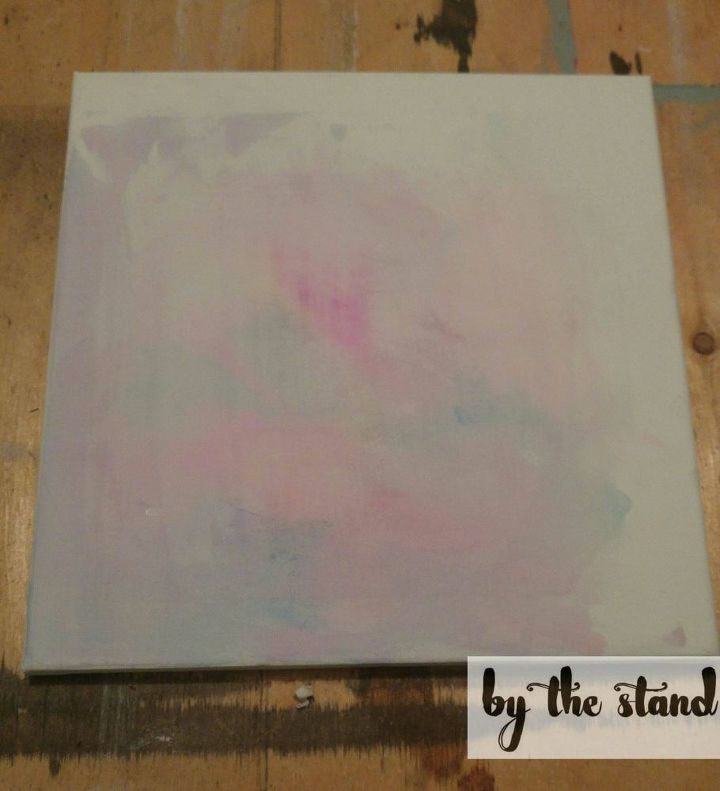
I started with a 12″ x 12″ canvas. This canvas I had already painted using my coffee filter water color technique. You can check out that project either on my Hometalk profile or my blog.
I found this file on an AMAZING site called Lovesvg.com. This site is seriously THE best! If you own a Cricut or a Silhouette, you are going to want to remember this one! All there cut files are completely free. They are personal use only… so no slapping their files on mugs and selling them! If you are feeling generous you can buy them a coffee.🙂 There is a tab where you can click to donate.

After I weeded my vinyl, I had to put it on my canvas. The method I use to transfer vinyl is simple. I buy clear shelf liner from Dollar Tree. It is $1.00 a roll, which is way better than the Cricut brand. Cricut Transfer Tape isn’t a terrible price. It is $6.99 for a 12″x 48″ roll, but with the Dollar Tree you get 18″ x 54″ and the shelf liner works just the same! I am all about that bargain!
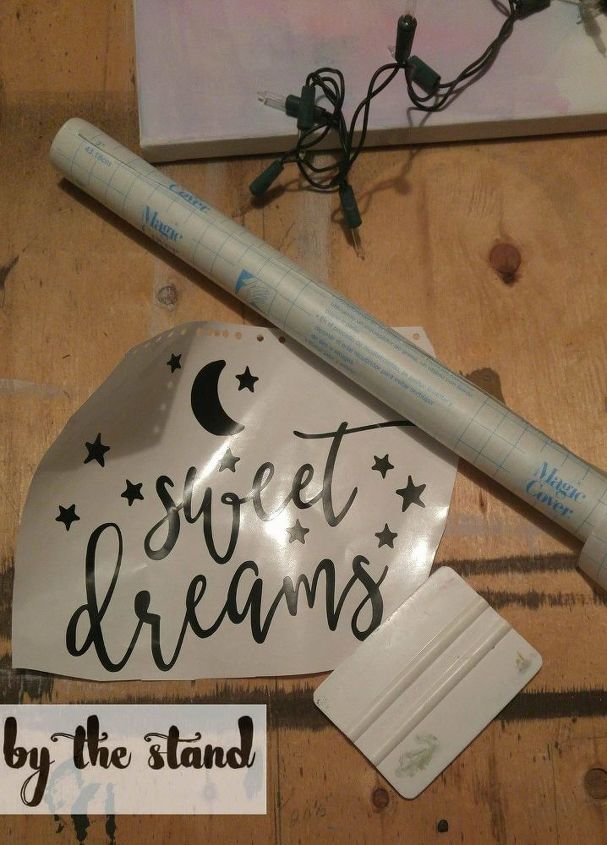
I start by cutting a piece of clear shelf liner that is the same size as my decal. I use my flat scraper to smooth out any air bubbles, starting from the middle and working my way out. I place the decal onto the canvas and again smooth out any air bubbles, starting from the middle and working my way out. Always start in the middle! I have learned this the hard way.
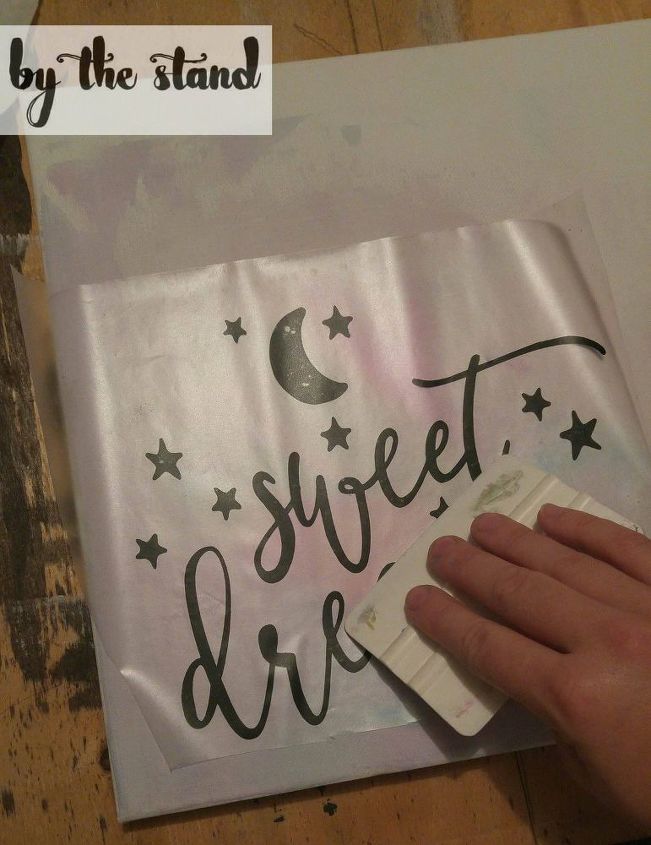
I carefully remove the clear shelf liner and the vinyl decal stays behind. Super simple! If you have a vinyl cutting machine, I would love to hear your tips, too!
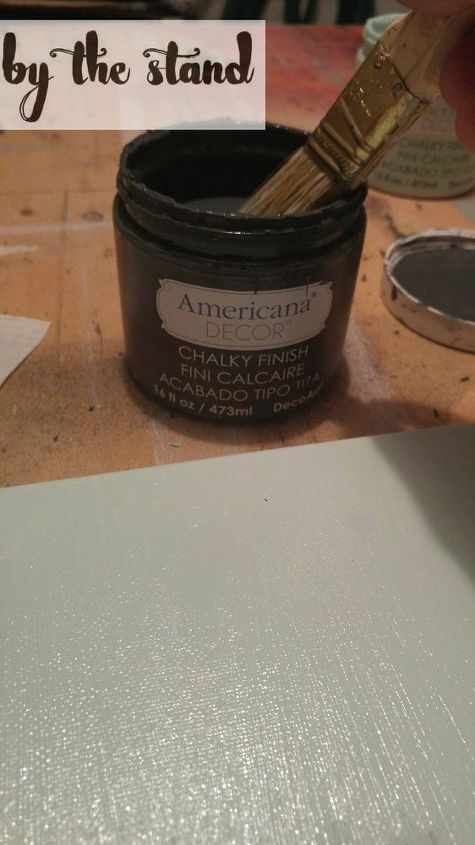
To paint the canvas I use Americana Decor Chalky Finish. I have said it before and I will say it again — this paint is awesome! (As you can probably tell based on my well loved canisters) I use this paint all the time! You can check out their whole line of colors here.
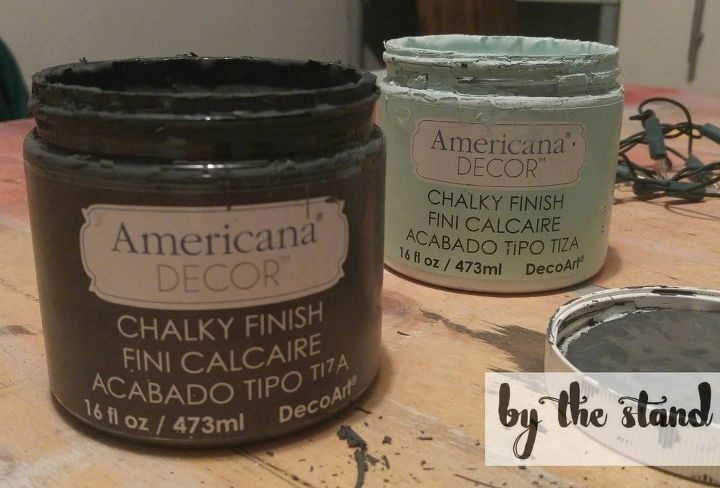
For this project I sort of mixed these two colors. I painted the canvas first with the lighter shade (Refreshing), and then while it was still a little wet, I went over it with the darker shade (Relic). I don’t have any great pictures of me painting, as my photographer (my seven year old daughter) had to go to the bathroom during this step! lol
I waited for the paint to dry and then I removed the vinyl decal. To do this I used a sharp dental instrument and tweezers. How does one acquire a dental instrument, you ask? Well, for those of you that don’t know, I use to be a dental assistant for 11 years. It was part of my journey to get here, but I am glad that those days are over! One of the great things that came out of that job is this tool! It works so well for DIYn’!
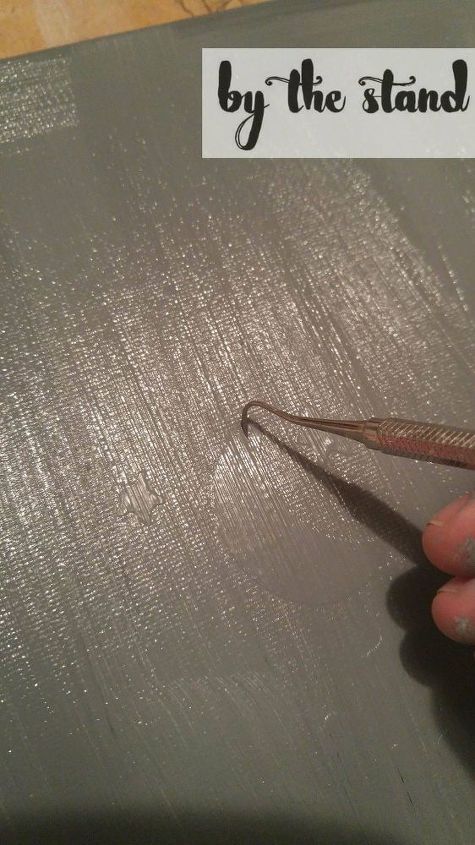
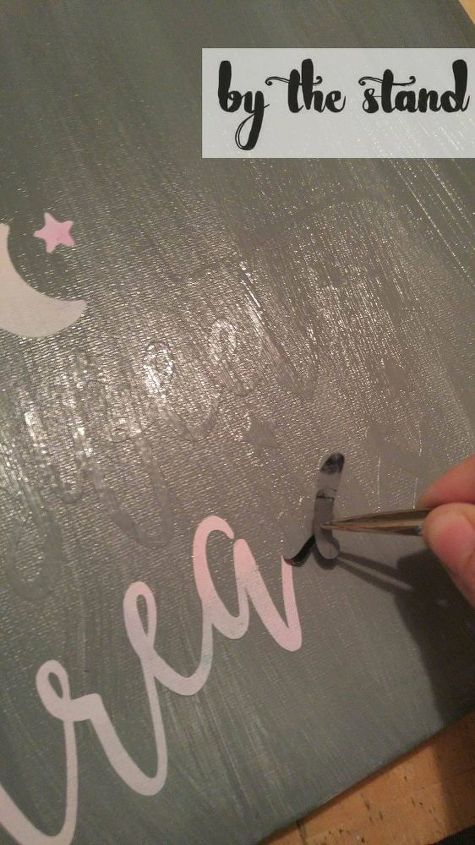
Once I had all the vinyl removed, it was time to make the holes for the Christmas lights. To do this I again used my trusty, sharp dental tool! You can see in this video how it is done.
{
"id": "3541543",
"alt": "",
"title": "",
"video_link": "https://www.youtube.com/embed/qfQ9NTDjsj8",
"youtube_video_id": "qfQ9NTDjsj8"
}
{
"width": 634,
"height": 357,
"showRelated": true
}
Once I had the holes all set, all that was left to do was put in the Christmas lights. This was super easy!
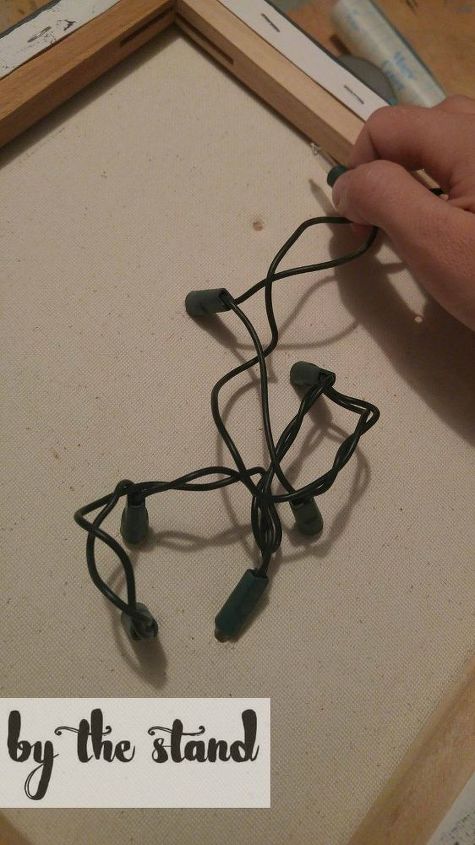
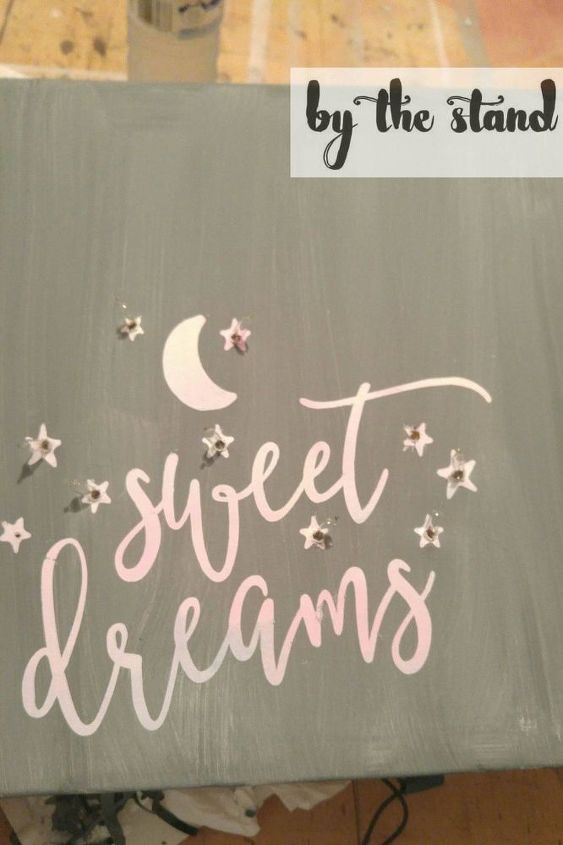
This is what is looks like before the lights are plugged in.
Plug it in, and just like that my daughter has a new night light!
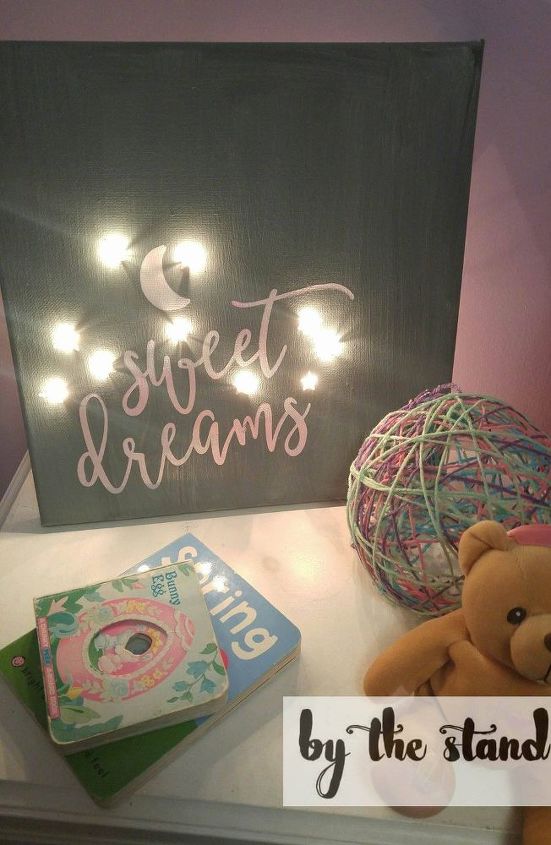
What do you think? Let me know in the comments below!
Want more details about this and other DIY projects? Check out my blog post!
Comments
Join the conversation
3 of 98 comments
-
Love this.
-
That is super cute! I love Cricut!


Frequently asked questions
Have a question about this project?