


How to Make Pressed Copper Penny Wind Chimes
6 Materials
1 Day
Medium
Whether you want to invest a lot of time and materials, or create a simple project with only a few items, this tutorial will provide the how-to, you provide the creativity and a few supplies.
(Be sure to click the video in this tutorial to hear how dainty and delicate the chime sounds.)
A basic, lightweight, dainty chime can be assembled and hung the same day. Grab a few handfuls of pennies, some fishing line, a stick, and a drill bit. The rest is up to you. Add beads, sparkling things, copper adornments, these are just a few ideas. Although the pennies do not have to be pressed, they do make a lovely sound. They can otherwise simply be drilled, and suspended.
Come along, and let’s have fun while making a quick treasure for the garden, front porch, deck, or window. Hang one from a limb of a tree in your backyard, front yard, or both. Make them as gifts. Start now, and by the time the holidays arrive, you'll have plenty to give away.

Easy to Make Copper Penny Wind Chimes
Using 45 copper pennies (dated 1962-1982 for higher copper content / better sound) that had been pressed upon a railroad track, I drilled holes in each of them, then strung them with fishing line hanging from a piece of driftwood, adding pretty little beads along the way. The result is a dainty chime with a delicate ring when a breeze comes along.
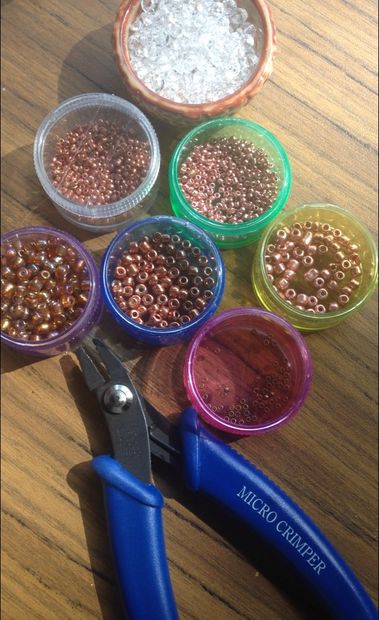
Beads - Less is more
Although optional, including beads and baubles will work wonders to add personality to your chime. Keep in mind, the more beads you add, the heavier the strands will be, which will require additional wind force to create sound. Crimping beads are a great help, which will eliminate the need for ugly knots in your chime.
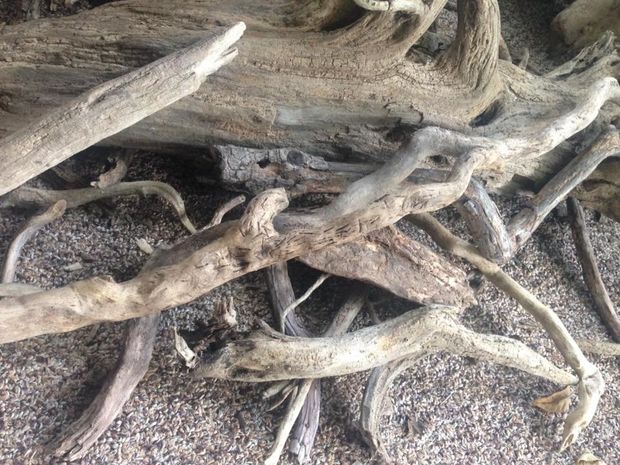
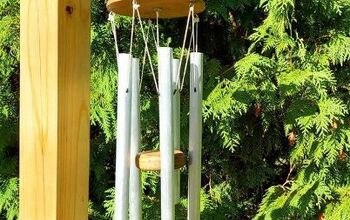
Driftwood makes an excellent support beam!
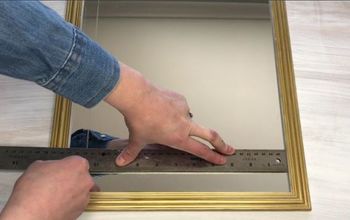
Using a piece of driftwood, a stick, a length of bamboo, or any sturdy piece of material to support the pennies, drill holes along the stick. In these holes will hang the fishing line with copper pennies, so be sure to space them close enough to strike one another in a breeze. It is a good idea to protect the chime from outdoor elements by brushing or spraying on a few coats of polyurethane.
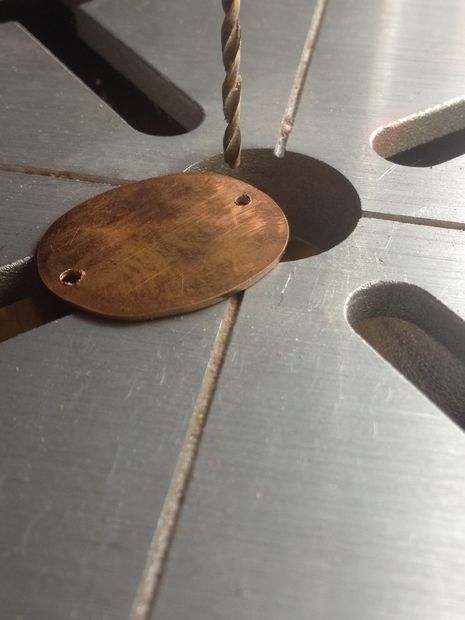
Wear safety glasses when drilling holes.
Using a steady hand, or a drill press, and a drill bit intended for metal, carefully drill a hole at the top and bottom of each copper penny. Although the pennies hanging on the outside of the chime will not host additional coins below, you can add a pretty bead to the bottom of these pennies with a jump ring.

Strings are secured with crimp beads at top
Once you've drilled holes in the support beam and pennies, you may begin stringing them. Be sure to add a string to the outermost left and right holes in the beam to hang the chime.
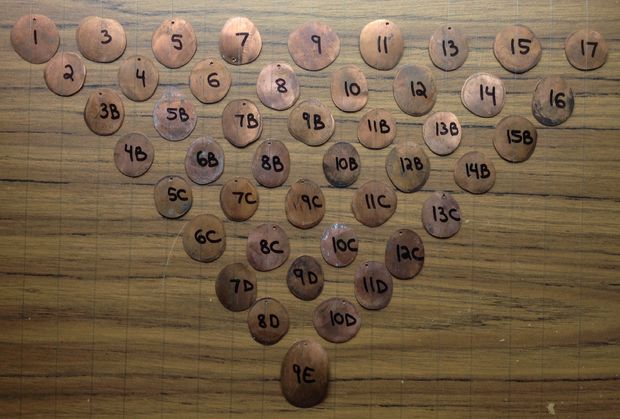
Look closely to see the string placement.
It helps to line the pennies up prior to stringing them, so you have an idea as to how they will hang. Note the way the penny on the top row, #7 for example, will support three additional pennies. #9 will support four more, etc. Look closely at the photo, and you can see the string that shows the way they will line up.

Making progress, one penny at a time.
Continue to add pennies in even and odd-numbered holes along the top of the support bar. Each successive row will host fewer pennies than the previous row. Keep going, keep securing the pennies with crimp beads, and before you know it, you'll be finished! Add a jump ring and a pretty bead to the outer-most pennies, and you're set to hang up your new treasure!
{
"id": "3545601",
"alt": "Click to hear the sound of a 45 cent chime.",
"title": "Click to hear the sound of a 45 cent chime.",
"video_link": "https://www.youtube.com/embed/BS6r94yw6cU",
"youtube_video_id": "BS6r94yw6cU"
}
{
"width": 634,
"height": 357,
"showRelated": true
}
Remember to use pennies with a higher copper content, and not those with zinc and tin, or they will sound tinny and cheap. A few are fine, but for the most part, copper pennies not only clean up better, but sound sweeter. :-) Enjoy!
Resources for this project:
See all materials


Any price and availability information displayed on [relevant Amazon Site(s), as applicable] at the time of purchase will apply to the purchase of this product.
Hometalk may collect a small share of sales from the links on this page.More info

Want more details about this and other DIY projects? Check out my blog post!
Comments
Join the conversation
2 of 104 comments
-
Jane, yes a vise does work.. The back end has a small flat area and that is how I flatten the pennies, because here in Az, NO stores carry anvils!!! and I mean NO hardware store,,, sometimes you do learn to regret leaving things behind when you move...😒😭
-
While pennies on a train track will not cause it to derail placing them on the tracks is trespassing and the coins can be sent flying into the surrounding area and can become imbedded into whatever is around. It is dangerous.


Frequently asked questions
Have a question about this project?
How did you flatten the pennies.
Isn't that illegal to destroy the pennies?
I love this idea, but the question I have is ,,did you string all the pennies on the one line or did you cut each penny string ?? I will be copying this idea !! I love the look and sound...