


Easy Faux Copper Finish on Old Tub
2 Materials
In an antique store on the Eastern Shore of Maryland, I spied and swooned over an antique copper wash tub. But I just wasn’t sure I wanted to plunk down $120 for a tub not knowing what treasures awaited as this was the first of 10 days of antique/junk store visiting.
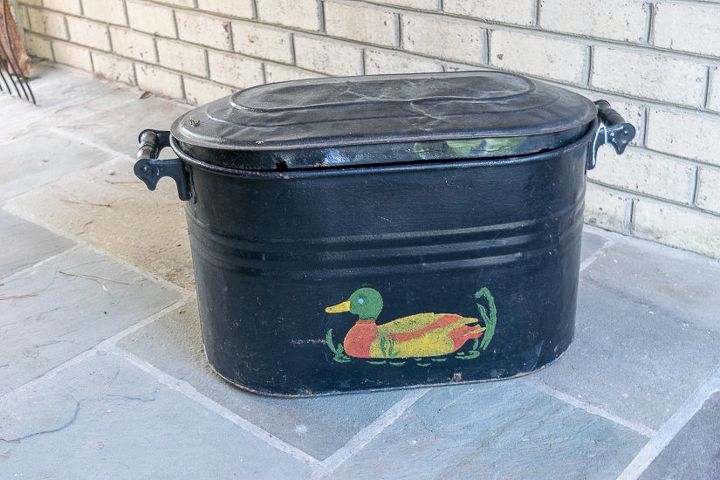
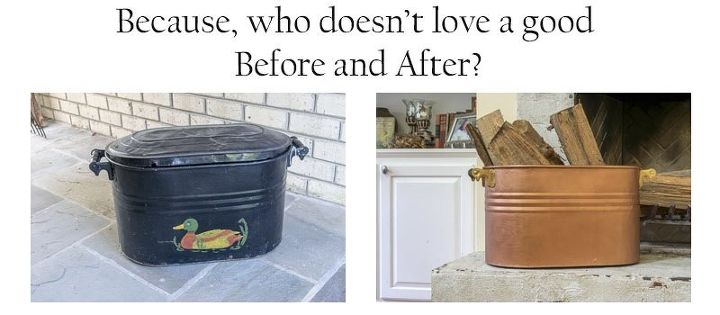
You know what I mean, it was just the first day of our trip and what if….? So, when I discovered a sad little metal tub (complete with painted duck) for all of $10, I was confident that I could jazz it up to look very similar to the authenic copper one and still have spending money for the rest of our travels.
You know what I mean, it was just the first day of our trip and what if….? So, when I discovered a sad little metal tub (complete with painted duck) for all of $10, I was confident that I could jazz it up to look very similar to the authenic copper one and still have spending money for the rest of our travels.
This was a seriously simple project that also fell into the almost ‘immediate gratification’ category as well. A complete win-win, if you ask me. When I went to Amazon to get some paint as I had recently used up what I already had, I discovered a different brand that also had a related primer product, Modern Masters. I opted to go that route to make sure that my faux copper finish efforts weren’t for naught if the paint didn’t adhere to the surface. And while I did not want to go the oxidized route, they do have an oxidizing solution if you want your copper ‘thing’ to have that beautiful verdigris.

After I finished sanding, I wiped the whole thing down well with a damp rag and let it dry.
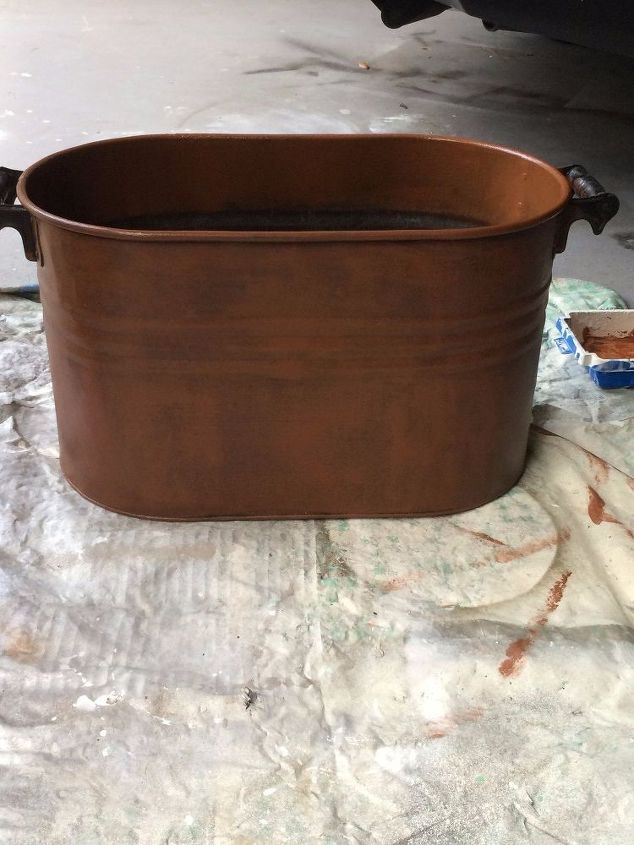
ust applying the primer made a HUGE difference and I was already feeling very good about my project. But now it was time for the REAL stuff…the copper paint.
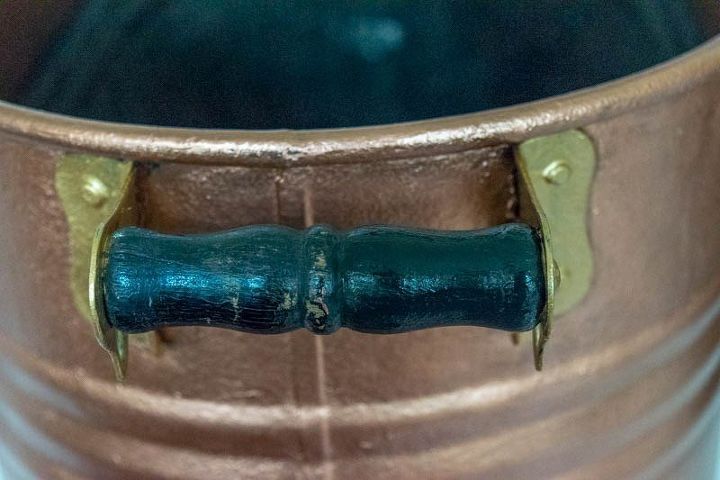
I gave the entire tub a good spray of Krylon Clear Acrylic Spray.
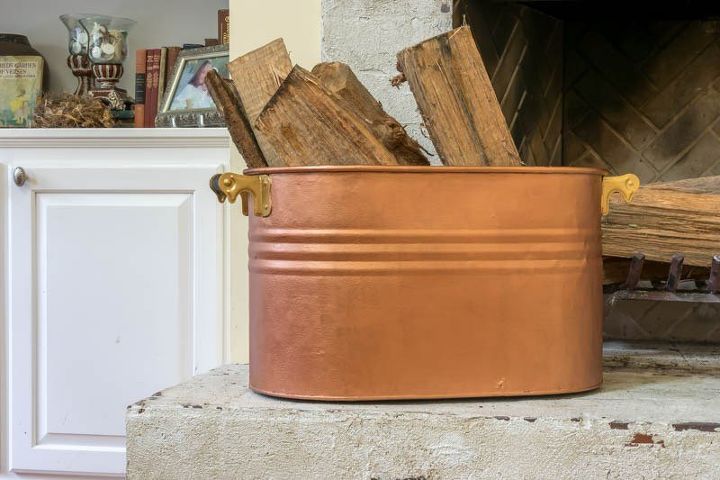
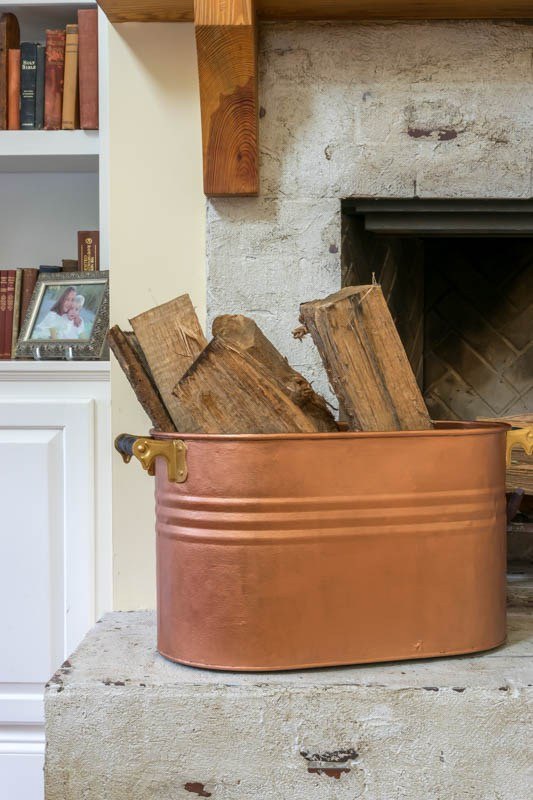
AN YOU EVEN BELIEVE IT’S THE SAME TUB? CERTAINLY THIS IS A PERFECT ‘BEFORE AND AFTER’ OPPORTUNITY.

Want more details about this and other DIY projects? Check out my blog post!
Comments
Join the conversation
2 of 41 comments
-
Great job...looks like real copper!!!!
-
LOVE IT !!! I was just trying to think of sumthin to place wood/logs n 4 roasting marshmallows this fall/winter season ( Hurricane stay away , cool air I'm ready 4 ya. lol) Thx 4 the faux copper wash tub idea.


Frequently asked questions
Have a question about this project?