


Chippy Goodness + Petite Dresser Transformation

5 Materials
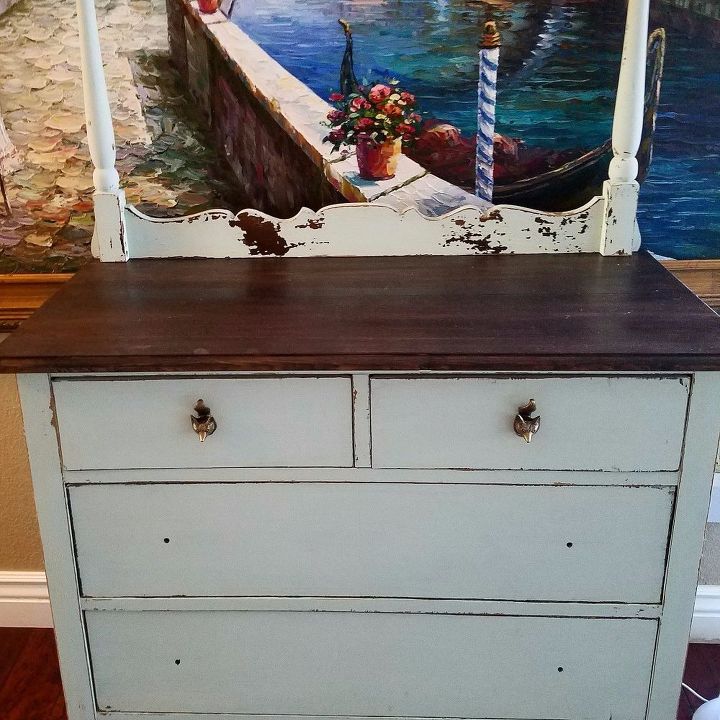
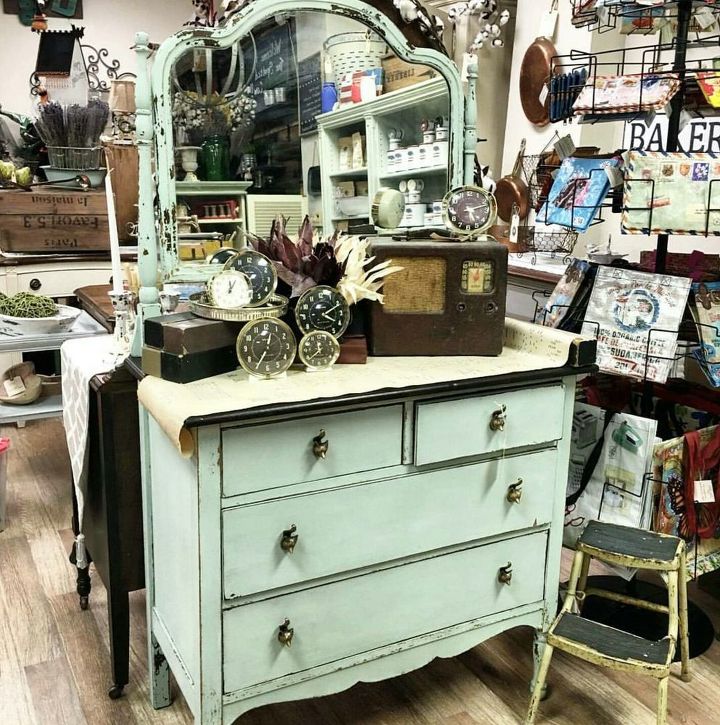
Olde Barn Milk Paint in Letterbox transforms this drab dresser! From the moment I saw this dresser I had a vision for how it wanted to look. I found this one for $50 in a local Facebook group! Better than Craigslist for me! Call me crazy, but I usually get a feeling about pieces when I know they are right for me. If I don't get vibes from it, I don't bring it home because it will just sit there. I have a garage full of furniture and get the look from Toni every time we open the garage to prove this!
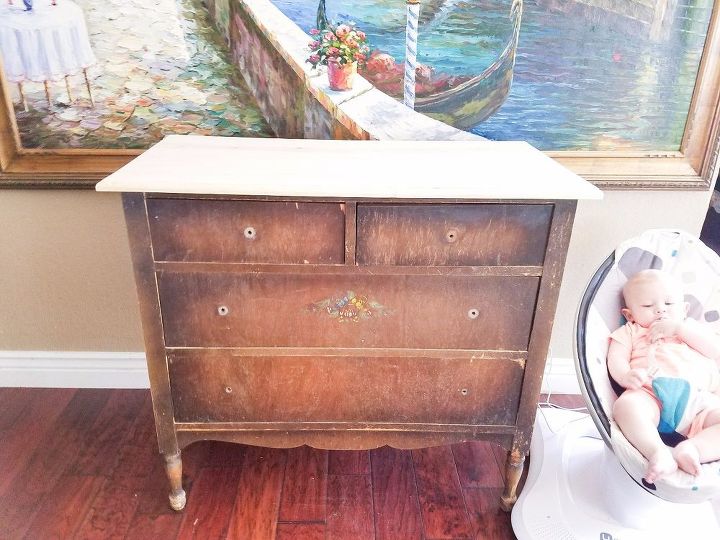
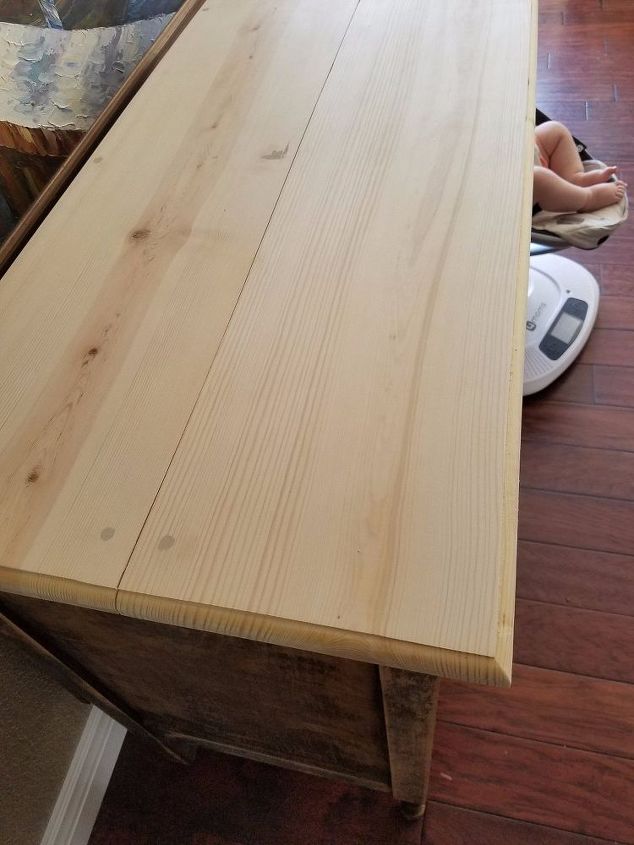
We removed the original top on the dresser because it was badly damaged and I wanted a more rustic top. Toni cut it to size and beveled the edges for me. I'm not really allowed around sharp object since I cut myself badly making spaghetti a few years ago...
Once it was cleaned and prepped we attached the top and I stained it with a couple coats of CeCe Caldwell Kuhkui (my personal fave). If you have not tried her stains hurry. GO NOW. They are absolutely amazing! Before applying the last coat of stain I mixed up Letterbox, our light minty green color. I always mix my Milk Paint either before prepping my furniture or before staining so that it had time to settle and dissolve completely. I'm not very patient so this works for me. I'm busy working while it's busy absorbing!
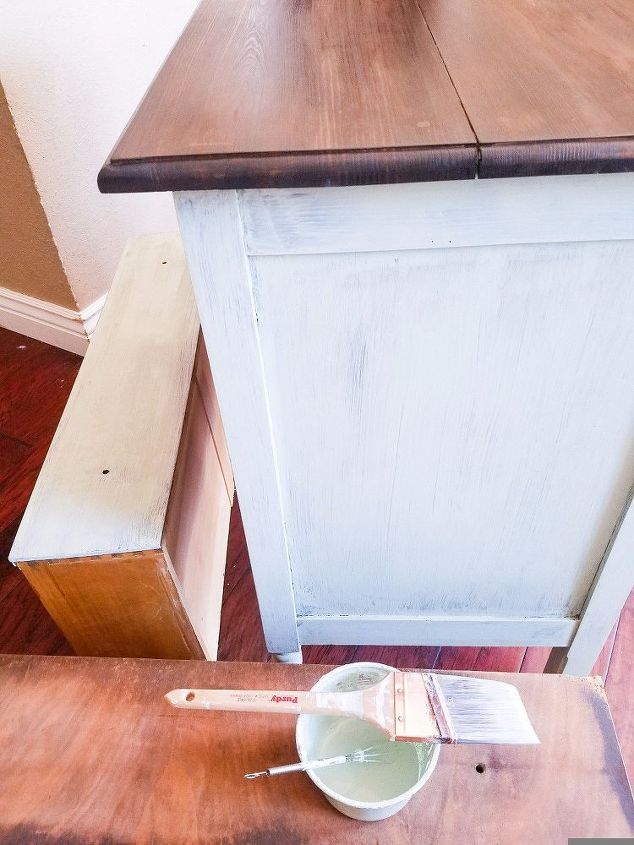
When you are applying your first coat of Milk Paint it will look pretty opaque. You may worry that it isn't thick enough, or that you mixed it wrong. Stop worrying. The first coat of Milk Paint usually doesn't look amazing. I think of it as sort of a primer coat. It's not pretty, but once you get your second coat of Milk Paint on you will see that the coverage is much better! Remember to stir your paint often as the pigments will settle!
You'll start to notice as the second coat of paint dries that some paint is lifting and flaking away. It's best to leave these bits and paint right over them with any additional coats of Milk Paint before you scrape or sand them off. That's right! I never sand between coats of Milk Paint unless I'm going for a smooth flawless finish!
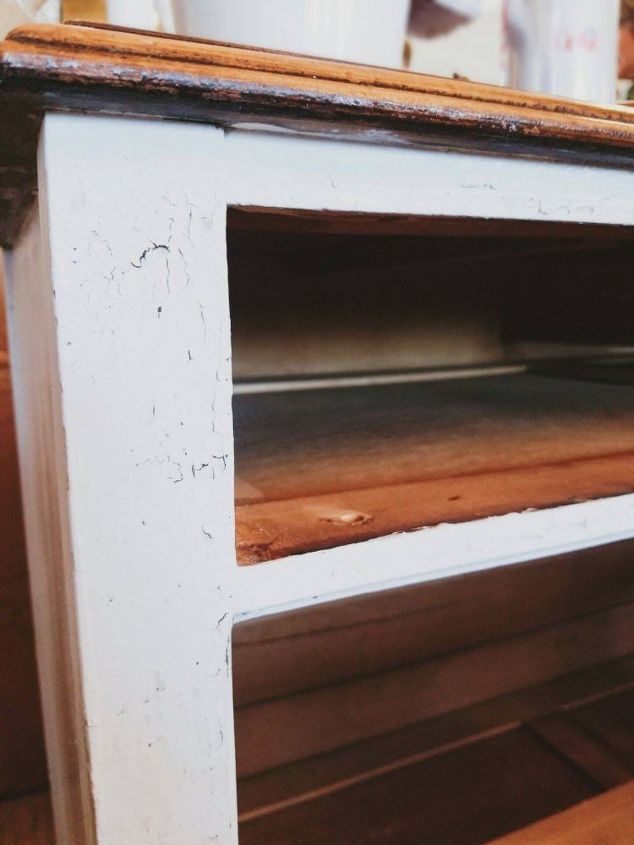
At this point I take out my favorite tool, my handy dandy scraper! I gently remove the loose flaking paint and add a bit of added distressing on the edges etc. I gently encourage the paint to lift off any dings and dents in the furniture as these are the bits that add to it's story. Was it banged into a wall during a move? Did a child run a toy into it? I love the history that antique furniture carries and never want to remove all of that authenticity from my pieces.
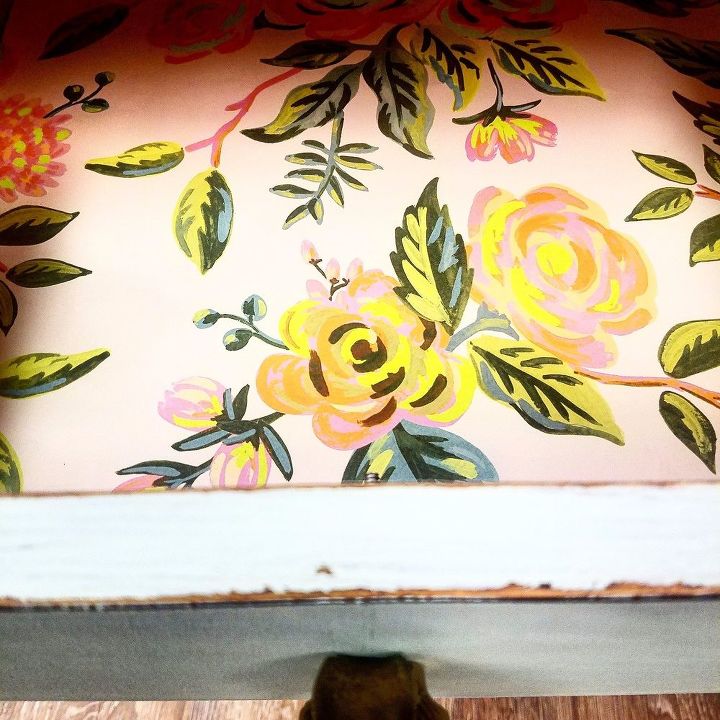
I really wanted the mirror and frame to chip as they did! I love how Milk Paint chips naturally, it never looks forced or like a newly distressed piece of furniture. It looks like it's been chipped and worn over time. I added these cute little fox knobs to the drawers and lined them with some pretty floral paper.
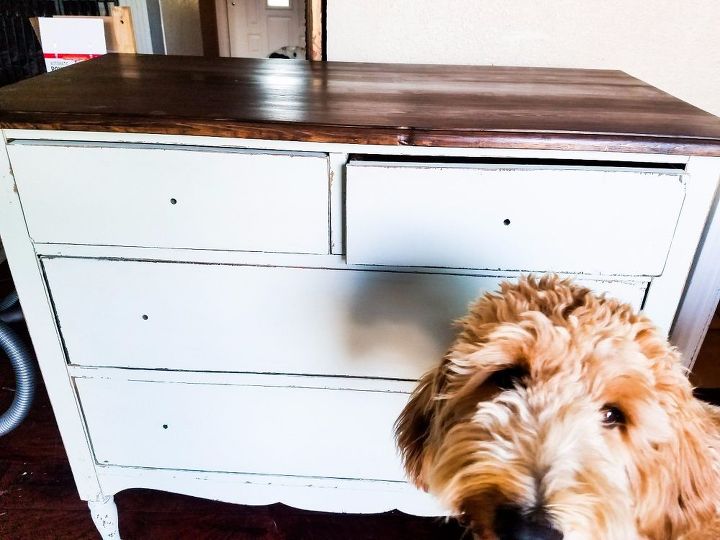
I like to pay attention to detail and even work on the top parts of the drawers and line the insides with some sort of decorative paper. Usually the drawer bottoms are ugly and have some marks on them. Since paint expands I don't paint the drawer boxes. To finish this dresser I applied our clear wax, which is one of my favorite parts because it fills the house with such a beautiful scent. I wax the entire dresser including the drawer boxes so that they slide nice and smooth! Nobody likes to have to fight the drawer to open it!
I hope you've enjoyed this little tutorial, thanks for reading!
Comments
Join the conversation
2 of 36 comments
-
Beautiful
-
Very nice. Love the pup in the photo bomb


Frequently asked questions
Have a question about this project?