


How to Make a Metal Orb Pumpkin
8 Materials
$40
1 Day
Easy
I got a newsletter from the hardware store the other day and saw this project in there. Thought it would be a fun one to try. I sure wish painting and waiting for it to dry went quicker, but other than that, it turned out pretty good, I think. This is one that I can use every season and not have to worry if we get an early snow, etc. I always love shopping at Lowe’s and the people that work there are so great. I hope you like it!!
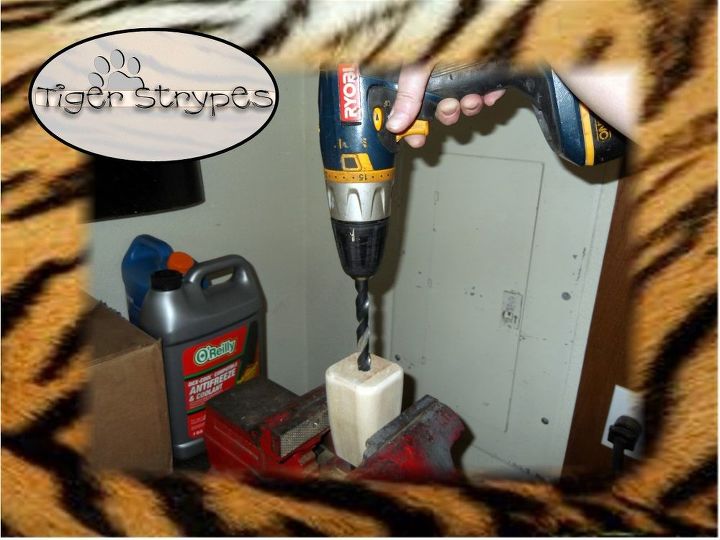
Using a pair of pliers, unscrew the metal hardware from the bottom of the bun foot. Then use a 1/2″ drill bit to expand (but not deepen) the hole where that was inserted. This will be to attach it to the metal rod at the end.
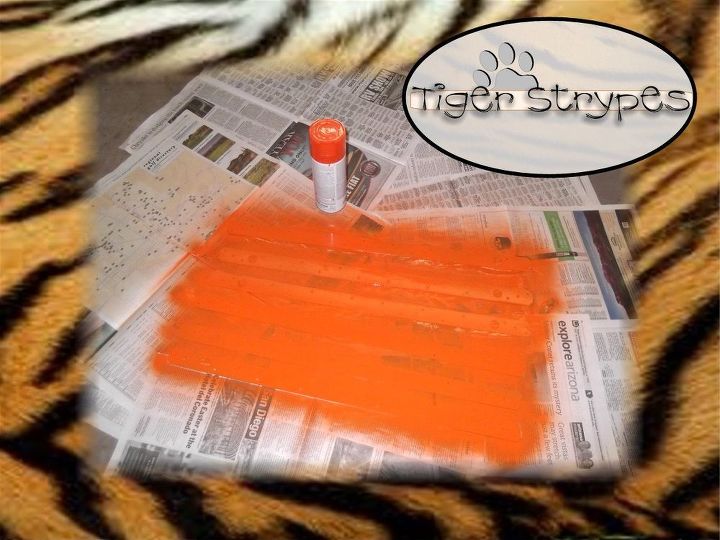
Remove any stickers, etc. from the metal straps, as well as the wood top piece, and put them outdoors in a well ventilated area on some old newspaper and begin painting. When the top coat of the straps is dry, flip them over and paint the back side, as well. You can also flip the wooden top and paint the underside of that if you’d like, too. Then just let them sit for awhile until completely dry. If you’d like to, you can also paint the threaded rod and hex nuts – I decided to leave them plain to keep with the “hardware look”. 🙂 Let this all dry completely before continuing.
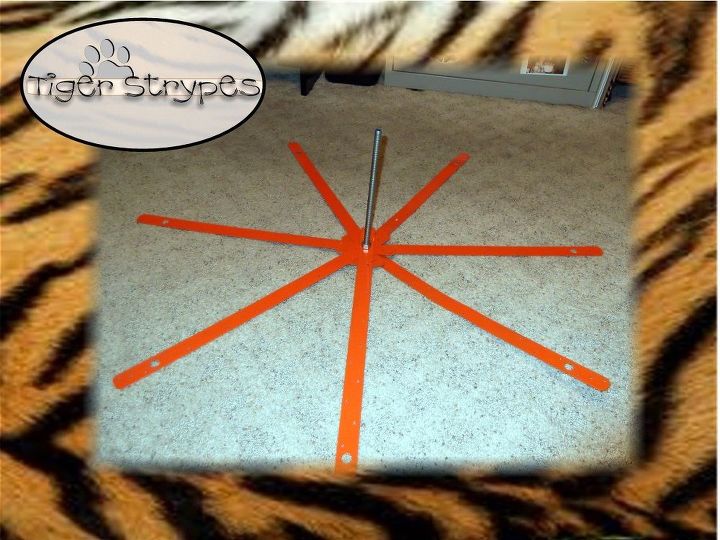
Screw one of the hex nuts to the end of the large threaded rod. Stand it up in a large area, with the nut at the bottom. Thread the straps over it, just one on top of the other. Then put another nut on top of the straps to hold them tight during the next process.

Space the straps evenly to be the “body” of the pumpkin shape. Doesn’t matter if it’s perfect, just eyeball it.

When the straps are secure, you can use a glue gun to add some glue to the hole that you drilled in the "steam", so that it will adhere to the top of the rod and stay secure. When you have the glue in, just insert it on top of the rod and hold until the glue dries.
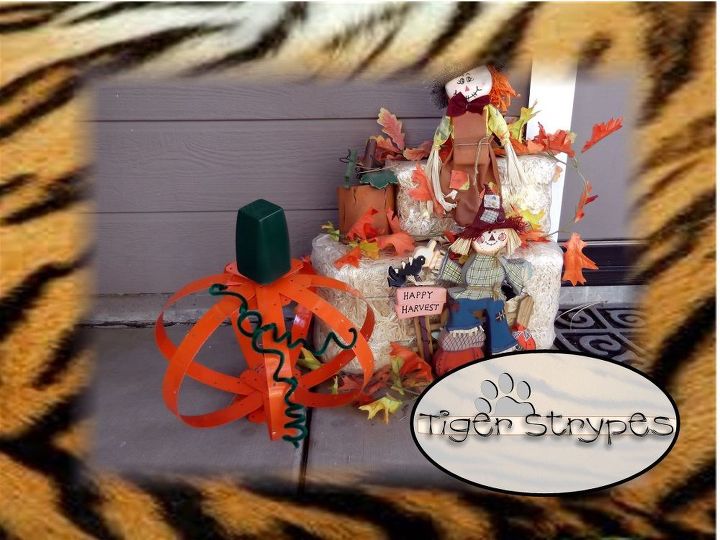
Now you’re done. Just set it outside somewhere (or even indoors if you wish) and enjoy the pumpkin that will never get soft!! It’s a bit hard to carve, but in the end will be one you can use to enjoy the Harvest time for years to come. Hope you like it!!

Want more details about this and other DIY projects? Check out my blog post!
Comments
Join the conversation
2 comments
-
This is too fun!! I love it.


Frequently asked questions
Have a question about this project?