


Twin Lakes Craftsman Cottage Tour
$249900
4 Months
Advanced
I’m super excited to share that the Twin Lakes Craftsman Cottage is 98% finished. I’m only waiting on a couple of special orders to come in and be installed but other than that…it’s DONE!!! Before I began this journey of building my first spec house all by myself (without the hubs as my full-time partner in this venture), I thought I could document each step, take pictures and blog about it. Silly Me!!! I didn’t have a spare moment. I have been SO busy, overwhelmed at times and SO tired by the time I get home every night. It has been an experience I will likely never forget!!! I learned so much through all the ups and downs of the building process. I can’t even count how many homes I have designed and/or staged, but to actually build from the ground up is a whole other story! Now that it’s finished, I couldn’t be happier with the results. Hope you enjoy the tour!
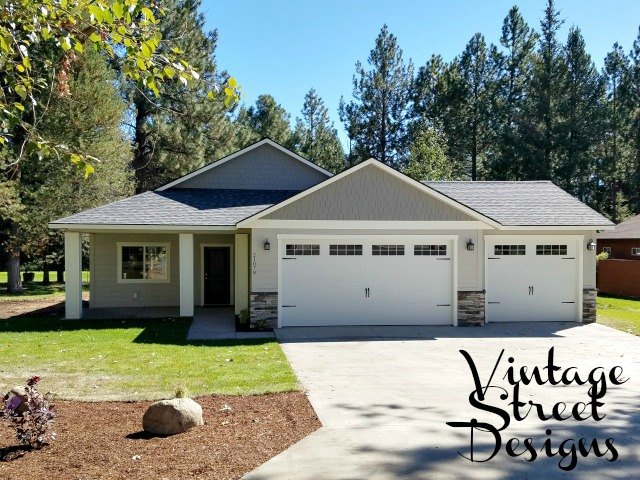
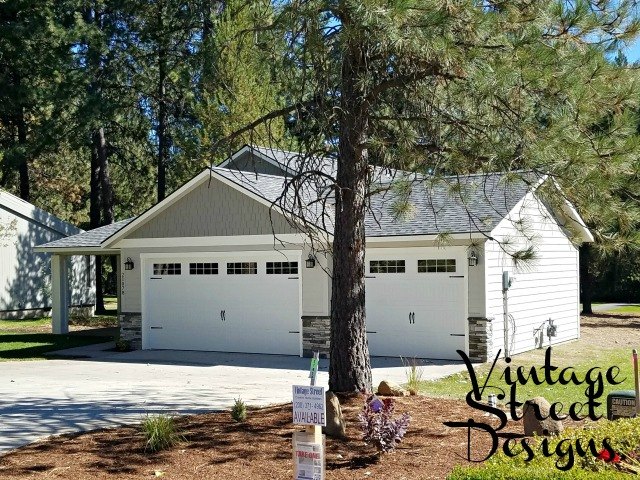
I chose tones of gray for the body of the house with white trim and a black front door. I’ll share the exact colors in a future post. The roof is charcoal and words cannot express how much I love the carriage garage doors! They are the icing on the cake!!!
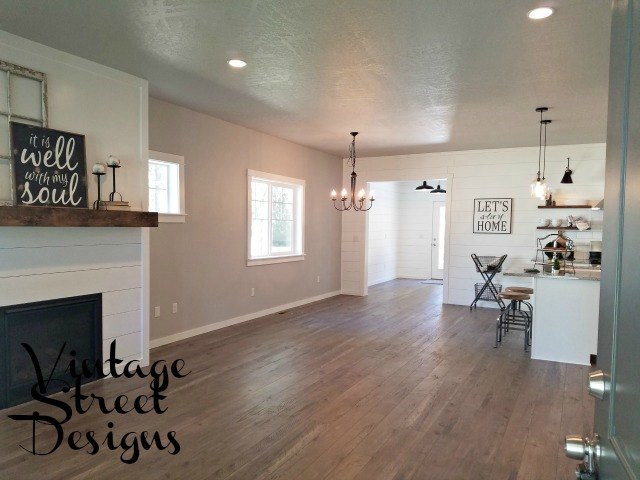
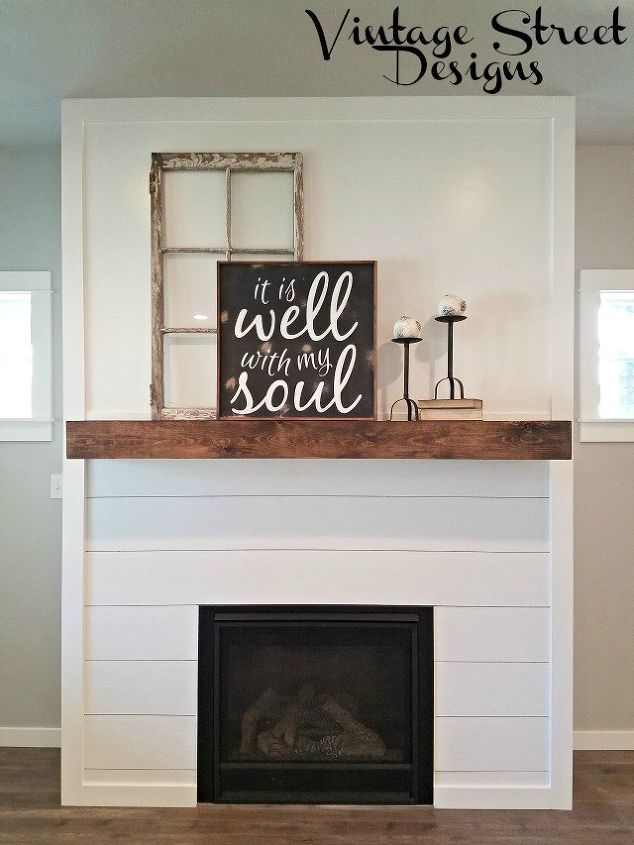
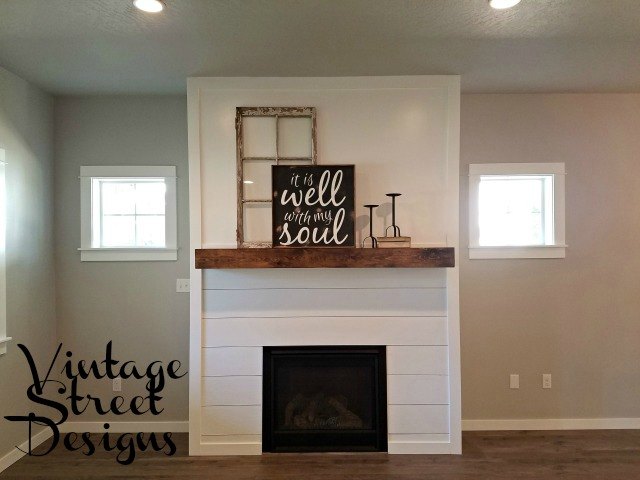
Let’s enter through the front door. Your eye is immediately drawn to the beautiful Bentley Smoke laminate flooring and the gorgeous fireplace. I used Hardie Plank Siding as shiplap on the fireplace. I had to use a product that was fireproof and I had plenty left over from the exterior siding. It turned out exactly as I had it imagined in my head. My husband was the installer of this master piece including the mantel. He is my hero!!!
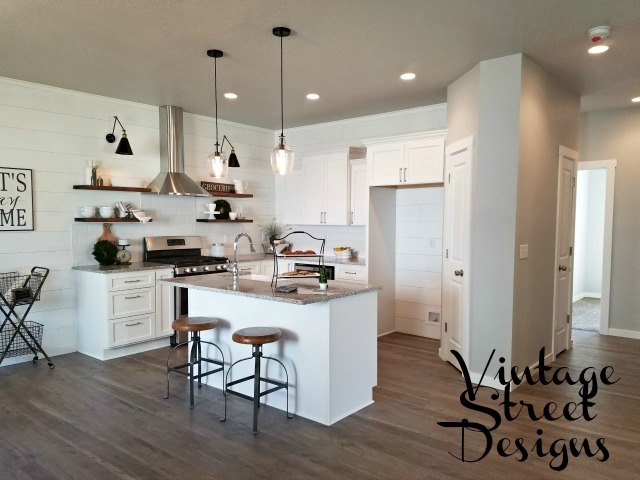
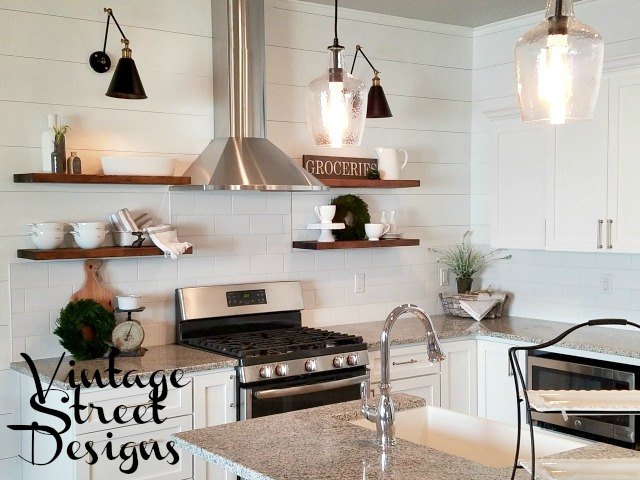
I have to say, the kitchen is my favorite space! I had the most fun shopping for the lighting and other finishes for this room. The biggest challenge was getting everything wired, plumbed and centered exactly where I wanted them to be during the construction phase.
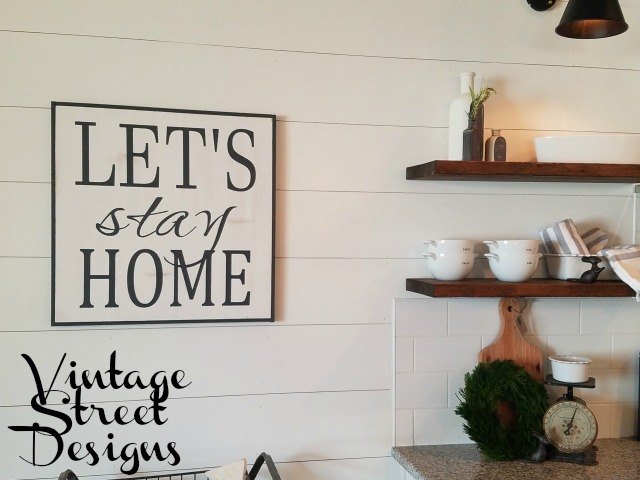
I quickly made this sign the night before the first Open House last weekend to fill the empty space on the wall. My french inspired bottle drying rack would look awesome here but I didn’t think I should make big holes in the shiplap. This sign hangs on little nails that fit in the space between the boards. No one will ever know!!!
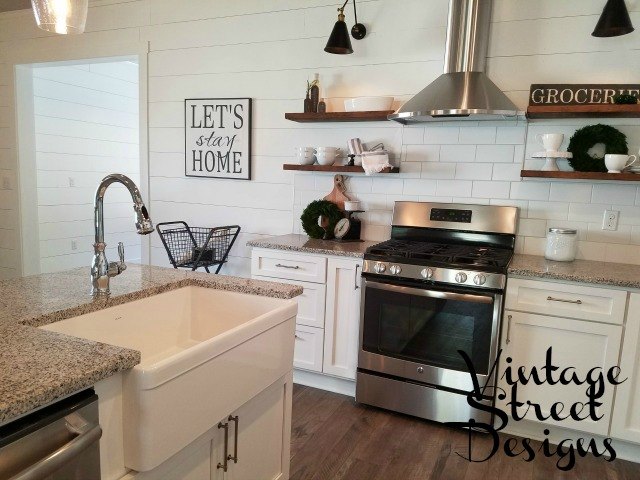
The apron front sink is to die for. I wish I was moving in just for this sink!!! Can’t wait to put one in my own house someday.
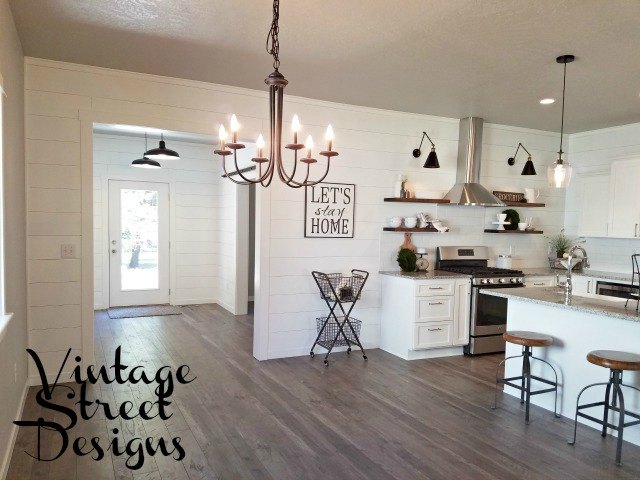
My electrician is extremely proud of himself as he centered up the dining room chandelier with the window as well as the barn lights in the mud room. I stressed to him how important this task was to me. He did a GREAT job!

I’m still waiting for the new barn doors to come in. For some reason, the framer decided to frame the opening 2″ taller than the rest of the doorways so the barn doors we made won’t fit. I ordered new 84″ tall craftsman style doors from Home Depot and they should arrive in a couple of weeks. Hmmm…should I paint them white or black?
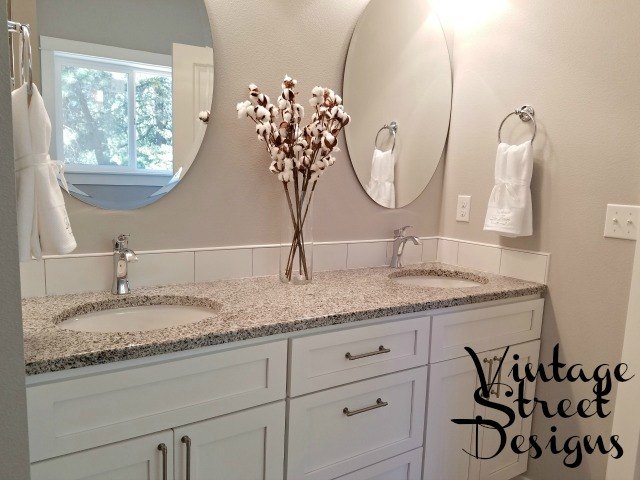
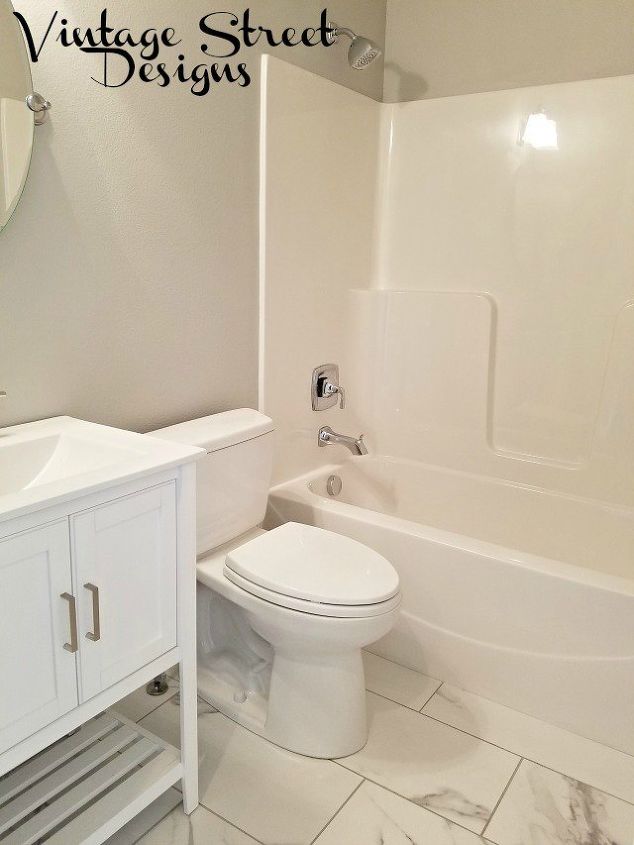
Nothing missed in the master bath. It features a dual vanity, granite counter top, tile flooring with separate tub and shower.
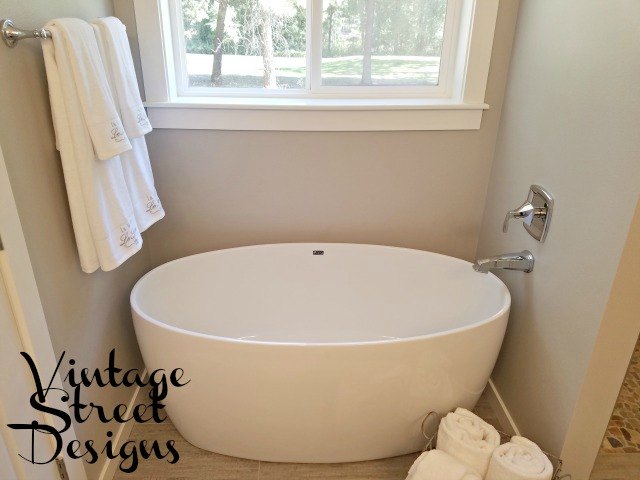
This was the BIG splurge for this space. Funny how a 6′ tub is about $600 less than a 5′ tub. Of course I needed the latter. It was worth it, don’t you think?
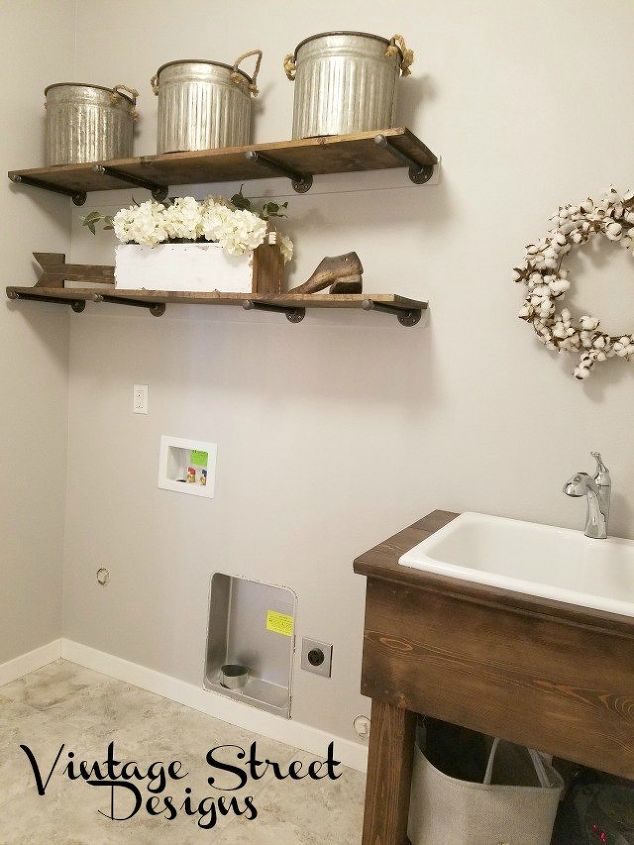
OK, now lets make a switch to the opposite side of the house. Here’s a peek into the laundry room. You can walk straight through from the garage to the hallway/kitchen. My husband made another one of his amazing rustic sink bases and I purchased the sink online from Lowes. He also made and installed the open shelving. The large 24″ floor tiles are from Panhandle Carpet One in CDA. They had them on special months ago and I had them hold ‘em for me. My brother and I installed these. I hired out for the rest of the house. I love to tile, but there are just not enough hours in a day to do everything I want to do.
The guest bath is a small space with a big impact! The vanity is from Wayfair and the mirror is from Lowes. I chose a porcelain tile with the look of marble for the flooring.
So there you have it! Several months of blood, sweat and tears has come to an end. Would I do it again? Absolutely! But, I need a rest and a contract on this one first! Hint, hint, smile, grin!

Want more details about this and other DIY projects? Check out my blog post!
Comments
Join the conversation
3 of 19 comments
-
What color paint did you usr in the living room abd bathroom
-
I came here through the ceiling post on HT hoping to find your finished kitchen but I couldn't find anything on it. I loved the idea of the corrugated metal ceiling but would SO like to see what else you did! and you spec house is adorable! In a previous chapter of my life I was half a residential building team and I adore all the touches you have in this home.


Frequently asked questions
Have a question about this project?