


How To Prep Kitchen Cabinets For Paint

Over the years I've painted a lot of furniture from shabby chic (let's distress the heck out of it) to very detailed, intricate work (perfect lines and finish) and I've learned the hard way that good prep is the key to not only a professional looking finish, but also for the paint to adhere to the wood properly which prevents flaking and chipping in the finish.
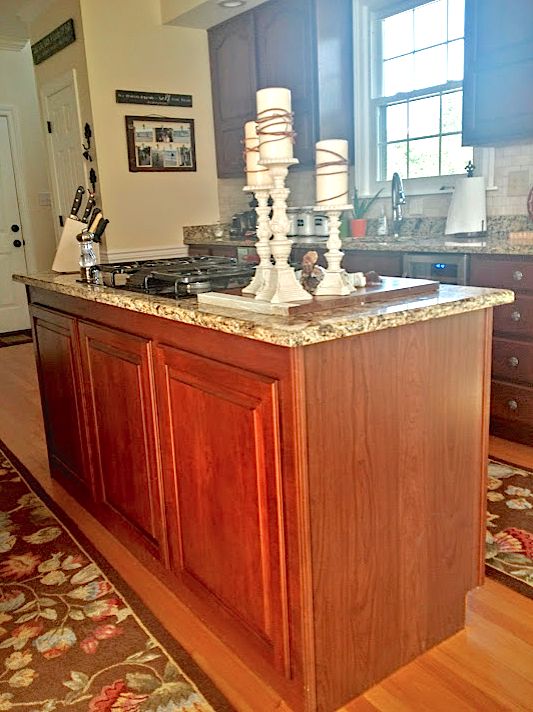
When I started thinking about painting our kitchen cabinets I knew the prep work would take longer than the actual painting. For almost a year, I had read professional craftsman articles, blog posts, home and garden forums, and Facebook furniture painting group posts about prepping and painting kitchen cabinets. I read the do's and the don't's. I read about the successes and the "OMG, my cabinets looked beautiful for a week or two and then the paint started chipping. What do I do now?" posts. There were quite a few of those and they were heartbreaking to read because I knew how much work they had put into their project.
While I was looking for the quickest and easiest method to prep my cabinets, I quickly realized that "quick and easy" and "best" are not in the same category when it comes to kitchen cabinets that get lots of use and abuse.
The difference between painting regular furniture and painting kitchen cabinets is that kitchen cabinets have lots of oil and grime build up which comes from cooking greasy food, the natural oil in our skin, and dirty little hands opening and closing the cabinets without using the knobs. It's imperative for this build up to be removed if you want your paint to stay on longer than a few weeks.
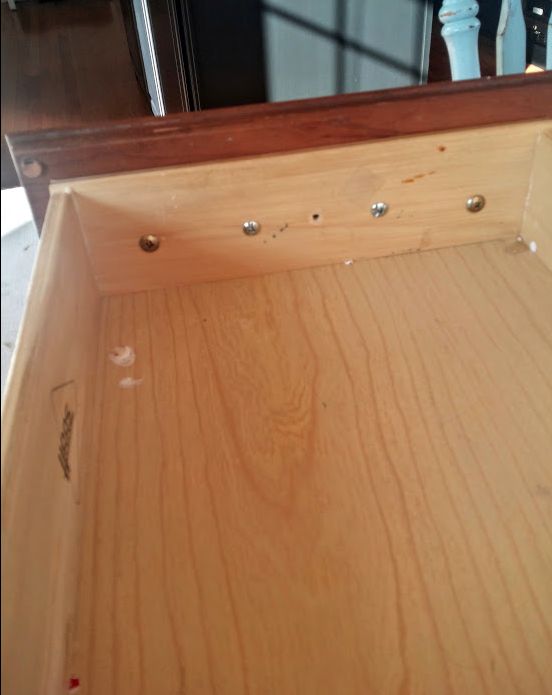
Since I have a large kitchen I decided to work in manageable sections so I wouldn't feel overwhelmed with my project. I started out by removing all cabinet doors, drawers, and hardware in that given section. Be sure to label the doors if you are removing several at one time. I then removed the drawer faces. As you can see in this picture, there are screws on the inside of the drawer for the hardware and to hold the pretty drawer front on the drawer. A drill will make this process much quicker. Painting on a flat horizontal surface is much easier than a vertical surface and runs will not be much of an issue.
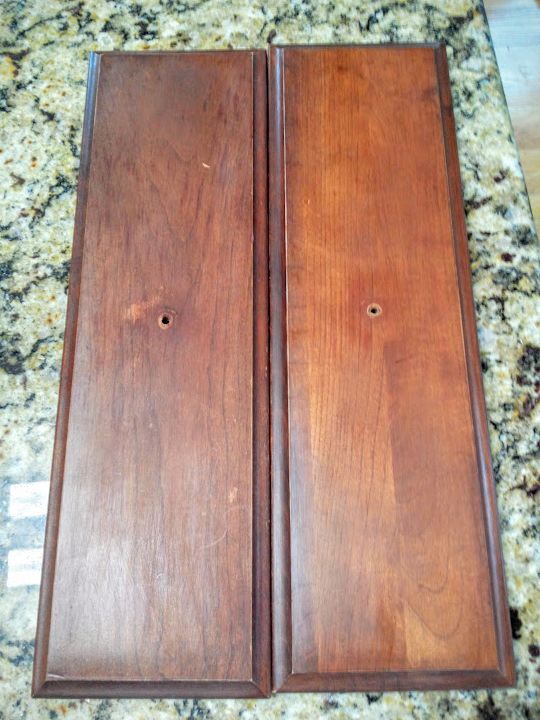
Here are the drawer fronts after they were removed. Next, you need to degrease the fronts and backs of the drawers, doors, and cabinet boxes. Make sure your degreaser is compatible with the paint and primer you choose to use. Many people love TSP but it's not compatible with all primers. I like Dawn dish washing liquid. Rinse well to get the degreaser off the wood and then dry the wood.
Lightly sand all surfaces to knock any remaining gloss off and to even out any knicks in the surface. Use a tack cloth to remove the dust. This is not a huge sanding job btw. Think of it as wiping down your kitchen counters when you're cleaning up. You'll use about the same amount of pressure and effort with the sanding as you do cleaning the counter tops. Vacuum your work area to decrease the amount of dust and animal hair that can be stirred up while you're working. The last thing you want is for dust nibs or dog hair to end up in your wet paint or sealer!
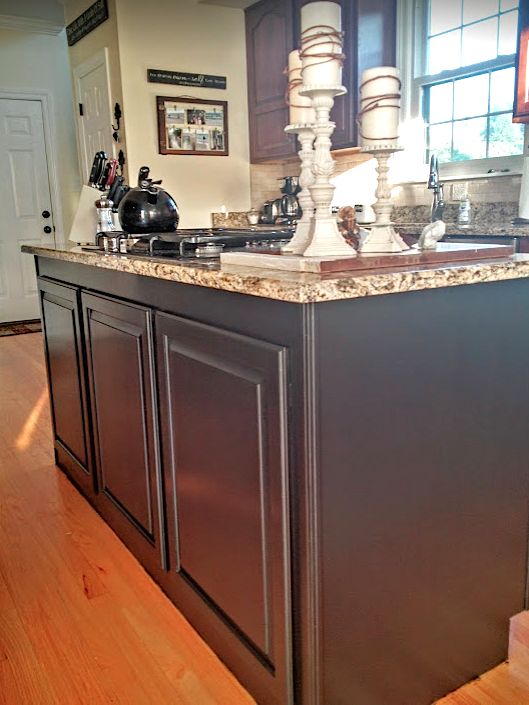
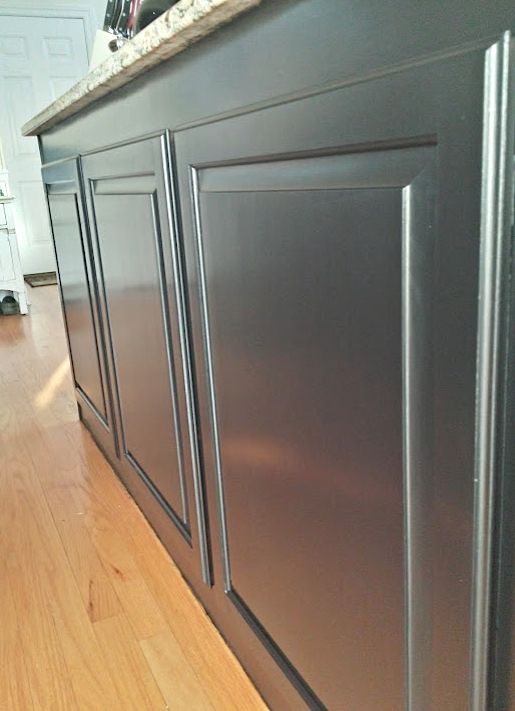
You're now ready to start the painting process. For more tips and specific products I used please check out my blog post. It's very detailed and you'll probably find the answers in there for any questions you have.
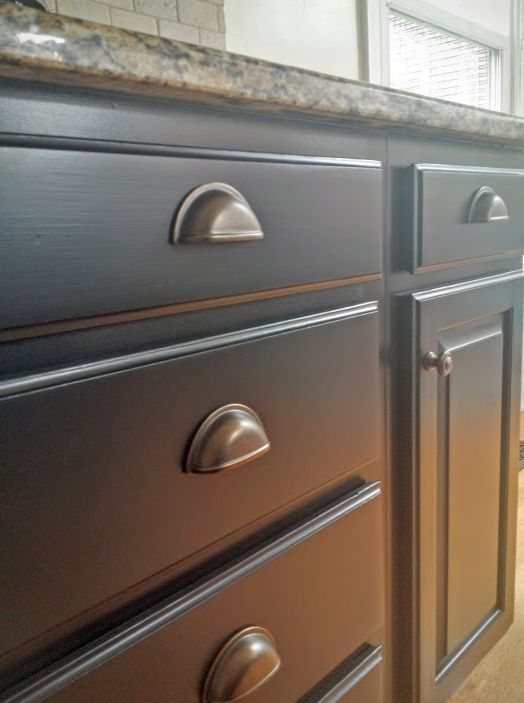
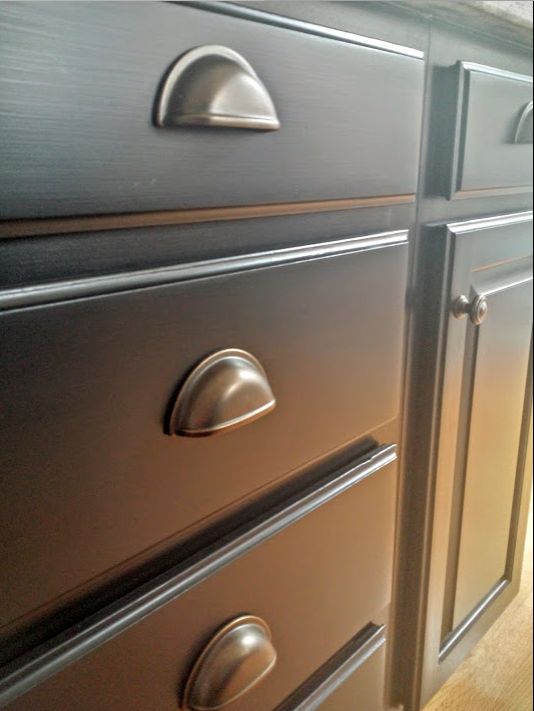
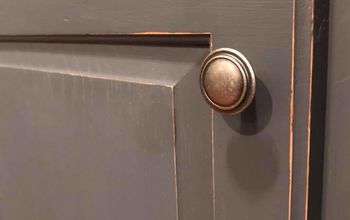
General Finishes "Lamp Black" Milk Paint. Distressed Avante Cup Pulls in Antique English from D. Lawless Hardware. This post was sponsored by General Finishes and D. Lawless Hardware.
Comments
Join the conversation
3 of 5 comments
-
I absolutely love the color. Great job!
-
Thanks for the info. I am definitely using it. :)


Frequently asked questions
Have a question about this project?
my cabinets are pressed wood with some kind of layer of wood grain added. it's in a mobile home. i had a small fire that blistered a lot of the paper stuff up. now it's peeling and i want to paint them. if that paper wood grain is peeled off its lookings like pressed wood. can i still paint them.