


How To Make Small Paper Clay Jack O' Lanterns

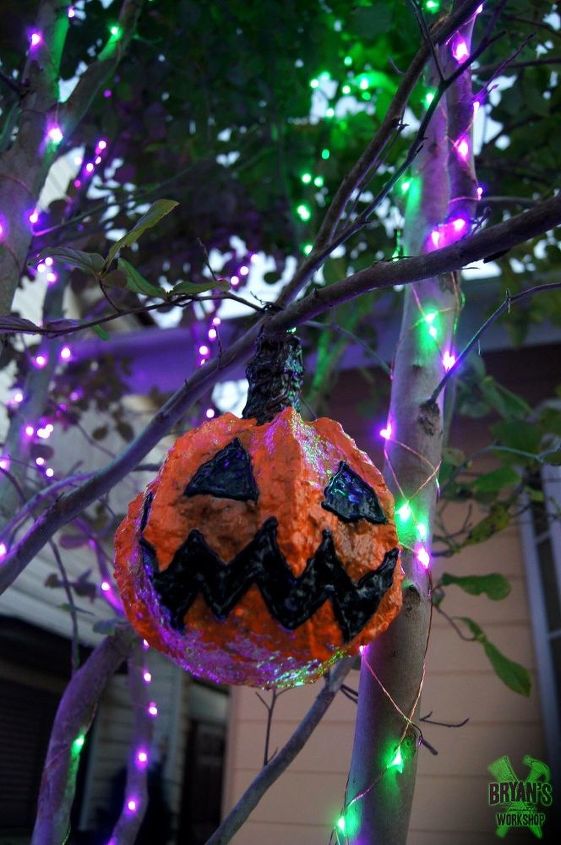
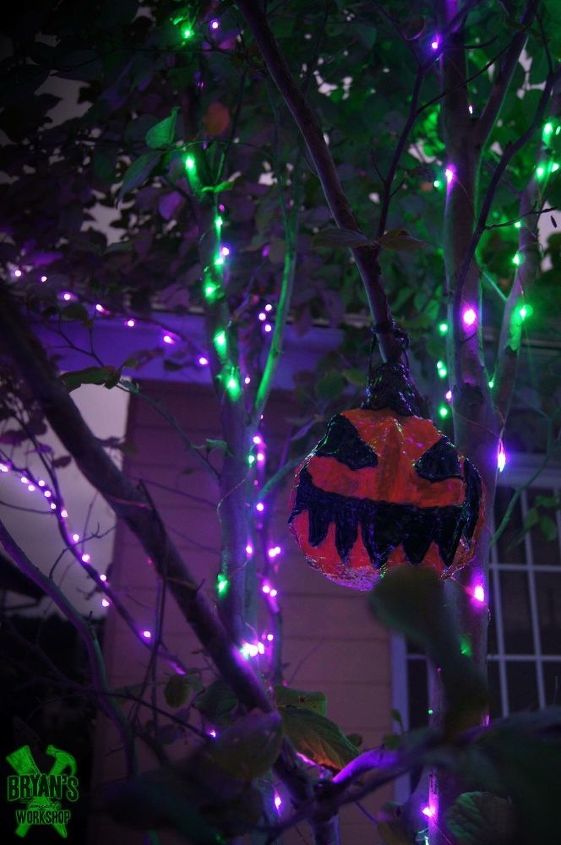
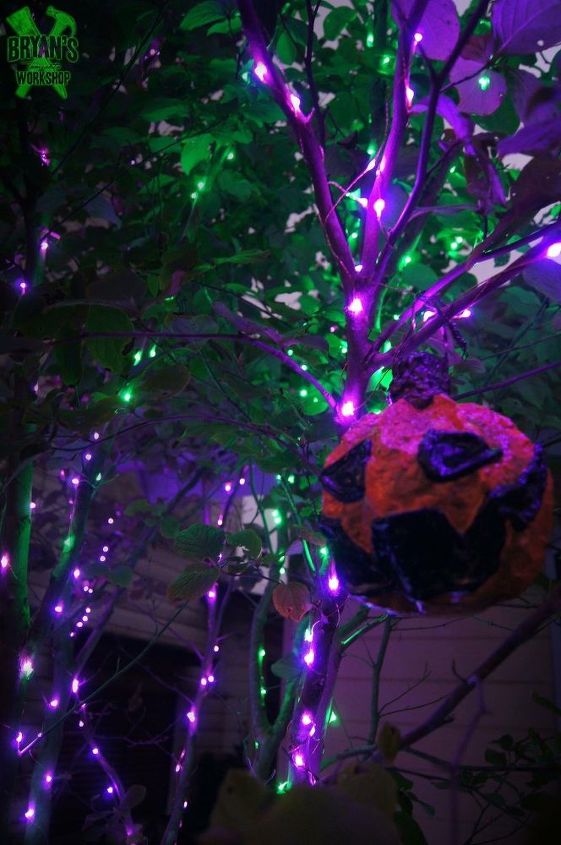
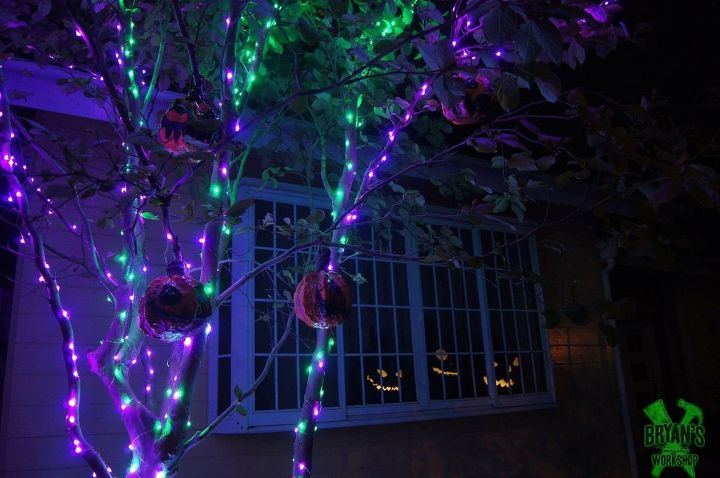
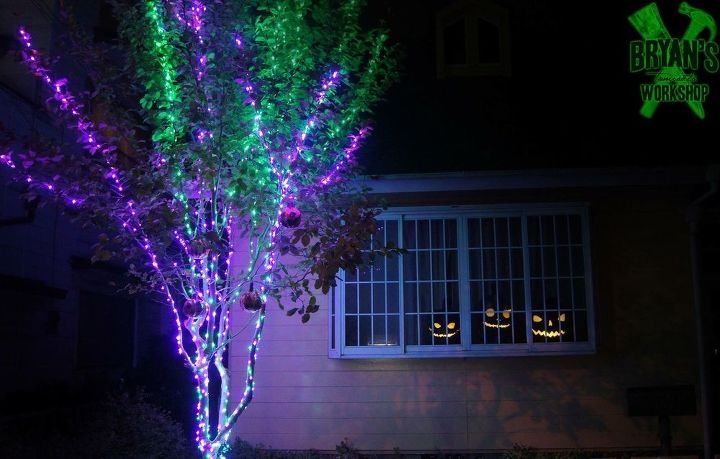
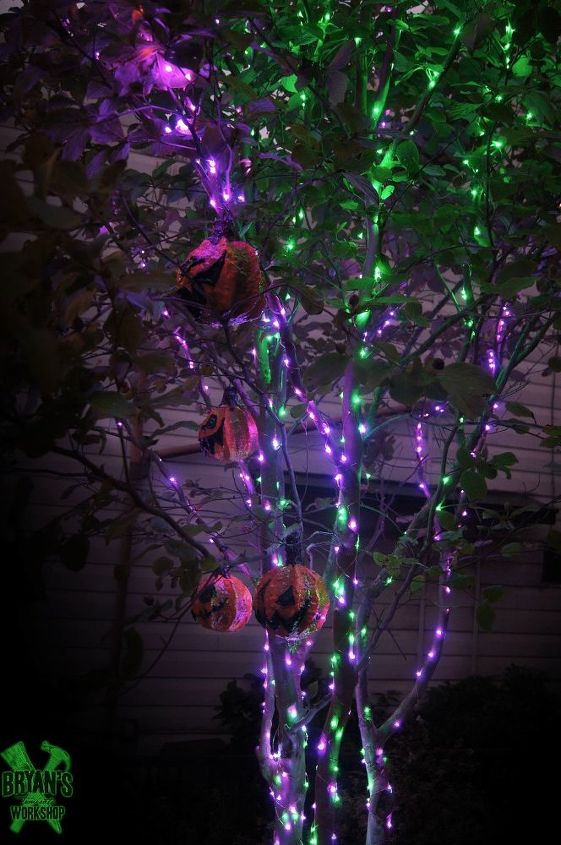
These little pumpkins are awesome! They're a fun and easy way to add some handmade Halloween decor to any part of your house. I hung them in this tree in my front yard.
I'm a huge paper clay guy!
My paper clay recipe is 6 rolls of unscented toilet paper, 6.5 cups of wood glue (1.5kg or 3.3lbs) and 1 cup of joint compound (dry wall mix). You will need a large bucket with an airtight lid, a mixing attachment for your power drill a plastic strainer and a smaller bucket to turn your toilet paper into pulp. I have tried many recipes and this is my favorite. The paper clay also keeps for a long time. I'm currently using clay I mixed last year.
1. Soak one roll of toilet paper at a time in the smaller bucket using warm water. The toilet paper tube will easily come out and the toilet paper will turn to pulp. Break up the pulp with your fingers and then dump it in a plastic strainer. Push as much water out as you can and then put the pulp in the big bucket. Do this for each roll of toilet paper.
2. Add the wood glue and joint compound.
3. Mix carefully at first, so the joint compound doesn't fly up in the air. Mix it thoroughly until it becomes paper clay.
*It's better to buy buckets and tools that will only be used for this.
*If the paper clay is too wet, add more paper pulp. If you have the option of buying pure dry pulp, it is definitely better and easier!
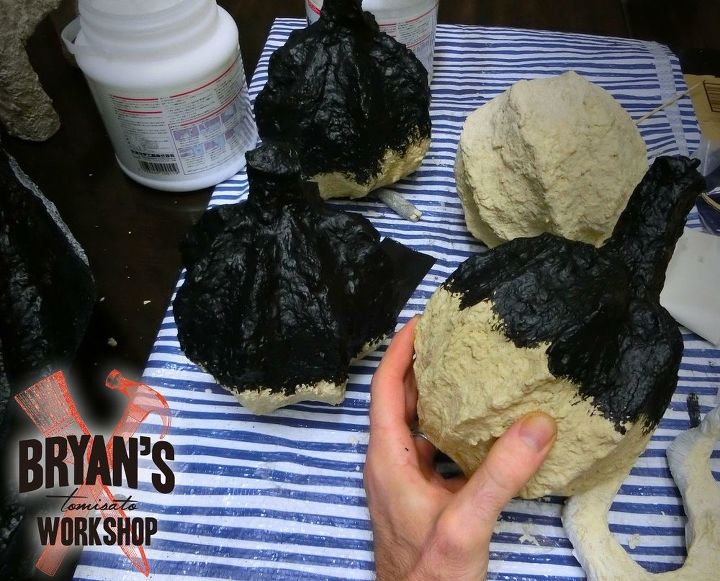
I hot glued cardboard ovals together and wrapped duct tape around the shape to make my little pumpkin armature, but you can use anything you'd like.
The armature will stay inside of the pumpkin and the paper clay will dry rock hard around it. Wrapping duct tape around balled up plastic bags or newspaper works well too. I used broken chopsticks for the pumpkin stem and built up clay around it to get the shape.
If you intend on hanging your pumpkin, I suggest adding the wire or string before you add the clay. I didn't do this and needed to drill holes to add my wire.
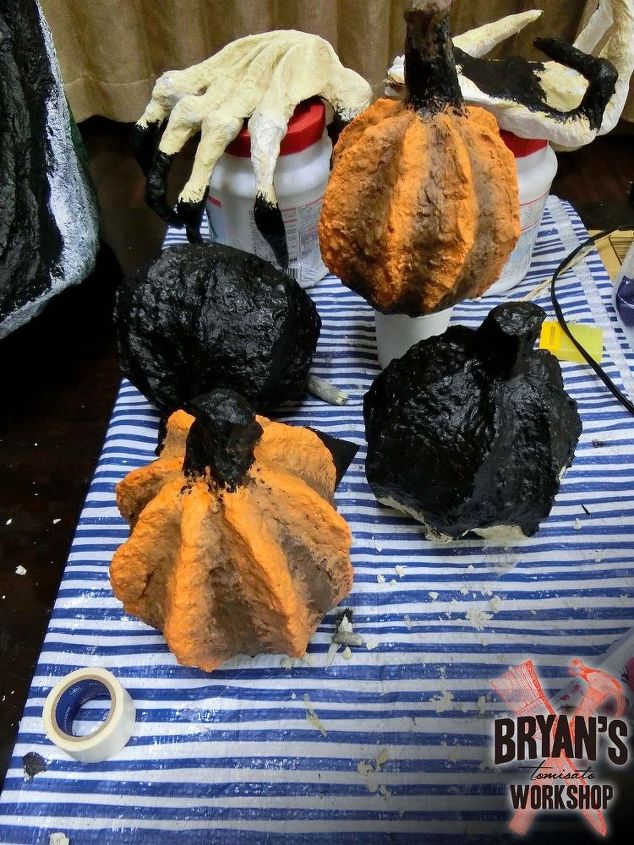
When the paper clay was good and dry, I painted a base coat using a wood glue and black paint mixture. I started with matte colors first, but ended up switching to glossy. I like them better glossy! :)
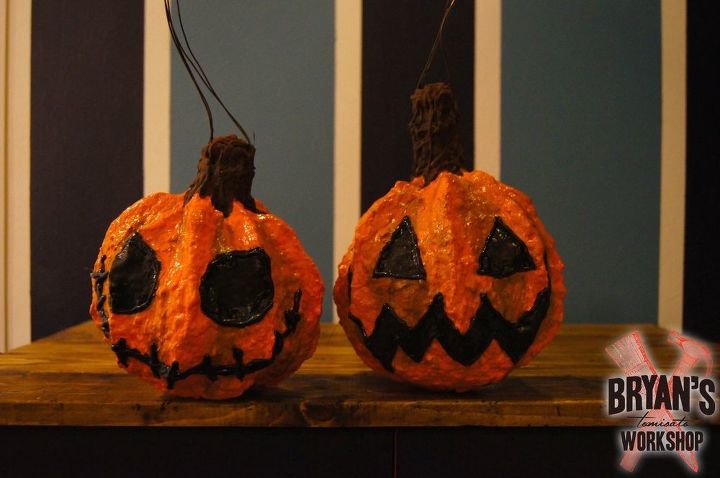
I drew on the faces with a black paint marker and then traced it with black hot glue.
I used two coats of poly to seal these. I used a local brand from here in Japan, so I can't recommend one, but any clear poly sealer for outdoor use should work well.

DIY Halloween Decorations
Comments
Join the conversation
-
I didn't even know that black hot glue existed! These are so cool!
-
Very cool. You are the master of paper clay!


Frequently asked questions
Have a question about this project?
Can you make tiny frogs?