


How to Refinish an Old Worn Out Buffet

by
Natalie
Medium
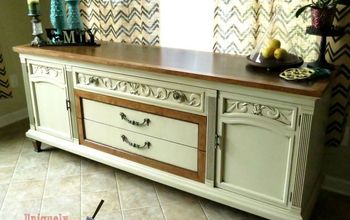
A few weeks ago I picked this STUNNING buffet up from a refinishing friend. It had been sitting in her garage for a year and she lost all motivation to tackle such a huge project! I about killed over when I saw that she was selling it and rushed over to her home as soon as I could! She pointed out dozens of problems from the veneer chipping and bubbling to places that needed some glue. She gave me the full run down, and the list was long. Worried that I wouldn't be able to tackle the job, I called my husband and asked for his expertise... let be honest, he didn't really care either way. After explaining it to him I talked myself into it buying it anyway and snatched it right up. All while doing a nervous happy dance.
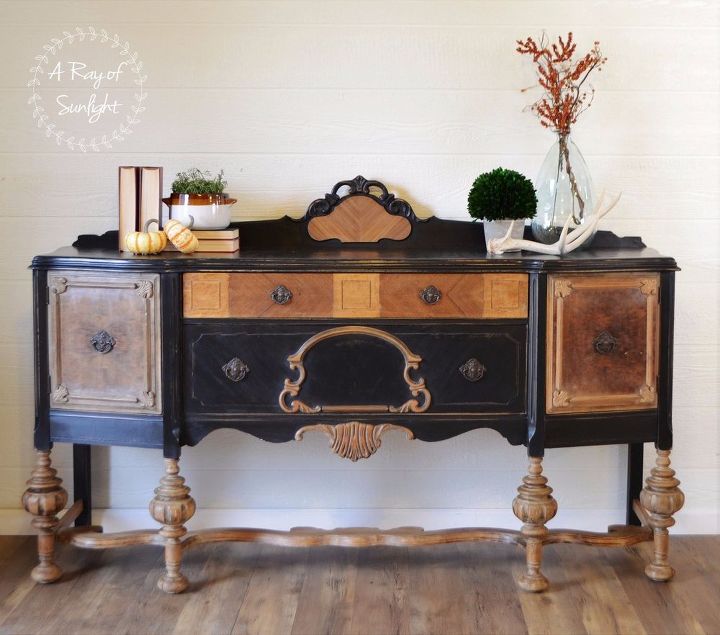
After we brought it inside I couldn't stop staring at the beauty. It was so beautiful. Those legs, all of the detail, that huge drawer. Mmmmmhhh! A long time dream had finally come true. I couldn't wait for the next morning to get working on bringing new life to this old worn out buffet.
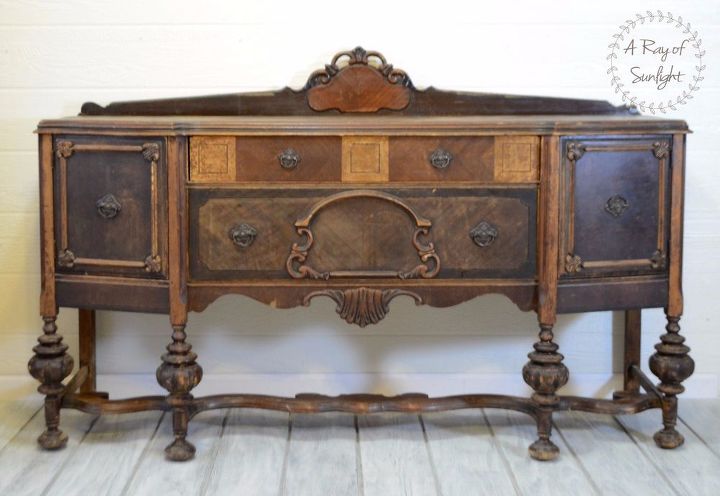
The next morning we moved it back outside where I took off the back splash and got sanding the top. I hoped that I could just sand the top down enough, cut out the bubbled veneer and patch it all up with Bondo. Well I did just that and thought it would all work out.
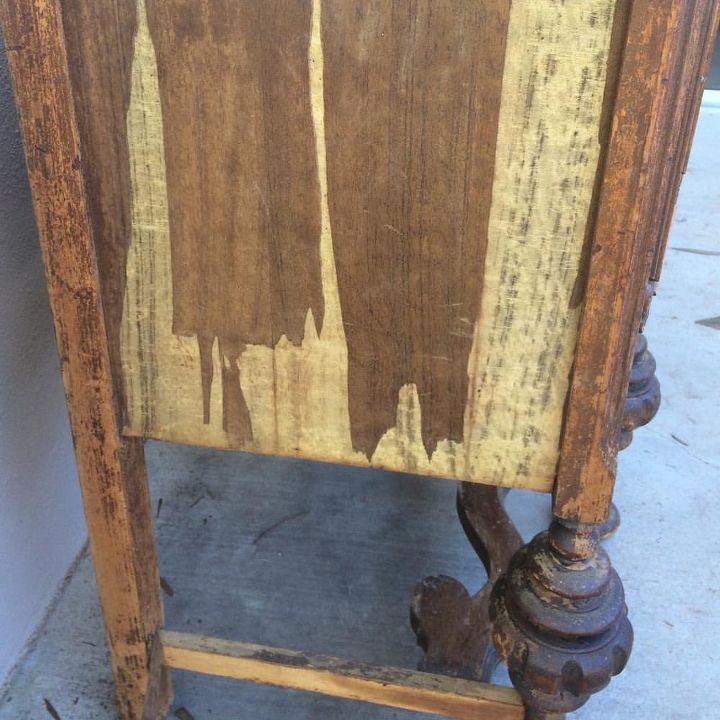
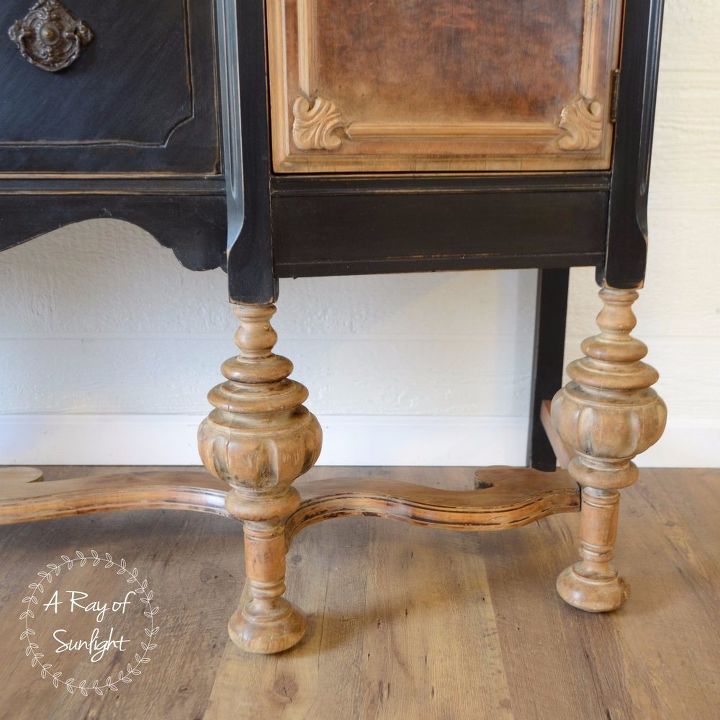
I dreamt about those legs with no paint or stain. Just raw legs. It was also a great time to bust out my camera and do a little tutorial on how to strip old finish off of detailed wood. You can find the tutorial link on my blog or on my hometalk profile. After stripping all of the legs, I let them dry and then cleaned the leftover gunk off. I did this to the doors and drawers as well.
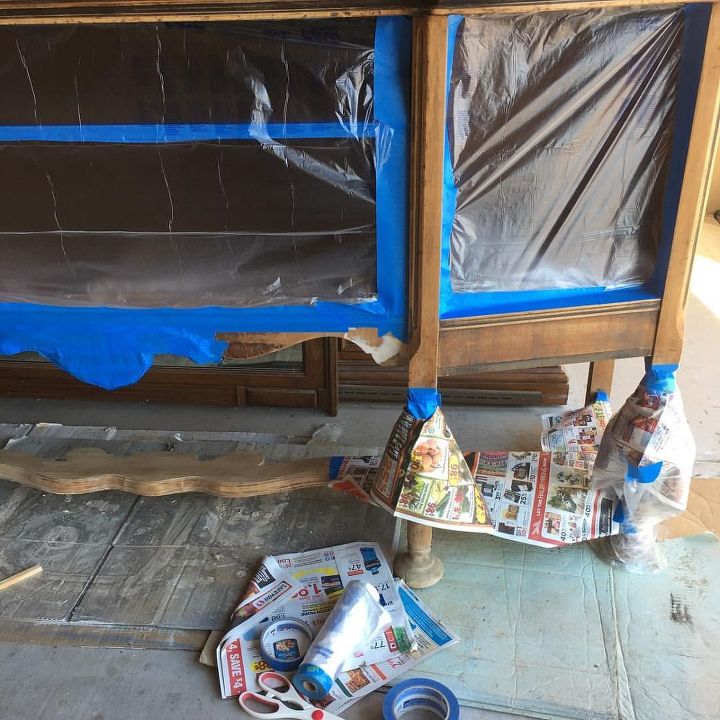
After everything was wiped down I made sure to tape off anything that I didn't want to get paint on. Especially since I use a paint sprayer for that nice smooth finish.
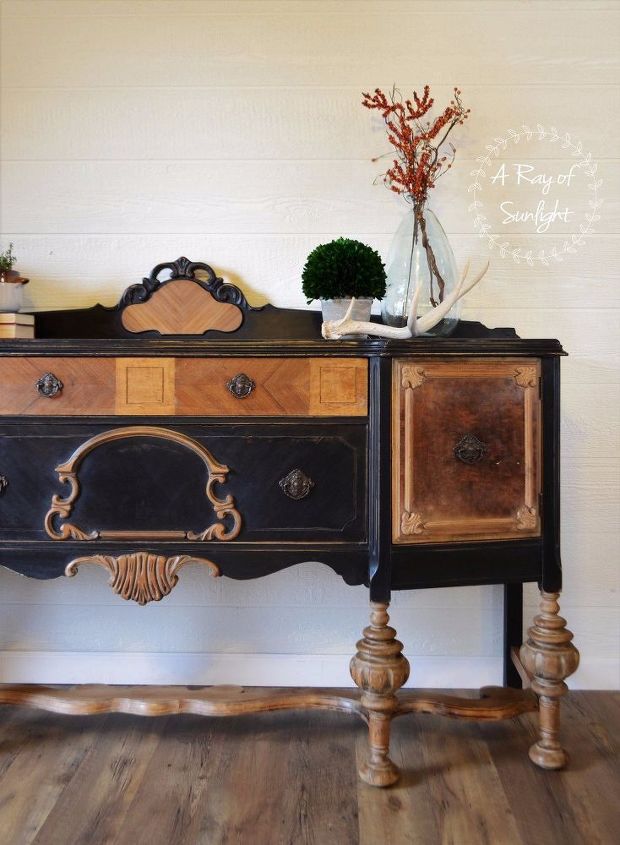
I taped extra around the detail areas that I wanted to be left natural wood. I didn't want any paint getting on those areas since I spent so long stripping off the old finish, but then I was left with quite a bit of tedious hand painting around the stunning wood details. A small paint brush did the trick to get right in the detailed spots without getting paint all over.
Almost a week later I still do a little happy dance every time I walk by it. It is such a stunning old piece that had been almost forgotten about. But now it has a new finish that shows its curves and details and it is ready to proudly serve another family for many more years to come.
Want more details about this and other DIY projects? Check out my blog post!
Comments
Join the conversation
2 of 126 comments
-
I loved it when you had partial veneer on the piece. I could see a man and a woman, only the legs. The womans' dress and legs and the mans pant legs. I guess it's the artist in me.
-
Great taste to put this together! Thank you for showing us!! :)


Frequently asked questions
Have a question about this project?
LOved your piece!
What is the best (easiest) method to remove veneer?