Update Those Boring Posts Outside Your Home!

Elizabeth Fencl
by Elizabeth Fencl
A few weeks ago I posted on Hometalk how I added curb appeal to our brick on the outside of our home: http://www.hometalk.com/diy/paint/exteriors/add-curb-appeal-with-german-mortar-smear--23890303 and I will say this, I get excited every time I pull into the driveway and I feel proud of the change I made to our home.
Okay, now check out that darn post! Yup, that nasty boy needed an update also. I will tell you this...seriously...this was the easiest part of my project. Truthfully, I did this project within a couple of hours.
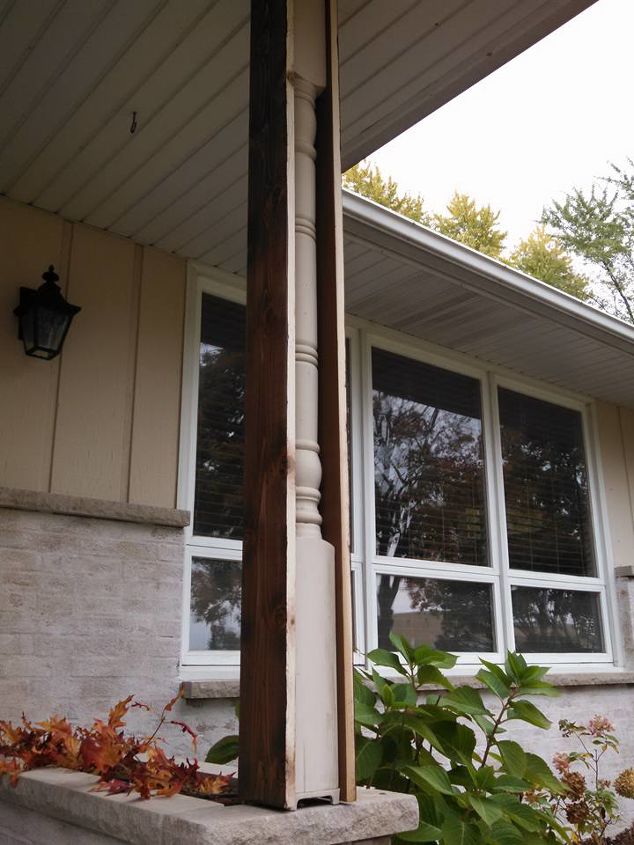
I measured the size of boards I needed and went to Home Depot to pick up some cedar boards (to match the lamp post in the front of the house-that's another story).


My sweet hubster bought me an anniversary present back in September-a table saw (you would have thought he gave me a trip to a tropical island, I was so excited) that I was able to use for the first time. I needed to rip down two of the boards to fit the front and back of the post.
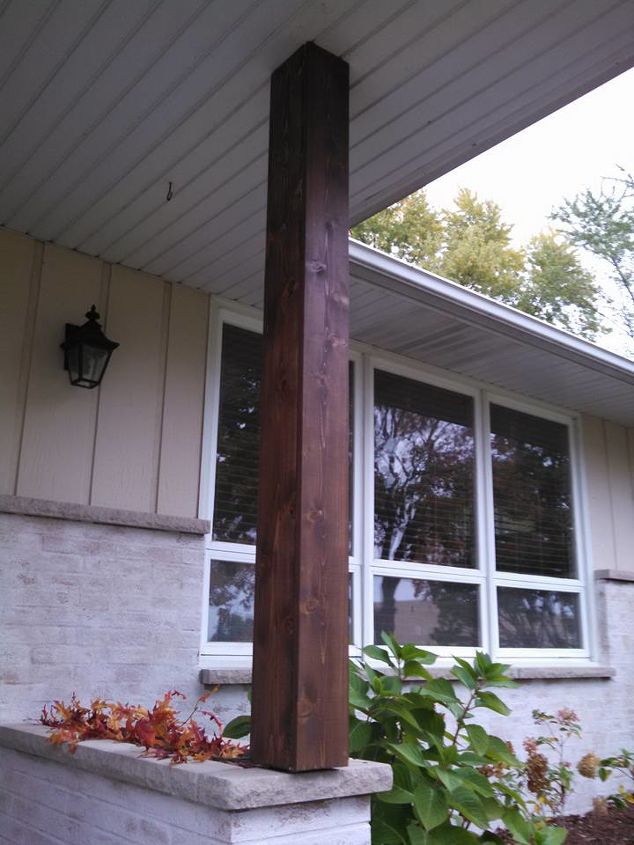
After staining the boards with my favorite, Minwax Gel Stain in Walnut color, and sealing with Spar Urethane by Varathane, I got out the nail gun and attached the boards to the old post.
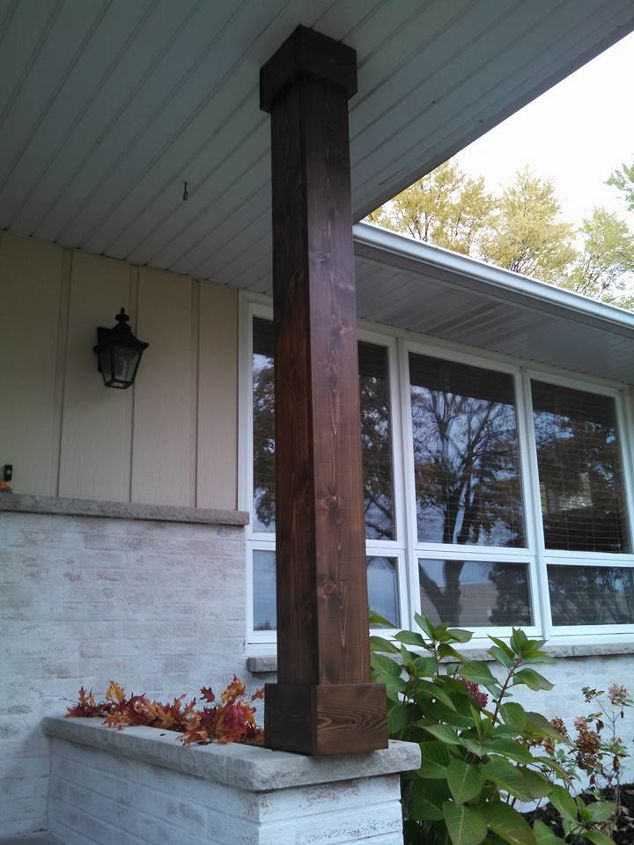
With the pieces of wood that were left over, and of course I couldn't let them go to waste, I was able to add to the top and bottom a little extra detail. I got out the nail gun and boom, done! I love my nail gun, every girl should have one!


The outdated light in the back round, yup, that will be replaced at a later date. I actually spent over $300.00 on all new lights and ended up returning them. I spray painted all the lights with paint that I had on hand and went from dull, faded brown to black lights. The DIY'er that I am, I didn't want to spend the money and felt pretty good with just painting them.


Ignore the way the post overhangs on the planter, at some point that will be addressed, but for right now, I love my new post and the craftsman look that it adds to the entrance of our home.


All in all, this project only cost me around $30.00 and it would have been less had I gone with a less expensive type of wood. For the money, and how easy this was, I couldn't be happier.
Frequently asked questions
Have a question about this project?
3 of 4 questions
  • MM MM on Nov 19, 2016
    Did you even need that post there in the first place? Looks as though there may have been a row of them at one time. Not trying to offend, just curious, but I wouldn't think one wooden trowel is holding up your porch overhang. Please enlighten me. Thanks in advance! I do love the improvement though!
  • Marcia Huffman Marcia Huffman on Nov 20, 2016
    Do you think this would work to cover my iron porch post?
  • Linda Cooper-Smith Linda Cooper-Smith on Nov 21, 2016
    I liked the wood stain on the new post. Maybe add a trellis stained the same color, and plant some crawling rose bushes? Or morning glories? That would add color and beauty.
Comments
Join the conversation
3 of 66 comments
Next