


Holiday Tray Made With A Frame Stencil and Gold Leaf Paint!

by
Anita K
8 Materials
$30.00
2 Hours
Easy
The Hometalk Team presented the opportunity to use a Cutting Edge Stencil in a holiday-themed project. I had never worked with a stencil before, and thought it would be fun to try a new technique. I wanted to create something useful and beautiful with the intricate stencil. In this tutorial, I will share what I learned with you - fellow DIY folks!
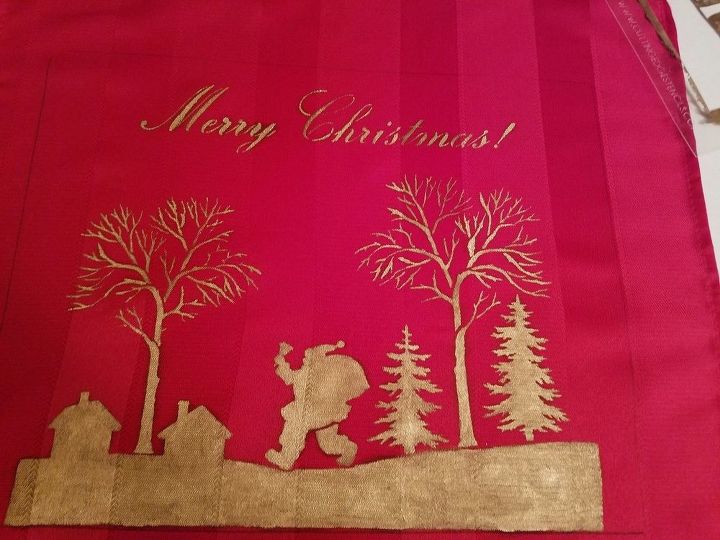
First, I experimented with the stencil using different mediums, to become familiar with the process. I chose a liquid gold leaf paint for a special effect, to bring out the details in the stencil with a shimmer. After some trial and error with poster board, then burlap....I perfected the way to apply the gold leaf paint to the pattern to avoid bleed through.
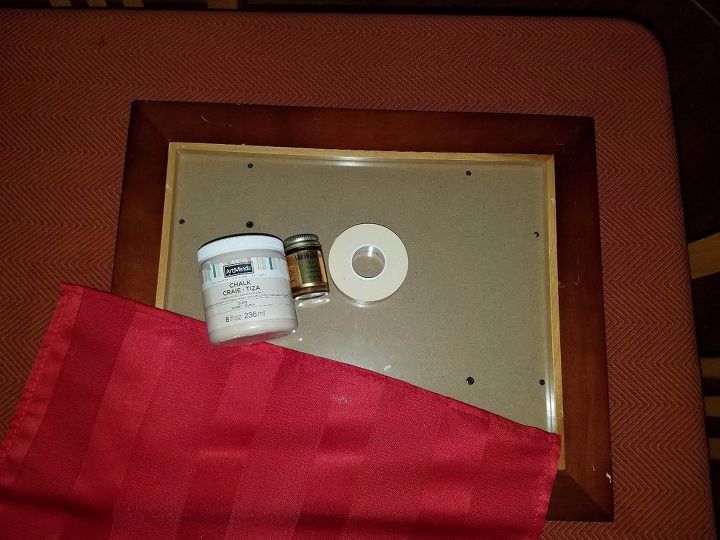
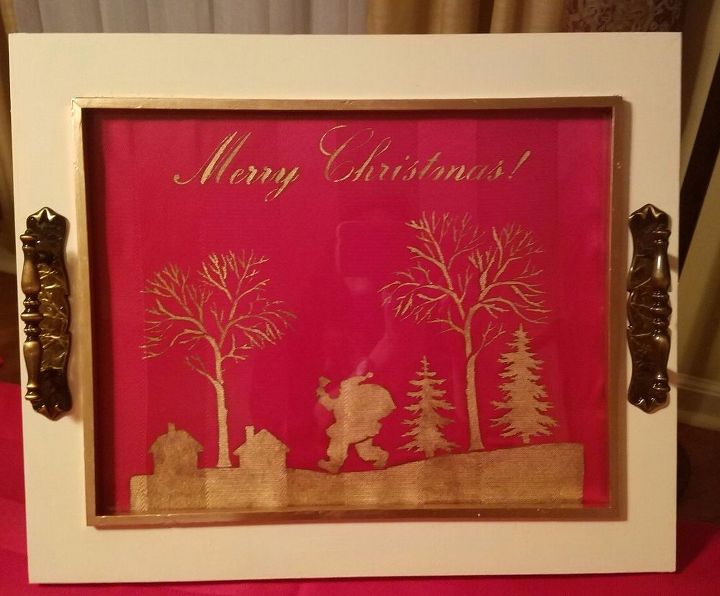
I decided on the color scheme for the project - the tray is a picture frame that was damaged, and in the clearance aisle at Michael's Crafts (got to love clearance bargains!). To add depth for the tray, so it can hold objects like candles, glasses, etc., I added the trim from another frame. The beautiful red fabric is a cloth napkin from a tablecloth set I had on hand. Drawer pulls are from Ace Hardware.
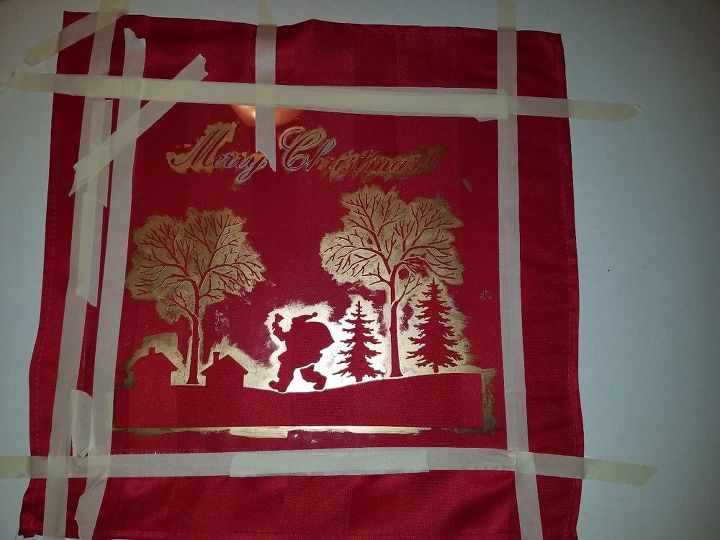
I removed the glass from the frame, and traced an outline of it in pencil, on the fabric. Then, I taped the stencil to the cloth napkin, inside the pencil outline to secure it so it would not move as I painted.
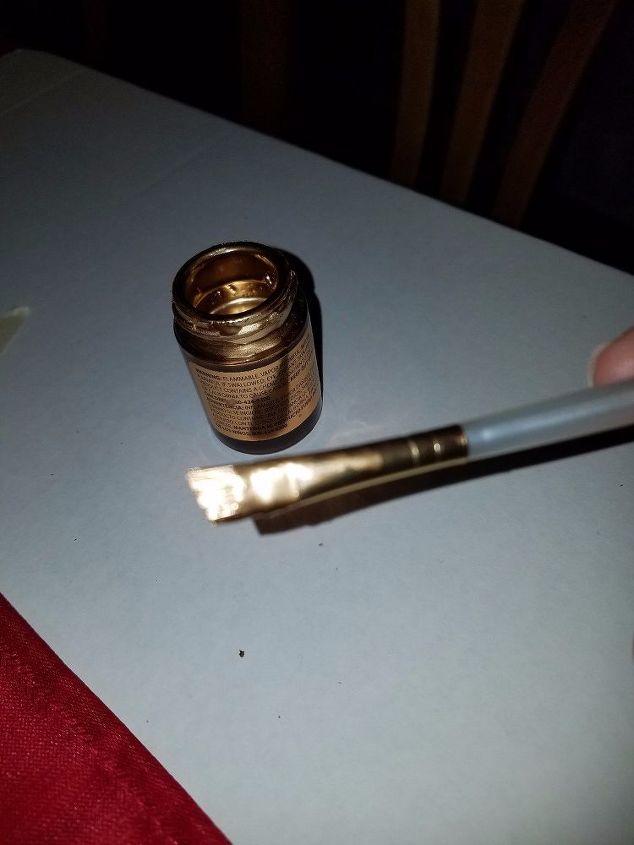
Liquid gold leaf paint is very thin, so it is important to use it sparingly. I used a stiff, angled brush with very little gold leaf paint - then applied it to the stencil in a dabbing (pounding) motion. Note: a sponge dabber is not useful for this type of paint! It applies too much paint to the stencil and the paint bleeds under the stencil!
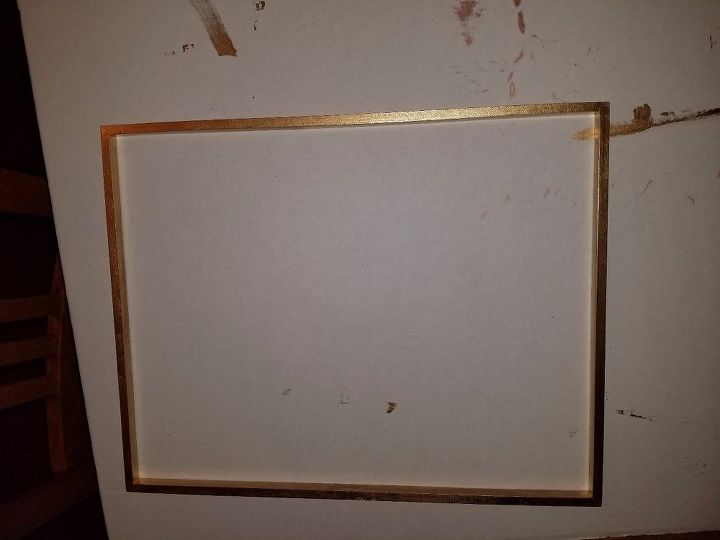
I painted the frame insert from another frame I had in my stockpile. Note: You can use wood trim, cut to size - OR - a second frame to build up your tray. I painted the clearance frame in a pretty cream colored chalk paint. After the frame was dried completely - I enlisted the help of my measuring expert Mike (my hubby!).
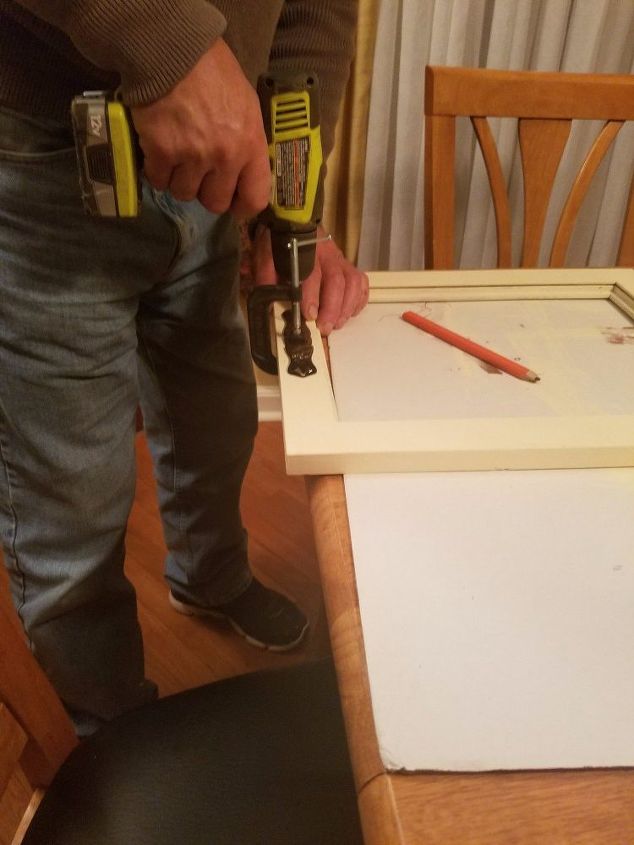
My husband measured and centered the brass drawer pulls in place on both sides of the frame. He used a small clamp to hold the brass drawer pull in place, as he drilled holes for the screws for the pulls. The drawer pulls would serve as the tray handles. I love these handles - and used them on our buffet project, too! I like to incorporate similar elements to create a cohesive design in my home.
The tray can be used for lightweight objects - such as wineglasses on top of the buffet...cookies for Santa....holiday breakfast in bed for guests....etc.!
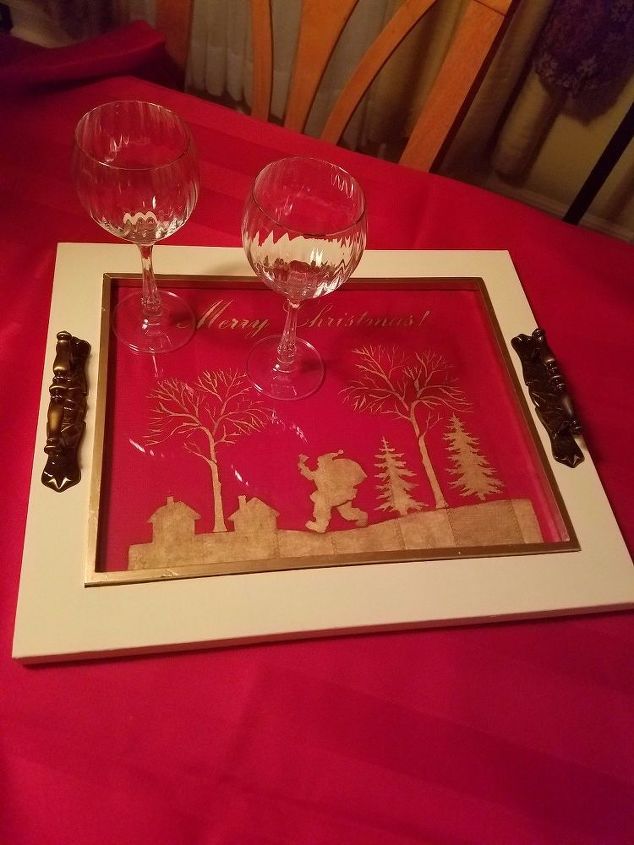
So there you have it! A beautiful tray for the holidays, using a stencil from Cutting Edge!
Comments
Join the conversation
3 of 15 comments
-
Thank you, Lisa!
-
WOW what a clever stencil project!


Frequently asked questions
Have a question about this project?