


Redo of 70's Kitchen With Oak Strip Cabinets - Under $200!

by
Louise
12 Materials
$200
1 Week
Medium
I've read plenty of kitchen redo projects, but no one seems to tackle these ugly oak strip type cabinets. I decided that I'd give it a try, and if it turned out really bad I could always fork out the big bucks and pay for granite and cabinet reface.
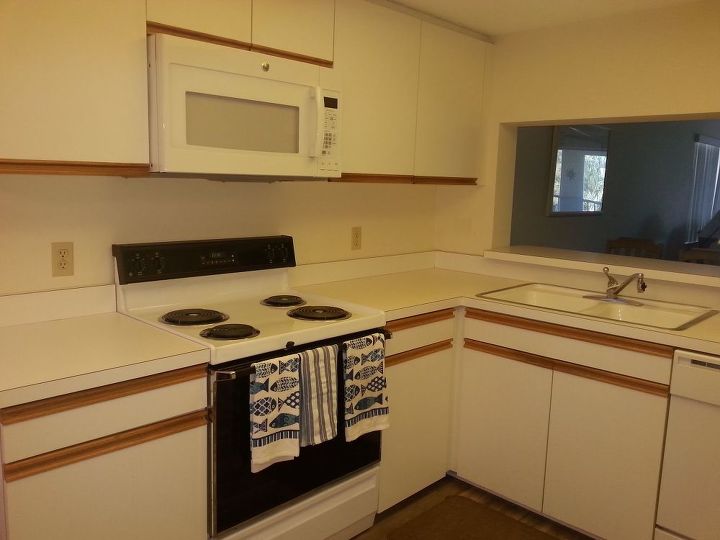
Before
Here is the original kitchen. The before photos came out very yellow, but the cabinets were "white" as opposed to almond. They sure don't look white next to the white appliances. And I can't stand those ugly oak strips.

Before
I went online, found an image of a pretty blue granite, and printed it out as my pattern. Then I bought a quart of Valspar 4011-4 Royal Navy Latex paint. Put that down as my "primer." This is the first and smallest section of cabinet in the kitchen. I did everything first here as my experiment. That was a big mistake! Later, after errors, I figured out that I should have done everything FIRST on the least visible section. Oh well!
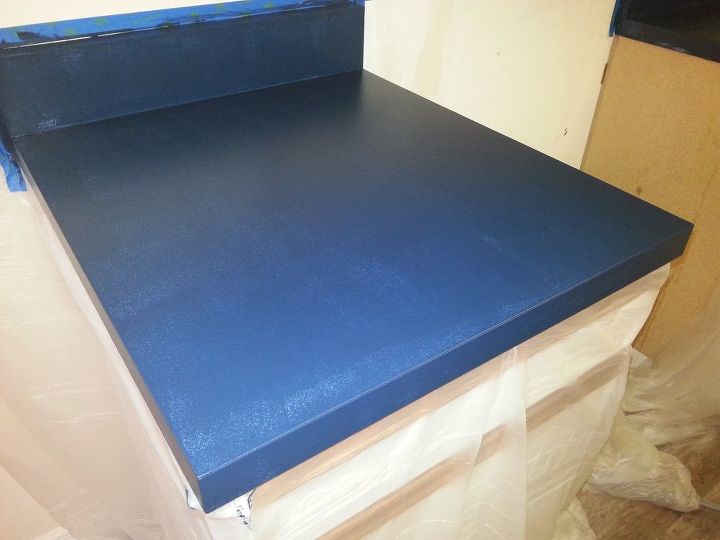
Base Paint 1
By the time I got to the least visible section, I was getting pretty fast and loose with the primer. It had gradually dawned on me that I didn't need a perfectly solid basecoat.
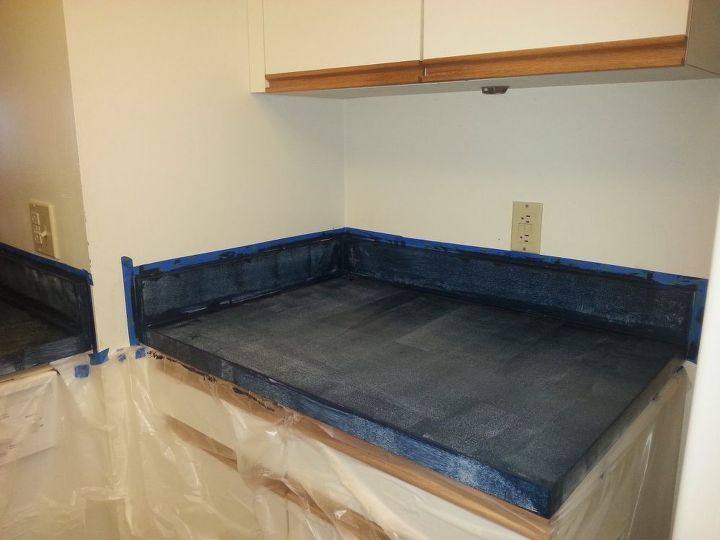
Base Paint 2
With cheap acrylics from Michael's in white, baby blue, grey and navy, I sponged on my granite pattern, using my computer printout as a reminder. I have to say, this came out so well that I can throw my printout onto the counter and it fades right in!
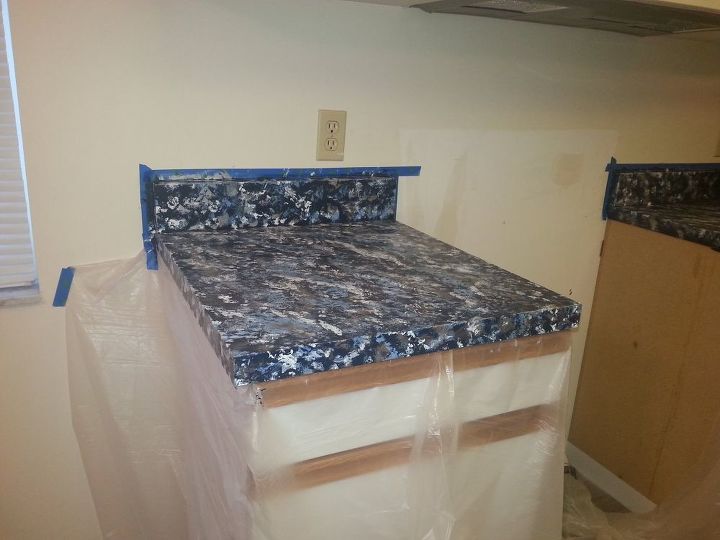
Sponging complete
Close up
I won't bore you with the details - there are a jillion posts on sponge painting faux granite and I read them all before starting. This part of the project was so much fun - I could do this for hours and was thinking to myself, "Oh boy, I can't wait to get to the bathroom countertops!"

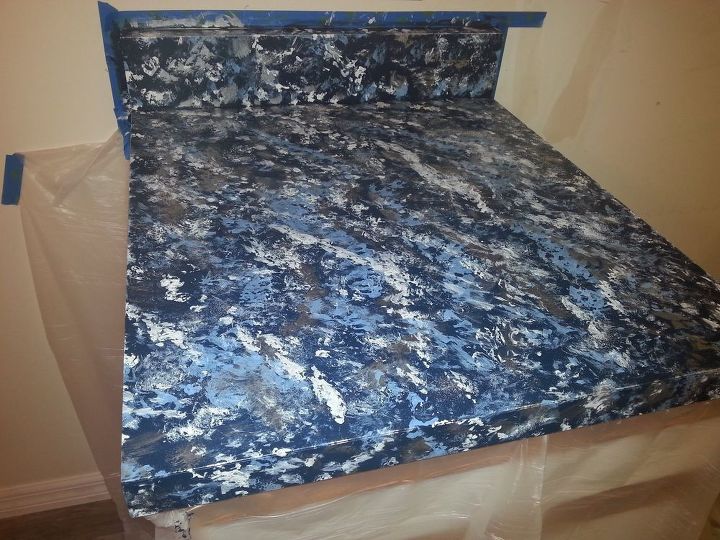
Tape lip before the pour
Midway
At this point I am resigned to imperfect edges and wobbly uneven vertical surfaces. Time to move on - I can always have a professional put in real granite when I win the lottery.
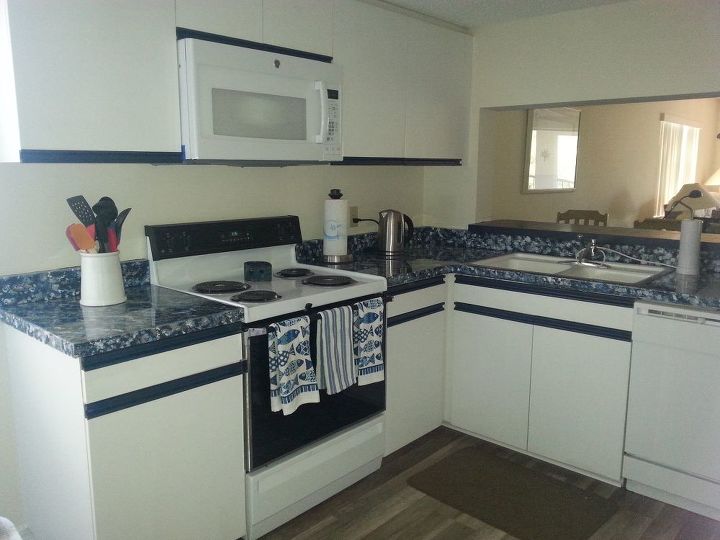
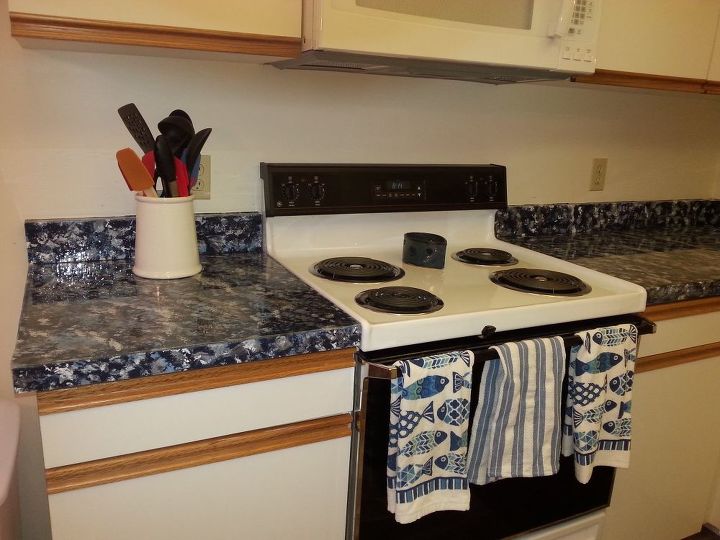
After
Warnings: This has not yet stood the test of time or the pummeling of small children. If you choose to pour epoxy, pre-reserve a rubber-lined room, and provide ear plugs for family members. No fumes were involved in this project and taking deep calming breaths was a necessity.
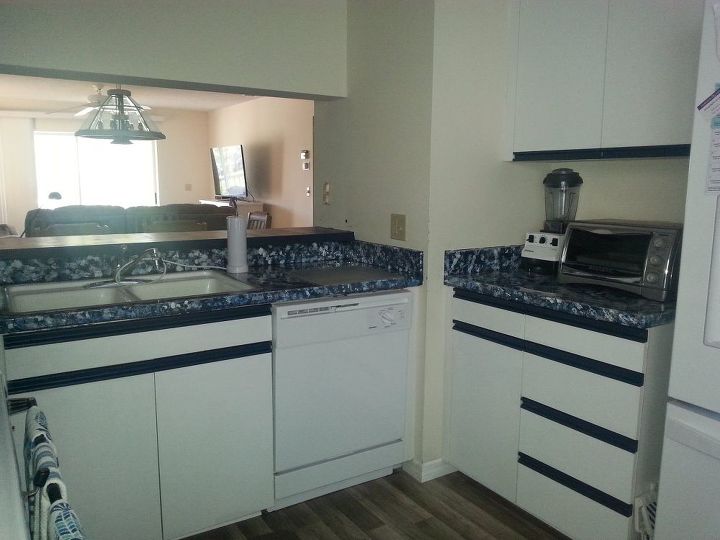
After
Resources for this project:
See all materials


Any price and availability information displayed on [relevant Amazon Site(s), as applicable] at the time of purchase will apply to the purchase of this product.
Hometalk may collect a small share of sales from the links on this page.More info
Comments
Join the conversation
2 of 293 comments
-
Well, Kathy, I thought about it too...the turning point for me was a "nothing to lose" scenario...I was either gonna spend big bucks to get it done, or give DIY a chance. I was glad I did it myself!
-
Great job!!! Looks fantastic!!!


Frequently asked questions
Have a question about this project?
I have these cabinets and once asked two different painters about them...they said they wouldn't hold up and no matter how they did it, it would start chipping and I wouldn't be happy with it. Is yours holding up???
Louise,
You did a GREAT job LOVE the navy blue why not add a few coastal of nautical touches to your new kitchen?
I have the same UGLY white Formica cabinets.
After ALL of those 1980s white kitchens I saw black kitchens i had wanted a black IKEA kitchen but had NO funds for the job.
And so a few rolls of Black Contact Paper I covered the cabinets, the oak strip glossy black duct tape (wears well better than contact paper) I had planed to cover the fake butcher block Formica counters but I like the way the fake golden oak looks against the black cabinets.
For $20 worth of Contact Paper i LOVE my kitchen!
All kinds of nice colors on the Internet for Contact Paper.
Kevin
Hello I am currently online searching for more of these particular cabinets. Love them and I am doing a vintage kitchen look. I took the car trim in silver and it has self adhesive and put them on the edge. Also you can do a formica for $50 to put on top. I love these cabinets because of the quality. My guesthouse is La Sienna so you can see the pictures online.