


Rustic Desktop Bookshelf

by
Clint
6 Materials
I recently posted a tool tote I made as a gift for my friend Jack as he recently got married. This time I'll be showing a desktop bookshelf made for his bride Helen. She's an avid reader and a big fan of Harry Potter so hopefully it'll get a lot of use! I have a YouTube video up showing the process and instructions on how I built it below. I hope you enjoy it.
{
"id": "3624875",
"alt": "",
"title": "",
"video_link": "https://www.youtube.com/embed/t4gN7OVYqJc",
"youtube_video_id": "t4gN7OVYqJc"
}
{
"width": 634,
"height": 357,
"showRelated": true
}
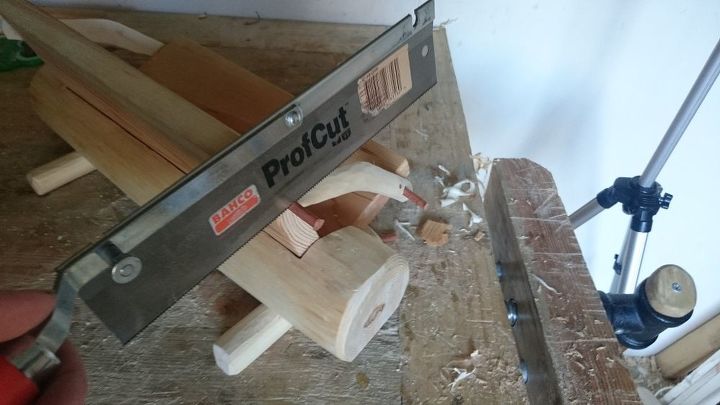
The first thing to do was to find a log and strip the bark off, this was done with a spokeshave, an incredibly rewarding process! I used an ash log. Once it was smooth I then had to cut a 90 degree slot all the way along it, leaving around 5cm (2") on each side. I achieved this by clamping it firmly on my workbench and chiselling out the material. At this point I'd like to mention that if you do this process on a large log you could make the entire bookshelf in this way.
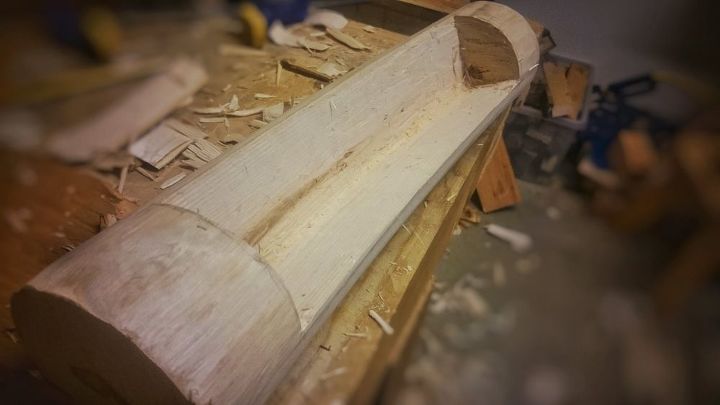
Chiselling out the log takes a while!
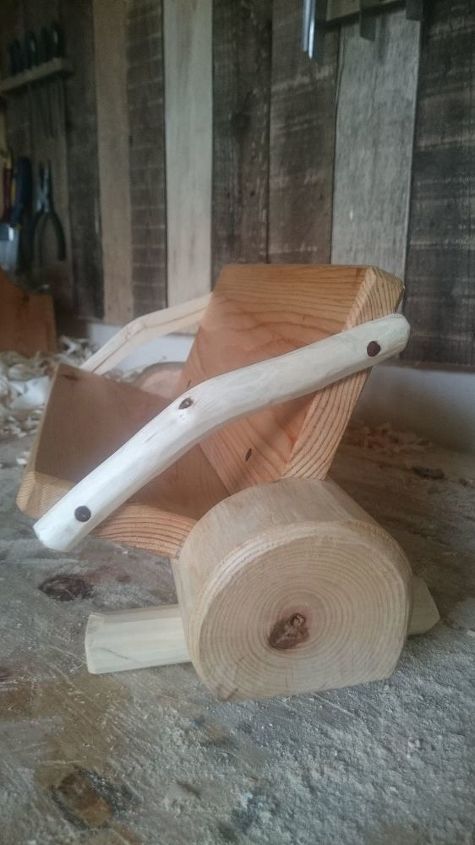
The next stage was to attach the legs underneath the log, without these the shelf would most likely topple over. I used a hazel branch and cut 2 lengths of around 12cm (4 3/4") as the legs. After planing one side of the legs flat (to sit flat on a desktop/tabletop) I rested the ash log on top of them where I wanted them to be attached. Holding a pencil against the leg you can then draw the curve of the leg onto the bottom of the log. I chiselled this out and screwed the legs on underneath.
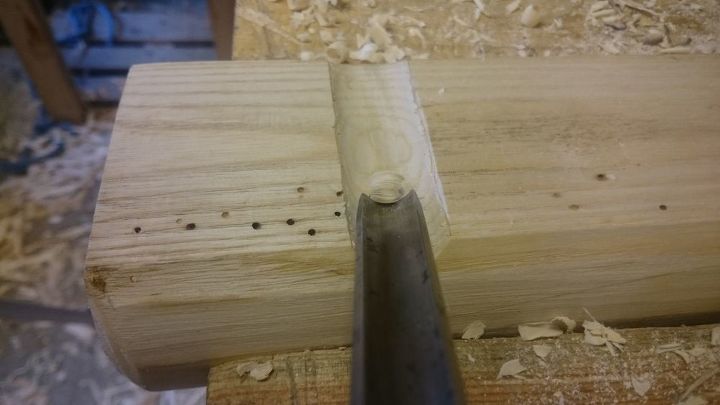
Gouging out a slot for one of the legs.
After the log was smoothed over and the edges chamfered you can then cut the shelf. I used an old pine board that was previously a shelf in the house. The gap for the shelf was around 40cm (15 3/4") but you could make it whatever size you liked. I decided to screw in the bottom part of the shelf right at the back so that the screws would be hidden by the back of the shelf. The back would be held in by dowels made of a wood called sapele which I saved from being thrown in the rubbish. That was just a case of drilling holes to the right size of the dowels and gluing them in.
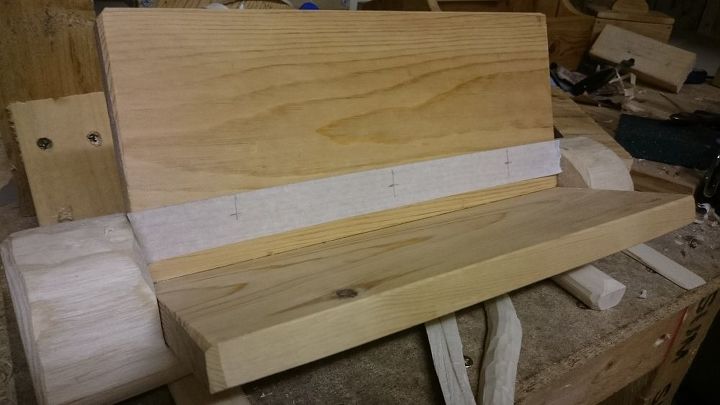
Taped over to reduce drilling tear out.
Dowels glued and ready to be inserted.
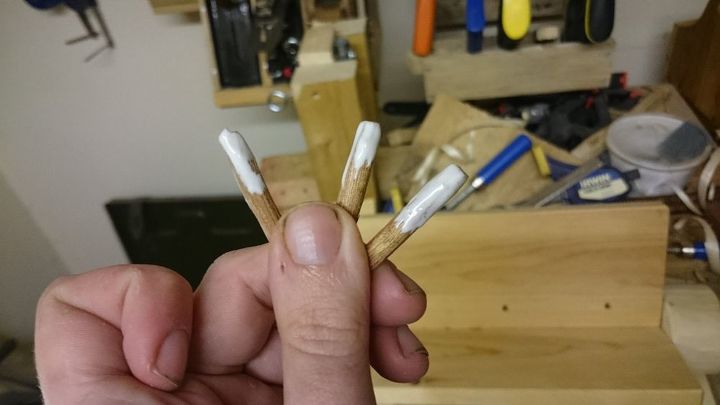
The next part was possibly the trickiest part of the build. In order to keep the shelf ends in keeping with the shelf, I decided to cut a hazel branch in half down its length. These two halves would go on either end of the shelf and also be doweled in with sapele. After they had dried for a day I cut off all the dowels and sanded it down.
Cutting the ends off the dowels.
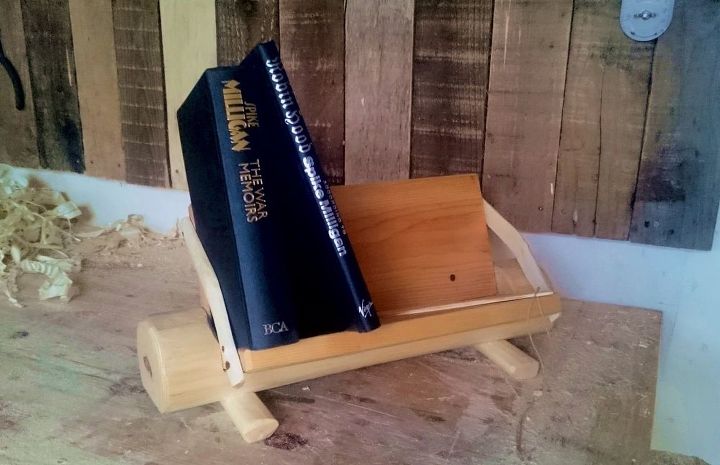
I sanded the whole shelf down with 240 grit sandpaper and afterwards with 800 grit sandpaper. Using mineral spirits (white spirits) and Danish oil, I mixed them together 50/50 in a tub. I find this mixture leaves a smoother finish and also more applications can be done in a shorter amount of time in comparison with using 100% Danish oil.
The finished bookshelf.
After leaving it for a couple of days just to make sure no residue will find its way onto your books you can start to use it!
Thank you for checking out this build, please feel free to ask any questions below.
Want more details about this and other DIY projects? Check out my blog post!
Comments
Join the conversation
2 comments
-
That looks great. The problem I have is that everything in my house is rather modern in style. I don't feel the rustic style would match we'll in my kitchen. Do you have any ideas for materials with a modern flair? Thank you. Yours looks really great though.


Frequently asked questions
Have a question about this project?