


How To Build a Sliding Wall In Your Home
9 Materials
I’m excited to share with you the tutorial on how to build a sliding wall. About 10 years ago is when I came up with this idea to make a sliding wall. At the time I was taking down our large Christmas tree and putting it away. Of course, this will make anyone start thinking of scenarios to make putting away Christmas EASIER! So I thought what if I had a secret room where I could put all my Christmas decor including my tree that I don’t have to take down and could store the Christmas tree still decorated and of course any other decor that needs storage. I really dislike storing all my decor/Christmas stuff in the garage. Since I don’t need a formal living room (our family room is very well loved and lived in) I’ve decided this will be the year to share how to build a sliding wall and create a secret room.
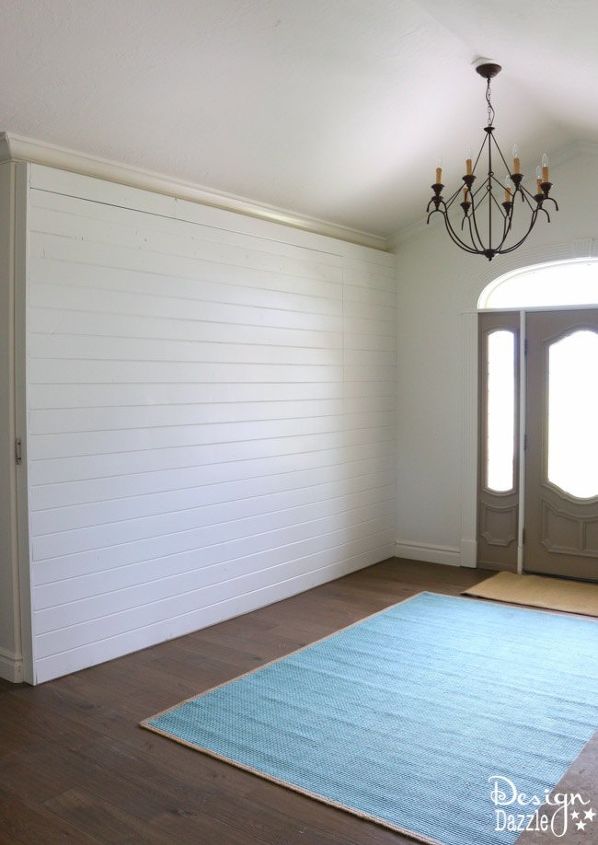
This is what the wall looked like after the project was done. It doesn’t look like a sliding wall but it really is. This wall is 12 feet long and about 9 feet of the wall actually slides!
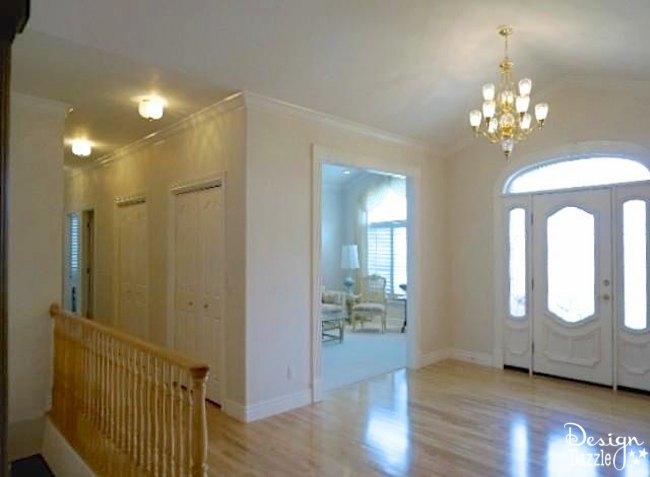
Here is the room without the wall attached. Now to the nitty gritty about the sliding hardware for the wall – I purchased what is usually used for barn doors. You will need a track, the brackets to hold the track and the rail trolley wheel hanger that has wheels to slide inside the trolley track. The trolley track door hanger I purchased can hold doors weighing up to 450 pounds. So I knew this is the one that would work well. The rail trolley hanger (with wheels) came in a package of two. Three of the box rail brackets were purchased to hold the trolley track. That is all we needed to make this work. This is a very good hardware system and I’m really happy with how well made it is.
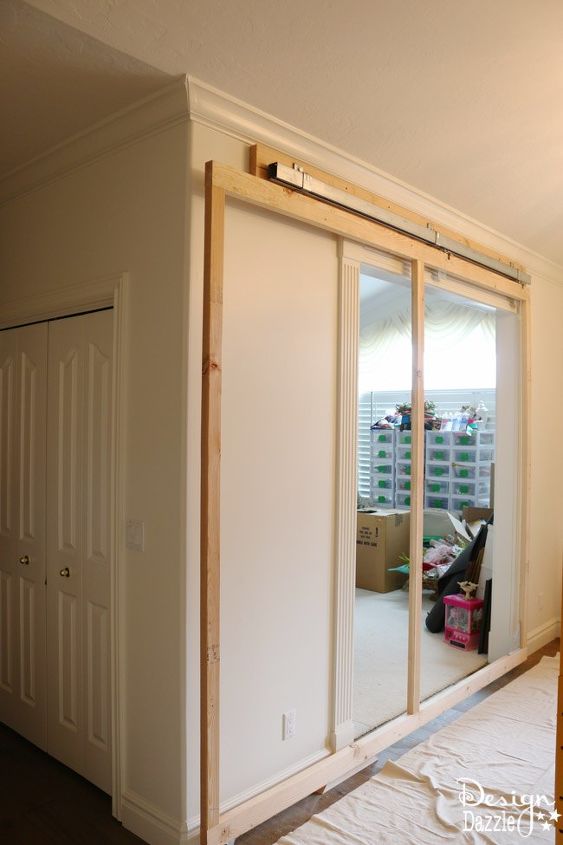
A 2″ x 6″ x 10′ was attached to the top of the wall with lag bolts that were counter sunk through the board into the wall. Make sure to use a stud finder for this part. If you don’t, the weight of the wall will pull out of sheet rock. This wall is heavy! Also, use a level to install the 2 x 6 and the rail. Nothing worse than a door not opening (or opening on it’s own) because the track isn’t level. This board was added to the wall to give support to the trolley track door hanger. The box rail mounting bracket came with lag bolts. This bracket was attached to the wood first and the Trolley track was then attached to the 2″ x 6″ wood. Check the top of the image to see the board and the trolley track. Here is the link to the trolley track door hanger and the sliding track hardware that I used, it works very well! Trolley Track Door Hanger Sliding Track Hardware
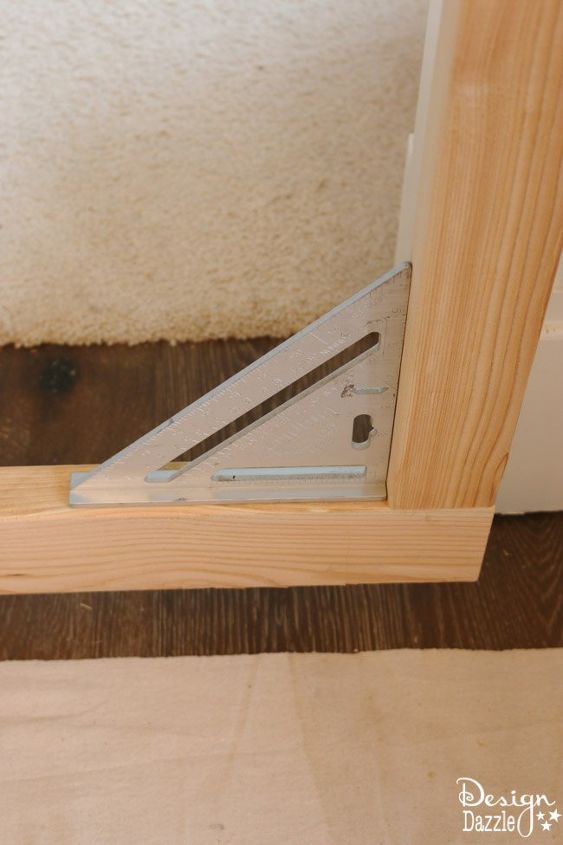
Diagonal bracing adds stability and is an important structural aspect of the wall frame. Bracing (2″ x 4″) was used in each bottom corner of the frame to square up the wall. Speed square was used to check squareness of the wall.

To see the rest of the steps on how to build this fun sliding wall be sure to check out my blog post with the link below!

Want more details about this and other DIY projects? Check out my blog post!
Comments
Join the conversation
2 of 57 comments
-
I love it! Perfect if you want to make a hidden room. No one will know it's there. Thanks for sharing.
-
I seriously love this idea. Perfect for my room and nothing is ever touched as no one knows it's there. Thank u


Frequently asked questions
Have a question about this project?
I do not see the blog address to see the full project?
Why not just a door?
Cost for this project?