


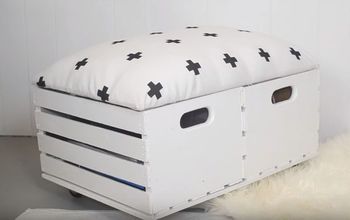
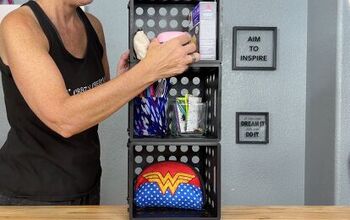
Crate Storage With a New Spin

I am always looking for inexpensive ways to create storage in my kids' rooms. I originally made this storage unit for my daughter but used boy-friendly colors, on the off chance that she doesn't want it. Turns out she wants it, but wants it painted fuchsia. One of the comments below from Snuttall1947 was brilliant! She is making one of these for her bathroom. Imagine what a great space to store towels and bath products vertically. Just wanted to share, in case you miss this in the comments. So many great comments on where to use this: craft rooms, closets, pantries, pool areas, garages, laundry rooms and mudrooms... I hope I didn't forget any... Possibilities are endless...
Tools and Materials
- Wooden crates
- Lazy susan
- Two pieces of wood
- Full length mirror
- Hooks
- Scrap wood
- Paint
**Just a note, my daughter is all of 5 ft 1 inch tall, so this project is the perfect height for her, but if I were making for myself... I would add another crate.**
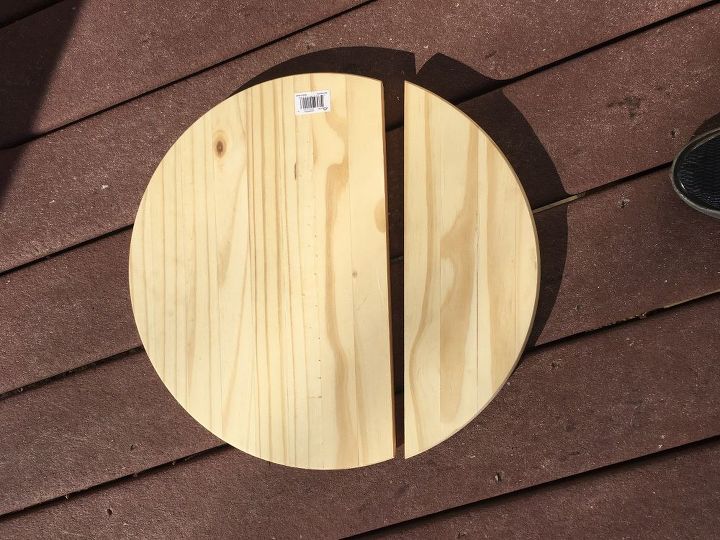
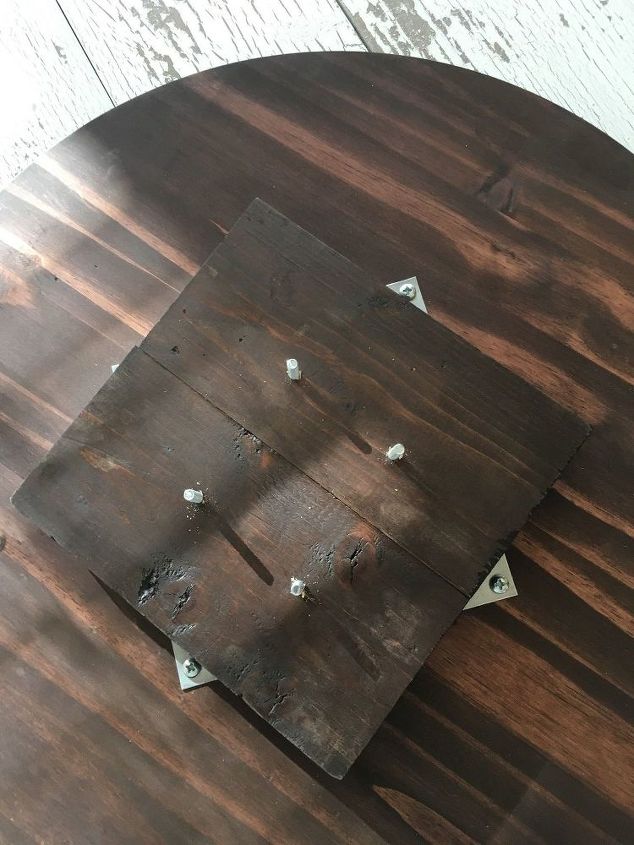
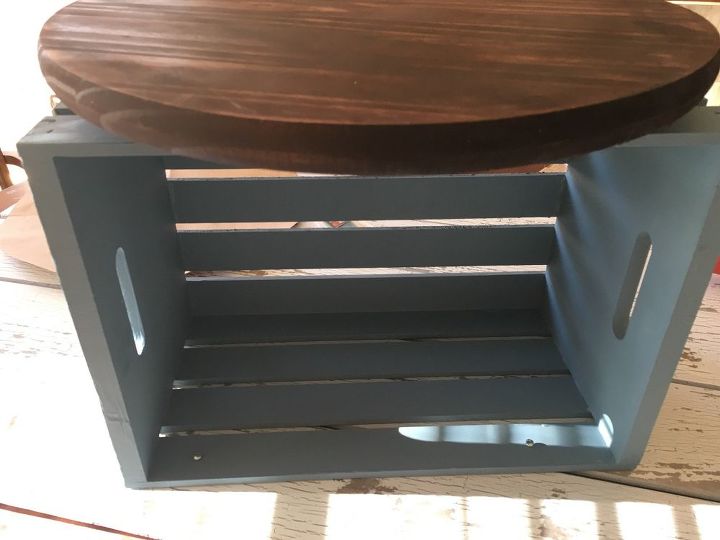
I started this project so long ago, I can't find the beginning pictures. Basically, there were two pictures of 5 painted wood crates and a picture of the lazy susan mechanism before it was attached to anything. The above picture is where the problems began. To make the lazy susan base of my project, I bought two circular-shaped glue edge boards from Home Depot. I began staining them on my deck. One was stained and then I was interrupted before I started the second. I completely forgot them on the deck until the next morning. Of course, it rained during the night. The one that was stained faired "ok" but this one did not. I was determined not to go buy another one and this wasn't going to glue back together perfectly. "Stay on budget" is my mantra. So, I changed the plans from two circles on my lazy susan to one circle as the base and a small square wood top.
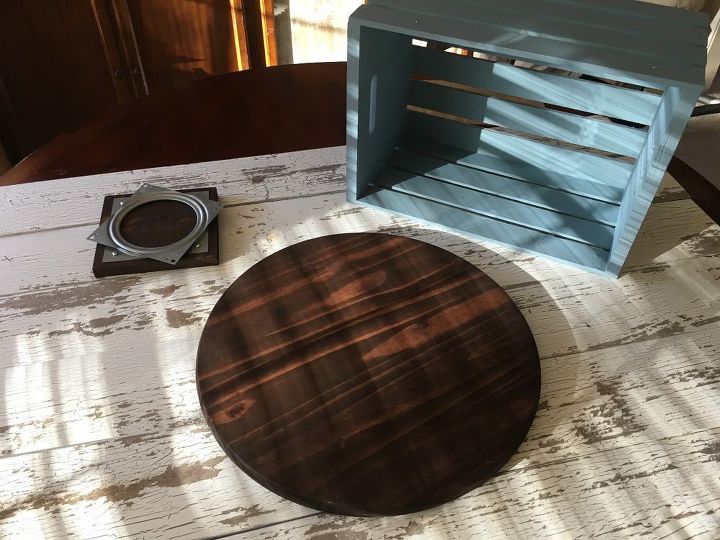
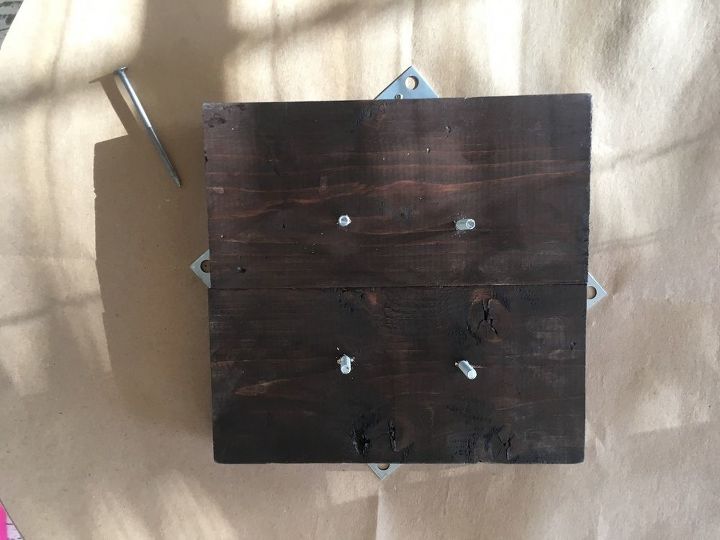
In this picture you can see the small square base that is slightly larger than the lazy susan mechanism. I made this by glueing two board scraps together. The square was roughly 7 inches by 7 inches.
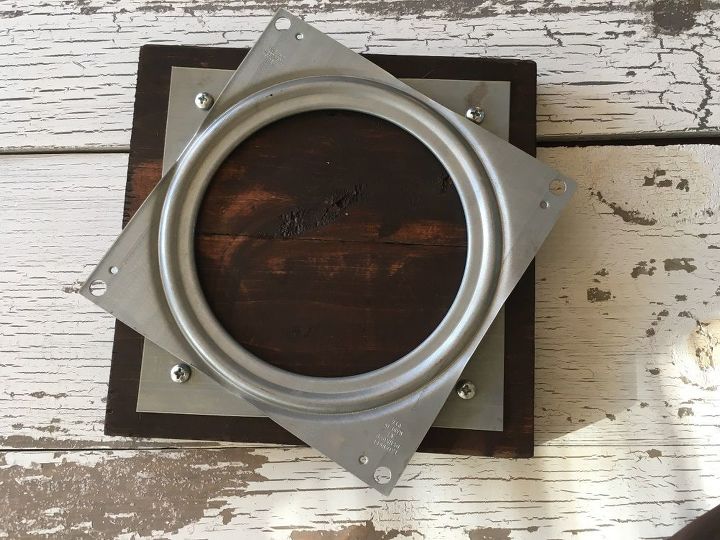
Here is a close up of the base that I made attached to the lazy susan hardware. Instructions recommend that you spray the ball bearings with a metal lubricant before attaching to the wood pieces. Once it is together, it would be hard to get close to them. My wood square is just slightly larger, at around 7 inches, than the lazy susan hardware.
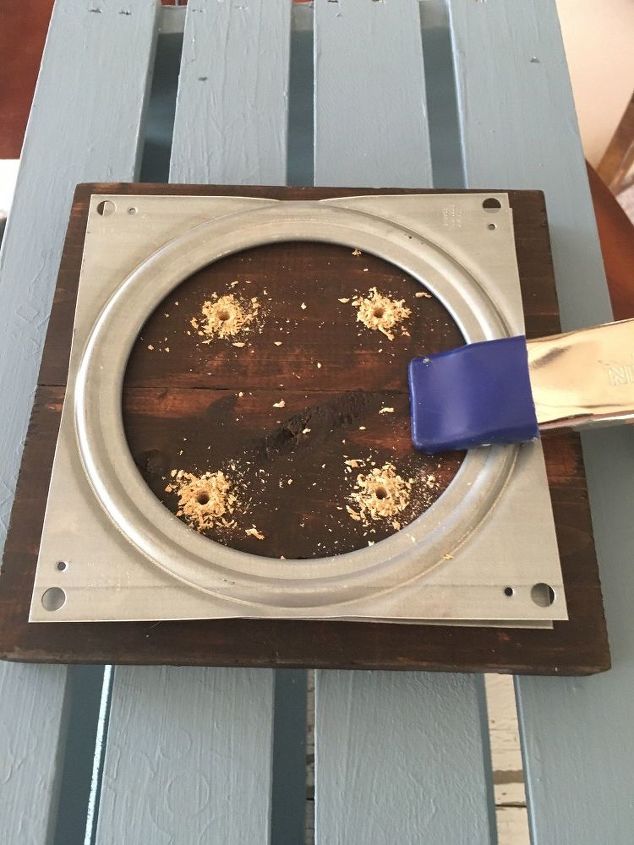
Next, I clamped it to my crate. This will be the bottom of the crate when it is all put together. I drilled holes for the bolts which will hold it to the crate and I just eye-balled a square shape. You should measure.
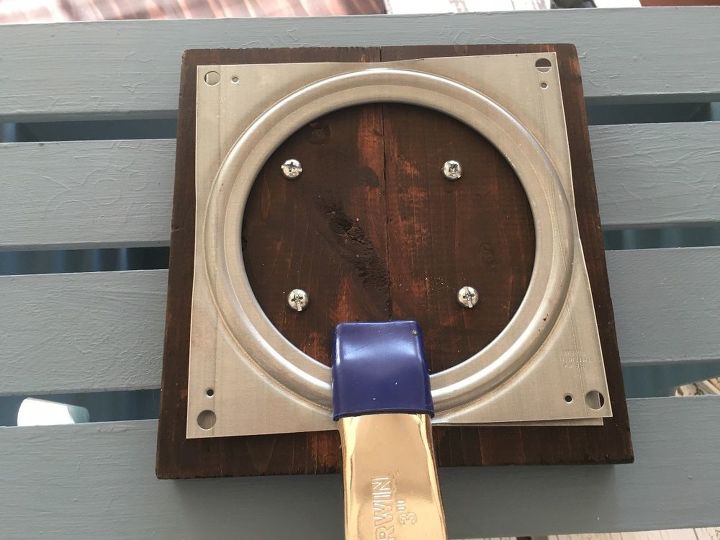
I put my bolts in to make sure everything was good. They were some that I had in jars and were actually too long but I will cut them off at some point if they bother me.
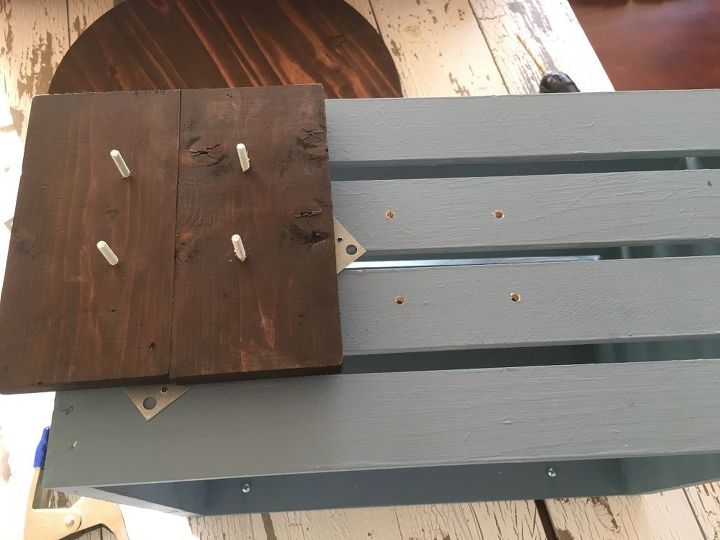
I pulled the wood square with attached bolts and lazy susan hardware from the crate. Now, it is time to attach this lazy susan hardware to the base of the unit and those bolts need to be in place. Once the base is attached to the lazy susan hardware, I will slide the bolts back into these holes on the crate. You will want to attach the lazy susan hardware to the middle of your base.
To quickly find the center, I traced the shape onto kraft paper. I folded it into quarters which marked the center. I put the kraft paper on top of the wood circle. I lined up the metal corners with the folds on my kraft paper. I marked each hole by pressing a nail through the paper and making a mark on the wood. This would show me where to attach my screws so that the mechanism would be located in the middle of the base/wood circle.
I removed the paper to reveal the marks on the wood where it should be attached and added the screws.
Now, you slide your bolts through your holes in the crate and attach the nuts. Tighten them with a wrench. I found it easiest to get the bolts back through the holes by having the unit upside down. Next, turn the unit right side up (wood circle on the floor/crate on top) At this point it should spin freely. I have a video on my Instagram of it spinning. That was a happy point for me! Now is when I recommend moving it to the room that will be its new home. Once the top crates are added, it is very heavy. Next add additional crates. I used a combination of bolts and screws to attach my crates. I can easily dismantle it to make something else someday. I used scrap wood to make shelves and shelf supports for the inside. I added hooks to the sides for jewelry, belts and/or bags.
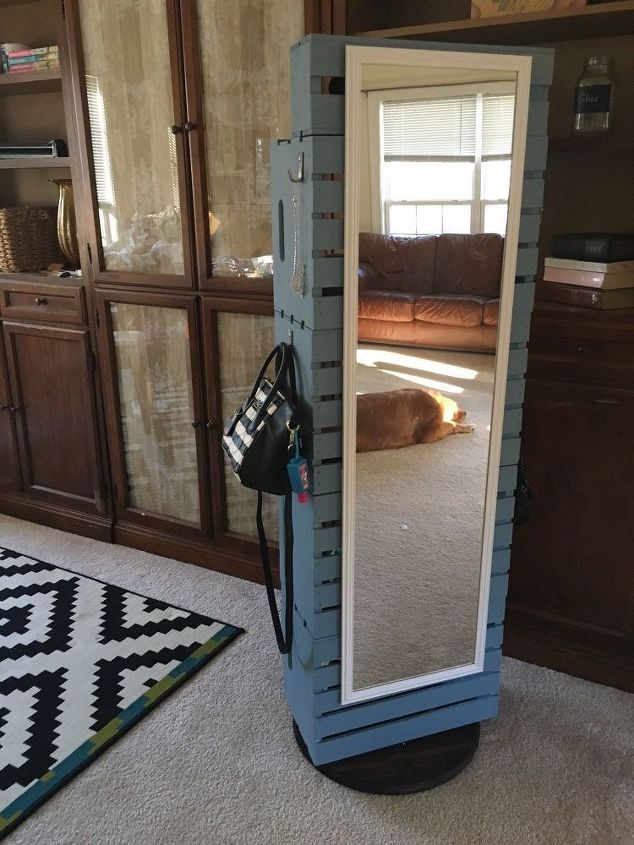
I have a full length mirror on the back. I couldn't believe it was only $5.99 from Target. The lazy susan hardware runs around $5 or $6 and the circle shaped piece of wood was $4.80 from Home Depot. This turned out to be a very budget friendly organization project.
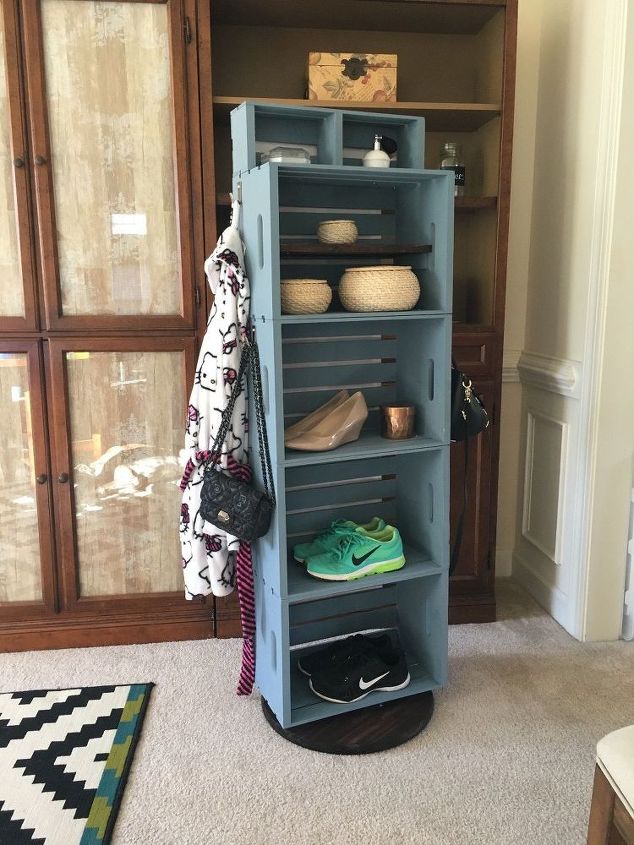
Here I have one pair on each shelf, but the shelves easily fit two pairs (Size 8) side by side.
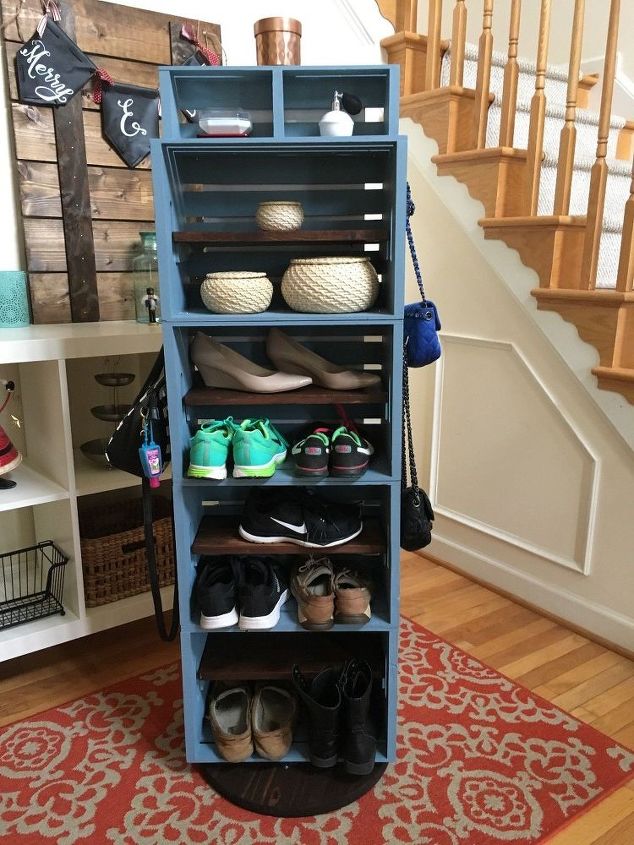
Fully Loaded Shoe Shelf. I glued in the shelf supports but the shelves set on top and are removable if not needed. So, this storage unit is flexible to changing needs.
Have you tried this out for yourself? Let me know how it went in the comments below!
Resources for this project:
See all materials


Comments
Join the conversation
-
This is one of the best ideas I’ve seen in Hometalk.
-
TOTALLY BRILLIANT-- what a great idea--- BRAAAAAAVO!!!!


Frequently asked questions
Have a question about this project?
How did you attach crates together?
WhT size crates did you use?
What size crates did you use?