


Fun Stenciled Toy Trunk

by
Melody
2 Materials
$40
3 Hours
Easy
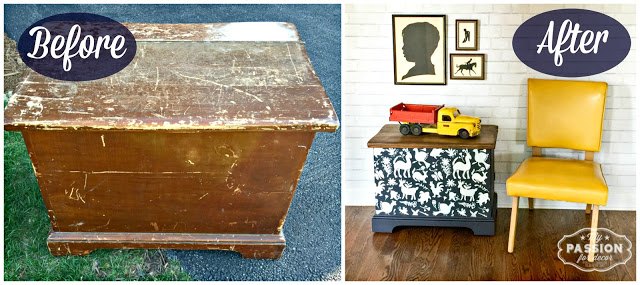
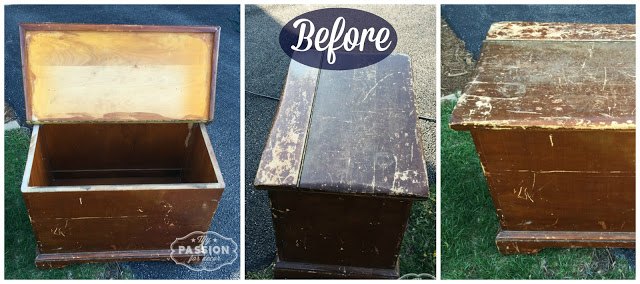
I found this quirky, fun and beat up trunk at an estate sale recently. I loved the style and the fact it has casters underneath so it moves around easily.
The first step was to clean the piece. I used a vinegar and water solution to clean the wood. After the trunk was dry, I sanded the top with 120 grit sandpaper, then 220 grit to give it a nice smooth finish. I stained the top a mix of jacobean and dark walnut stain.
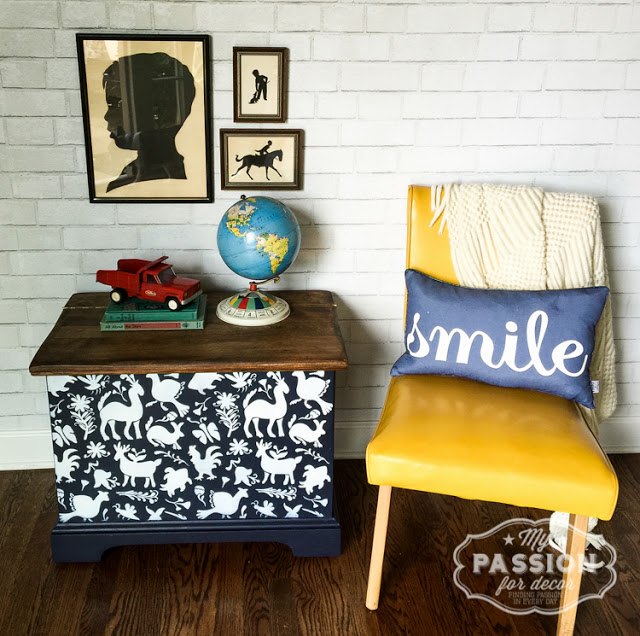
For the rest of the trunk I used my favorite navy blue paint, General Finished Coastal Blue.
Last, but not least I used a stencil I'd bought a few weeks ago from Royal Design Studio. I instantly fell in love with the fun pattern and knew it would finish the trunk off perfectly. The Stencil I used is the Otomi Mexican Folk Art Furniture Stencil. If you haven't used Royal Design stencils before, make sure you have a look at all the amazing options they offer! (and no I didn't get any compensation for writing this post)
Once the stencil was on, I waxed the entire trunk with a clear wax and I was done!
I love how this one turned out. I'm such a huge fan of this stencil and can't wait to find another piece to use it on.
The first step was to clean the piece. I used a vinegar and water solution to clean the wood. After the trunk was dry, I sanded the top with 120 grit sandpaper, then 220 grit to give it a nice smooth finish. I stained the top a mix of jacobean and dark walnut stain.
For the rest of the trunk I used my favorite navy blue paint, General Finished Coastal Blue.
Last, but not least I used a stencil I'd bought a few weeks ago from Royal Design Studio. I instantly fell in love with the fun pattern and knew it would finish the trunk off perfectly. The Stencil I used is the Otomi Mexican Folk Art Furniture Stencil. If you haven't used Royal Design stencils before, make sure you have a look at all the amazing options they offer! (and no I didn't get any compensation for writing this post)
Once the stencil was on, I waxed the entire trunk with a clear wax and I was done!
I love how this one turned out. I'm such a huge fan of this stencil and can't wait to find another piece to use it on.

Want more details about this and other DIY projects? Check out my blog post!


Frequently asked questions
Have a question about this project?