


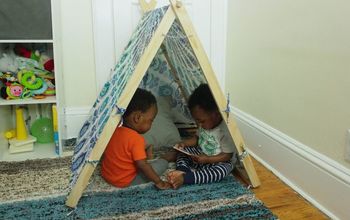
No-Sew Kids Teepee

8 Materials
$65
1 Hour
If you have young children, then you are probably familiar with the latest trend in kids decor - teepees! They are everywhere, and why wouldn't they be? What child doesn't love their own special place to share secrets, hide treasures and enjoy their own cozy nook? This DIY is great, because the end result fits in with my homes color scheme, doesn't take long (because what parent has spare time on their hands?) and is half the price of what retailers charge. Your kids, grandchildren, pets, etc. are going to LOVE it!
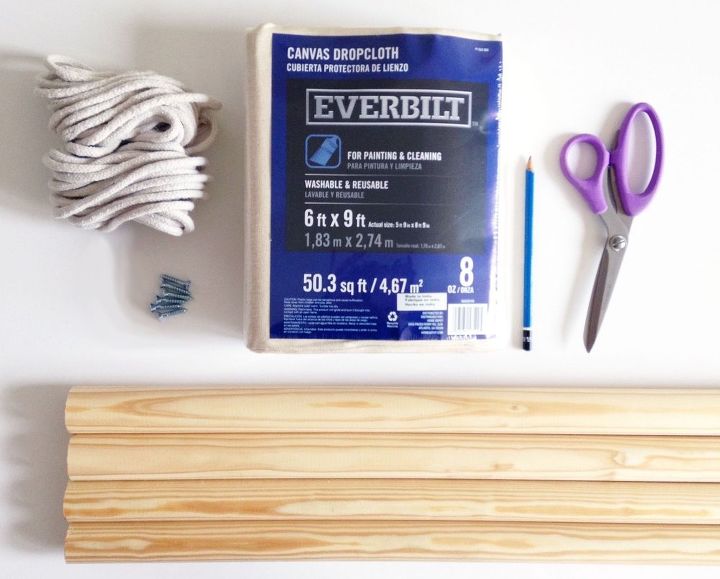
SUPPLIES: - 6x9' Canvas Drop Cloth - 1 1/2' x 6' Wood Dowels (x 4) - Wood Screws (x4) - Rope (atleast 1/2" thick) - Hand Drill - Scissors - Pencil - Ruler - Tape (optional) *Note: I recommend completing steps 4 - 7 on some type of non-slip surface. If you aren't working on carpeting, put down an old rug, or a drop-cloth. It will make your life easier when lining up your poles.
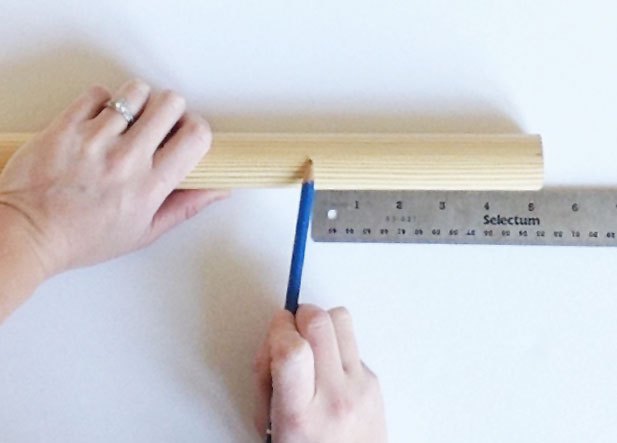
Step 1: Mark Your Dowels Using a ruler, mark 5" down from the top of pole #1.
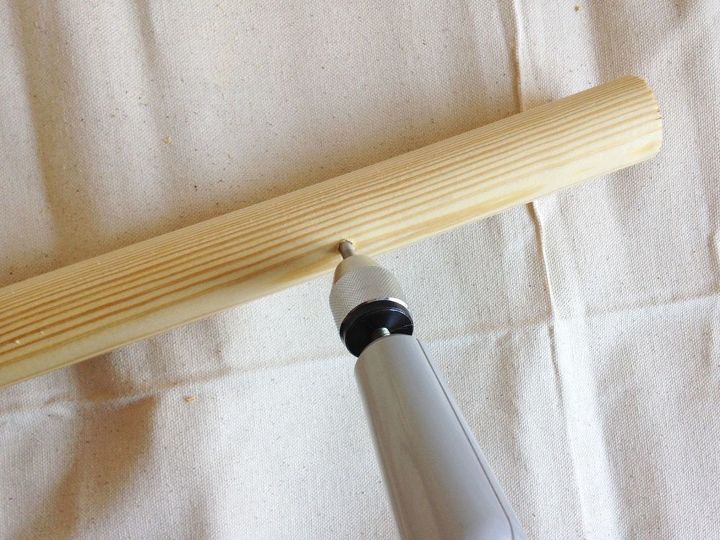
Step 2: Drill a Hole Drill a hole at the mark, all of the way through pole #1. I'm using one of my favorite products, my Fiskars hand drill. This is an amazing tool for small projects, as it runs completely by hand and doesn't require electricity. No noise and less-mess, means more craft time for mom during nap time. Hooray!
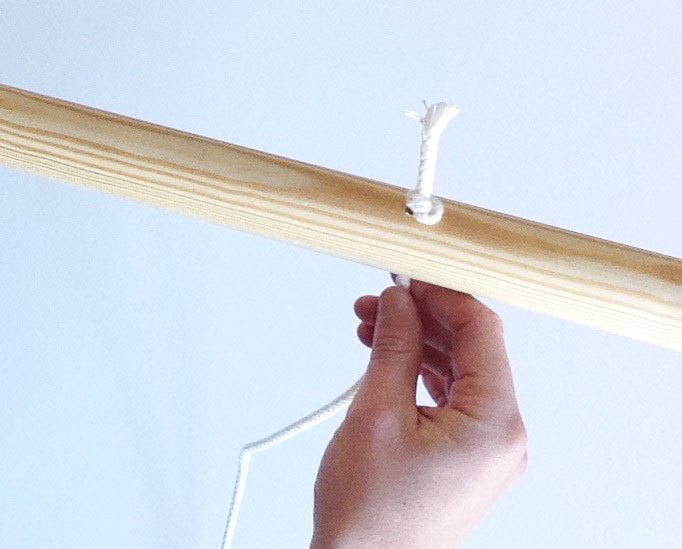
Step 3: Thread Your Rope Thread your rope through the hole and tie a knot at the end where it meets the pole.
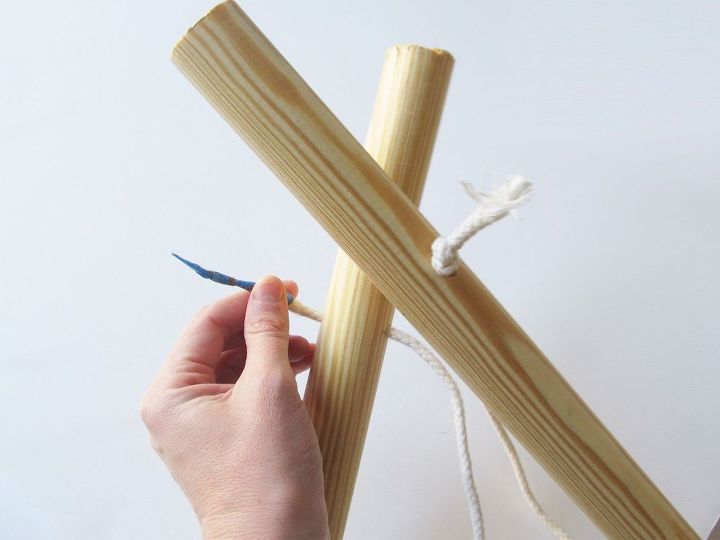
Step 4: Rope the Dowels Together Place pole # 1 and pole #2 upright to form the front of a faux teepee. Ensure they are stable and balanced to create the entryway of the teepee. Next, mark the place where they meet on pole #2. Drill a hole through this marking. Thread your rope from pole through the hole in pole #2 and wrap the rope several times over, under, around the two poles to secure them together. *TIP: If you are having trouble threading your rope through the hole, take a piece of tape and wrap it around the end of your rope. This will create a much smoother line to be inserted into the hole, as opposed to a piece of rope with a frayed end.
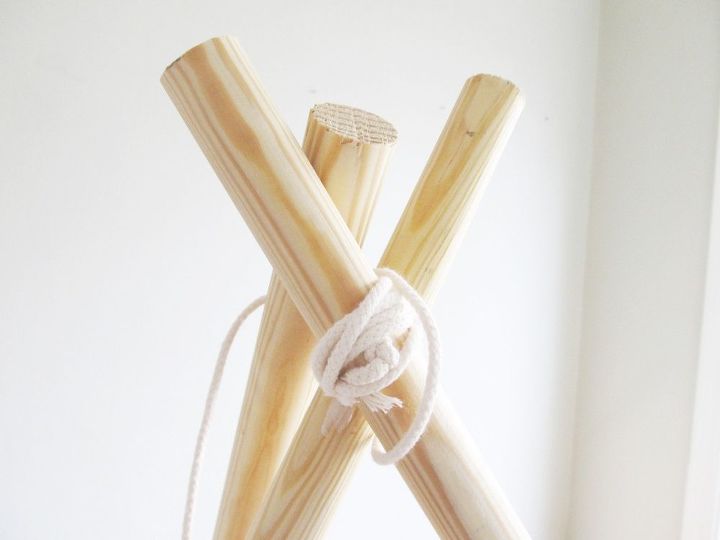
Step 5: Add the Third Pole Next, lean pole #3 up against the first two poles and place it where it best lies to stabilize the teepee. Remember, the entryway of the teepee should be wider than the backside of the teepee. Mark hole, drill, feed rope and wrap the rope over, under and around - just like you did with pole #1 & 2.
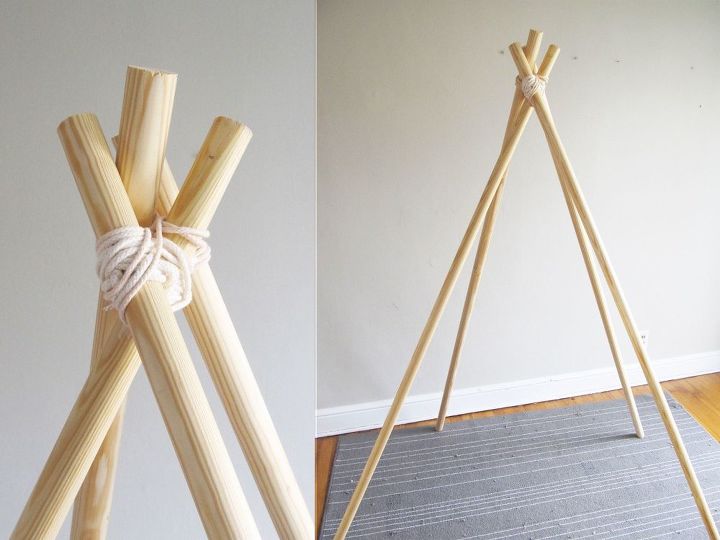
Step 6: Add the Fourth Pole Continue the process for pole #4. Find the place where the pole best lies to balance out the entire teepee. Mark it, drill the hole, thread the rope and wrap. Voila! The frame of your teepee has been built.
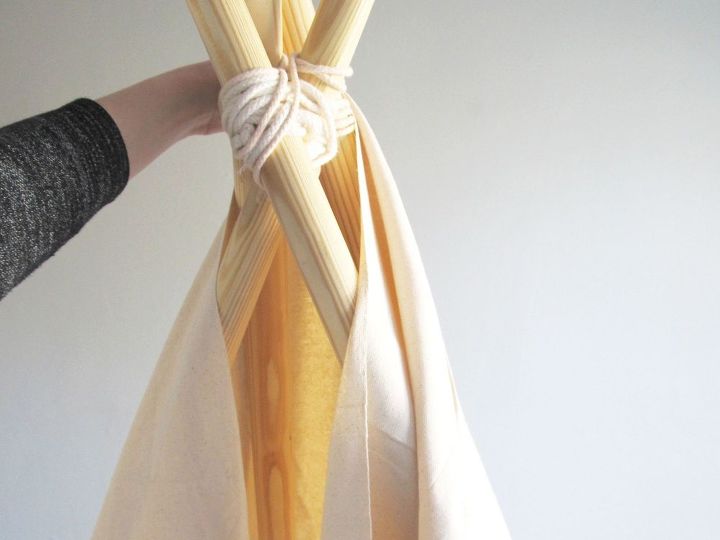
Step 7: Wrap Your Drop Cloth Open your canvas drop cloth horizontally and find the middle of it. Align the middle of the drop cloth with the top of the backside of the teepee. Make sure the sides of the cloth are draped evenly.
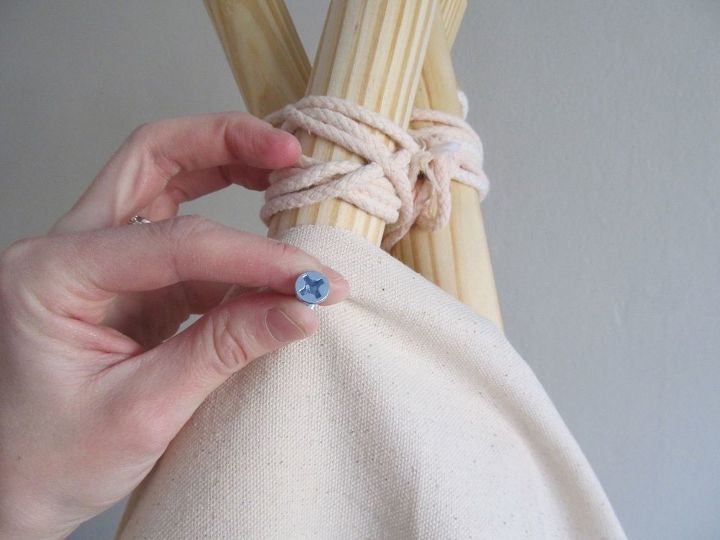
Step 8: Secure the Drop Cloth Insert a screw through the backside of the first pole. Screw it in through the cloth, and all of the way into the wood to secure it.
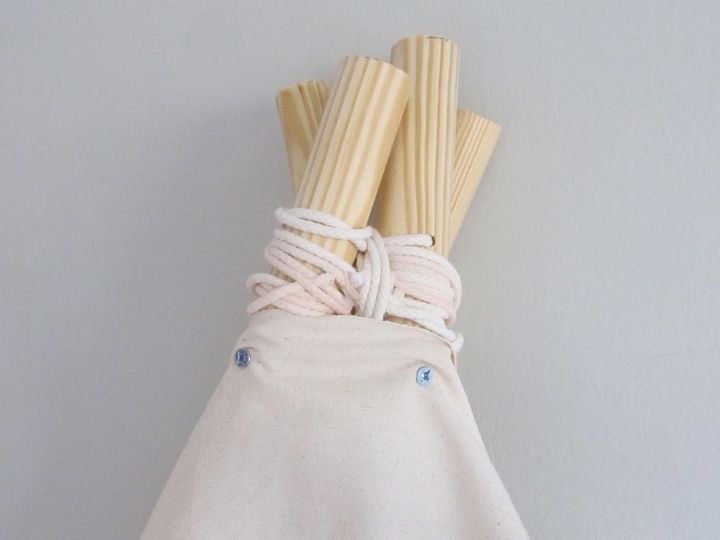
Insert a screw through the backside of the second pole. Screw it in through the cloth, and all of the way into the wood to secure it.

Step 9: Adjust The Fabric and Poles Extend the fabric from the back of the teepee to the front of the teepee, covering the sides and tucking the extra canvas underneath the poles on the floor tightly. Adjust your poles so that it creates a balanced teepee frame.
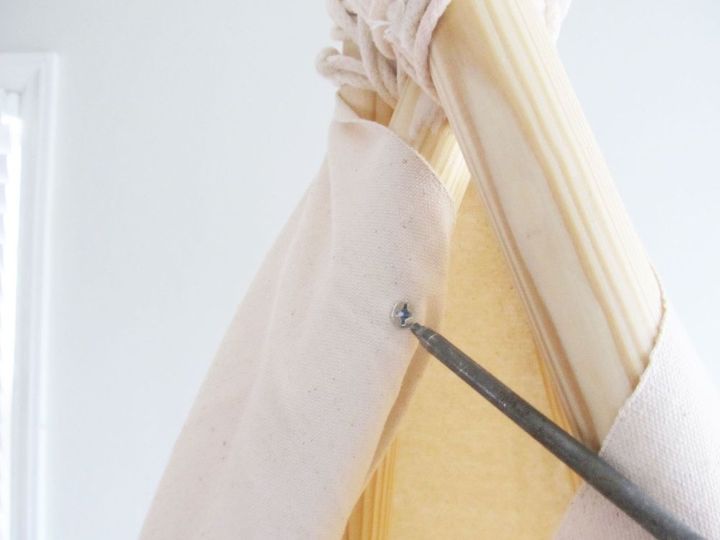
Step 10: Roll the Fabric and Pull It Tight Roll the fabric tightly around the first front pole. Secure a screw through the fabric and wood, just like you did on the backside. Repeat this step on the other front pole. OPTIONAL: You may cut off the extra fabric along the front of the teepee poles. For safety reasons, you may want to do this if you have young children.
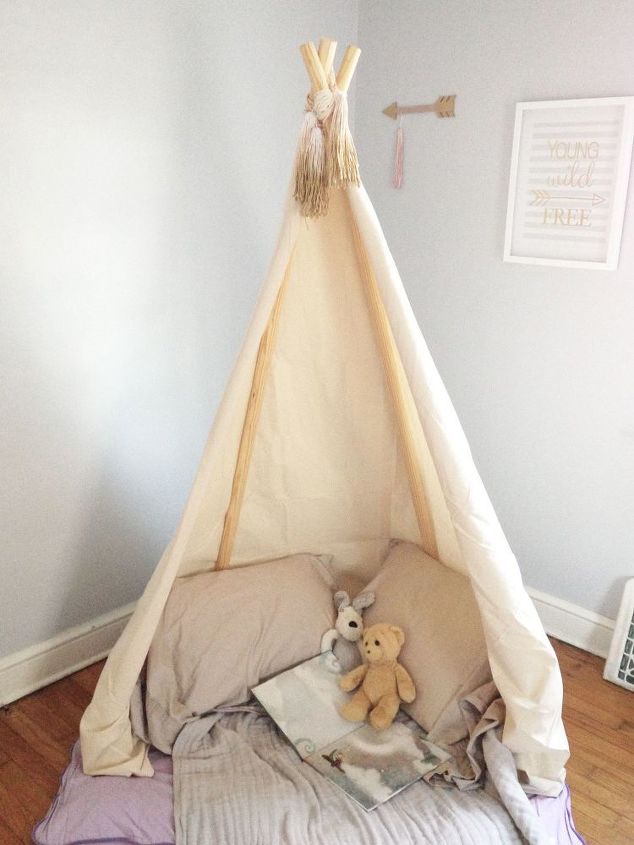
Now, it's time for the fun part. Add twinkle lights, fill it with comfy blankets and pillows, gather your child's favorite stuffed animals or hang pretty scarves from the top. Let your imagination run wild!
{
"id": "4092369",
"alt": "",
"title": "",
"video_library_id": "8301",
"thumbnail": "https://cdn-fastly.hometalk.com/media/2017/07/31/4092369/no-sew-kids-teepee.jpg"
}
{
"width": 634,
"height": 357,
"showRelated": true,
"noautoplay": ""
}
Comments
Join the conversation
3 of 31 comments
-
Throw a sheet over a table, voila! Instant "fort", plus the kids can make it themselves.
-
Love it!!!!


Frequently asked questions
Have a question about this project?