


DIY Tie Dye Sharpie Mugs
6 Materials
45 Minutes
Easy
A DIY Sharpie mug is one of the easiest and most personalizable DIY gifts you can make! You can mark up a mug in just a few minutes, then let it bake it for 60 minutes. Let me show you how to make a "tie dye" effect Sharpie mug, a method I came up with after much trial and error.
Click here for the full DIY Tutorial
Click here for the full DIY Tutorial
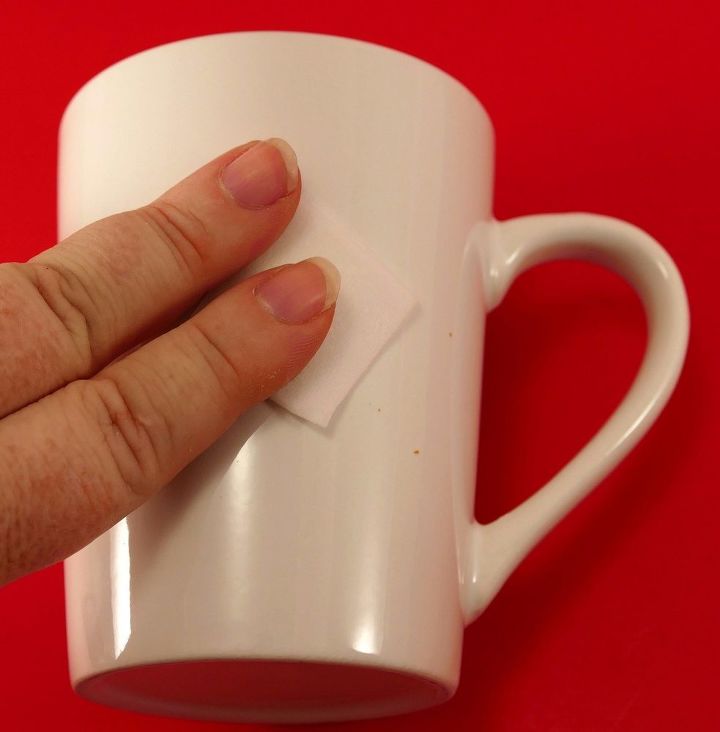
Step 1: Wash your mug with soap and water, then clean it again with rubbing alcohol. Allow the rubbing alcohol to evaporate (this takes a few minutes). Avoid touching the surface you intend to draw on with your fingers, as your oil can cause the paint to not adhere properly. I like to put my hand inside the mug while I decorate it. Also, be sure to put something under your mug to catch alcohol/paint later on.
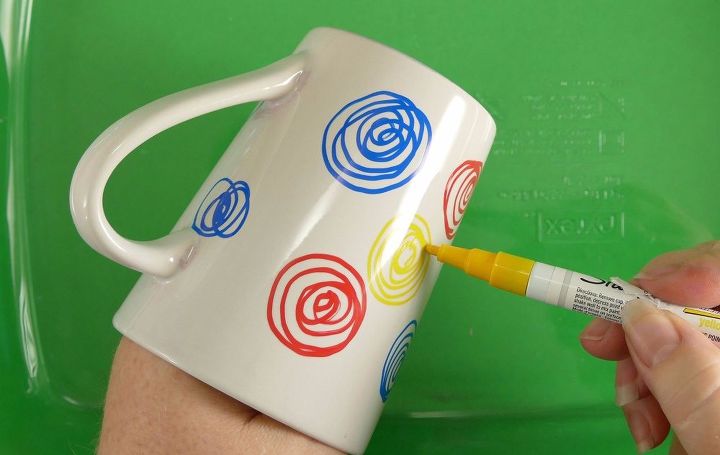
Step 2: Using a variety of different color oil-based paint Sharpies (this is an affiliate link; do NOT use regular Sharpies), scribble circles of color all over the sides of the mug. (Tip: I would avoid the metallics for tie-dye mugs — they end up just looking muddy after they run.)
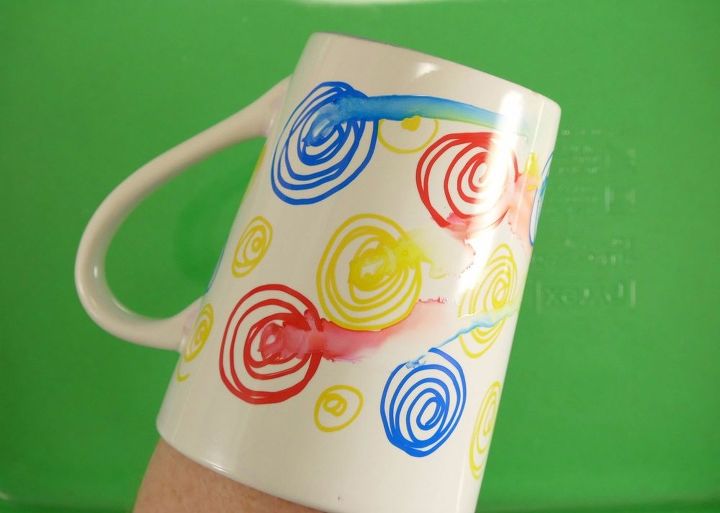
Step 3: Once your mug is colored, slowly drip one drop of rubbing alcohol on each circle of color. Keep rotating the mug around, up, and down as the rubbing alcohol makes the colors run. If a patch of color seems untouched, add more rubbing alcohol to that area and continue rotating the mug to distribute it.
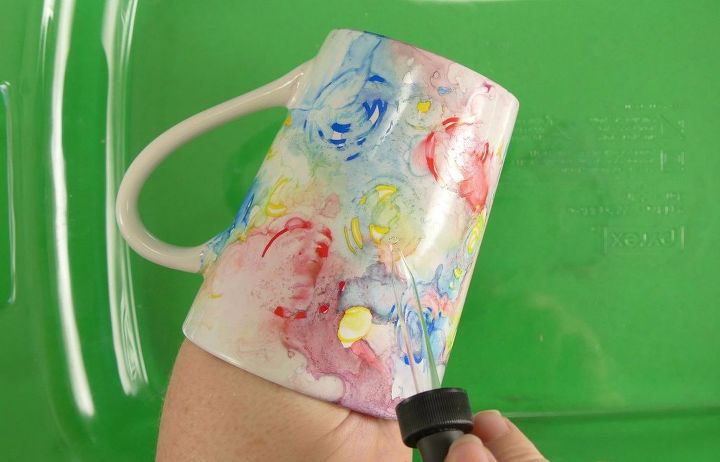
Step 4: Retouch. If you end up with a bare spot, wait until the rubbing alcohol has evaporated, add another circle of color, and do another drop of rubbing alcohol. Repeat until you like the way it looks. If you got paint somewhere you did not (like the rim), just put some rubbing alcohol on a paper cloth and wipe off the bit you do not want.
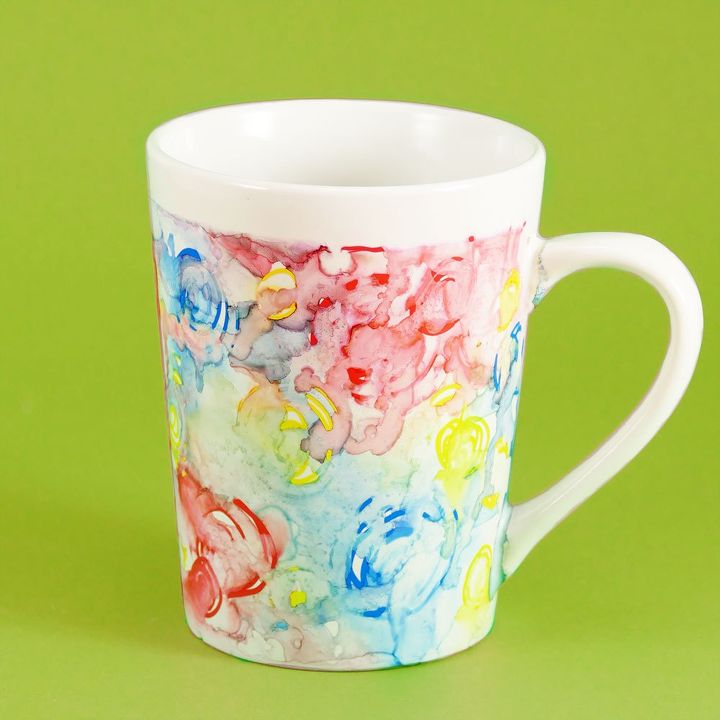
Step 5: Allow your mug to dry at least 24 hours for best results. Bake in a 350F oven for 60 minutes. Spray clear sealer on the OUTSIDE of your mug and allow it to dry. Hand wash for best results.

Want more details about this and other DIY projects? Check out my blog post!
Comments
Join the conversation
3 of 14 comments
-
I have a grand-daughter who dearly loves anything tie-dye and her Mom is a VERY crafty teacher - SO............. thank you!
-
Thank you! Thank you! Thank you!
Jennifer I have been searching for a simple, easy idea for my grandson to decorate coffee mugs for his mother who is getting remarried this weekend.
I only have one quick question-can I use any kind of coffee cup? I have 2 old plain Correlle cups I'd like to use.
Thank you so much for your DIY and time!
Terri 😊🙏😊


Frequently asked questions
Have a question about this project?
I noticed you have a sharp edge where the paint stops below the rim. Did you use regular painters tape or do you need a special tape because of the alcohol? I would think that the alcohol would interfere with a tape's adhesive...?