


Christmas Tree Stand

2 Materials
Last year I bought an 8 foot Christmas tree, and the stand wasn't "man enough" to hold it upright, meaning that I ended up having to tie it to the banister.
So I thought I would make something a bit heavier and more robust.
Now obviously, having the whole year to do this I left doing anything until the 7th of December, because procrastination etc...............
So I thought I would make something a bit heavier and more robust.
Now obviously, having the whole year to do this I left doing anything until the 7th of December, because procrastination etc...............
Step 1: The "Ingredients"
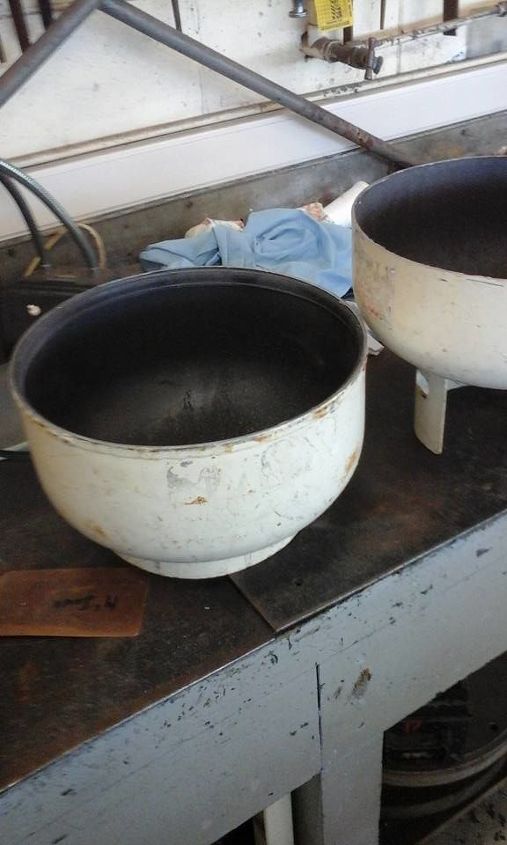
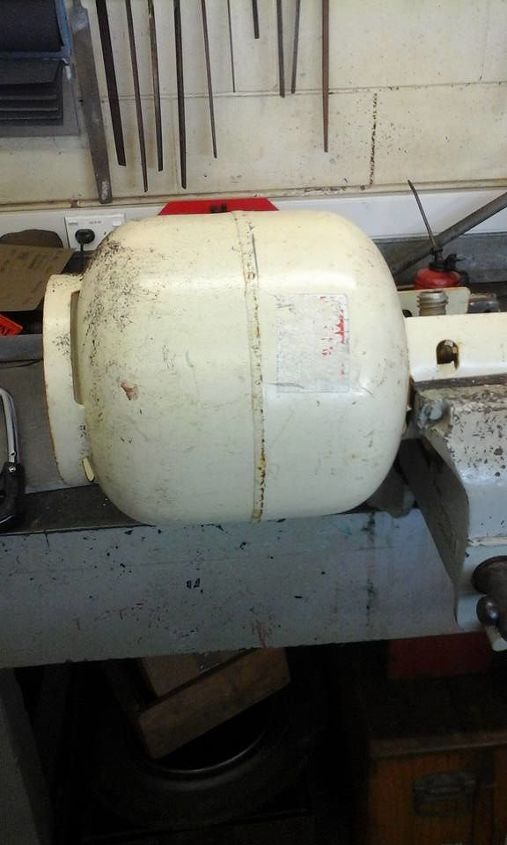
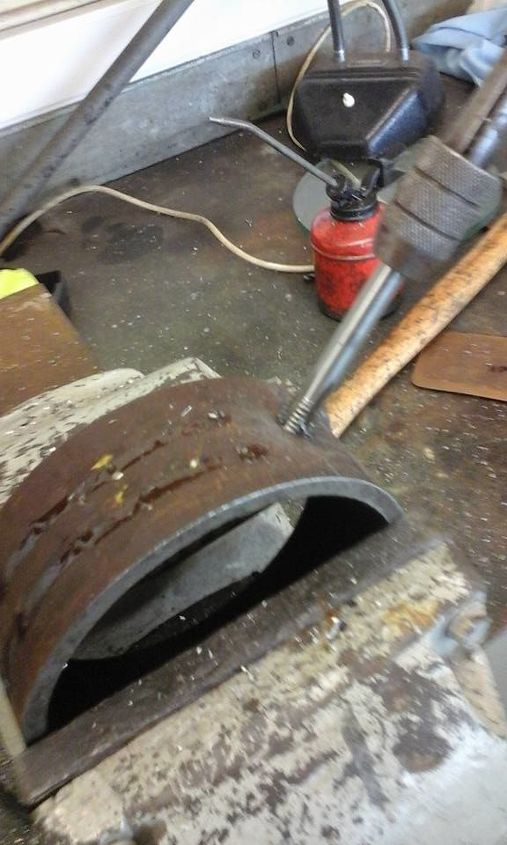
The Gas Cylinder - Chop that sucker up!!!
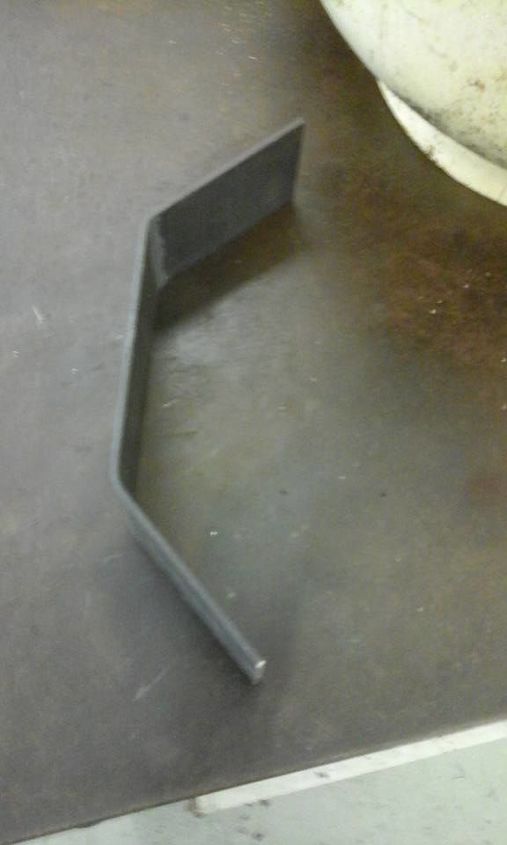
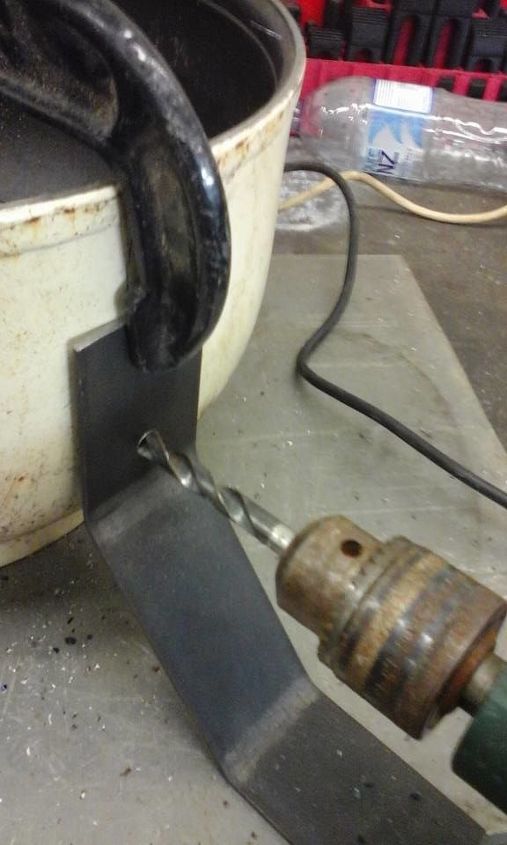
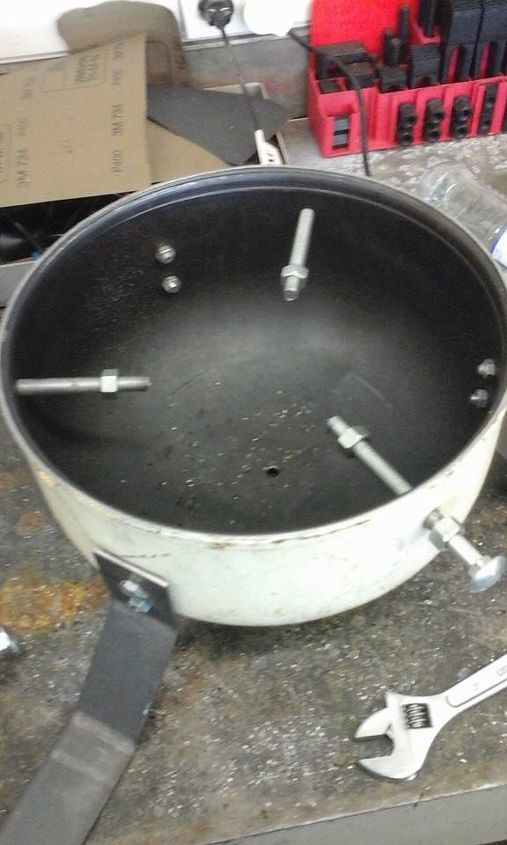
She's got legs - she knows how to use them!
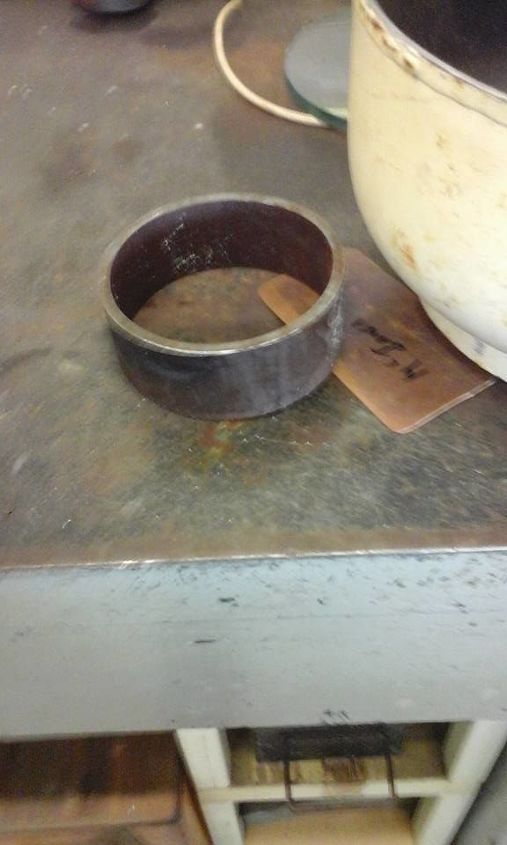
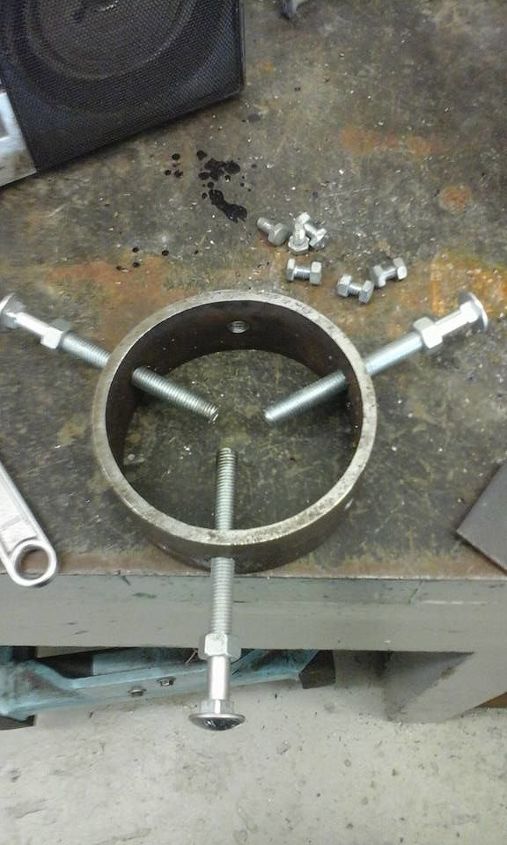
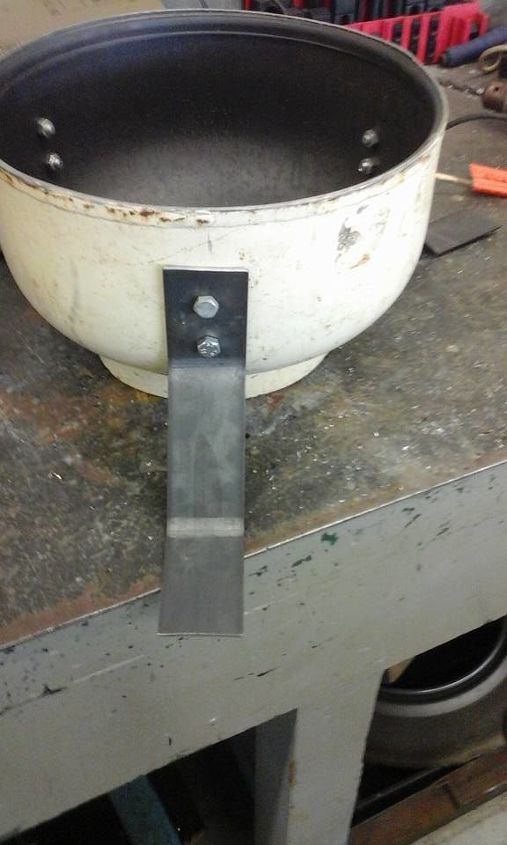
The Trunk Holder
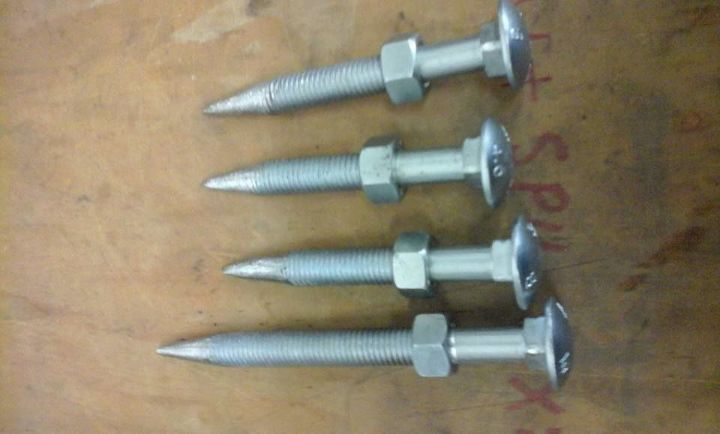

Fastening Screws
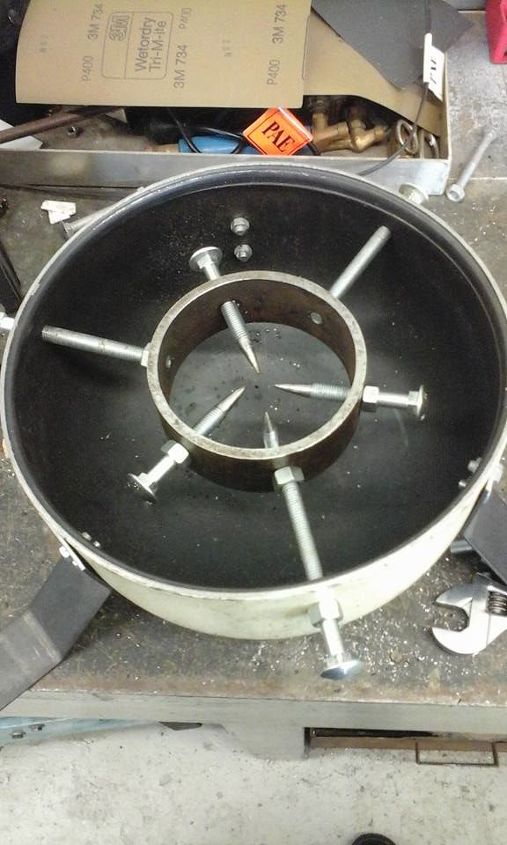
Assembly
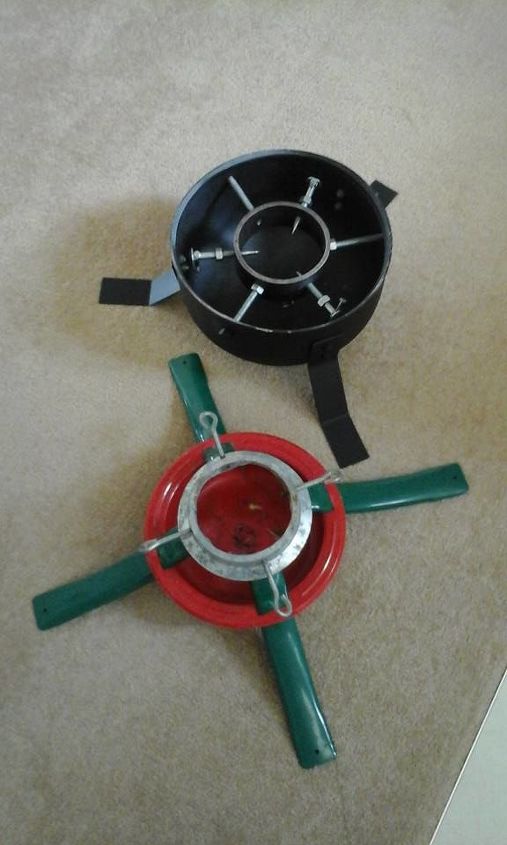
Painting

Add Tree!!
Comments
Join the conversation
6 of 62 comments
-
Lots of work but nice job. I would have bolted the old stand to a nice flat piece of wood and weighted it down with some bricks. Worked for us for years. Have fun!
-
I see some of the comments and I think HA! Lazy scared people.

 The one where you say Danger is my middle name... I made a wreath last night now that was dangerous. That hot glue gun burns me every time. It has given me blisters. Cooking is dangerous, I once dropped a big knife it landed tip down in my big toe. Walking is dangerous. I fell off a log in the forest. Maybe I'm just a klutz!! And to the time consuming part. anything worth having or making is worth the time. Granted if I ever do this I'll have my hunny do it. He has cut gas tanks and the like working on motor bikes. He'd cut it with some sort of grinding wheel. Danger is his middle name too he once lit the grass on fire using a cut off wheel on metal.


Frequently asked questions
Have a question about this project?