Gave My Steps a Very Different Makeover

DP
by DP
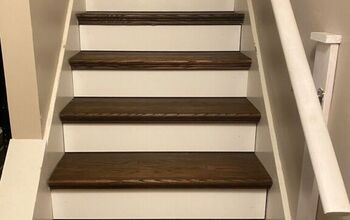
Someone posted a picture on here showing a waterfall steps and I was determined to try it myself
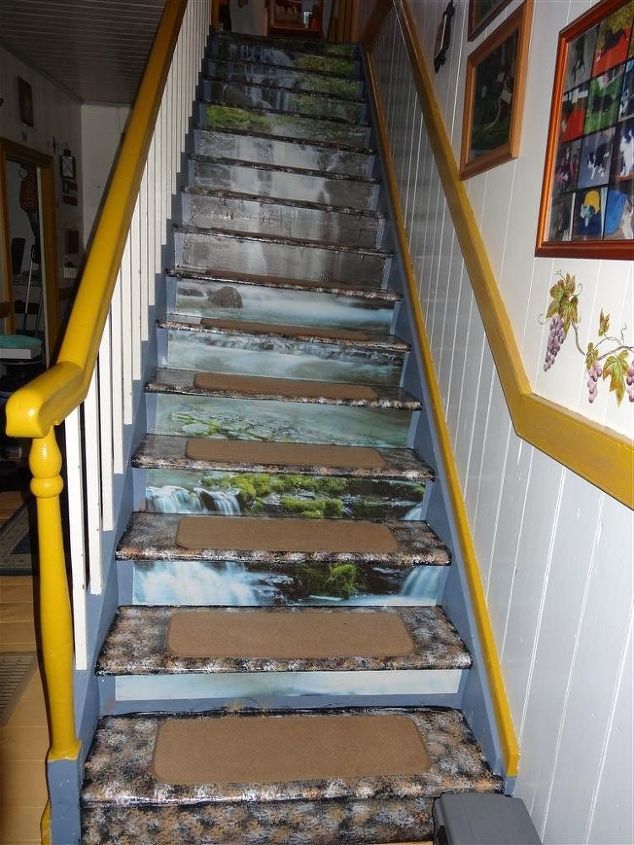
These steps are the original steps in our 200 year old house, they are crooked too so it was challenging to put the poster paper on. This was a door poster, the largest I could find and it still wasn't wide enough or quite long enough but I like it. I purchased it from amazon. (https://www.amazon.com/gp/product/B0015TWJUE/ref=oh_aui_detailpage_o01_s00?ie=UTF8&psc=1). I put the wallpaper type poster on by measuring each step, cutting the paper to fit then used mod podge to put it on. I do need to do something to edges where the paper stops, not sure at the moment what that will be.


I wanted to use a wood graining tool on the top of the steps but the steps are not completely flat so it wouldn't work so I made sort of a marble stone type of pattern on the steps using Black, 2 different shades of brown and a light grey with a sponge. They didn't come out quite as good as I wanted them to but they look good to me over all.


We had to put the stair treads back on because the dog is afraid to go up and down the steps without them and I don't want her to fall.
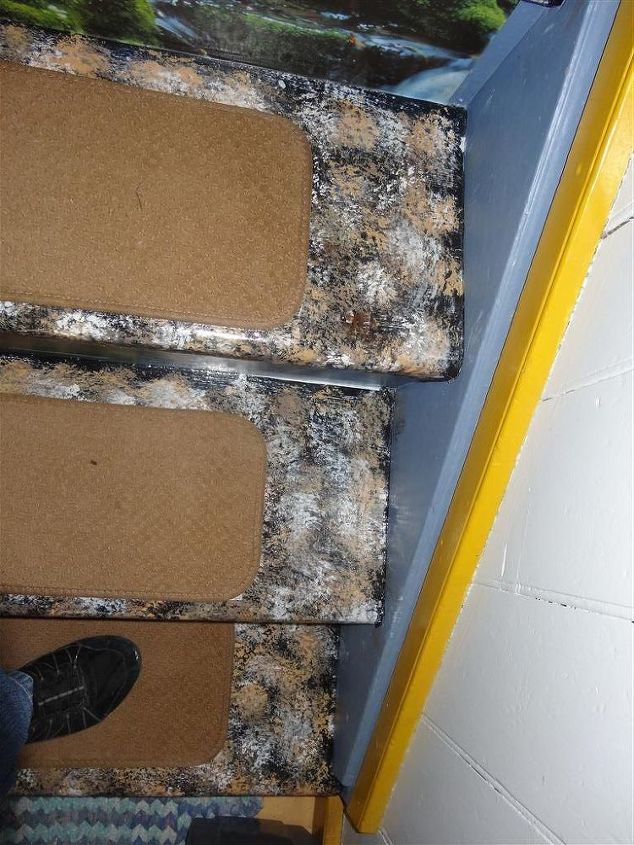
These are the steps looking down on them
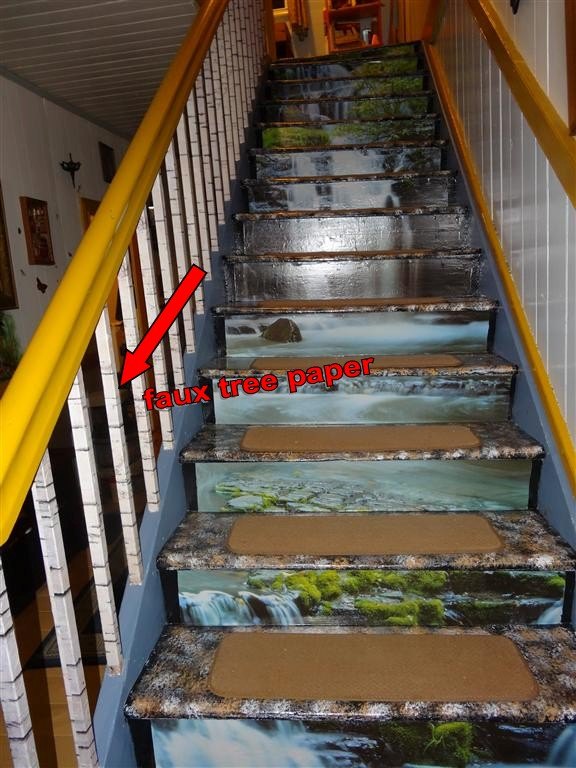
I bought some wrapping paper and mod podged it onto the uprights on the stairs so it looks like tree bark
DP
Want more details about this and other DIY projects? Check out my blog post!
Go
Frequently asked questions
Have a question about this project?
  1 question
  • JoAnn JoAnn on Jun 29, 2017

    Wow im gonna do this thank u so much i m gonna post it too show what mine looks like when done i still have to figure out the railing i dont have one lol

Comments
Join the conversation
3 of 4 comments
  • Haysha S. Haysha S. on Dec 27, 2016
    WOW! I'm blown away!
  • JoAnn JoAnn on Jun 29, 2017

    Omg i really love this idea u have step by step intructions or or pic by pic

    • DP DP on Jun 29, 2017
      I don't have step by step pics but all I did was buy the largest door mural I could find that was a waterfall and I measured each step, cut the mural and used mod podge to put it on the riser trying to smooth it out the best I could (it does have some wrinkles in it) then when I got all the steps risers done and it was dry I painted the leftover space black since my steps were wider than the mural, then I top coated the mural and the black paint with a water based polyurethane so it could be wiped when it is dirty. The top of the steps I just used a sponged and sponged different colors of brown, black, grey and white. The little rails are just heavy tissue paper mod podged onto them then coated with polyurethane (those were time consuming) It really isn't as hard as it looks just takes time and lots of trips up and down the steps. I think the hardest [art was trying to keep wrinkles out of it but the design kind of hides them. Let me know if you have any questions.
Next