


Valentine's Day and Easter Pom Pom Animals With Treats

by
Stacy Davis
5 Materials
For Christmas, I gifted myself a pom pom maker and I have been making pom poms ever since. I wanted to get a head start on treats and gifts for Valentines Day and Easter this year. I think these are quite fun to make and if you use your imagination, I am sure you can dream up even more creations to give.
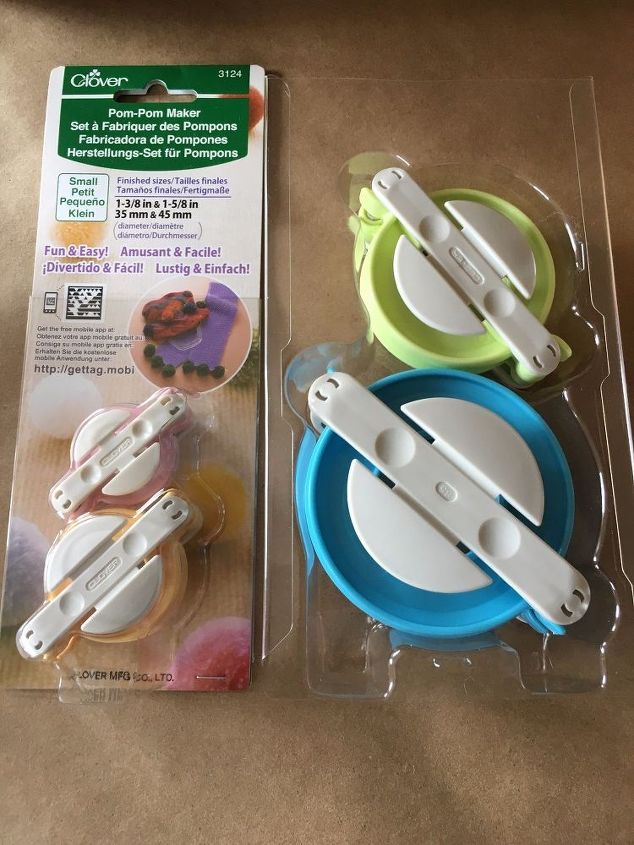
I used the Clover Pom Pom Makers. I got mine at Joann's and used the 50 and 40 percent off coupons on two different trips. I only used the two larger sized makers for this project.
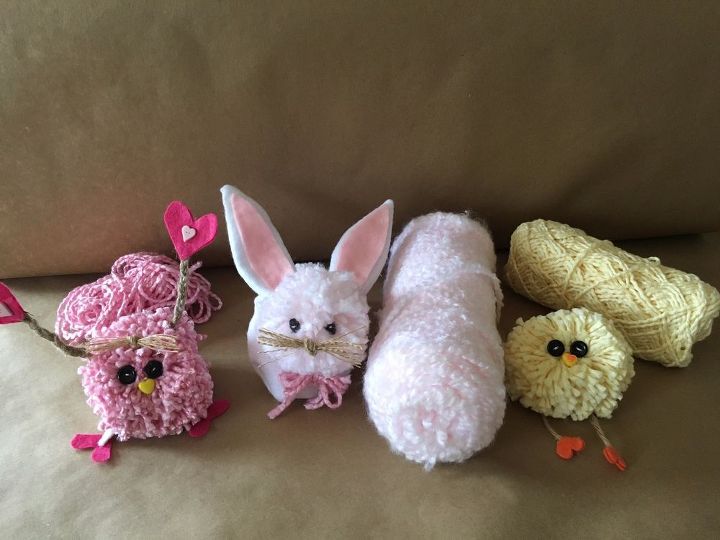
I gathered yarn that I already had. The lovebug is made with a silky type yarn. The bunny is a fluffy yarn and the chick is similar to the lovebug but not as silky. Since these are from years ago, I don't know the type or brand. If you know what these might be, please comment and I will add it to the tutorial.
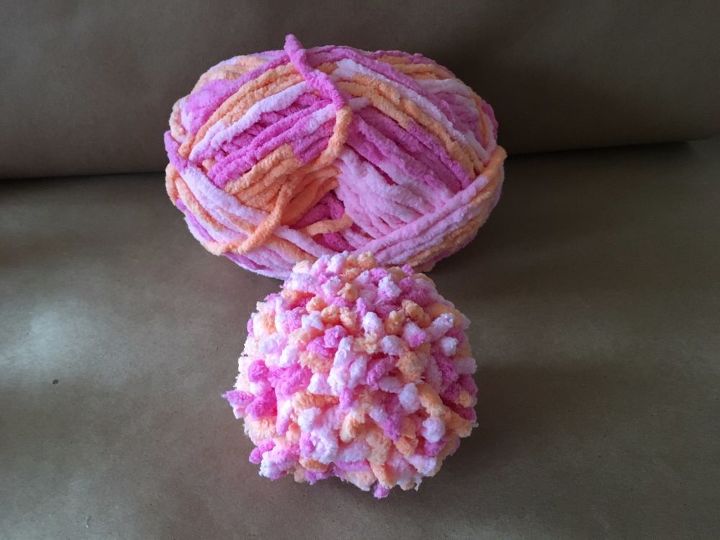
I bought this yarn thinking it would make big beautiful pom poms but they seem to be a shedding nightmare.
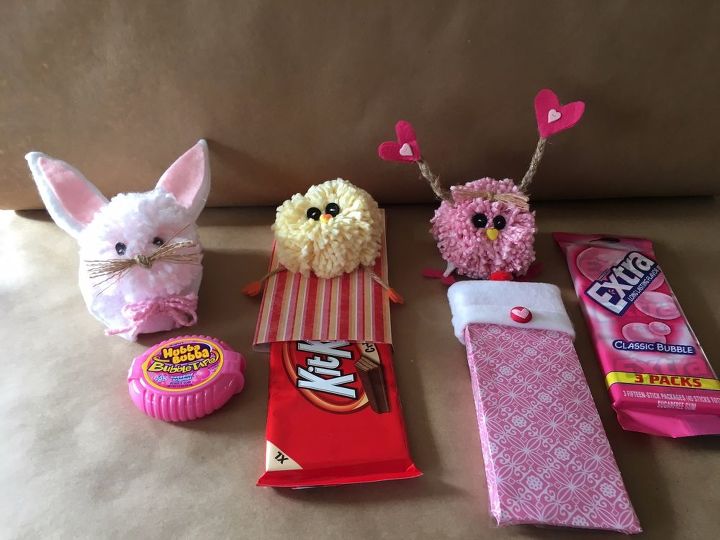
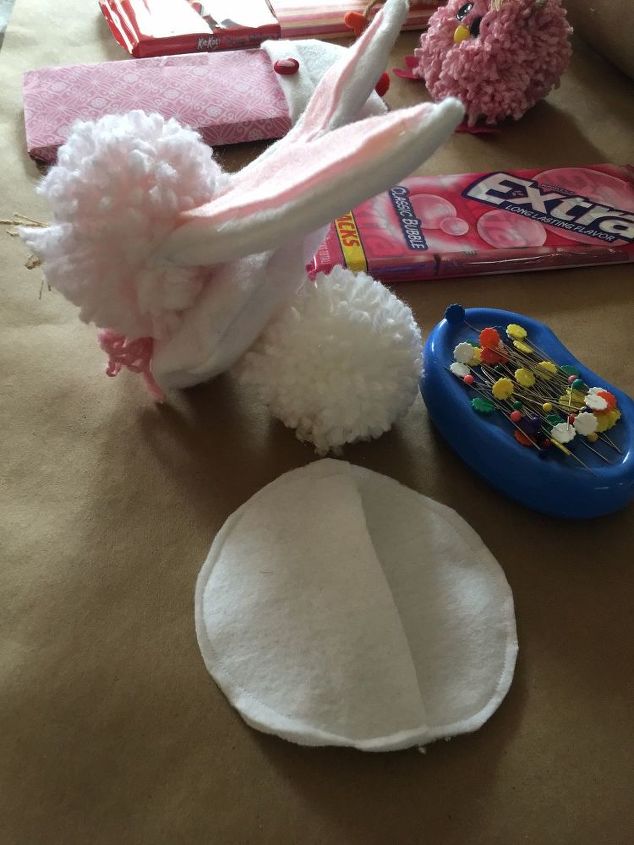
And really these animals would make a cute gift all on their own, no candy required. But, here is how I was planning on packaging them up. Inside the bunny's body is Bubble Tape. The chick and lovebug have a scrapbook paper covered KitKat and multi pack of gum, respectively. I cover more about these in my holiday candy sleeve tutorial. You can find it under my projects or here...
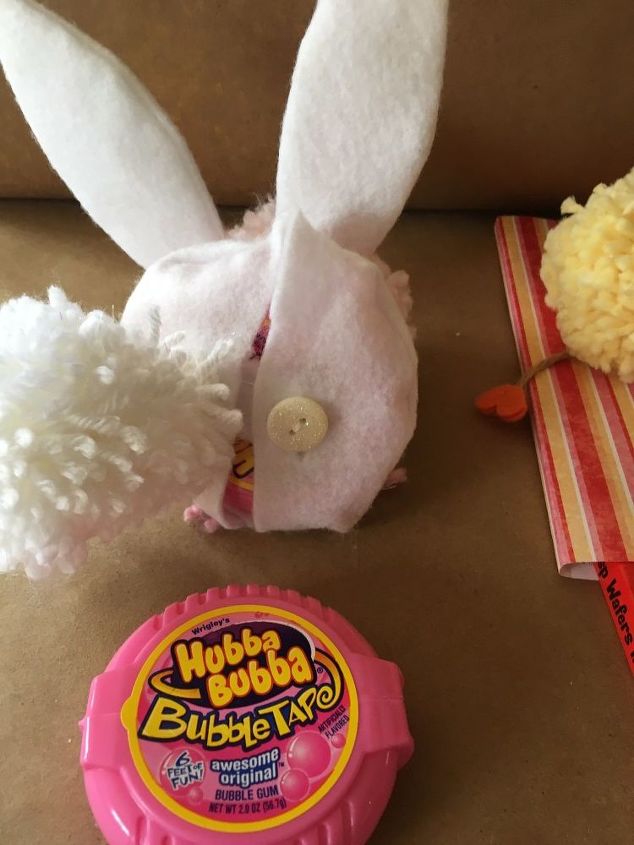
This bunny is the first that I made and I always consider these the beta project. When I made this bunny, the backside is one circle cut in half. I added a button to close it. I decided future bunnies would have a back similar to an envelope pillow.
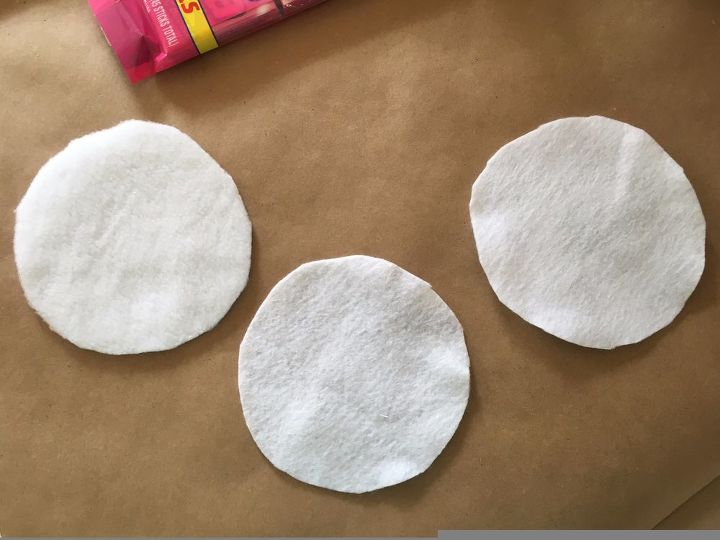
I used a computer cd to use as the size (It is bigger than the bubble tape but after sewing, it is perfect.) and cut out 3 circles. You can use felt or fleece. I decided to use fleece for the front of the bunny and felt for the back.
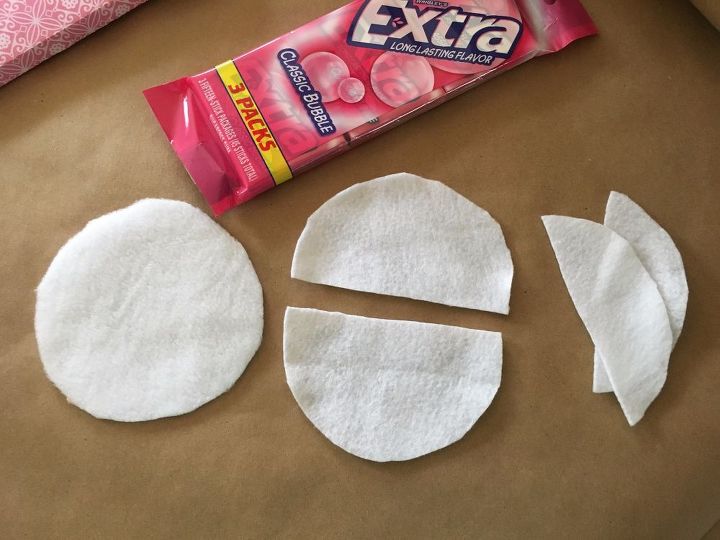
I stacked the two felt pieces and made a cut that would give me two pieces that are around two thirds of the circle and two pieces that are about one third the size of the circle. The 2 small ones are not needed.
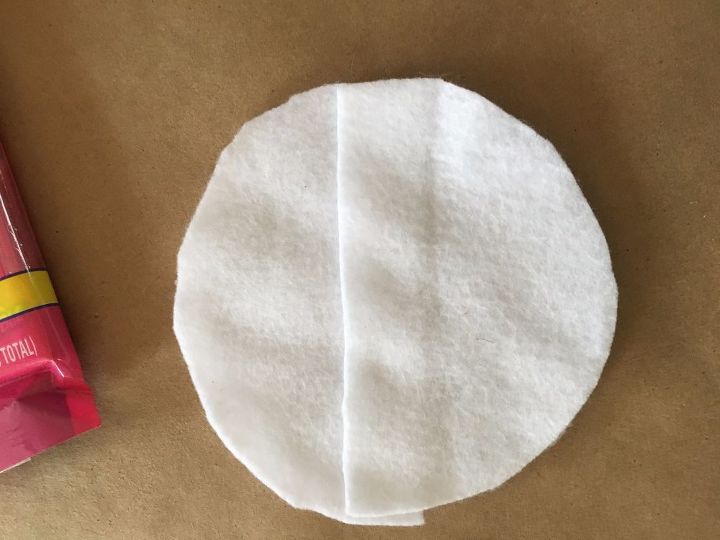
I placed the two felt pieces on top of the circle. (My fleece had a right side so if that matters, right sides together.) The side with two halves should overlap each other.
Here it is after I have sewn around the outside.
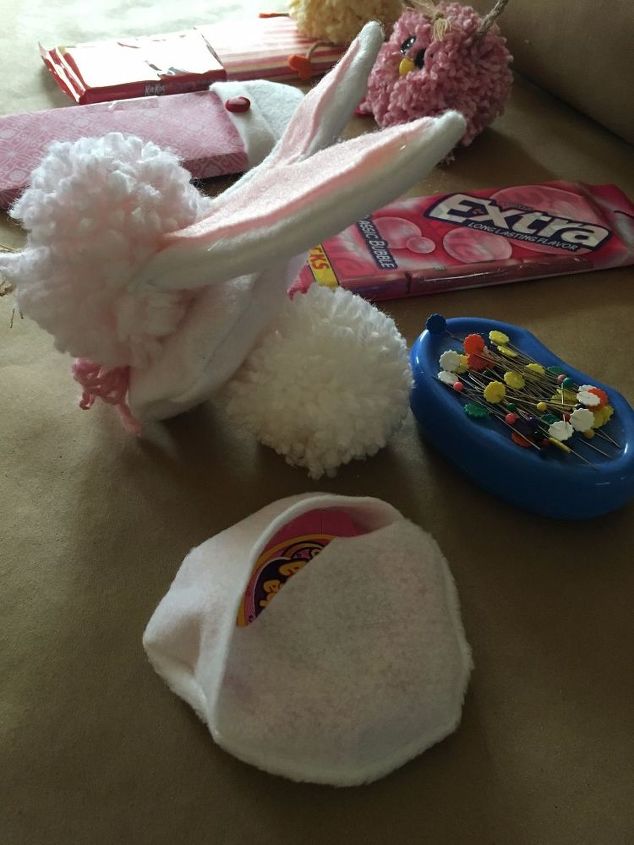
Turn it right side out and I added my Bubble Tape and propped it open so you could see the treat inside. But you can smooth it flat and then the treat is hidden inside.

My bunny's eyes are buttons and the ears are felt. I made his whiskers from pulling out some burlap threads. I added a white pom pom to the backside for a tail. Once I made the face/head, I added the head and tail using a hot glue gun. I also used hot glue for adding the ears.
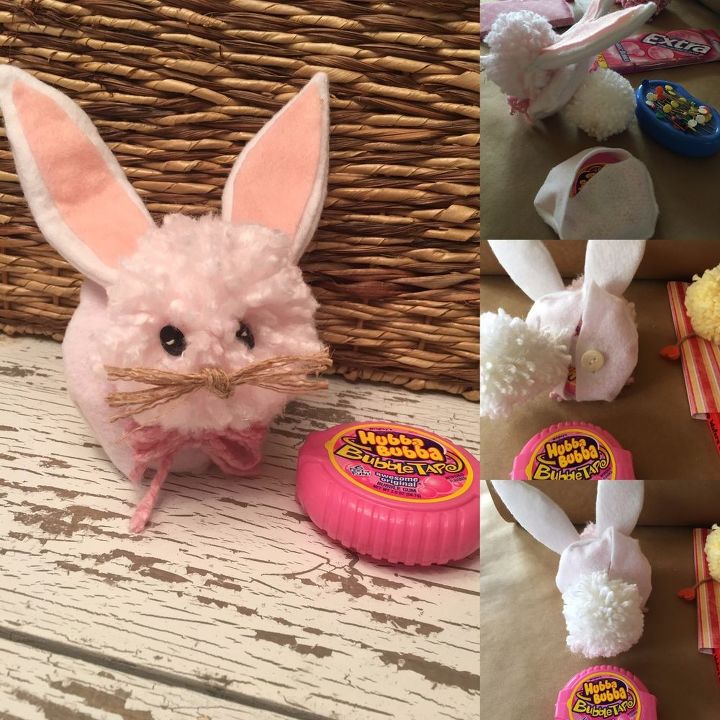
He will make a perfect addition to someone's Easter basket.
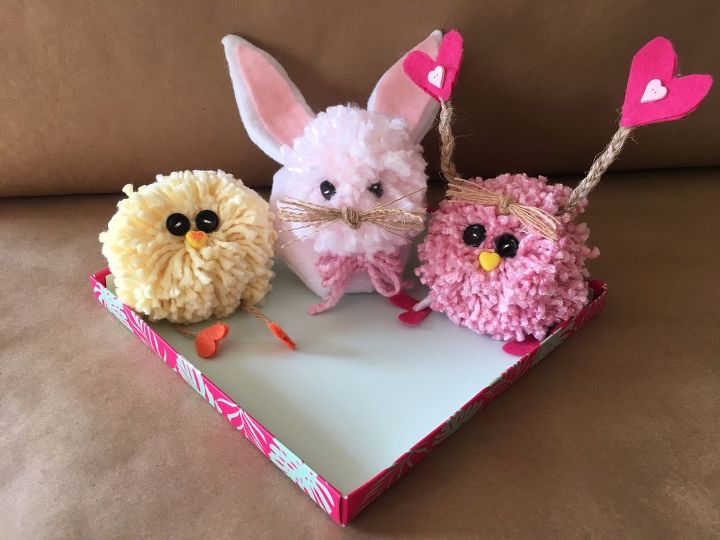
My chick and lovebug have button eyes and pony beads for mouth/beak. I made the lovebug antennas using the same method as my snowman's arms in my project called Holiday Fleece or Felt Covers for Treat Jars. You can find that tutorial here... http://www.hometalk.com/diy/craft/seasonal-decor/holiday-fleece-covers-for-treat-jars-26102709
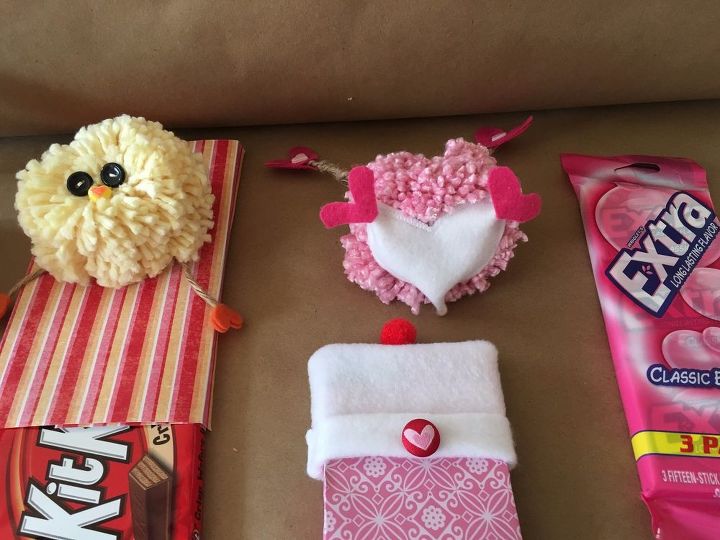
It's fun to personalize and add fun touches. My lovebug has heart shaped bloomers.
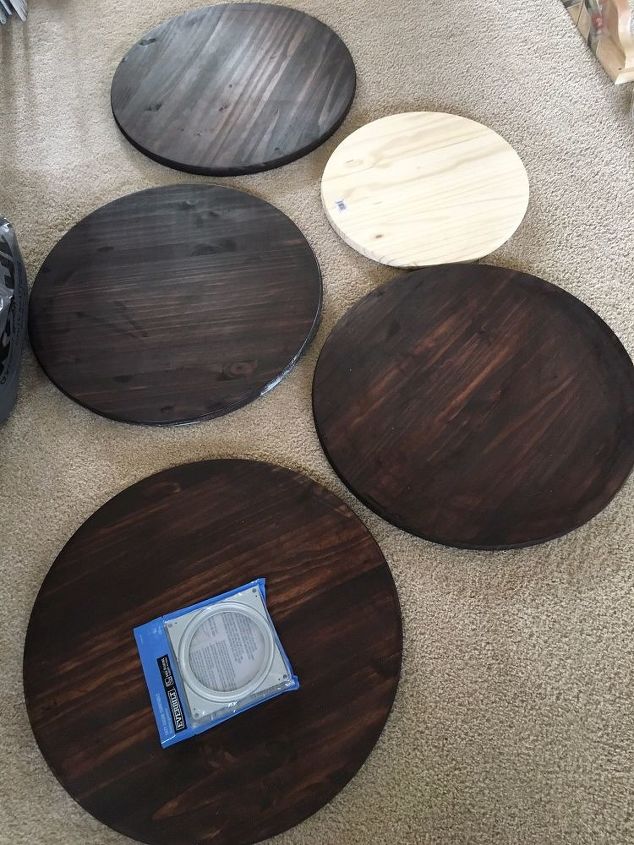
And if you are waiting for a home improvement project, it won't be much longer. This is going to be a big project. The small circle is the size of the circle from my lazy susan crate storage. This is a super-sized version and there aren't crates involved this time... Stay tuned for more...
Comments
Join the conversation
4 of 6 comments
-
Too cute!
-
How cute are THESE!!! And Easters right around the corner....:)


Frequently asked questions
Have a question about this project?