


Mixed Media Rose Damask Table

5 Materials
I love everything Damask! And I LOVE all ball and claw foot furniture! And I LOVE pearls, corbels, old stone walls, the graceful curves of traditional Queen Anne furniture ... I think I am an old soul at heart.
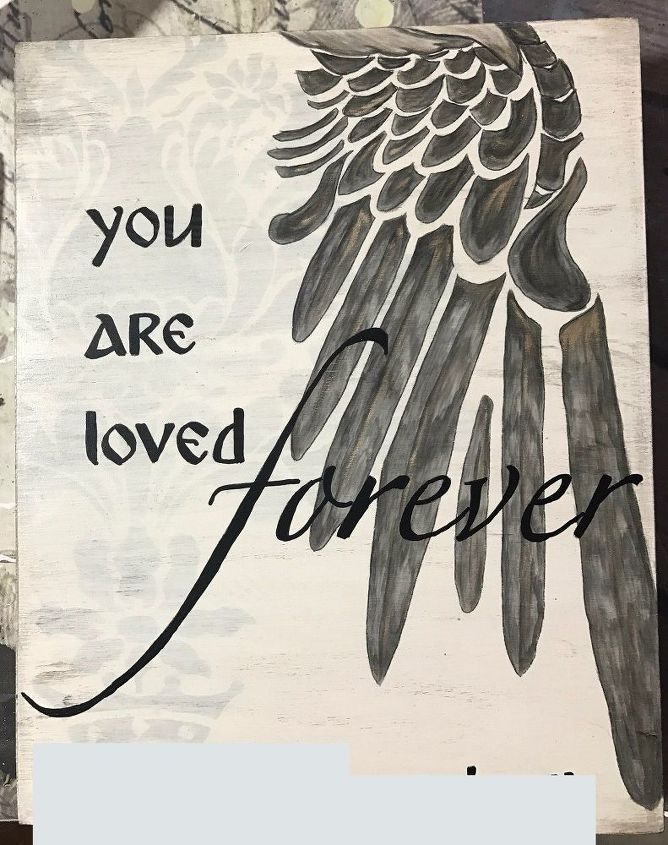
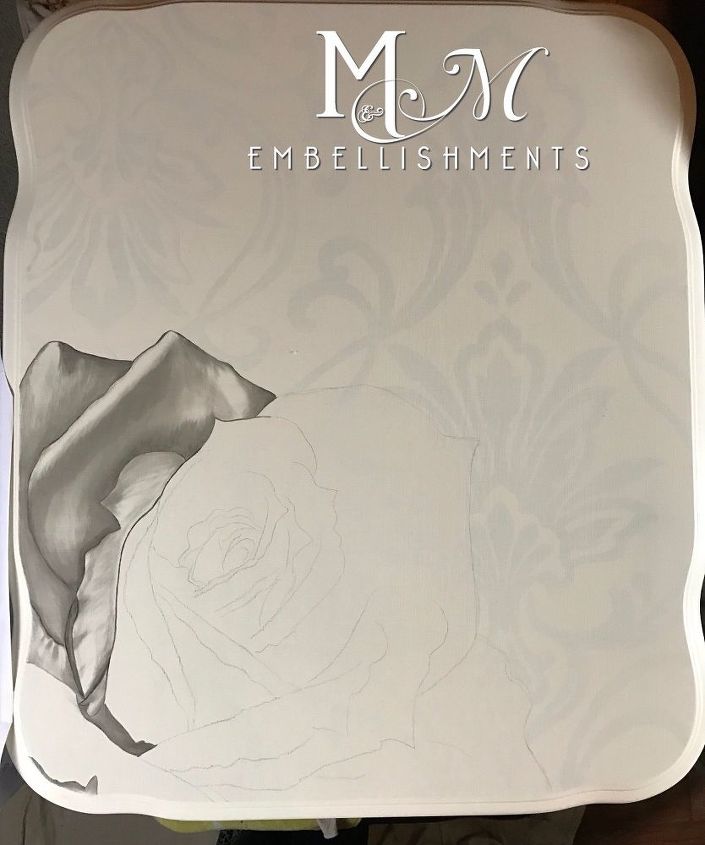
I've been wanting to use damask in my stained art pieces, but haven't been able to come up with a way to incorporate it until recently. I did a small piece for a family friend who had lost their child. I used damask and added angel wings with their child's name at the bottom.
I've been wanting to use damask in my stained art pieces, but haven't been able to come up with a way to incorporate it until recently. I did a small piece for a family friend who had lost their child. I used damask and added angel wings with their child's name at the bottom.
This gave me inspiration for my next piece, which by the way has BALL&CLAW feet! YAY!
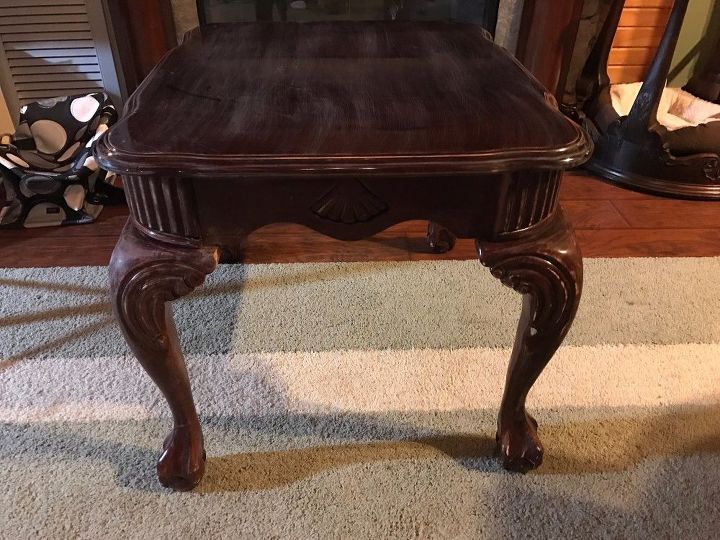
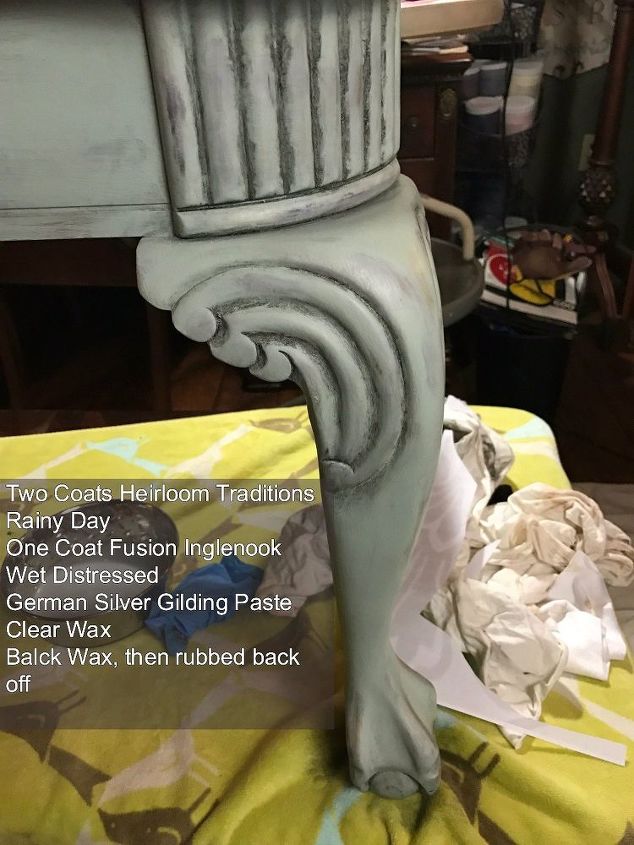
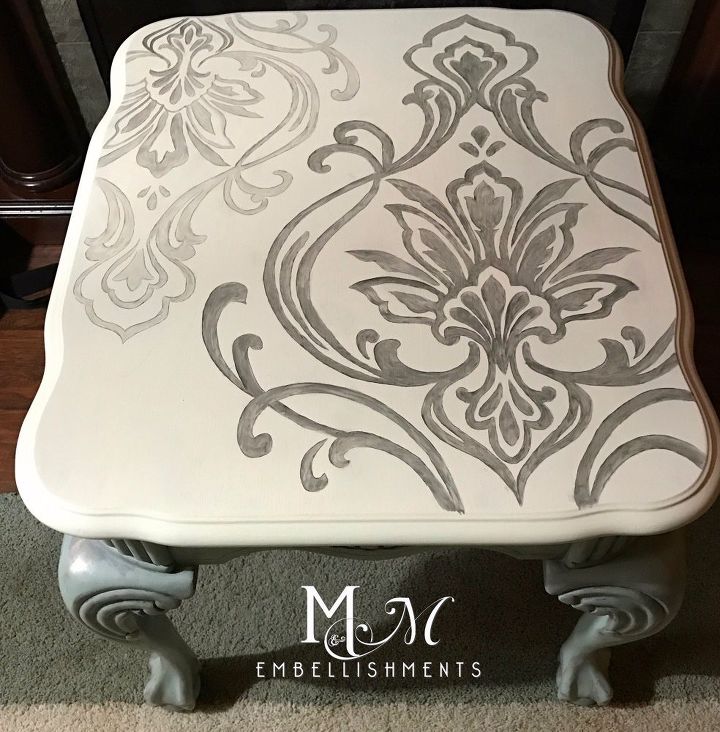
I started with the base of the table. I sanded the finish off and used Velvet Finishes "Ready", which takes off the top coat. I applied a coat of Heirloom Traditions Rainy Day chalk paint - a nice grey.
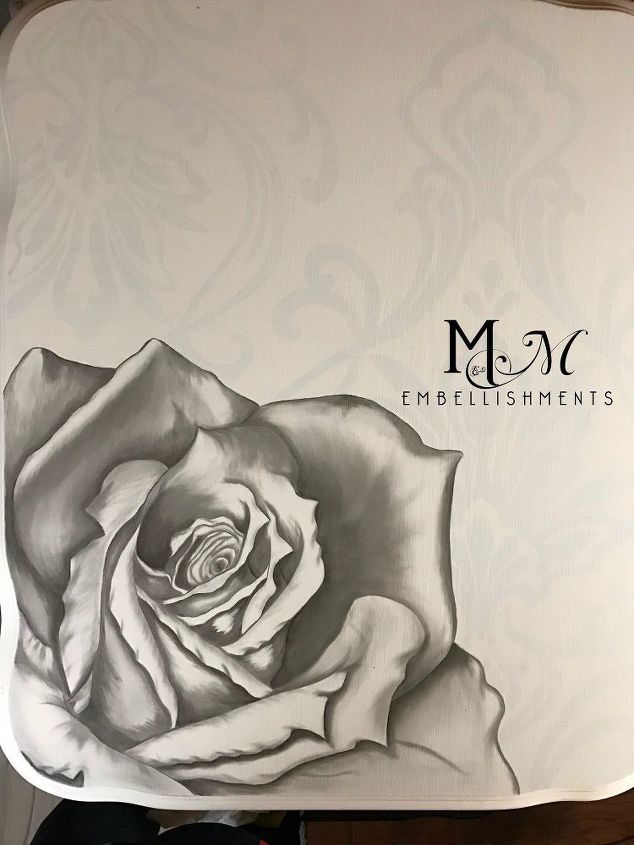
Now for the top. I used Velvet Finishes' Roccoco - a nice creamy color. I think I used 3 coats. And then I was able to get started with my Damask!
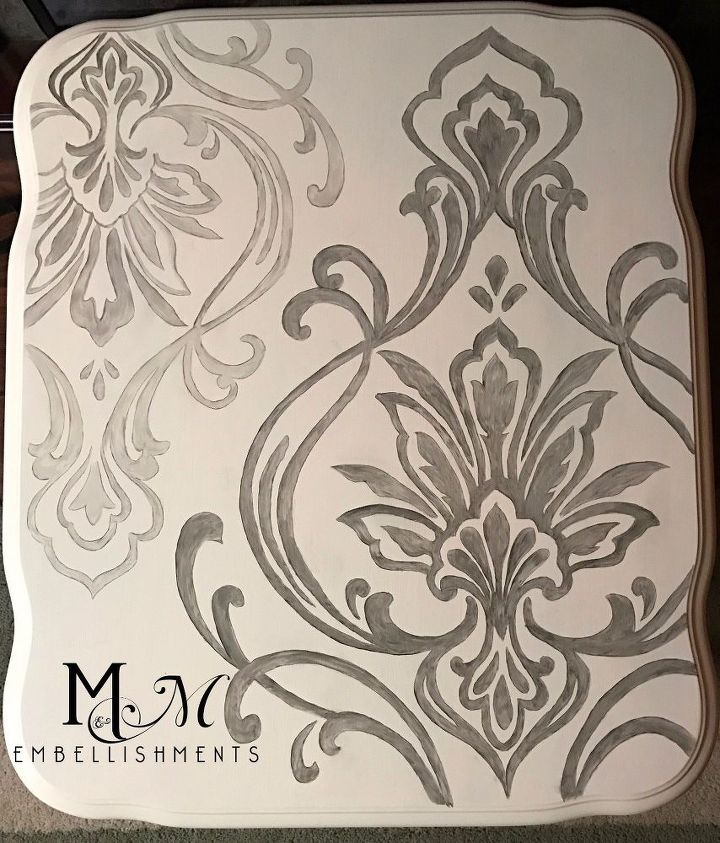
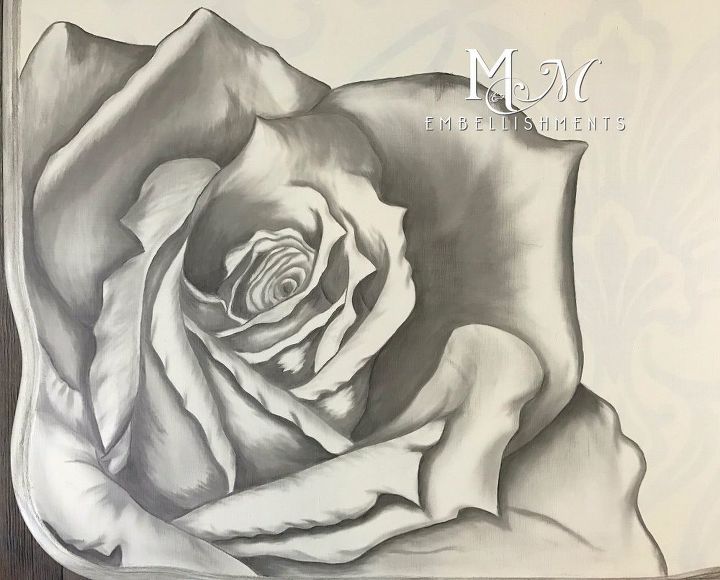
Looks pretty, huh? I wasn't exact on this because I knew I was going to cover it up. WHAT?! COVER IT UP?!! Well, I had to wash it out so that the next layer would show up. My vision is to have the damask in the background - seen, but not the focal point.
For the Angel Wings, I had used a paint wash - watered down paint, brushed on and wiped off.
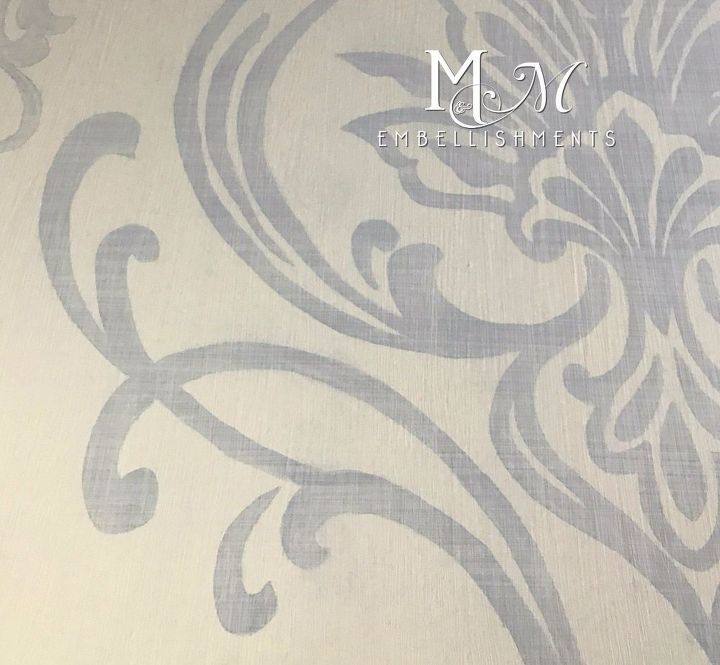
It was a shame to cover up that damask, but let's move on...
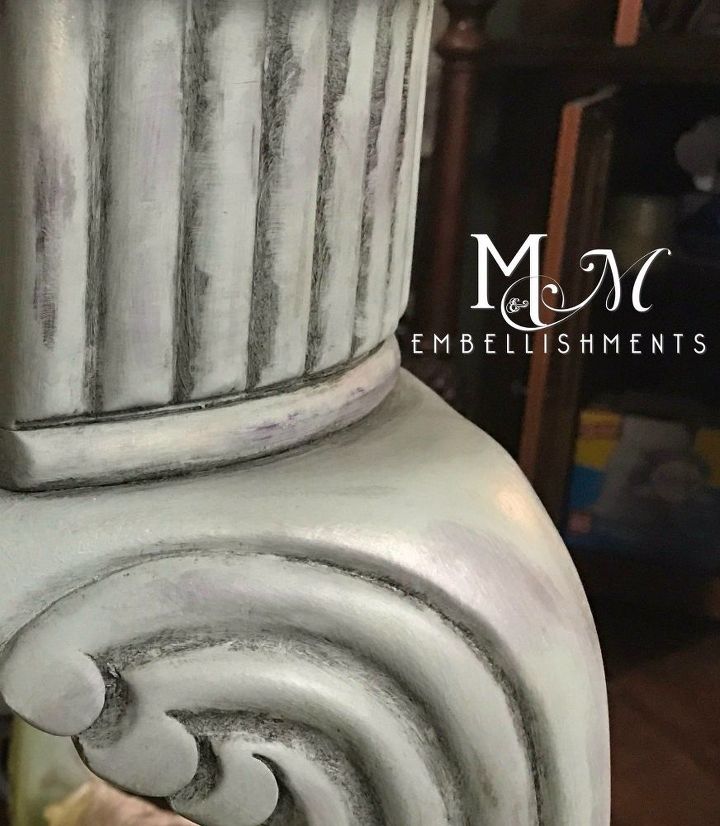
I could go on and on with the detailing, but at some point ya just have to PUT.THE.BRUSH.DOWN!!
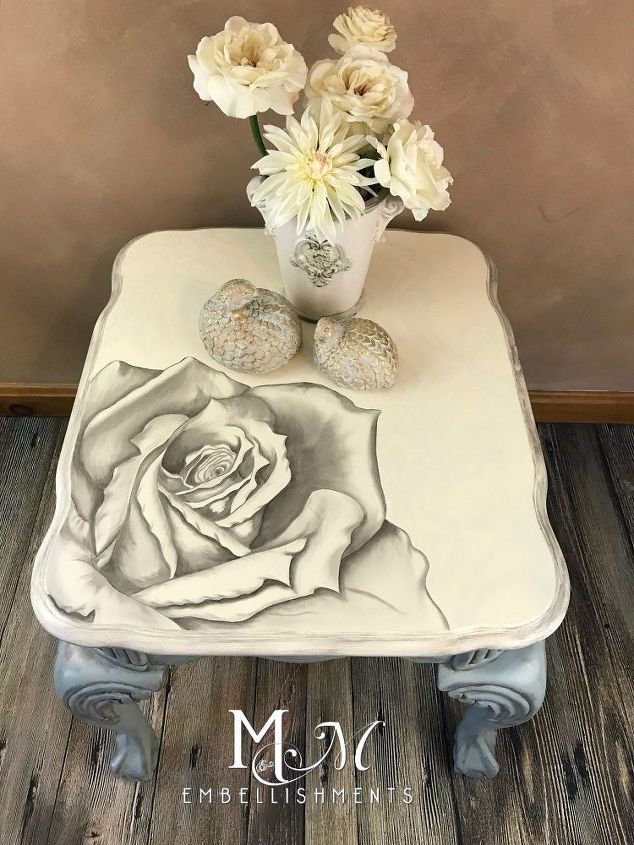
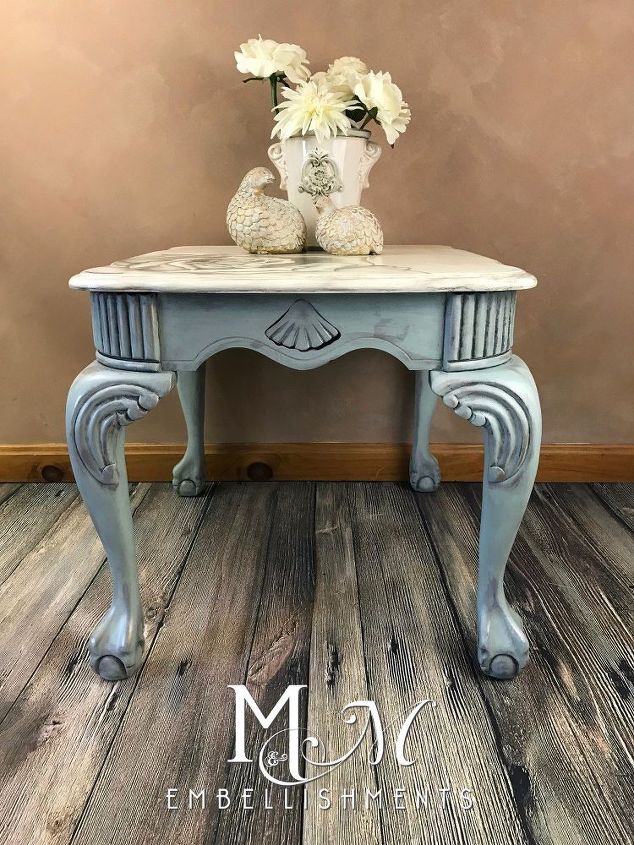
LOOK AT THOSE LEGS!!! Let's take a closer look...
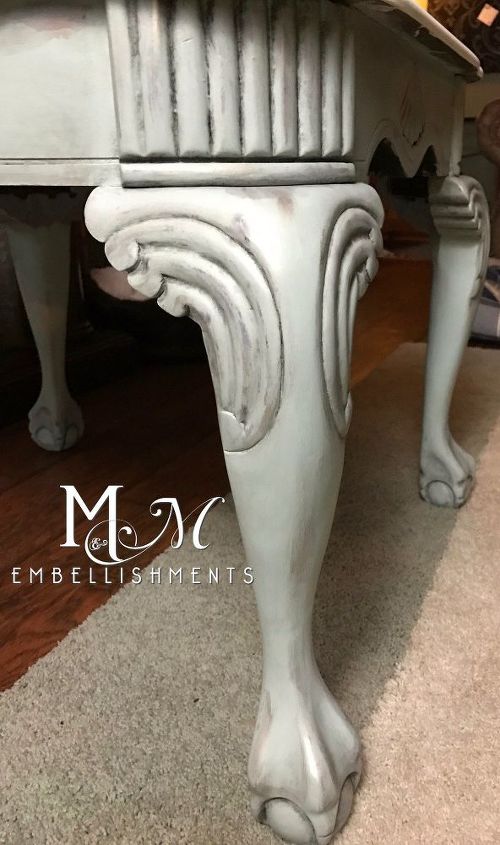
AHHHHHH, so MAJESTIC... STATUESQUE... DIGNIFIED.... STATELY ... DISTINGUISHED .... GRAND... SUMPTUOUS! OK, I digress...
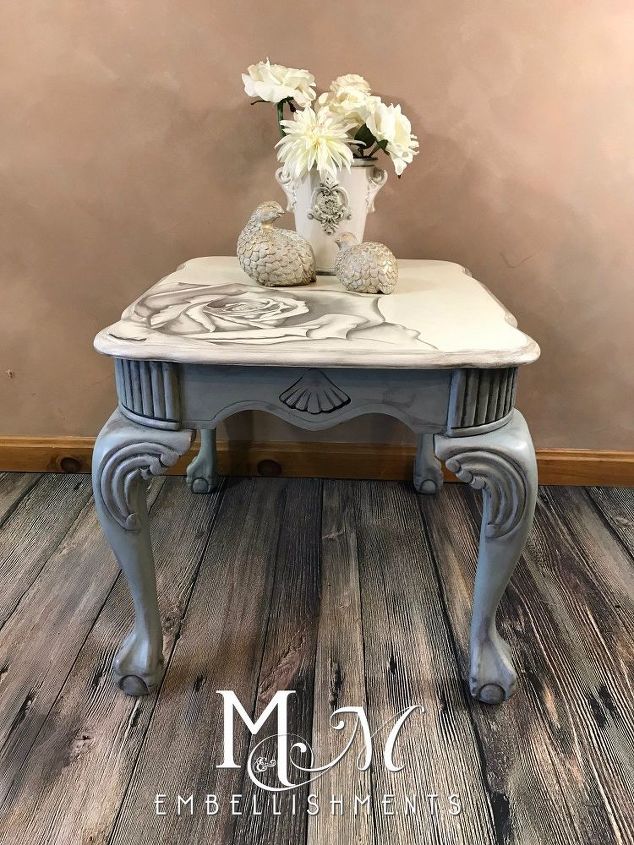
This one has my heart! I love all of the elements that play together to make a gorgeous statement piece! She is ready to find her forever home!
Comments
Join the conversation
5 comments
-
Where did the wings go? Very pretty.
- See 1 previous
-
It's beautiful! You do good work. :-)


Frequently asked questions
Have a question about this project?