DIY Ironing Board Wall Storage to Spruce Your Laundry Room

Elena K, Hometalk Team
by Elena K, Hometalk Team
9 Materials
$20-40
1-2 Hour
Medium
I know, I know: Winter has just begun!
Perhaps as my way to conjure up the warmer weather (let me tell you, it gets cold here in NY!) I’m already in a Spring Cleaning mode.
So this week I tackled an easy - and long due! - project: a DIY IRONING BOARD WALL STORAGE.
We want to help you DIY, so some of the materials in this post are linked to sellers. Just so you know, Hometalk may collect a small share of sales from the links on this page.
An easy Storage Unit that fits all Boards!
Want one? Read on to find how to make yours.


Clutter makes me cranky and the “Boiler Room” makes a perfect storm: laundry, products we make and sell, tools and hardware, cleaning items; plus boiler, water tank, and laundry machine. Whew! All in the same space.


In attempt to keep things organized I used to hide the ironing board and other tools behind the door. Problem was it’d often fall on my feet!


Until now, that is, that I figured out how to keep the board out of the way neatly hung from the wall!
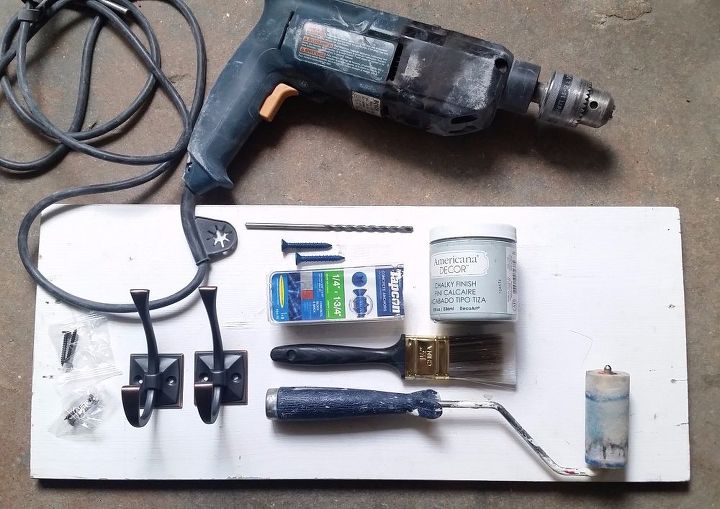
Get your materials ready & let’s get started!
STEP 1: GATHER YOUR MATERIALS


To make your DIY Ironing Board Wall Storage you’ll need the following:


— DRILL - Project cost doesn't include drill


— TWIST BITS (more on bits later, on STEP 4)


— HEX BIT (STEP 9)


— T-SQUARE RULER or TAPE MEASURE


— SCREWS


— WOOD BOARD


— 2 WALL HOOK or COAT HANGERS


— SAMPLE SIZE PAINT, preferably water based


— MEDIUM BRUSH (2”) or SMALL ROLLER


Got your tools ready? Let’s get started!
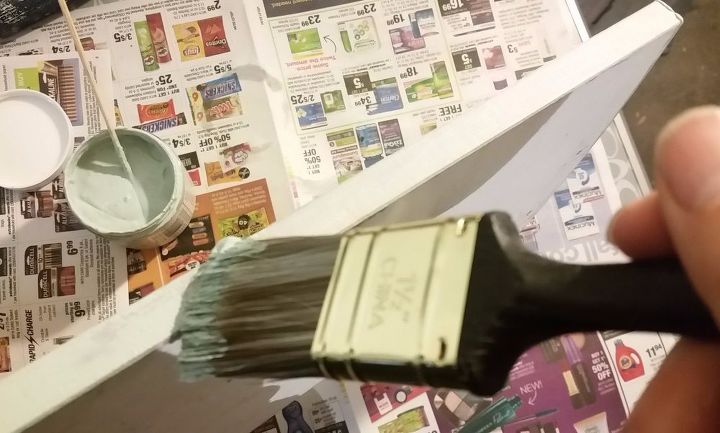
Paint the edges now and save some time later!
STEP 2: PAINT EDGES OF WOOD BOARD


Unless you want the board to match the nearby door feel free to use any scrap wood you have. If you’re going to paint it, there’s no need for a fancy wood — pine will do.


Grab the paint and brush (or roller) and start by painting all edges. By doing it now you won’t mess up the wall later: Big time-saver!


Make sure you stir the paint well before applying.


TIP: Don’t forget to put newspapers or plastic to protect your work table.


If you’re painting new unprimed wood board, consider applying a coat of PRIMER first, or get a “WOOD PRIMER & PAINT in One”.


Wait until paint is dry for a second coat or to move onto STEP 3. Water based paint usually dries in about 30 minutes, but check instructions to be sure.
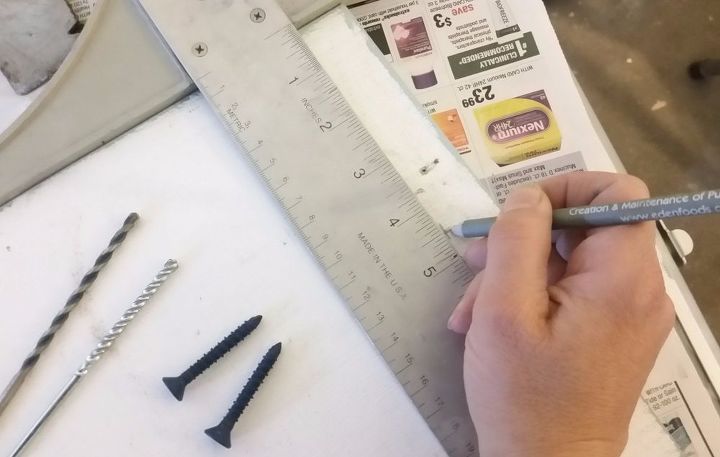
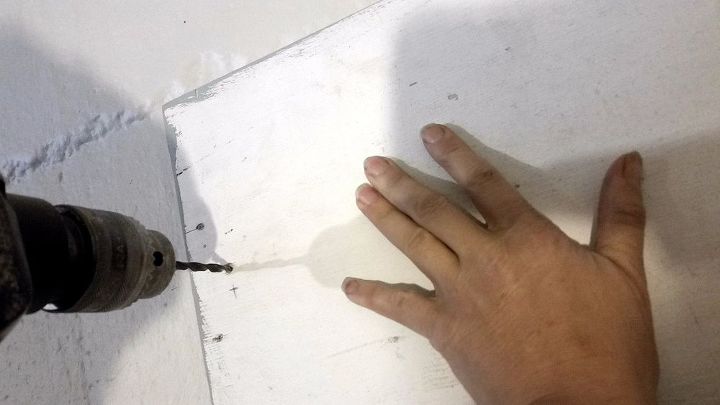
Are the edges dry? Let’s mark drill holes now
STEP 3: MARK HANGING HOLES ON THE WOOD BOARD


To hang the board on the wall all you need is two screws! Your wall will likely be drywall or plaster (if an old house), or cinder block cement if you’re in a basement.


TIP: So make sure you got the right screws!


For drywall, you’ll need the black screws.


For a cement wall — that’s ours — use tapcons. If you’re not sure, ask somebody at the home center.


How LONG do they need to be? Screws should go about 1” - 1 1/4” into the wall, so ADD the BOARD THICKNESS (usually 5/8”) and you’ll get SCREW LENGTH: Usually 1 5/8” - 1 7/8”


Now, lay the wood board flat on your table and mark half the board height at about 1” off the edge. Do it in both sides: left and right. These will mark where the board will hang.
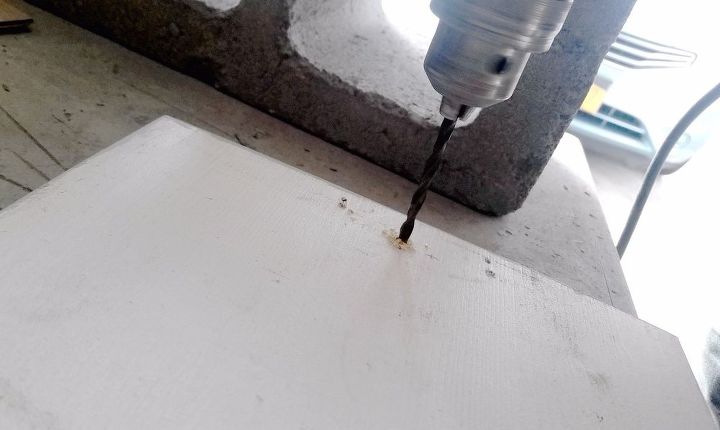
Drill holes on wood board before you hang it
STEP 4: DRILL HOLES ON THE BOARD


For this project, we’re going to use TWIST BITS, the most common for general purposes. They have a pointy end and a spiral groove (i.e. flute), and come in different materials and with a variety of ends.


We’ll need a wood and a masonry also, if your wall is cement. Otherwise, wood is just fine.


TIP: Check the SCREW PACKAGE. It usually indicates recommended bit size in the back. Still unsure? Ask someone at the home center.


As a rule of thumb: for a good hold the BIT should be a little SMALLER than the SCREWS, otherwise they won’t secure the board properly onto the wall.


So load a WOOD BIT into the drill and get it ready. We’re gonna drill in the two spots you marked earlier. Make sure your bit is the right size for the screws you’ll use later.


TIP: Clamp your board to your work table before drilling. You'll get a cleaner drill hole!


All done? Let’s drill onto the wall next!
Let’s transfer measurements onto the wall!
STEP 5: MARK DRILL HOLES ON WALL


Position your board on the wall where you’d like to be and hold it to mark the drill holes. It’s a lot easier than transferring the measurements with a ruler!


Now grab your drill and drill just enough to MAKE a DENT on the wall that marks drill holes.


TIP: Get a BLACK MARKER and HIGHLIGHT the dents you just made.


That’s especially important when your wall has a texture (like ours!) It’ll be a lot harder to remember later where the drill marks were.
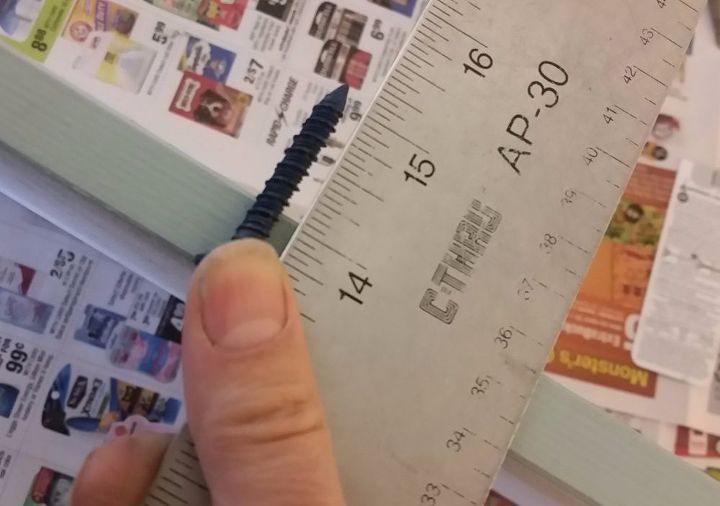
Figuring out the depth of the bit is easy!
STEP 6: FIGURE OUT HOW DEEP YOU NEED TO DRILL INTO THE WALL


Drilling too deep into the wall can be as bad as not drilling enough. To find out how deep your hole needs to be grab the screw — or tapcon — you’ll use, and hold it against a ruler, as in the picture.


Place the screw on the edge of the board, as it were already screwed, and against a ruler to measure how much longer it is. The screw tapcon I’m using is 1 1/8” longer than the wood board.


Now ADD 1/8” - 1/4” to account for the debris that will fall into that hole, and you’ll get your total depth. For me that would be 1 1/8” + 2/8” (or 1/4”) - 1 3/8”.


Got it? It’s really not that hard.


I know you’re thinking why should I bother? Though this process may not be all necessary with a lighter item, you don’t want that heavy shelf coming off the wall over time, do you?
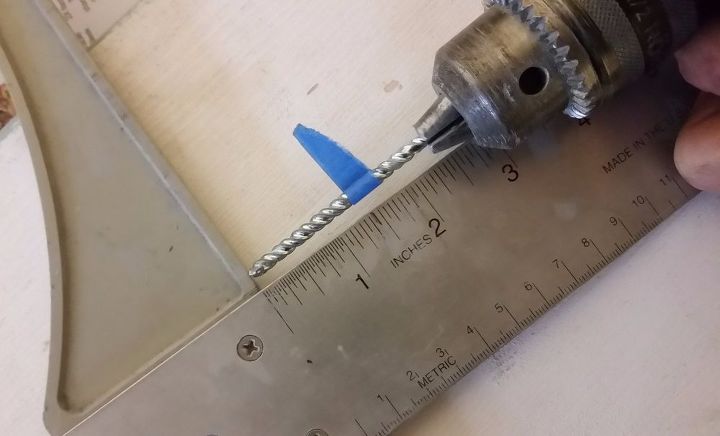
Next: transfer that measurement to the bit!
STEP 7: TRANSFER MEASUREMENT TO DRILL BIT


Get the bit you’ll use to drill on your wall.


NOTE: This DRILL MAY BE DIFFERENT from the one you used to drill on wood. If you have DRYWALL, your previous WOOD BIT should be fine. For cement (or cinderblock) use a MASONRY BIT.


To mark the 1 3/8” inches hold the bit against the ruler and use a little piece of painters or electrical tape to mark how deep the bit will go into the wall. You can also wrap a small rubber band to mark your desired depth.


Done? Let’s rock that drill again.
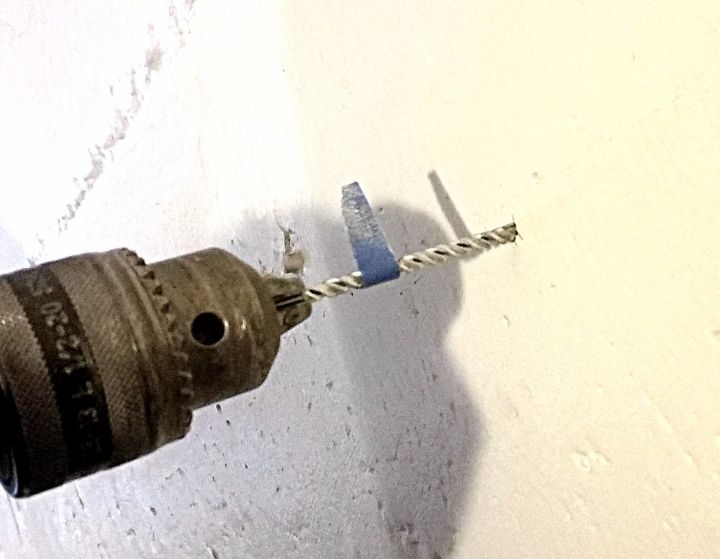
Lets drill into the wall next!
STEP 8: PRE-DRILL THE WALL BEFORE YOU PUT SCREWS IN


Load the bit onto the drill — again, MAKE SURE YOU GOT THE RIGHT BIT for the surface you’re drilling into — and get it ready to drill.


Find the marks you did on the wall (remember STEP 5?) and start drilling slowly, especially on drywall or if you’re not used to drilling onto that surface.


TIP: Hold the drill TIGHT and PARALLEL to the floor.


Stop the drilling once the tape or rubber band has reached the wall.


You’re done! Let’s put up the wood board next.
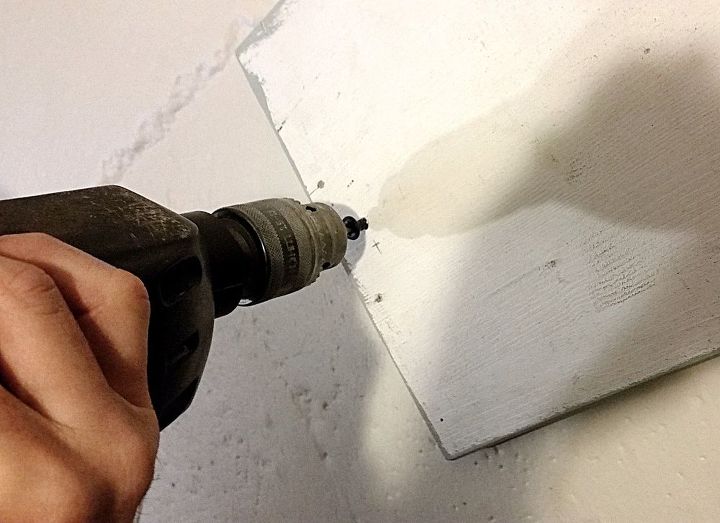
Time to screw that board into the wall.
STEP 9: SCREW YOUR WOOD BOARD IN WALL


Get the drill and get ready: we’re finally going to hang the board!


First you need change the bit to an HEX BIT — the ones with an hexagonal head. These are perfect for screwing.


TIP: Make sure your hex bit is the correct size for the screws you’re using. If not sure, get a SET instead of one, you’ll likely to use them often.


The most common size is for a 1/4-in. hex bit & screw, but PUT THE SCREW NEXT TO THE BIT to double check before you drill.


Hold your wood board against the wall, with holes on board and wall lining up and screw in.


TIP: To LINE UP holes use a LONG NAIL (anything longer than your screw is good) on both sides.


Remove one to drill in the screw but keep the other in place so the board doesn’t shift. Repeat on the other side.


All done? Get your brush and paint ready!
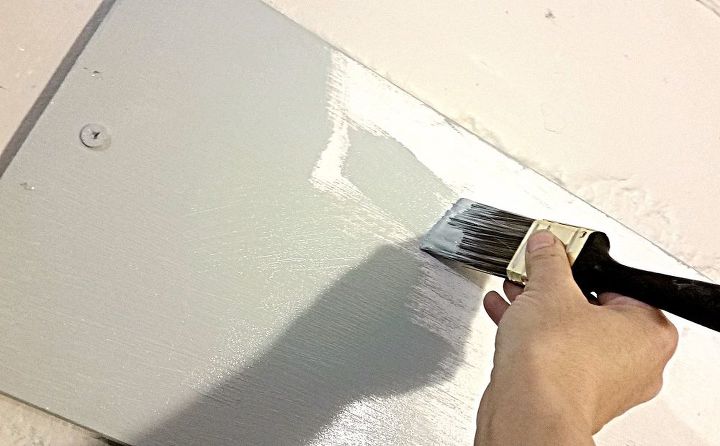
Let’s finish the wood board!
STEP 10: PAINT THE FRONT OF THE BOARD


Again, if your wood is unpainted and unprimed, better to get a paint with primer in one or apply a coat of primer before.


Now grab your brush (or roller) and APPLY A COAT OF PAINT to the front. You won’t need to paint the edges (you did that on STEP 2, remember?)


You may need to apply a second coat — I did! — but wait until the paint is dry to assess whether another application is needed.


TIP: Check paint label for drying time. If it’s a water based paint it should take no more than 1 hr.


Anyway, once the paint has dried we’re ready for the hangers!
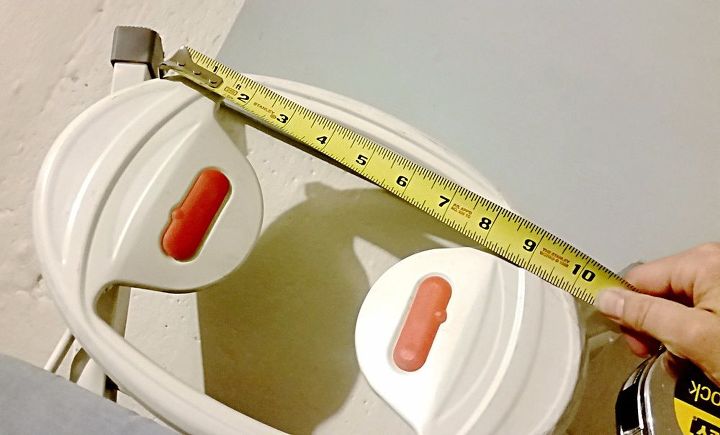
Wait—How far apart should I place my hangers?
STEP 11: MEASURE THE DISTANCE BETWEEN HANGERS ON THE BOARD


Don’t “guesstimate”! Or you may have to reposition your hangers on the board. :-(


Get the measuring tape or ruler and your ironing board, and measure the maximum distance the hangers need to be spread apart.


NOTE: Our ironing board is a bit different from most. Yours will likely have a straight bar in one end. Either way, the idea here is the same: on that bar, measure the distance between the legs or the opening.


My opening is about 6” but I want the hangers to be at least 3/4” off the end.


So I’ll divide 4 1/2” (i.e. 6” minus 1 1/2” — or 3/4” two times) in two to get the distance each hanger should be from the center: I get 2 1/4” when I divide 4 1/2” in two.


So for me, the DISTANCE BETWEEN the CENTER of the wood board and CENTER of EACH HANGER IS 2 1/4”


Now go to your board and mark the center with a light pencil or a piece of painter's tape. Then add the 2 1/4” on each side. PUT the HANGERS in place, get a pen and MARK on the wood board where screws will go in.


TIP: Or get a helper to place the ironing board on the wall board and EYE BALL HANGERS POSITION within the hanging bar.


Done? Now you’re ready to screw the hangers in!
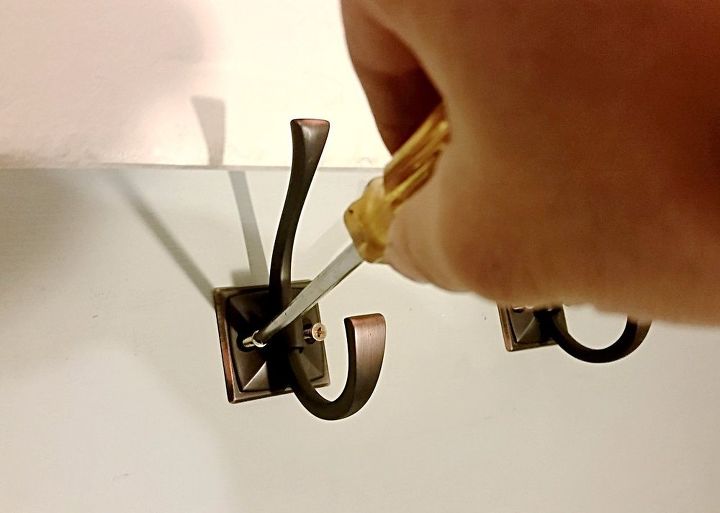
Almost done! Let's screw hangers in the wall.
STEP 12: SCREW HANGERS INTO WOOD BOARD


Get your drill again (make sure it has the screw hex bit loaded) and screw in as far as you can, on until it is all the way in.


Repeat three more times, to complete both hangers.


If your screws aren’t flushed, grab a screwdriver and finish tightening the screw by hand.


Step back and admire your handy work, before we wrap it up!
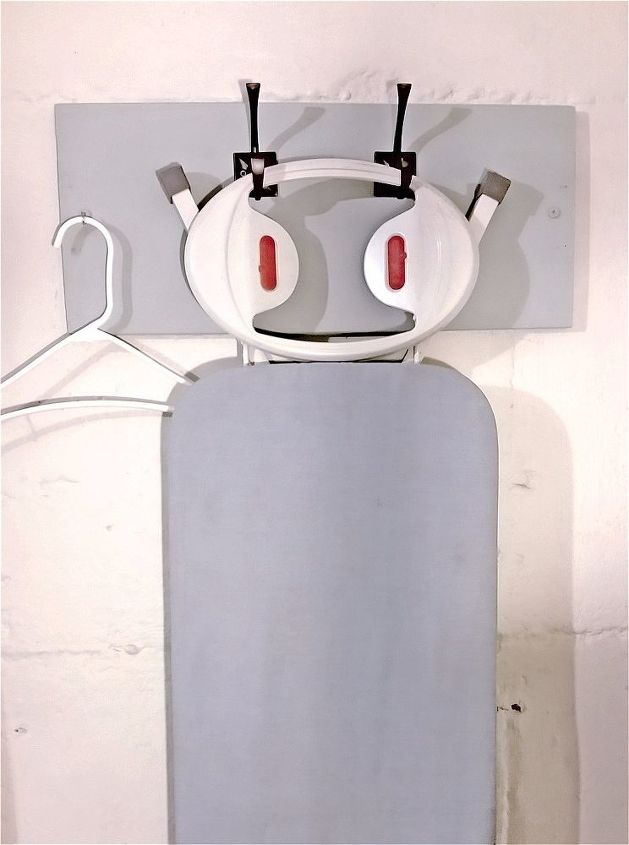
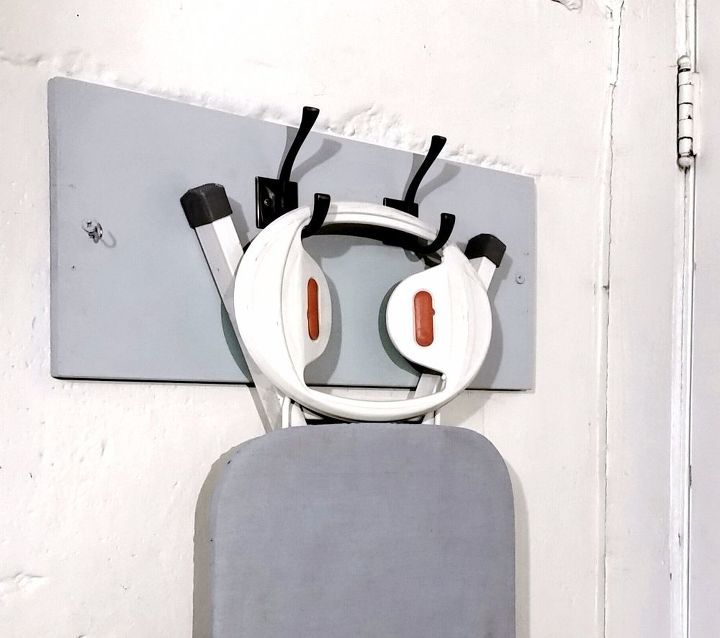
Let’s hang the ironing board & we’re are done
STEP 13: HANG IRONING BOARD ON THE WOOD BOARD


Now to the easy part: Get the board and hang it. So much better, right?


Give yourself some love because you’re done! I got my choc waiting for me ;-)


One more thing:


Since I often need a hanger for the laundry, I decided to add a small HOOK EYE OPEN SCREW to the wood board, to keep it there. So, feel free to add one or two of these screws to your hanging wall board to make it more functional.


NOTE:


Could you have just HUNG the HANGERS DIRECTLY ON THE WALL? Sure!


Start on STEP 11 and move on from there. It is important that you get the right kind of screws — often hangers come with a set — but double check these will work on drywall, wood paneling, or your wall surface.


TIP: Again, ask at your home center.


And that makes it for a DIY Hanging Ironing Board.


If you like this post, follow me: Next time I’ll show you how to organize your closet with a few easy hacks.


Happy New Year y'all!
Suggested materials:
  • DRILL   (Home Depot)
  • TWIST BITS   (Home Depot)
  • HEX BIT   (Home Depot)
See all materials
Frequently asked questions
Have a question about this project?
  1 question
Comments
Join the conversation
2 of 39 comments
  • Old Dog Old Dog on Jan 31, 2017
    I use a small ironing board now that the kids are grown and hubby is retired. It has short legs that allow me to hang it on a couple of coat hooks. I applaud your initiative and your inventive mind. Raised by a mom who lived through the depression years. Reuse and save EVERYTHING!!
  • 17335038 17335038 on Oct 15, 2022

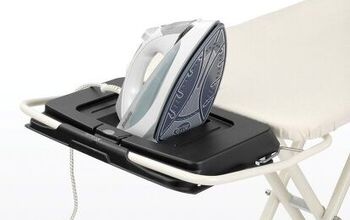
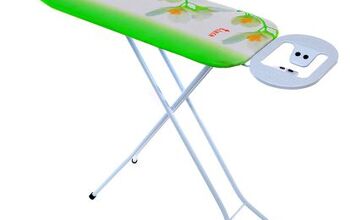
    For anyone not familiar with this style of ironing board, yes, the white thing on the end is indeed an attached iron holder, also called an iron stand.


    Boards are available with stands in rectangle or oval shapes. The types with the hole or empty space in the middle are designed specifically for steam iron use.


    Here are a couple of examples:


Next