How to Stencil DIY Terracotta Wall Art Tiles

Royal Design Studio
by Royal Design Studio
4 Materials
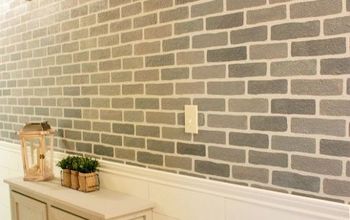
Terracotta floor tiles are classic staple of interior decor that are enjoying a resurgence as a hot design trend. What if you want to add the look to your home but aren’t ready for a major remodel? Fortunately, aged terracotta is a beautiful natural surface that is very easy to recreate with multiple colors of matte Chalk Paint®. And, when you add an embossed stencil design to the surface first it takes the look to a whole different level!
Click play and watch this DIY stencil tutorial to see how to paint terracotta-inspired wall art on wood panels with Royal Design Studio Tile Stencils.
Buy Supplies from www.royaldesignstudio.com


Royal Design Studio Stencils: Medium Florence Tile Stencil and Medium Sicilia Tile Stencil


Annie Sloan Chalk Paint®: Coco, Barcelona Orange, Primer Red, Scandinavian Pink, and Old Ochre


Wood Icing™


Two 12” x 12” wooden panels


Paint Brush, Japanese trowel, spatula, sanding block, spray adhesive
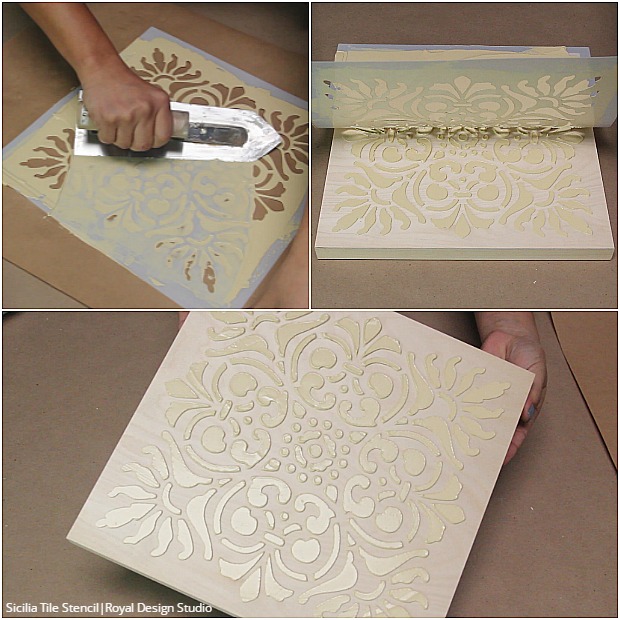
Step 1: Spray the back of the stencil with spray adhesive and center it on the wooden panel.


Step 2: Load the trowel with Wood Icing™ using a spatula and lightly trowel a thick, even coat over and through the stencil. Carefully remove the stencil immediately.


Step 3: Clean the stencil right away. To clean the stencil, lay it over a flat, protected surface and remove the excess Wood Icing™ with the trowel. Repeat Steps 1 and 2 with the other tile stencil and wooden panel.


Step 4: Allow both panels to dry completely (overnight) before using a sanding block to smooth down the Wood Icing™. Be sure to wear a dust mask as the sanding will product a lot of dust. Remove sanding dust with a brush and damp rag.
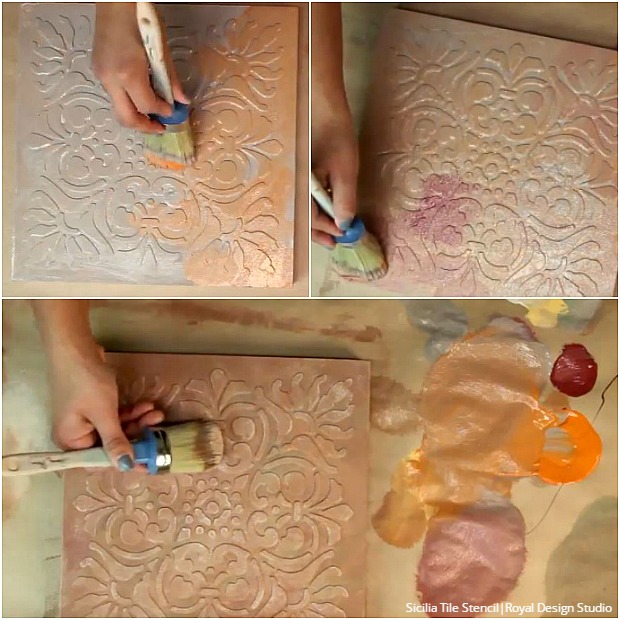
Step 5: Apply a layer of Coco Chalk Paint® over the entire panels with irregular brushstrokes and a stippling motion.


Step 6: To achieve an aged terracotta look, apply the additional paint colors while the first layer is still wet. All the colors can be mixed directly by picking the paint colors up on your same brush and blending them on heavy paper. Don’t overthink it. Just play with the paint until you get the color balance you want. Mix some Barcelona Orange Chalk Paint® with Coco Chalk Paint®. Stipple this mix onto the panel and leave some areas with the first layer showing.


Step 7: Mix Primer Red Chalk Paint® and Coco Chalk Paint® and stipple this layer here and there to create a few darker/contrasting areas on the panels.


Step 8: Continue going back and forth between the colors. This creates a random, natural look. Then stipple some Chateau Gray Chalk Paint® randomly onto the panels to add even more contrast.


Step 9: Mix in some Arles Chalk Paint® and apply soft highlights on the raised areas and edges of the panels with a dry brush. Do the same with Country Gray Chalk Paint®.


Step 10: Allow to dry and don’t worry! The paint colors darken and the highlights soften once dry. If you would like more highlight,s you can go back over the panels and dry brush on some of the lighter mixed colors.
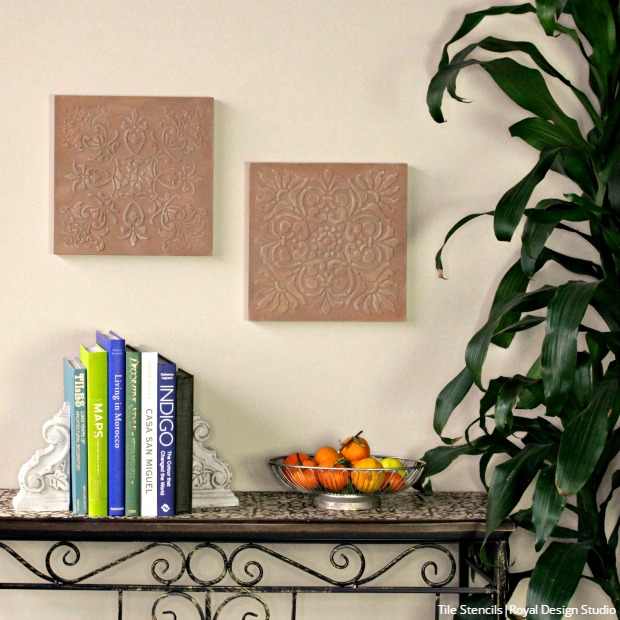
These DIY terracotta tiles would look beautiful at a statement piece or even as a kitchen backsplash!
Suggested materials:
  • Tile Stencils   (http://www.royaldesignstudio.com/collections/tile-stencils)
  • Annie Sloan Chalk Paint   (http://www.royaldesignstudio.com/collections/annie-sloan-chalk-paint)
  • Wood Icing   (http://www.royaldesignstudio.com/products/wood-icing-textura-paste)
See all materials
Frequently asked questions
Have a question about this project?
  1 question
Comments
Join the conversation
Next