


Timber Garden Stairs/Steps

by
Carole
Our back garden is on a very steep slope. Part of it has a hill that for every 4.5 metres, the level drops a metre in height. I consulted a landscape gardener and he quoted me about $5,500 to put steps in - he estimated about 20 steps. Well, that was much more than we could afford. So we turned to our neighbour who is a carpenter/builder. He built his own home so I figured he could do just about anything! He took a look and told me he could do it for about $1,500 - $2,000 but that we -my husband and I would be the labourers. This would keep the cost down. So we decided to go with that option.
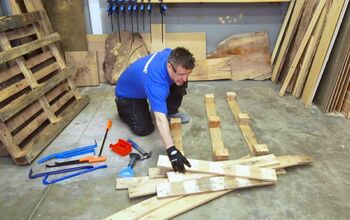
First, he came out to measure up. This involved using a string line with a small plastic spirit level half way along the string. He took the measurement from the gate down the pathway. I use the term pathway loosely as it was all gravel, eroded soil and grass and weeds and rocks. He estimated 18 steps would do it. The steps are 1.5 metres wide. He took the centre line from our garden gate and that is the centre of the steps. 750mm each side of the centre made sure that the steps are central to the gate. We went together to buy the ironbark H4 treated timber, brackets and galvanised screws etc. These were purchased from our local timber and hardware store. The frames were measured and made up in our garage - all 18 of them. Then my husband and a neighbour helped him to carry the frames down the garden.
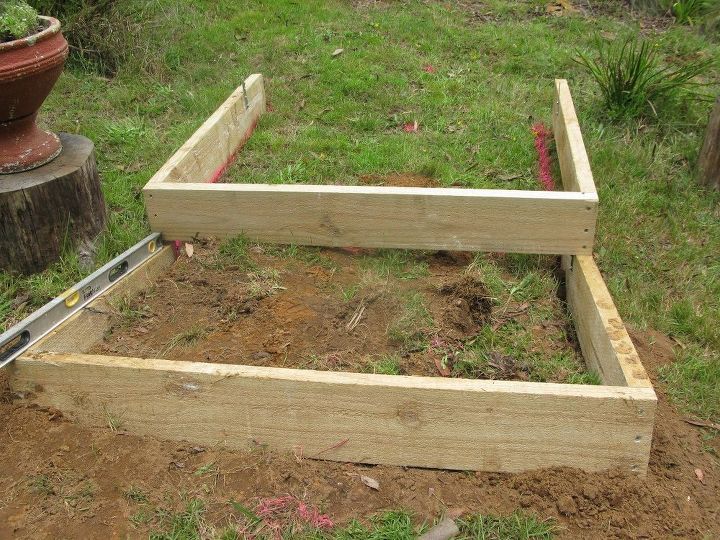
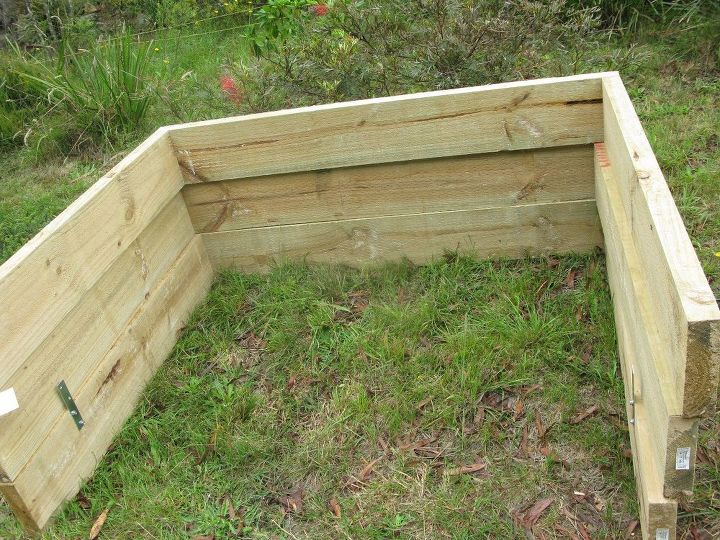
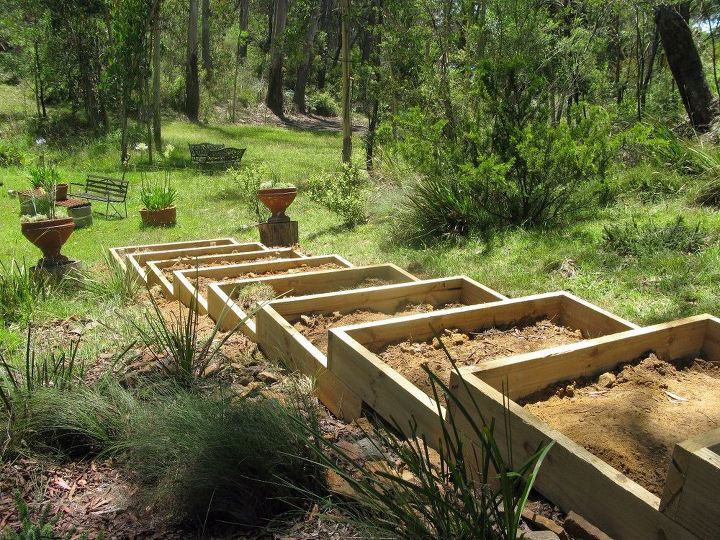
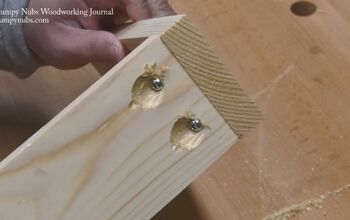
Using a mattock and a long handled shovel, he began to dig out the ground to fit the frames into the hill side. No need to remove all the soil inside the frame. The second frame was placed sitting atop the first frame and using the brackets and screws, the two pieces were joined together. Timber hardwood pegs were also made and inserted deeply into the soil and attached to the inside of the frames. A spirit level helped to ensure that each frame was sitting level before adding the next.
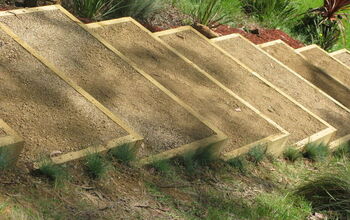
It was slow progress and hard work but he did a few 'steps' each day. At the top of the steps nearest the gate, the final or top step is a half size step. So now his part in this project is done and my husband and I were left to level the soil inside each step and we covered with thick newspaper/cardboard before filling. We used decomposed granite, ordered in from our local landscapers. We ordered a 2m3 load as we can always order more if it is not enough but would not know what to do with it, had we ordered too much. So far we have managed to fill half the steps with the decomposed granite. We will be working on it some more in the next few days. As we need to barrow the granite from the street frontage to the back garden (no rear access to garden for vehicles) it has been a slow process but we are getting there.
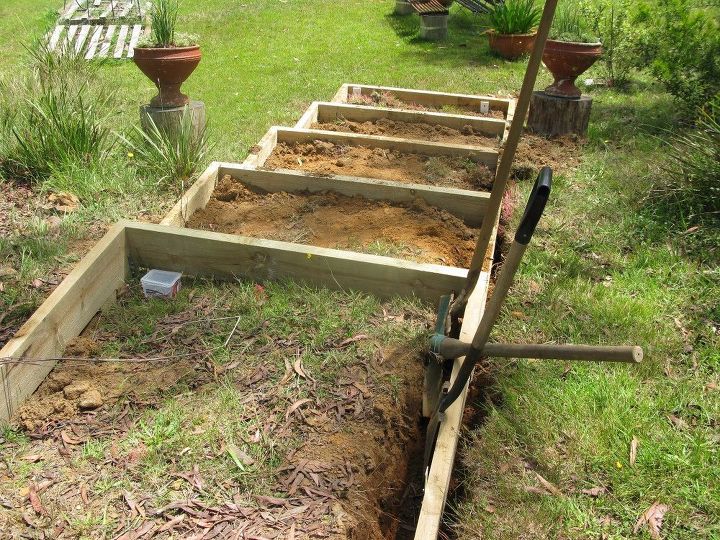
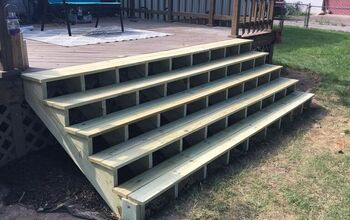
Here you can see the view looking down the timber frames from the top and can see that we have grass to dig out and also needed to fill in down the sides of the steps as more soil was dug out to fit the frames than necessary and of course we then had to fill the gaps on either side. Some of the soil from inside the frames was used to pack out the sides.
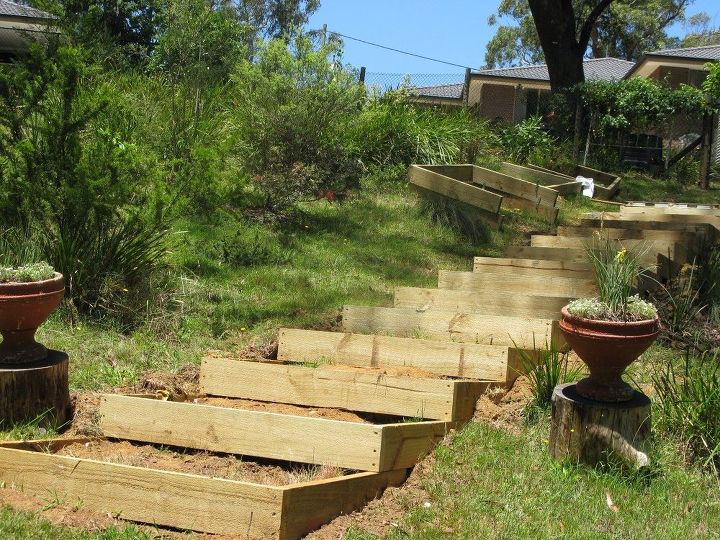
On the left side I used bush rock to pack it out and then mulched along that side with decorative red mulch, on the right hand side looking down the hill we want the grass to grow back and against the edges of the framework. I will post more photos of this project once completed but so far it is looking good and a good deal cheaper getting our friend and neighbour to help with this project and do the filling in labouring ourselves than using a landscape gardener to do it. If we could not have got some help with this, we would not have been able to afford it. I also bought new glazed pots with Cordylines in and some Allysum and will be moving the old urns on timber stumps to somewhere else in the garden. Watch this space!
Comments
Join the conversation
3 of 23 comments
-
Here is finished photo. 18 steps in all.
-
That’s amazing I’ve always wanted to do something like that only if I had some help.


Frequently asked questions
Have a question about this project?
I love it and wondering if it would take the ground freezing we have in Iowa, USA? I have a steep slope and looking for ways to build steps. Hope this would work.
Hi!I am doing a very similar project right now in my yard, and I found this great post from a few months ago. What was the final front to back depth of each flat horizontal step area that you filled in? Looks like at least 18-24 inches depth on each step from your photo. Do you find them comfortable for stepping up and down? Are the steps a comfortable depth to step just a single foot in each step or do you walk up with 2 footsteps on each step? And what is the rise/vertical height of each step? Are those 2x6 or 2x8 boards? I’m trying to get the perfect comfortable size for each step area.
Do you know if its necessary take a permission for to install the steps?