


Modern Industrial Pipe Office Shelves
3 Materials
$120
6 Hours
Easy
Our office had limited space and pretty much two of everything, including two printers. So we needed to customize the height of shelves for the printers and add flexibility for lightswitch access/cords hidden/etc.. and I love the industrial modern look of galvanized pipe and wooden shelves.
Deciding on materials:
- There's three options for your hardware-plumbing pipes (consider ordering at www.supplyhouse.com for cost savings)
- Galvanized, which will look far more silver
- Black Steel (shown here)
- Copper - if you decide on copper you will need to solder the connections together, this would be much cheaper but more labor intensive
- Wood for shelves
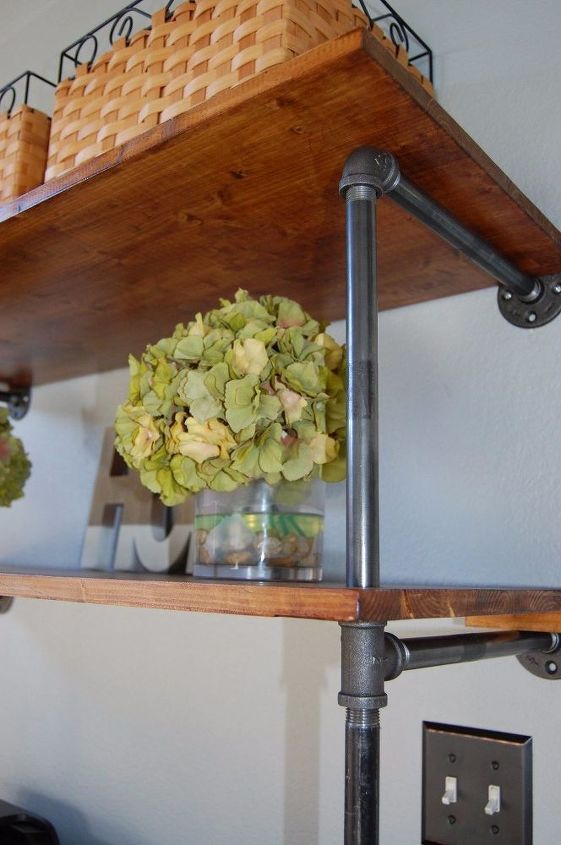
- Size of shelves compared to the size of your pipe, here the shelves extend over the pipe about 3 inches
- Type of wood
- Type/Color of stain
How many shelves to add?(if I didn't need the storage, I would have opted out of the top shelf...a plant would look great here with the metal hardware on the sides)
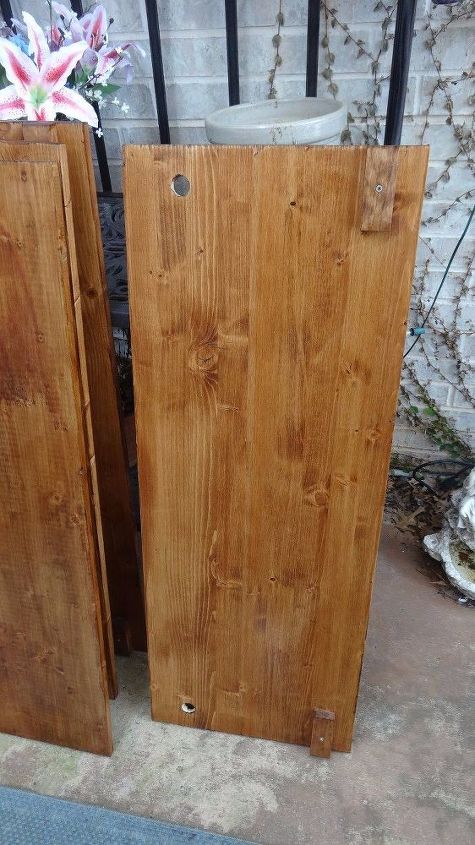
Stained wood with circular holes drilled
Wood Shelves: Cut, Sand, and Stain - I used a stain/polyurathane combo product. This saves time but you have to be sure to stir often or you will get a real thick layer at the bottom of your can, which will be much darker. I also did two coats and sanded lightly with a hand sander between coats. To make the bottom four shelves lie completely flat, we had to add 1 inch thick blocks at the back underside of each shelf because of the size of the pipe fitting on the front.
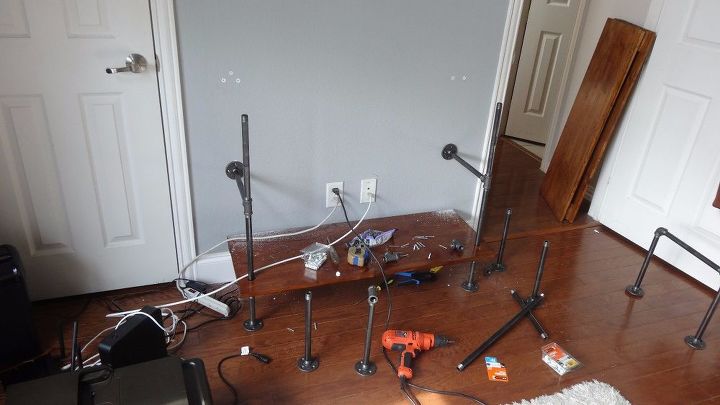
Design - here we used pipe that came in 1 ft increments, and 2 ft for the height between shelves for the printers. But if we had gone with 18 inch increments, we would not have needed the 1 inch round drill bit for cutting the round holes in the front of each shelf, to accomodate for the overhang. We used 16 in. boards(depth), measured to the desired width of shelf(42 in.), and with all four shelves and a 2 ft opening for the printer shelf, the height ended up right around 6 ft.
Assemble - we took a layer by layer approach, because it was hard to tell exactly where the holes for the fitting on the wall were going to be once assembled. We did not drill holes to attach the fittings to the hardwood floor because the shelf was stable with the wall fitting alone. For each wall fitting, we used two screws with plastic anchors or directly to the studs.
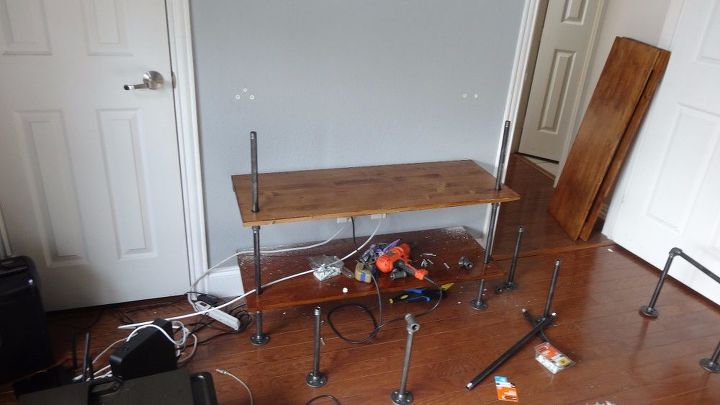
Another layer...
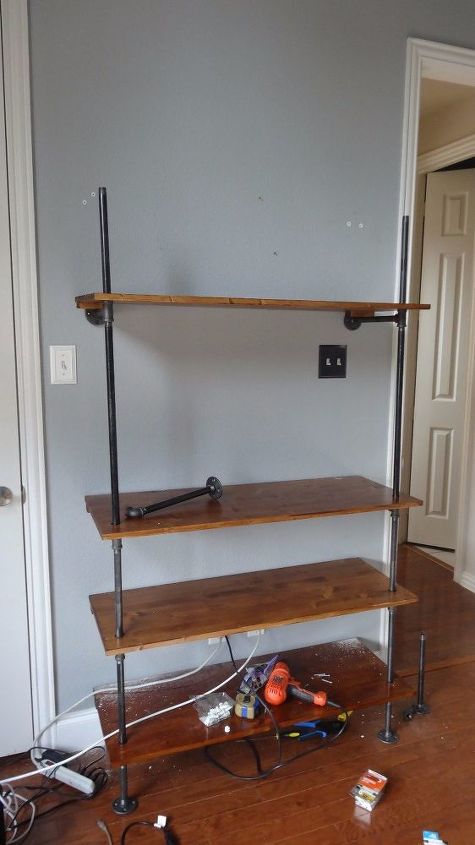
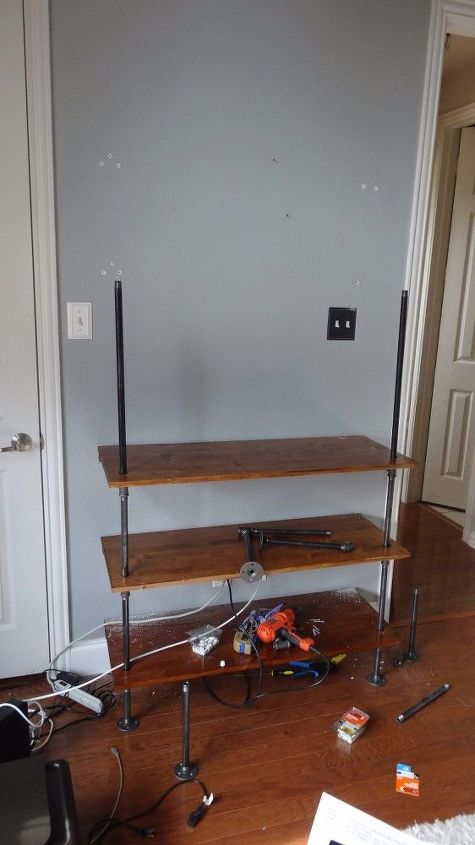
Another layer...this is the shelf area for the printers...extra space to accomodate the scanner printer...which needs to open (requiring extra height than the machine itself)
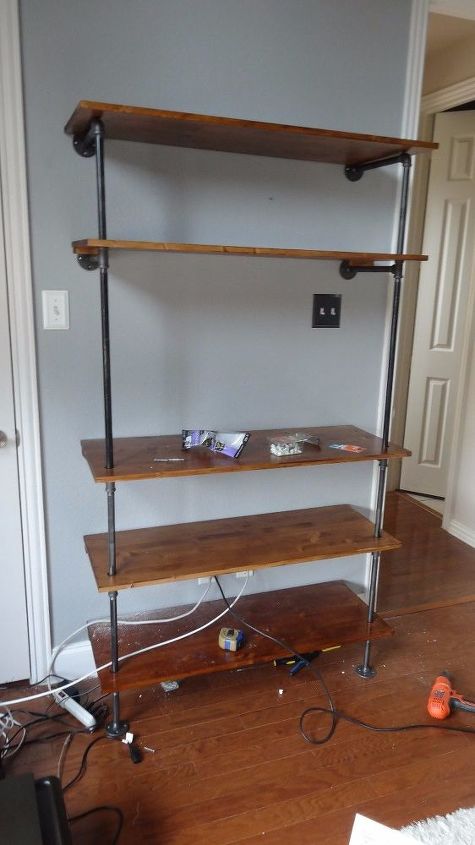
Final layer - here you can see what I mean about the top layer and if this was less functional and more for decor...I would not have added it but had plants at the top. Also keep in mind there is no holes needed for top shelf..it isn't secured..it just sits on the top of the pipes...so far we have never had an issue with it moving.
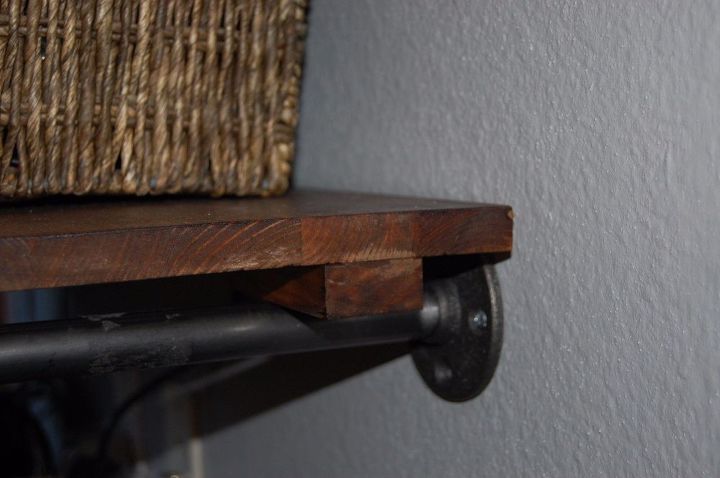
Here is a look at the shelf edge..we did have to add these 3/4 inch blocks to make our level. The other option would have been to make the circle holes larger to fit over the hardware...but we felt this was more stable.
Side view of finished product.
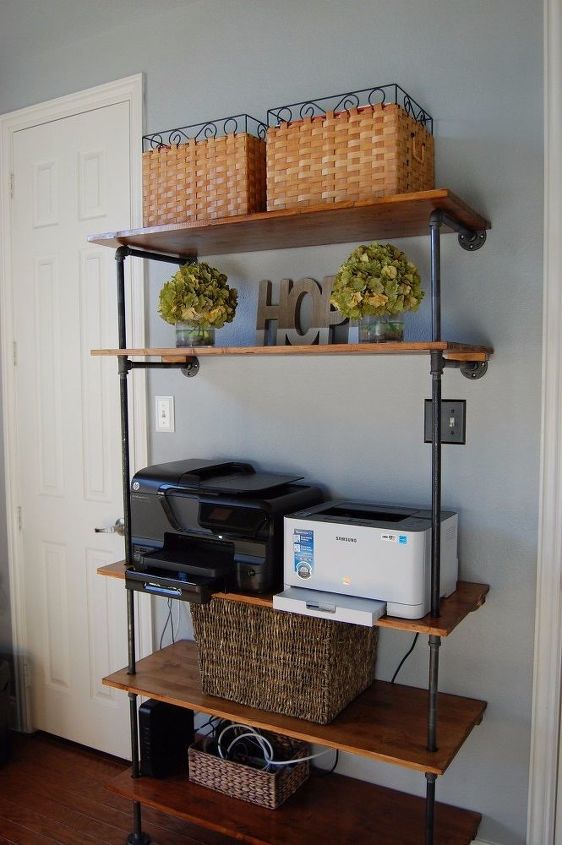
Finished product - we love our office shelves - super cool and very functional!

Want more details about this and other DIY projects? Check out my blog post!


Frequently asked questions
Have a question about this project?