


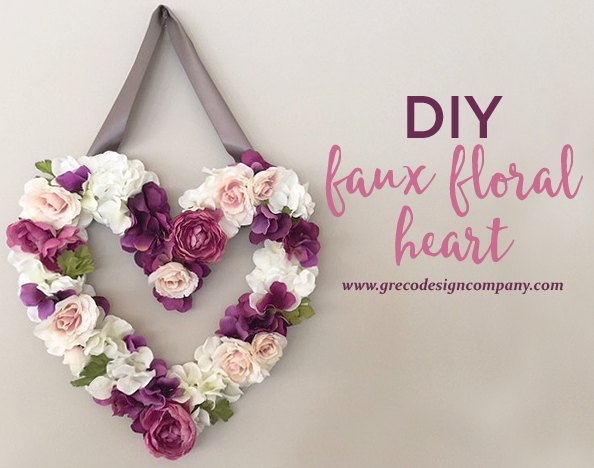
DIY Faux Floral Heart

by
Lori Greco
5 Materials
This DIY faux floral heart makes a great Valentine’s or spring decoration but it can be left up all year too. It's easy to make and it looks like it came from a fancy boutique.
Here’s what you’ll need:
• A piece of cardboard – I cut a piece from a box
• Scissors or an X-acto knife
• Glue gun
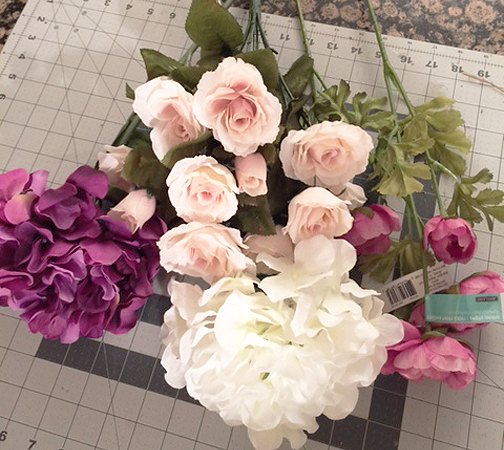
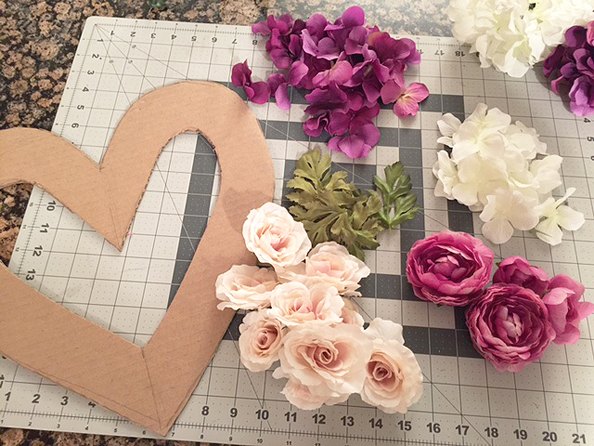
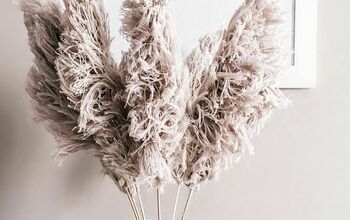
• Faux flowers - I bought 5 flower bunches at Michael’s in different sizes and shapes. Tiny flowers are good to fill in the gaps at the end.
• Ribbon for hanging
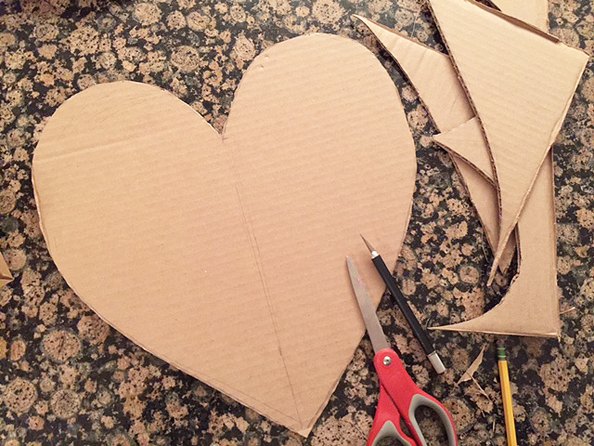
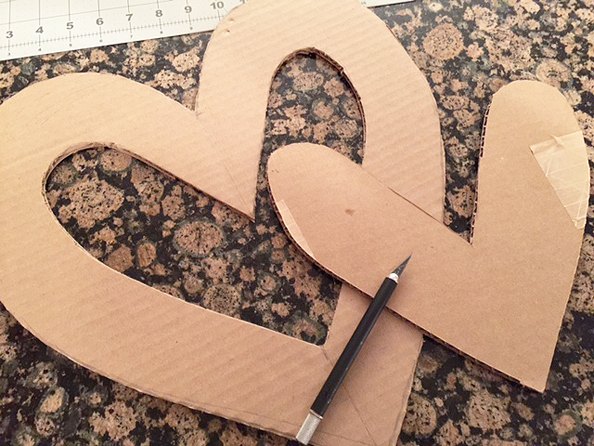
1. Draw your heart shape on a piece of cardboard. Here’s a little trick to make your heart shape look symmetrical: draw one side of the heart on a piece of paper, cut it out and use it as a template for both sides, flipping it around for the opposite side. My heart is about 14 x 15″.

2. Once you’ve drawn your shape, cut it out using scissors or an x-acto knife. I found the knife to work better on the cardboard. You don’t need to be too fussy – the flowers will extend slightly beyond the edges of the form so it’s very forgiving.
3. Then, using the same paper heart template, cut out a smaller heart and use that to draw and cut out the inside opening.
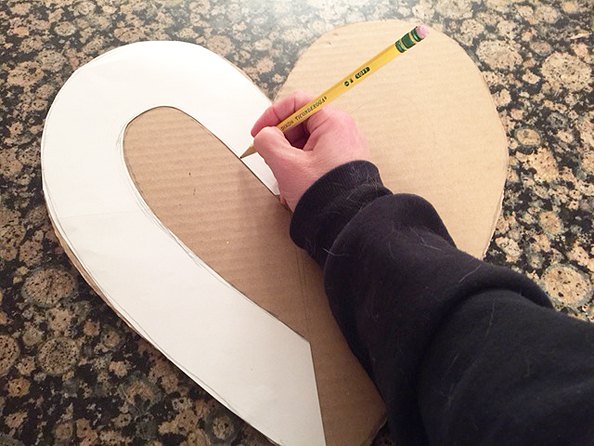
4. Now you have your heart form ready to decorate.
5. Next, cut all the flowers off the stems, leaving only a very little of the stem so they can lay fairly flat. Be careful not to cut the flowers too short though so they don’t fall apart. For the hydrangeas, you’ll have to cut each little flower off the stem bunches. They won’t look as much like hydrangeas when you do this, but once you glue them on the form, they’ll look like the typical hydrangea bunches again.
6. Arrange the flowers on your heart to get a rough idea how they should look. I started with the larger flowers and spaced them out evenly, then filled in the gaps with the smaller ones. I also like to keep the colors balanced. Glue them down when you like how they look.
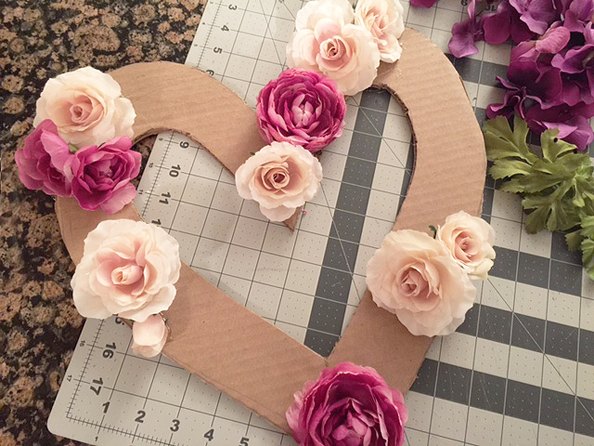
7. Keep glueing the flowers until you cover all the cardboard. Hold the heart form up as you go so you can see how it looks and make any changes as needed.
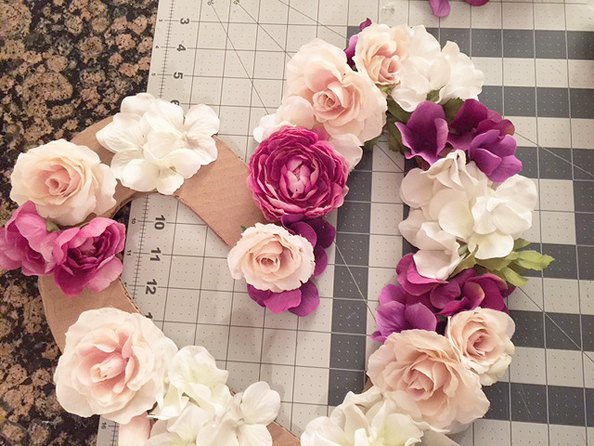
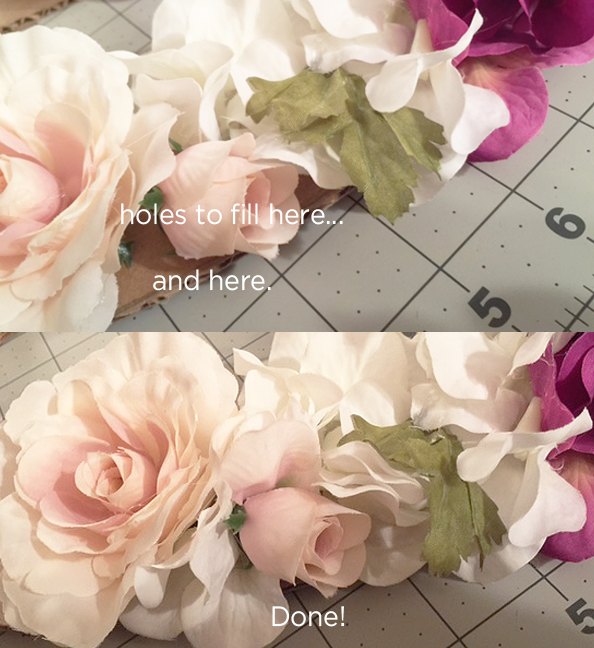
8. Be sure to cover all of the cardboard – even around to the edges and any bare spots. This is best done with the smaller flowers. I added a few of the leaves too.
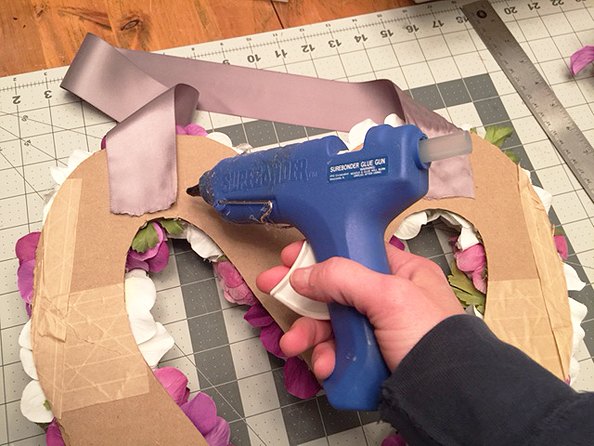
9. Attach a ribbon for hanging. I just used the glue gun to attach my ribbon to the cardboard on the back of the heart. It holds fine since the piece is very light.
Hang it on any hook or knob – I used a command strip hook so it can be removed easily. Or turn it on it’s side and lean it on a shelf.
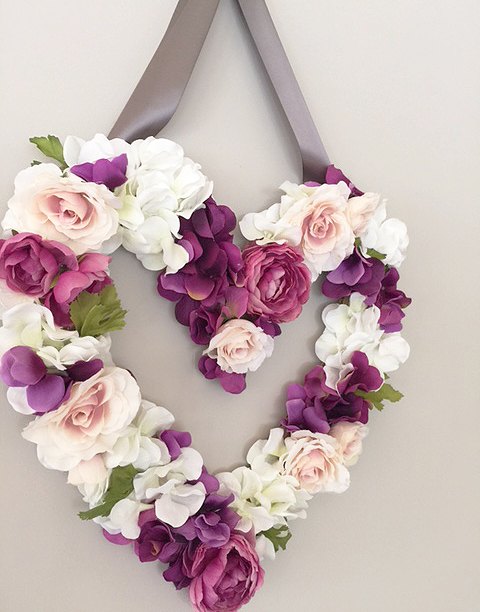
I think this heart shape looks so pretty and high-end – no one would guess that it’s made with an old piece of cardboard! This technique can be used for any initial, shape or design. I love the idea of smaller letters that spell out a word or XOXO for another Valentine’s decoration idea. Enjoy!
{
"id": "3783117",
"alt": "",
"title": "",
"video_link": "https://www.youtube.com/embed/B5kswgPENT8",
"youtube_video_id": "B5kswgPENT8"
}
{
"width": 634,
"height": 357,
"showRelated": true
}
Want more details about this and other DIY projects? Check out my blog post!
Comments
Join the conversation
3 of 30 comments
-
I can't wait to make one!! Yours is beautiful!
-
This is beautiful!!! I love ❤️ the use of cardboard!!! This technique just opened a whole new world for me!!! The endless possibilities! It’s like a no brainer I’d never thought of.....sincere thanks for sharing. !!!


Frequently asked questions
Have a question about this project?